Note
Access to this page requires authorization. You can try signing in or changing directories.
Access to this page requires authorization. You can try changing directories.
Note
We recommend that you use the Azure Az PowerShell module to interact with Azure. To get started, see Install Azure PowerShell. To learn how to migrate to the Az PowerShell module, see Migrate Azure PowerShell from AzureRM to Az.
This article explains how to host reverse DNS lookup zones for your assigned IP ranges with Azure DNS. The IP ranges represented by the reverse lookup zones must be assigned to your organization, typically by your ISP. The scenario described in this article is not for IP addresses assigned by Microsoft. To configure reverse DNS for Microsoft-assigned IP address ranges, see Configure reverse DNS for services hosted in Azure.
Before reading this article, you should familiarize yourself with the overview of reverse DNS and it's support in Azure.
In this article, you learn how to create your first reverse lookup DNS zone and record by using the Azure portal, Azure PowerShell, Azure classic CLI, and Azure CLI.
Create a reverse lookup DNS zone
Sign in to the Azure portal.
On the top left-hand side of the screen, select Create a resource.
Search for DNS zone, select DNS zone, and then select Create.
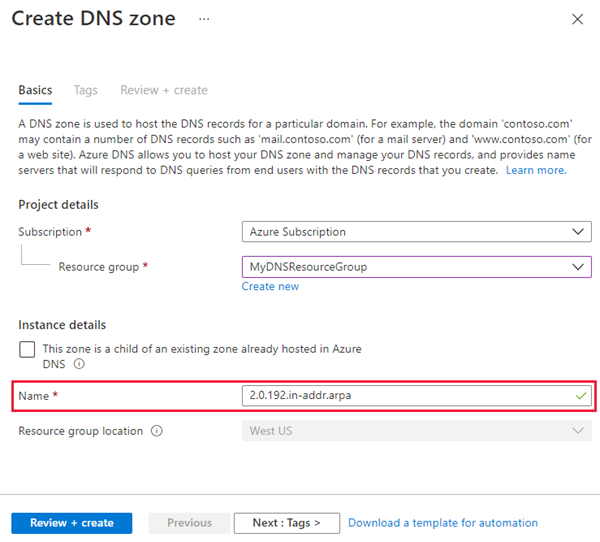
On the Create DNS zone page enter the following values, then select Create:
Setting Details Subscription Select your subscription. Resource group Select or create a new resource group. To learn more about resource groups, read the Resource Manager overview article. Name Enter a name for the DNS zone. The name of the zone is specified differently for IPv4 and IPv6 prefixes. Use the instructions for IPv4 or IPv6 to name your zone. Location Select the location for the resource group. The location is already be selected if you're using a previously created resource group. Select Review + create, and then select Create once validation has passed.
IPv4
The name of an IPv4 reverse lookup zone is based on the IP address range that it represents. Use the following format: <IPv4 network prefix in reverse order>.in-addr.arpa. For examples, see Overview of reverse DNS for IPv4.
Note
When you're creating classless reverse DNS lookup zones in Azure DNS, you must use a hyphen (-) instead of a forward slash (/) in the zone name.
For example, for the IP range of 192.0.2.128/26, use 128-26.2.0.192.in-addr.arpa as the zone name instead of 128/26.2.0.192.in-addr.arpa.
Although the DNS standards support both methods, Azure DNS doesn't support DNS zone names that contain the forward slash (/) character.
The following example shows how to create a Class C reverse DNS zone named 2.0.192.in-addr.arpa in Azure DNS via the Azure portal:
The following examples show how to complete this task using Azure PowerShell and Azure CLI.
PowerShell
New-AzDnsZone -Name 2.0.192.in-addr.arpa -ResourceGroupName mydnsresourcegroup
Azure classic CLI
azure network dns zone create mydnsresourcegroup 2.0.192.in-addr.arpa
Azure CLI
az network dns zone create -g mydnsresourcegroup -n 2.0.192.in-addr.arpa
IPv6
The name of an IPv6 reverse lookup zone should be in the following form:
<IPv6 network prefix in reverse order>.ip6.arpa. For examples, see Overview of reverse DNS for IPv6.
The following example shows how to create an IPv6 reverse DNS lookup zone named 0.0.0.0.d.c.b.a.8.b.d.0.1.0.0.2.ip6.arpa in Azure DNS via the Azure portal:

The following examples show how to complete this task using Azure PowerShell and Azure CLI.
PowerShell
New-AzDnsZone -Name 0.0.0.0.d.c.b.a.8.b.d.0.1.0.0.2.ip6.arpa -ResourceGroupName mydnsresourcegroup
Azure classic CLI
azure network dns zone create mydnsresourcegroup 0.0.0.0.d.c.b.a.8.b.d.0.1.0.0.2.ip6.arpa
Azure CLI
az network dns zone create -g mydnsresourcegroup -n 0.0.0.0.d.c.b.a.8.b.d.0.1.0.0.2.ip6.arpa
Delegate a reverse DNS lookup zone
Once the reverse DNS lookup zone gets created, you then need to make sure the zone gets delegated from the parent zone. DNS delegation enables the DNS name resolution process to find the name servers that host your reverse DNS lookup zone. Those name servers can then answer DNS reverse queries for the IP addresses in your address range.
For forward lookup zones, the process of delegating a DNS zone is described in Delegate your domain to Azure DNS. Delegation for reverse lookup zones works the same way. The only difference is that you need to configure the name servers with the ISP. The ISP manages your IP range, that's why they need to update the name servers instead of domain name registrar.
Create a DNS PTR record
IPv4
The following example explains the process of creating a PTR record for a reverse DNS zone in Azure DNS. To learn more about record types or how to modify existing records, see Manage DNS records and record sets.
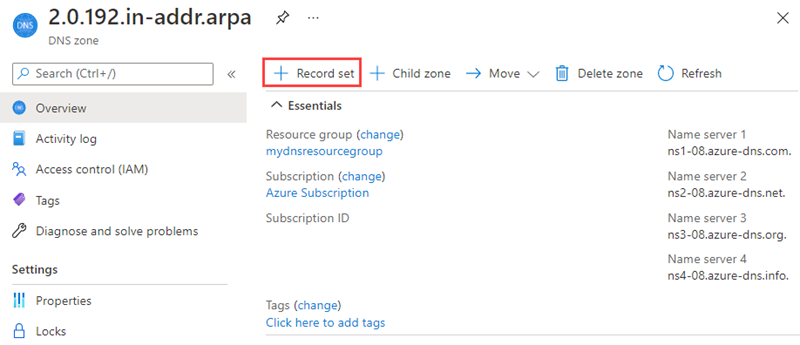
At the top of the reverse DNS zone Overview page, select Record sets and then select +Add.
The name of the record set for a PTR record is the rest of the IPv4 address in reverse order.
In this example, the first three octets are already populated as part of the zone name
.2.0.192. That's why only the last octet is needed in the Name box. For example, give your record set the name of 15 for a resource whose IP address is192.0.2.15.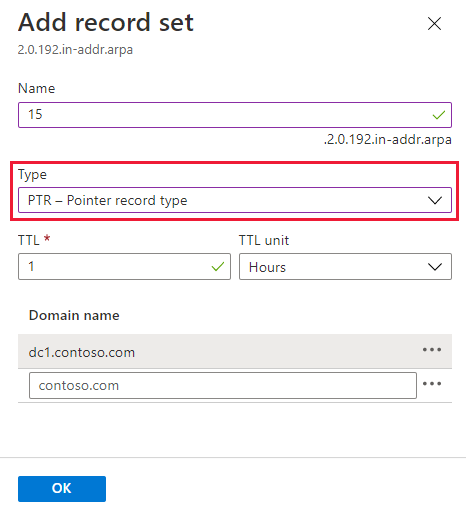
For Type, select PTR.
For DOMAIN NAME, enter the fully qualified domain name (FQDN) of the resource that uses the IP.
Select Add to create the reverse DNS record.
The following examples show how to complete this task by using Azure PowerShell and Azure CLI.
PowerShell
New-AzDnsRecordSet -Name 15 -RecordType PTR -ZoneName 2.0.192.in-addr.arpa -ResourceGroupName mydnsresourcegroup -Ttl 3600 -DnsRecords (New-AzDnsRecordConfig -Ptrdname "dc1.contoso.com")
Azure classic CLI
azure network dns record-set add-record mydnsresourcegroup 2.0.192.in-addr.arpa 15 PTR --ptrdname dc1.contoso.com
Azure CLI
az network dns record-set ptr add-record -g mydnsresourcegroup -z 2.0.192.in-addr.arpa -n 15 --ptrdname dc1.contoso.com
IPv6
The following example explains the process of creating new PTR record for IPv6. To learn more about record types or how to modify existing records, see Manage DNS records and record sets.
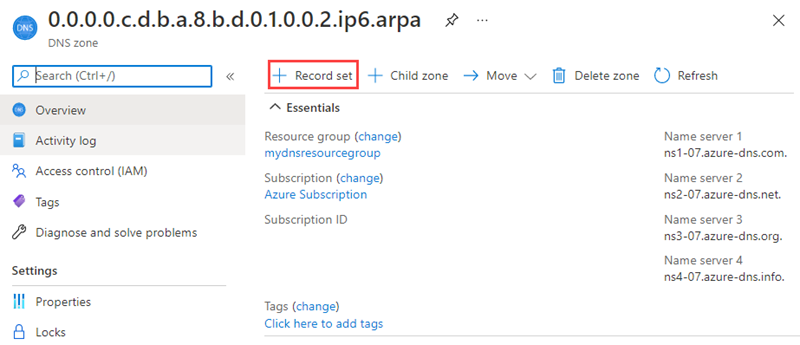
At the top of the reverse DNS zone Overview page, select Record sets and then select +Add.
The name of the record set for a PTR record is the rest of the IPv6 address in reverse order. It must not include any zero compression.
In this example, the first 64 bits of the IPv6 gets populated as part of the zone name (0.0.0.0.c.d.b.a.8.b.d.0.1.0.0.2.ip6.arpa). That's why only the last 64 bits are supplied in the Name box. The last 64 bits of the IP address gets entered in reverse order, with a period as the delimiter between each hexadecimal number. Name your record set e.5.0.4.9.f.a.1.c.b.0.1.4.2.5.f if you have a resource whose IP address is 2001:0db8:abdc:0000:f524:10bc:1af9:405e.
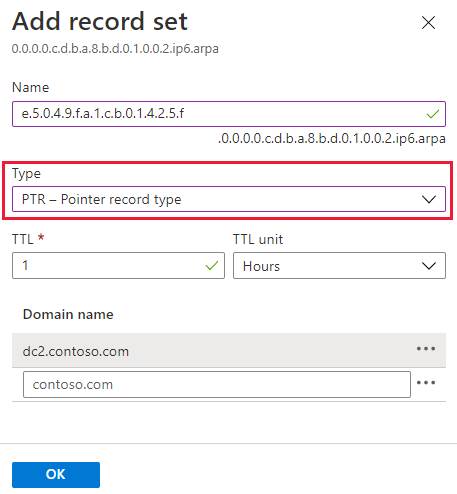
For Type, select PTR.
For DOMAIN NAME, enter the FQDN of the resource that uses the IP.
Select OK to create the DNS record.
The following examples show how to complete this task by using PowerShell or Azure CLI.
PowerShell
New-AzDnsRecordSet -Name "e.5.0.4.9.f.a.1.c.b.0.1.4.2.5.f" -RecordType PTR -ZoneName 0.0.0.0.c.d.b.a.8.b.d.0.1.0.0.2.ip6.arpa -ResourceGroupName mydnsresourcegroup -Ttl 3600 -DnsRecords (New-AzDnsRecordConfig -Ptrdname "dc2.contoso.com")
Azure classic CLI
azure network dns record-set add-record mydnsresourcegroup 0.0.0.0.c.d.b.a.8.b.d.0.1.0.0.2.ip6.arpa e.5.0.4.9.f.a.1.c.b.0.1.4.2.5.f PTR --ptrdname dc2.contoso.com
Azure CLI
az network dns record-set ptr add-record -g mydnsresourcegroup -z 0.0.0.0.c.d.b.a.8.b.d.0.1.0.0.2.ip6.arpa -n e.5.0.4.9.f.a.1.c.b.0.1.4.2.5.f --ptrdname dc2.contoso.com
View records
To view the records that you created, browse to your DNS zone in the Azure portal. In the lower part of the DNS zone pane, you can see the records for the DNS zone. You should see the default NS and SOA records, plus any new records that you've created. The NS and SOA records are created in every zone.
IPv4
The DNS zone page shows the IPv4 PTR record:

The following examples show how to view the PTR records by using Azure PowerShell and Azure CLI.
PowerShell
Get-AzDnsRecordSet -ZoneName 2.0.192.in-addr.arpa -ResourceGroupName mydnsresourcegroup
Azure classic CLI
azure network dns record-set list mydnsresourcegroup 2.0.192.in-addr.arpa
Azure CLI
az network dns record-set list -g mydnsresourcegroup -z 2.0.192.in-addr.arpa
IPv6
The DNS zone page shows the IPv6 PTR record:

The following examples show how to view the records by using PowerShell or Azure CLI.
PowerShell
Get-AzDnsRecordSet -ZoneName 0.0.0.0.c.d.b.a.8.b.d.0.1.0.0.2.ip6.arpa -ResourceGroupName mydnsresourcegroup
Azure classic CLI
azure network dns record-set list mydnsresourcegroup 0.0.0.0.c.d.b.a.8.b.d.0.1.0.0.2.ip6.arpa
Azure CLI
az network dns record-set list -g mydnsresourcegroup -z 0.0.0.0.c.d.b.a.8.b.d.0.1.0.0.2.ip6.arpa
FAQ
Can I host reverse DNS lookup zones for my ISP-assigned IP blocks on Azure DNS?
Yes. Hosting the reverse lookup (ARPA) zones for your own IP ranges in Azure DNS is fully supported.
Create the reverse lookup zone in Azure DNS as explained in this article. Then work with your ISP to delegate the zone. You can then manage the PTR records for each reverse lookup in the same way as other record types.
How much does hosting my reverse DNS lookup zone cost?
Hosting the reverse DNS lookup zone for your ISP-assigned IP block in Azure DNS is charged at standard Azure DNS rates.
Can I host reverse DNS lookup zones for both IPv4 and IPv6 addresses in Azure DNS?
Yes. This article explains how to create both IPv4 and IPv6 reverse DNS lookup zones in Azure DNS.
Can I create reverse DNS zones for both Azure Public and Private DNS?
No. Reverse lookup zones are only supported for Azure Public DNS.
Can I import an existing reverse DNS lookup zone?
Yes. You can use Azure CLI to import existing DNS zones into Azure DNS. This method works for both forward lookup zones and reverse lookup zones.
For more information, see import and export a DNS zone file using Azure CLI.
Next steps
For more information on reverse DNS, see reverse DNS lookup on Wikipedia.
Learn how to manage reverse DNS records for your Azure services.