Note
Access to this page requires authorization. You can try signing in or changing directories.
Access to this page requires authorization. You can try changing directories.
This example of setting up a DNS Forwarder Virtual Machine (VM) is for the contoso5.com domain with three domain controllers on IPs 10.0.2.4, 10.0.2.5, and 10.0.2.6.
Steps in this guide
- Deploy DNS Forwarder VM.
- Update virtual network DNS.
Deploy and configure DNS forwarder VM
Create VM
Create Windows Server VM in the enclave workload of your choice, within the enclave virtual network, AzureVirtualEnclaveSubnet subnet, and with no public IP address.
Install DNS feature on Windows Server VM
In the Server Manager window, select Manage to install a new feature
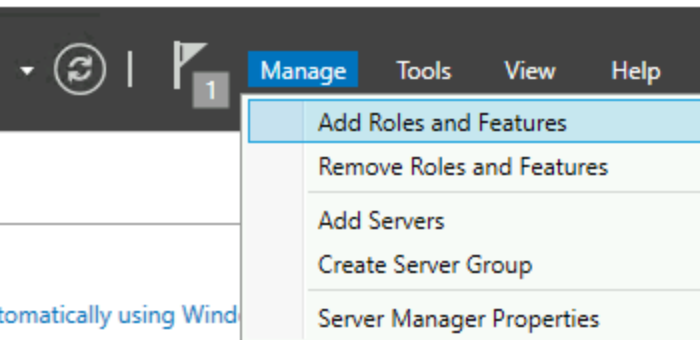
- Select
NextuntilServer Roleswhere you check the box next toDNS Server. - Accept the recommended tools and select
Nextuntil the install button appears. - Wait for the installation to finish.
Add domain controller IPs as the DNS Forwarders
In the Server Manager window, select Tools and DNS. Make sure the DNS forwarder VM name is selected and double select Forwarders and add the domain controller IPs.
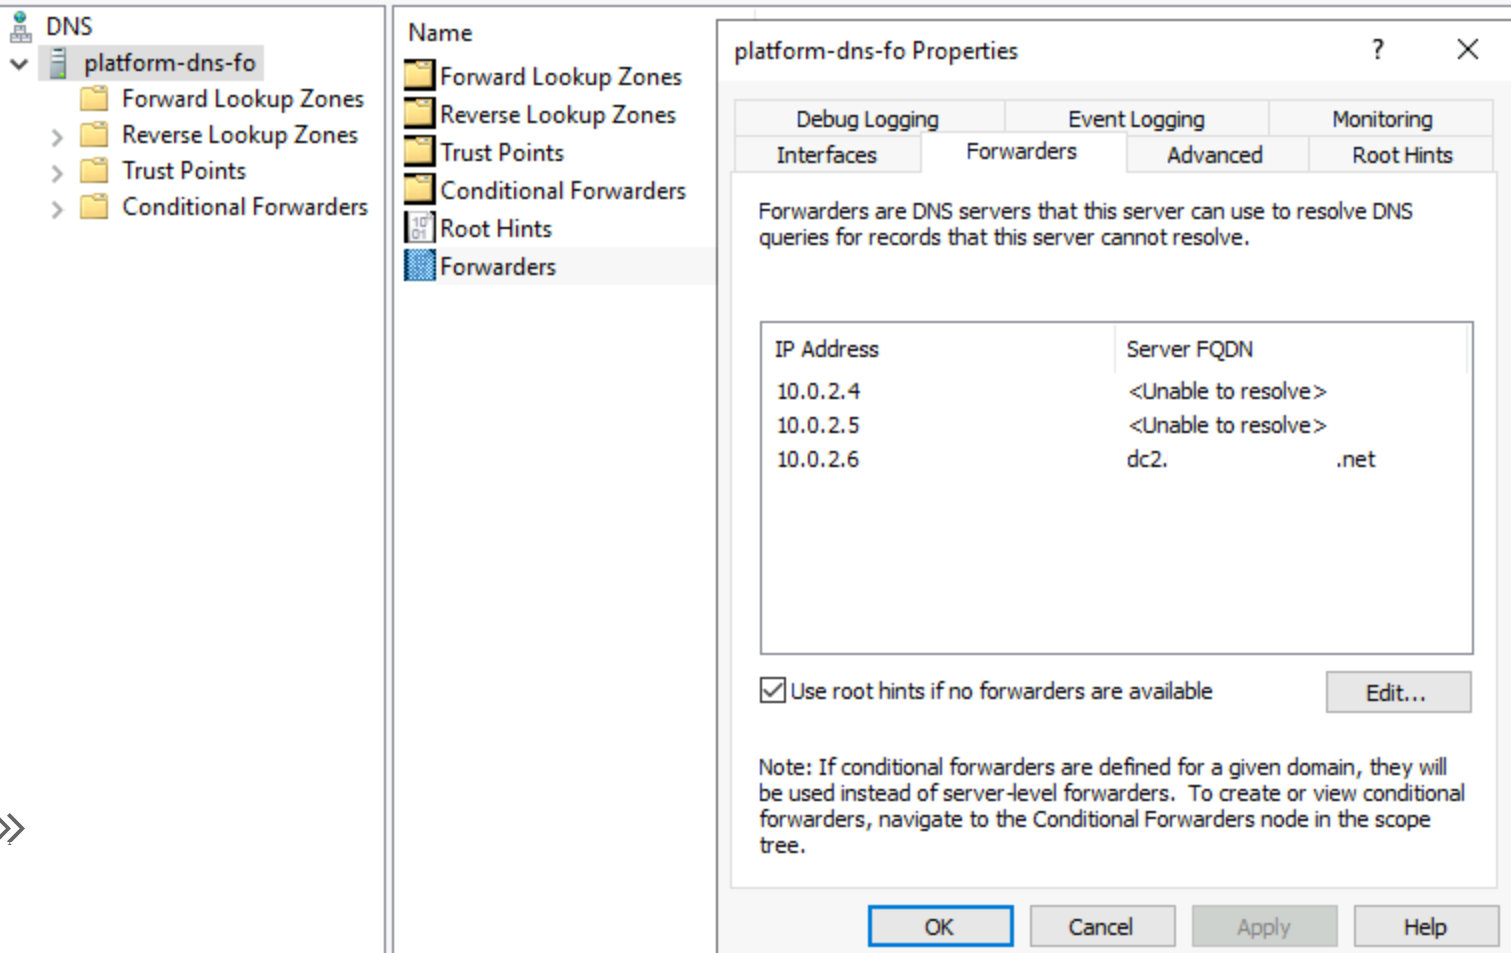
Set Static IP for DNS Forwarder
Use the commands ipconfig /all and nslookup contoso5.com to get the VM IP address, gateway, and DNS Servers (one or more of the DC IPs).
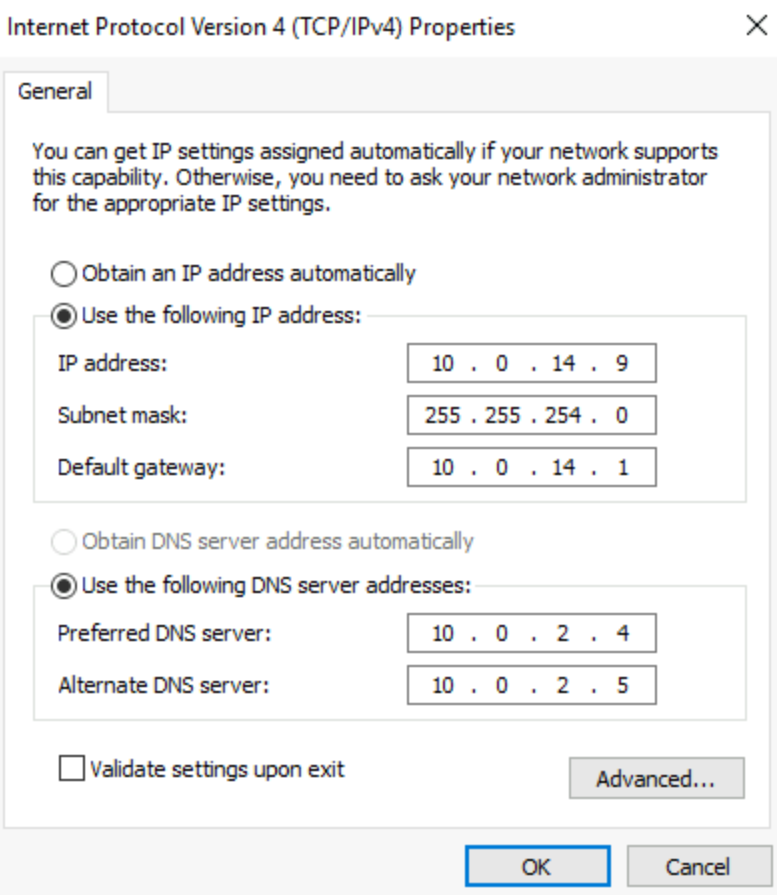
Update enclave virtual network DNS
- Open the enclave virtual network resource.
- Select
DNSon the left side. - Remove the default Azure IP address and add the domain controller IPs. Reboot any VMs in the virtual network for these new setting to take effect automatically.