Note
Access to this page requires authorization. You can try signing in or changing directories.
Access to this page requires authorization. You can try changing directories.
Workloads are logical groups of zero or more workload resource groups and their underlying Azure resources in an enclave.
In this how-to guide, you create a workload in an existing Azure Enclave enclave and optionally add workload resource groups.
Prerequisites
- To access Azure Enclave, you need an Azure subscription. If you don't already have a subscription, create a free account before you begin.
- All access to Azure Enclave takes place through a community or an enclave. For this how-to article, create a community and enclave using the Azure portal.
Sign in to Azure
Sign in to the Azure portal.
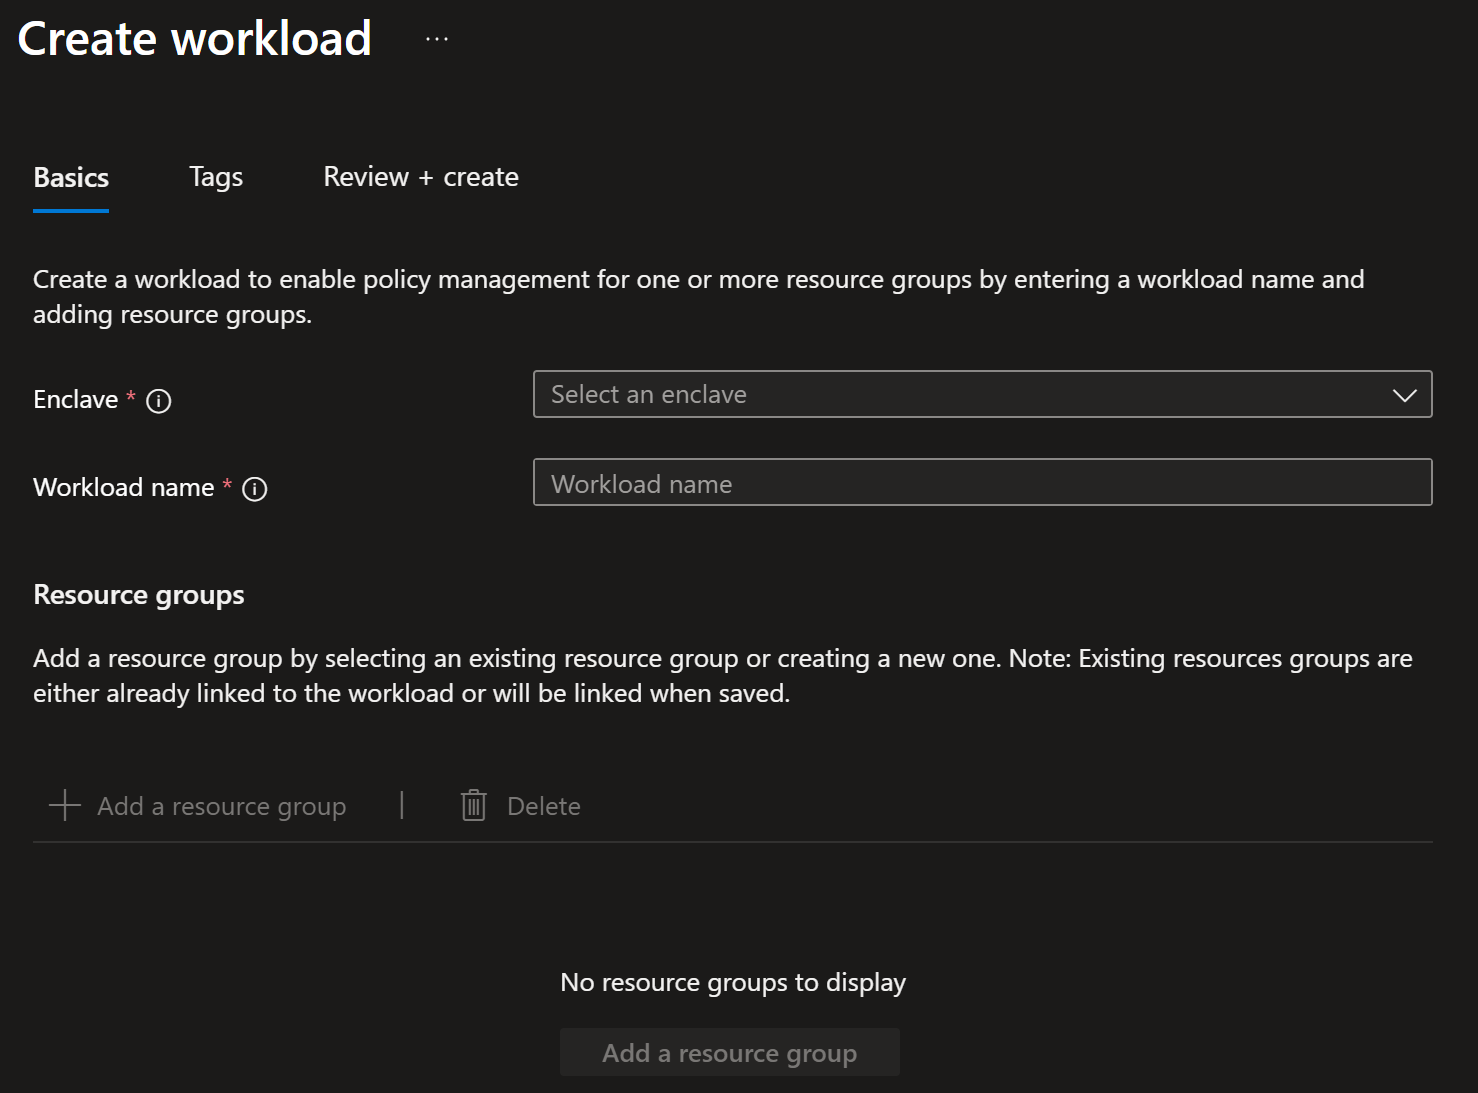
Create workload
Enter
Azure Enclavein the search.Under
Services, selectAzure Enclave.In the
Azure Enclavepage, selectWorkloadsin the left menu.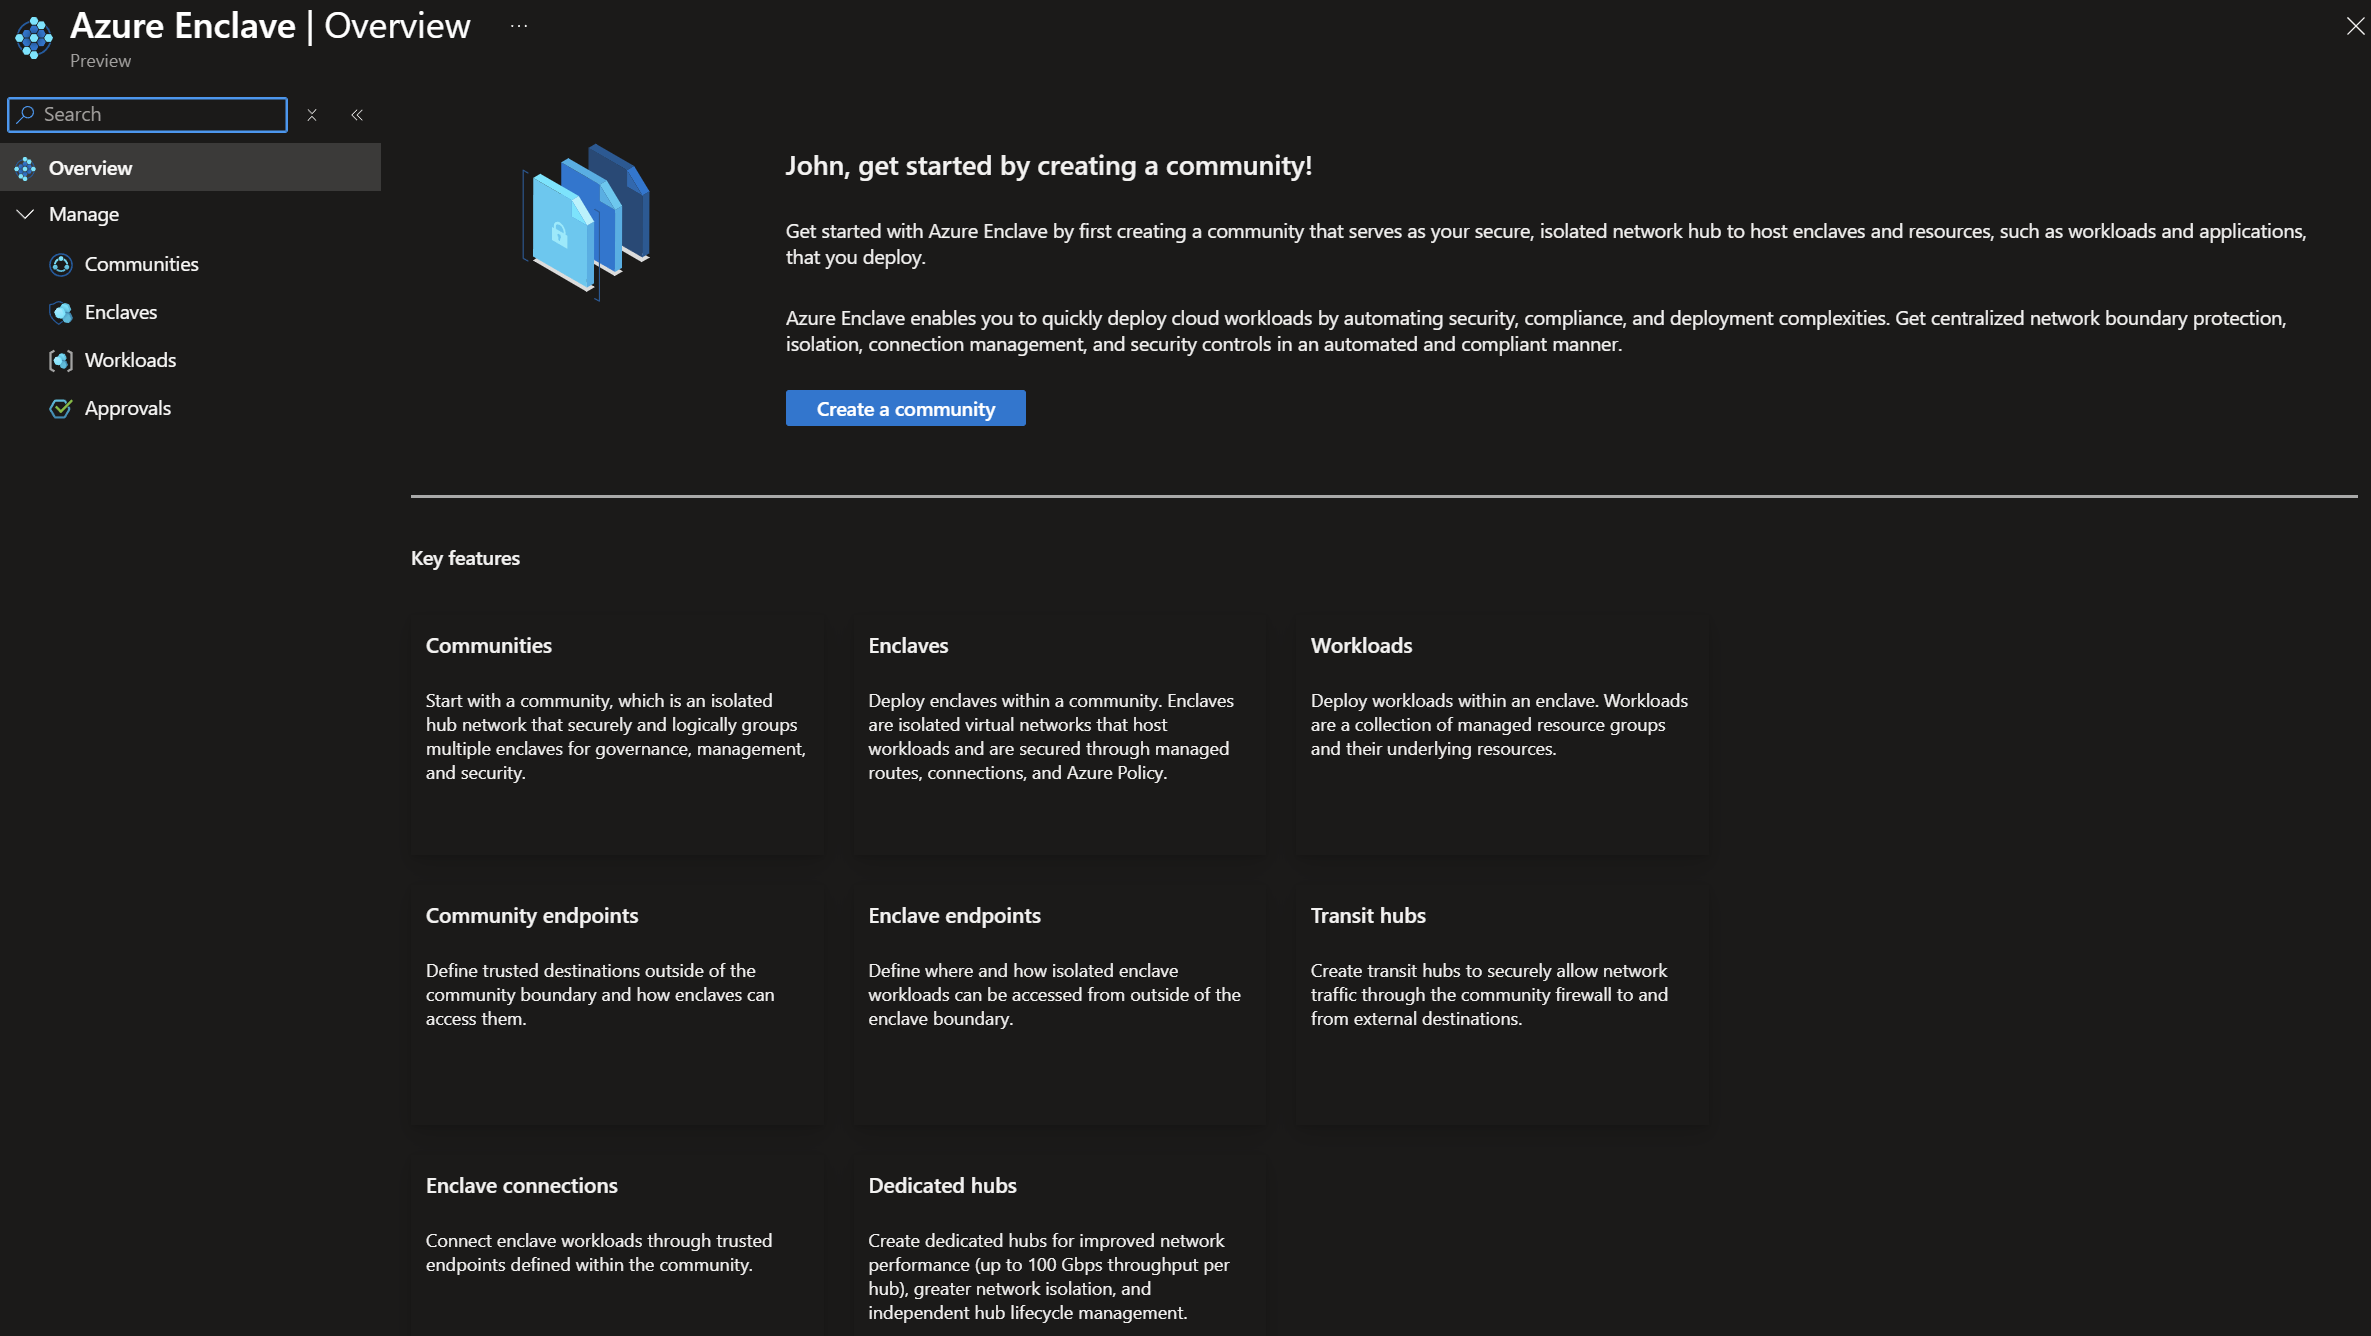
On the
Workloadspage, selectCreate.Enter the basic details for your workload:
Enclave: Select an existing enclave. This value is automatically applied if you started workload creation from an existing enclave.Workload name: Enter a workload name, for example,cyber-monitoring-apps.

Note
Choose a workload naming convention that makes sense for your organization. For more information, see Define your naming convention.
Add workload resource groups
To add a new resource group during workload creation, select
Add, enter a resource group name, and repeat as needed. You can also create resource groups later or move existing resource groups into the workload after the workload is created.Select
Next, and then enter any tags for your workload.Select
Review + create, confirm that the workload details are correct, and then selectCreate.
Note
Workload resource groups are flexible and you can decide how to logically organize your resources in workload resource groups.