Note
Access to this page requires authorization. You can try signing in or changing directories.
Access to this page requires authorization. You can try changing directories.
In this article, you learn how to request a quota increase for your Azure Extended Zone resources using the Azure portal.
Prerequisites
- An Azure account with an active subscription.
Request a quota increase
In this section, you request a quota increase in the Azure portal.
Select the ? in the global header.
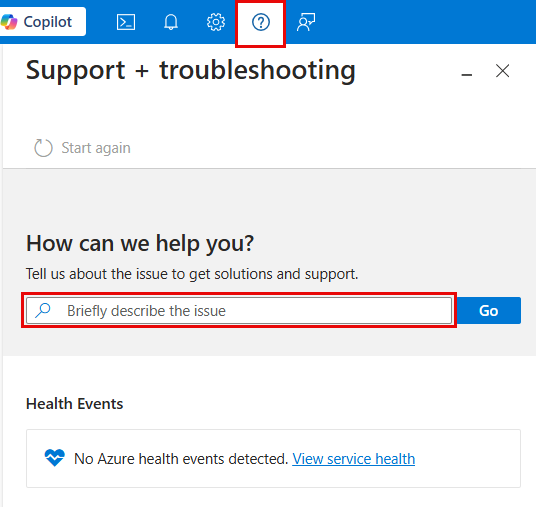
In the Support + troubleshooting search box, enter compute quota, then select Subscription Management. Select Next.
Select your subscription, select Next, then select Compute-VM (cores-vCPUs) subscription limit increases. Select Next.
Select Create a Support Request.
In the New support request pane, enter the following details:
Field Value What is your issue related to? Select Azure services. Issue type Select Service and subscription limits (quotas). Subscription Select your subscription. Quota type Select Compute-VM (cores-vCPUs) subscription limit increases. Select Next.
In the Additional details tab, select Enter details.
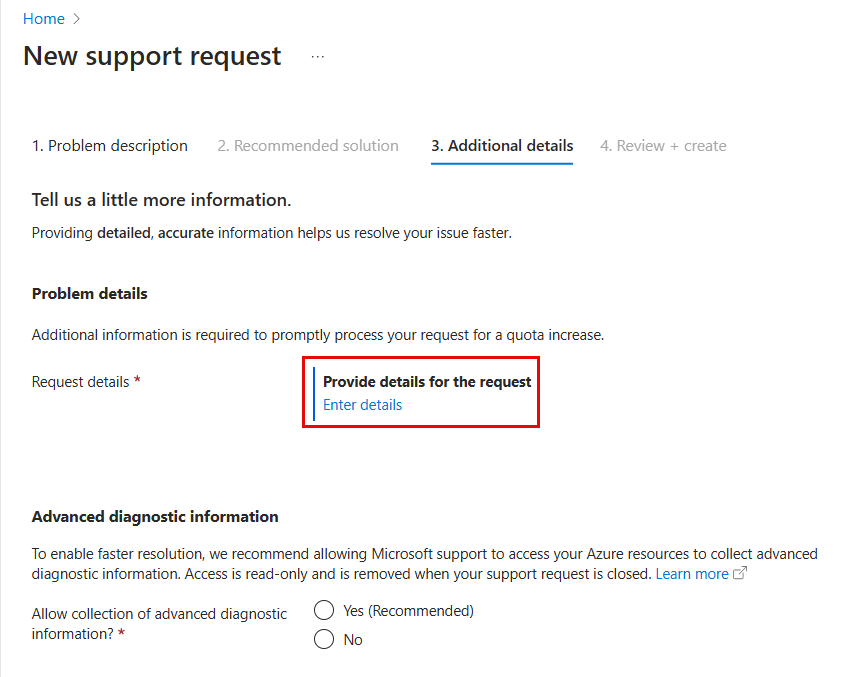
In the Request Details pane, enter the following information:
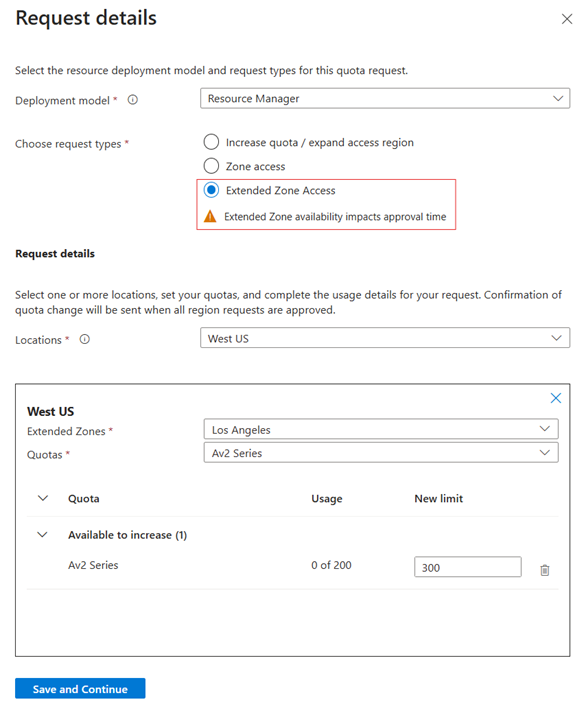
Field Value Deployment model Select Resource Manager. Choose request types Select Extended Zone Access. Locations Select the Extended Zone region. Extended Zones Select the location of your extended zone. Quotas Select the quota you want to increase. Available to increase Enter the new quota limit in the New limit box. Note
You need to select the parent region first, and then choose the paired Extended Zone to select the correct Extended Zone location. For example, if you select West US, you can then choose Los Angeles as the Extended Zone. If there's no Extended Zone paired with the selected region, you won’t be able to select an Extended Zone location.
Select Save and Continue.
In the Advanced diagnostic information section, select Yes (Recommended) to allow Azure support to gather advanced diagnostic information from your resources, or No if you prefer not to share this information.
In the Support Method section, provide your preferred contact method, availability, and support language, and confirm your region. Complete the Contact info section to ensure we can reach you.
Select Next. Review your request and select Create. Your request will be processed by the Extended Zones engineering team accordingly.
Note
The Quota's view will only show the quota from the Extended Zone's parent region, given Extended Zones respect quota from their parent region. Nevertheless, providing the Extended Zone's information is needed when requesting quotas, as that's where the SKU is intended to be deployed. Consequently, there may be situations where the parent region is capacity constrained while the Extended Zone is not.