Organizations often need to update their Azure Firewall Policy for various reasons, such as onboarding new applications or workloads, addressing security vulnerabilities, performing maintenance, or optimizing policies by merging or removing unused rules. These updates can involve multiple contributors, and each change can take several minutes to deploy.
With Azure Firewall Policy Draft + Deployment, you can streamline this process using a two-phase approach:
Draft: Make multiple changes collaboratively, saved in a temporary draft policy cloned from your current applied policy. These changes don't affect the live policy.
Deployment: Apply all changes at once by deploying the draft, replacing the current applied policy with the updated version.
Supported scenarios and limitations
The Draft and Deployment feature is designed for specific use cases and has certain constraints:
Supported scenarios
- This feature is exclusively available for Azure Firewall Policies. It doesn't support firewalls configured with classic rules.
Limitations
- A draft is created as a clone of the currently applied policy. Any changes made to the applied policy after the creation of the draft isn't reflected in the draft unless manually updated.
- Deploying a draft replaces the entire applied policy. Changes made to the applied policy after the draft is created aren't preserved unless they're also added to the draft.
- Creating a new Rule Collection Group (RCG) isn't supported directly within a policy draft.
- Only one draft can exist for a policy at any given time.
Prerequisites
- If you don't have an Azure subscription, you can create a free account to get started.
- To use this feature with the Azure CLI, ensure that you have the Azure Firewall extension installed and updated to version 1.2.3 or later.
Note
When using this feature through Azure PowerShell or Azure REST API, you must first download the current policy and manually create a draft based on it. In contrast, using the Azure portal or CLI automatically generates a draft from the existing policy.
Use Draft + Deployment
Azure Firewall Draft + Deployment allows you to make bulk updates to your firewall policy before applying them to production.
In the Azure portal, navigate to your existing firewall policy or create a new one.
On the Azure Firewall Policy page, under the Management section, select Draft & Deployment, then select Create a new draft. This creates a draft that is an exact copy of your current applied policy.
On the draft page, make changes or additions to your rules or settings. These pages are identical to those in the deployed policy. The changes will only take effect when you deploy the draft.
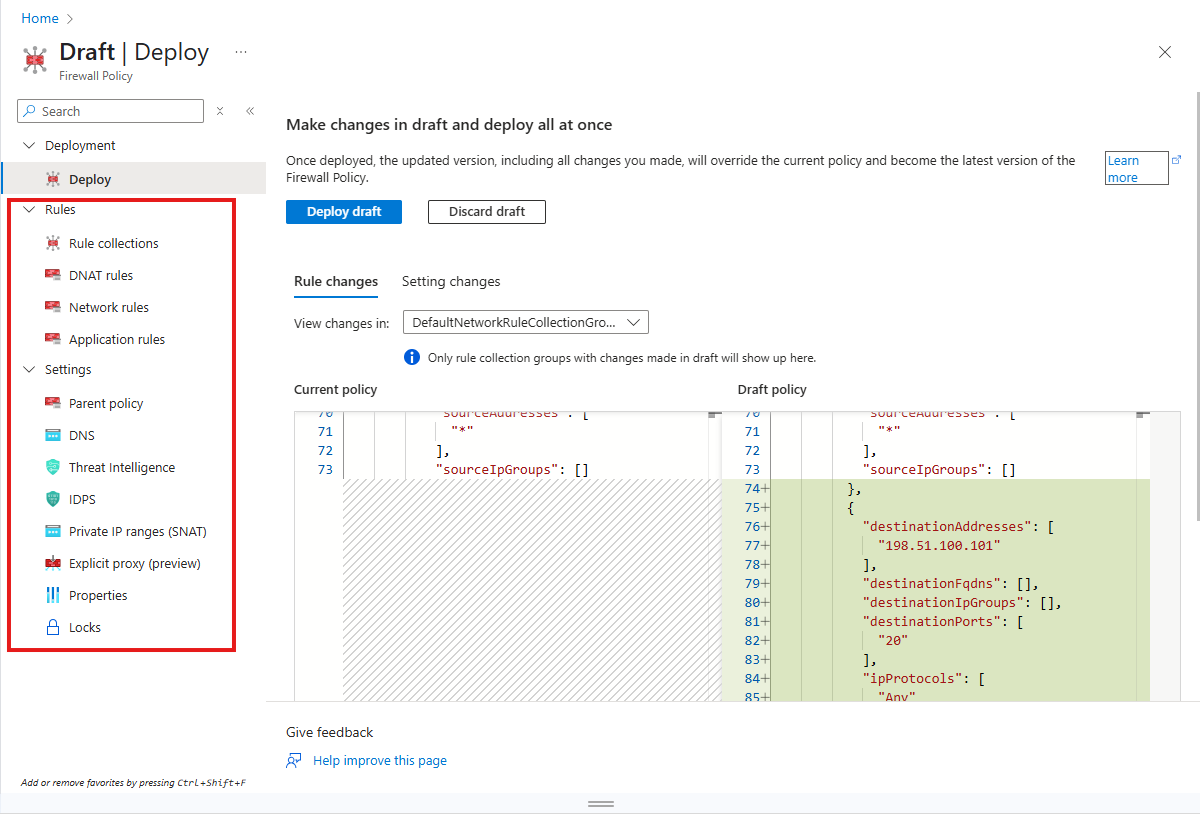
To verify the changes, return to the Deploy screen to review the updated rules or settings. To apply the changes, select Deploy draft. Once deployed, the draft replaces the current policy and becomes the latest version. The draft is deleted after deployment.

Repeat this process as needed to make further updates to your firewall policy.
Run the az login command to log in to your Azure account:
az login
Create a draft using az network firewall policy draft create command. This command creates a draft of the current applied policy. You can use the --policy-name and --resource-group parameters to specify the name and resource group of your firewall policy:
az network firewall policy draft create --policy-name fw-policy --resource-group test-rg
Update the settings in the draft using the az network firewall policy draft update command. This command allows you to modify the threat intelligence mode and IDPS mode for the draft. Use the --threat-intel-mode parameter to set the desired threat intelligence mode and the --idps-mode parameter to configure the intrusion detection and prevention system (IDPS) mode:
az network firewall policy draft update --policy-name fw-policy --resource-group test-rg --threat-intel-mode Off --idps-mode Deny
Update Draft Rules
Create a New Rule Collection Group (RCG) using az network firewall policy rule-collection-group draft create command:
az network firewall policy rule-collection-group draft create --rule-collection-group-name rcg-b --policy-name fw-policy --resource-group test-rg --priority 303
Add a NAT Rule Collection to an Existing RCG in the Draft
az network firewall policy rule-collection-group draft collection add-nat-collection \
      --name nat_collection_1 \
      --collection-priority 10003 \
      --policy-name fw-policy \
      --resource-group test-rg \
      --rule-collection-group-name rcg-c \
      --action DNAT \
      --rule-name network_rule_21 \
      --description "test" \
      --destination-addresses "202.120.36.15" \
      --source-addresses "202.120.36.13" "202.120.36.14" \
      --translated-address 128.1.1.1 \
      --translated-port 1234 \
      --destination-ports 12000 12001 \
      --ip-protocols TCP UDP
View the details of the draft using az network firewall policy draft show command:
az network firewall policy draft show --policy-name fw-policy --resource-group test-rg
Deploy the draft to apply the changes using az network firewall policy deploy command:
az network firewall policy deploy --name fw-policy --resource-group test-rg
Discard the draft if you no longer need it using az network firewall policy draft delete command:
az network firewall policy draft delete --policy-name fw-policy --resource-group test-rg
Use the New-AzFirewallPolicyDraft cmdlet to create a draft of the current applied policy. Specify the policy name and resource group:
New-AzFirewallPolicyDraft -AzureFirewallPolicyName fw-policy -ResourceGroupName test-rg
Use the Set-AzFirewallPolicyDraft cmdlet to update the settings in the draft. For example, you can update the threat intelligence mode and IDPS mode:
Set-AzFirewallPolicyDraft -AzureFirewallPolicyName fw-policy -ResourceGroupName test-rg -ThreatIntelWhitelist $threatIntelWhitelist
Update draft rules with the following cmdlets:
New-AzFirewallPolicyRuleCollectionGroupDraft -AzureFirewallPolicyRuleCollectionGroupName rcg-a -ResourceGroupName test-rg -AzureFirewallPolicyName fw-policy -Priority 200
$rule1 = New-AzFirewallPolicyApplicationRule -Name "Allow-HTTP" -Protocol "Http:80" -SourceAddress "10.0.0.0/24" -TargetFqdn www.example.com

$rule2 = New-AzFirewallPolicyApplicationRule -Name "Allow-HTTPS-2" -Protocol "Https:443" -SourceAddress "10.0.0.0/24" -TargetFqdn "www.secureexample.com"

$ruleCollection = New-AzFirewallPolicyFilterRuleCollection -Name "Allow-Rules" -Priority 100 -Rule $rule1, $rule2 -ActionType Allow

Set-AzFirewallPolicyRuleCollectionGroupDraft -AzureFirewallPolicyRuleCollectionGroupName rcg-b -ResourceGroupName test-rg -AzureFirewallPolicyName fw-policy -Priority 400 -RuleCollection $ruleCollection
Use the Get-AzFirewallPolicyDraft cmdlet to view the details of the draft:
Get-AzFirewallPolicyDraft -AzureFirewallPolicyName fw-policy -ResourceGroupName test-rg
Use the Deploy-AzFirewallPolicy cmdlet to apply the changes in the draft to the live policy:
Deploy-AzFirewallPolicy -Name fw-policy -ResourceGroupName test-rg
If you want to discard the draft without applying the changes, use the Remove-AzFirewallPolicyDraft cmdlet:
Remove-AzFirewallPolicyDraft -AzureFirewallPolicyName fw-policy -ResourceGroupName test-rg
Next steps