Blue/Green deployment is a software release methodology that gradually introduces application enhancements to a small subset of end users. If the enhancements are successful, the number of users on the new deployment is slowly increased until all users are on the new deployment. If there are any issues, requests are routed to the old backend with the previous application version. This method is a safer way to introduce code changes than suddenly pointing all users to the new enhancements.
Azure Front Door is Microsoft’s modern cloud Content Delivery Network (CDN) that provides fast, reliable, and secure access between your users and your applications’ static and dynamic web content across the globe. This article explains how to use Azure Front Door’s global load balancing capabilities to set up a blue/green deployment model for your backends.
Prerequisites
An Azure subscription. If you don't have an Azure subscription, create a free account before you begin.
Select Create a resource from the home page, search for Front Door and CDN profiles, and select Create.
Select Custom create on the Compare offerings page, and then select Continue to create a Front Door.
On the Basics tab, enter or select the following information:
Settings
Values
Subscriptions
Select your subscription.
Resource group
Select Create new and enter myAFDResourceGroup into the text box.
Resource group location
Select East US.
Name
Enter a unique name for your Front Door profile.
Tier
Select Standard.
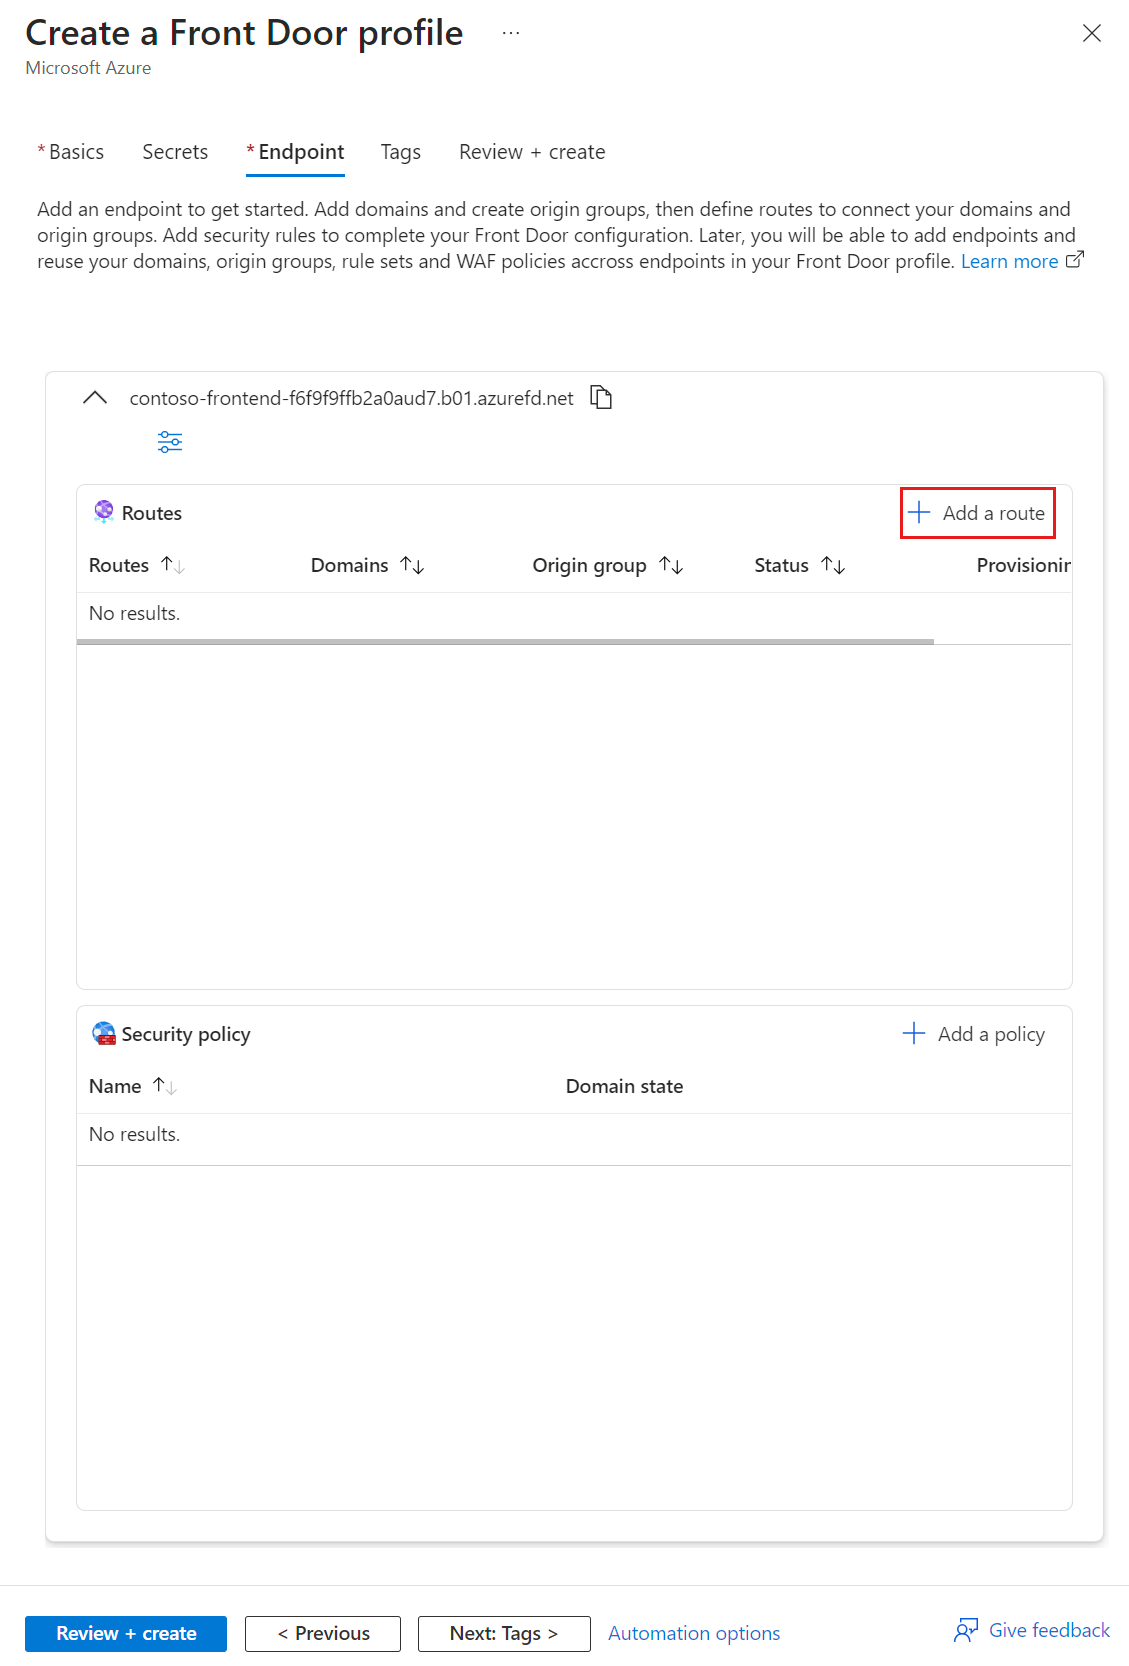
Select the Endpoints tab, and then select Add endpoint. Enter a globally unique name for your endpoint, and then select Add. You can create more endpoints after the deployment.
Select + Add a route to configure routing to your Web App origin.
Provide a name for the route and configure the route settings based on the needs of your application. For more information, see Create a Front Door for your application.
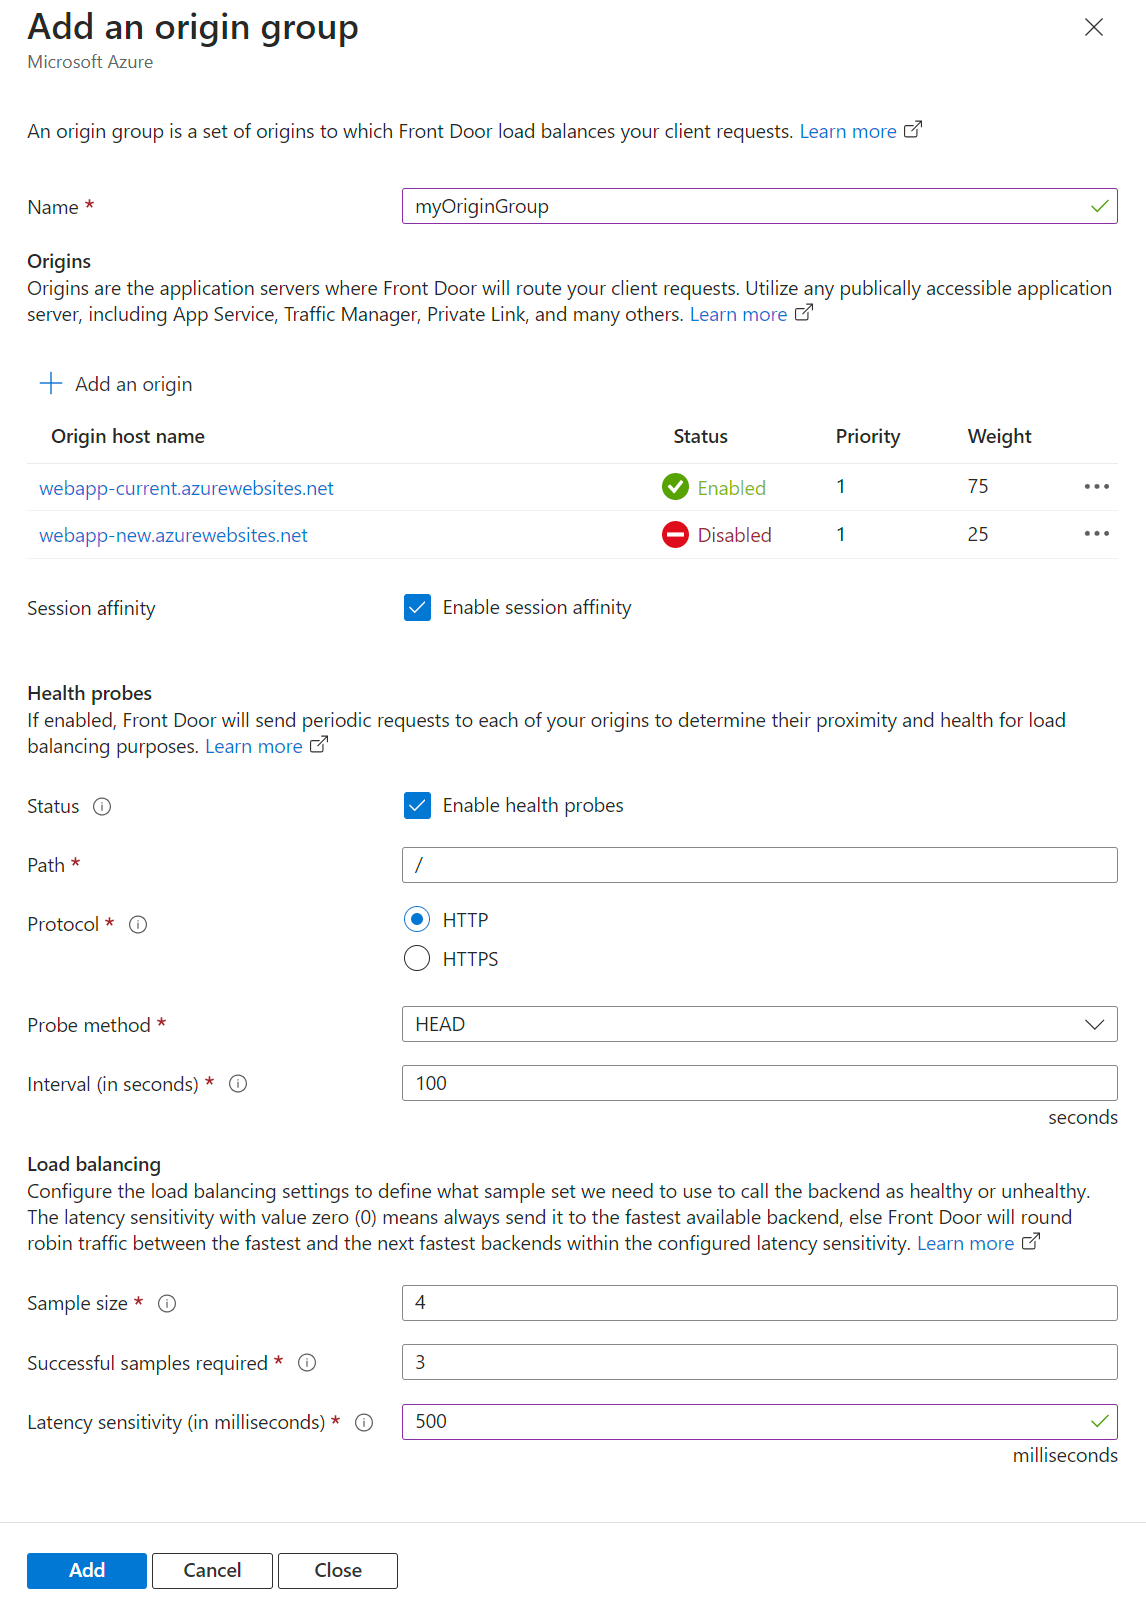
To create a new origin group, select Add a new origin group and enter myOriginGroup as the name.
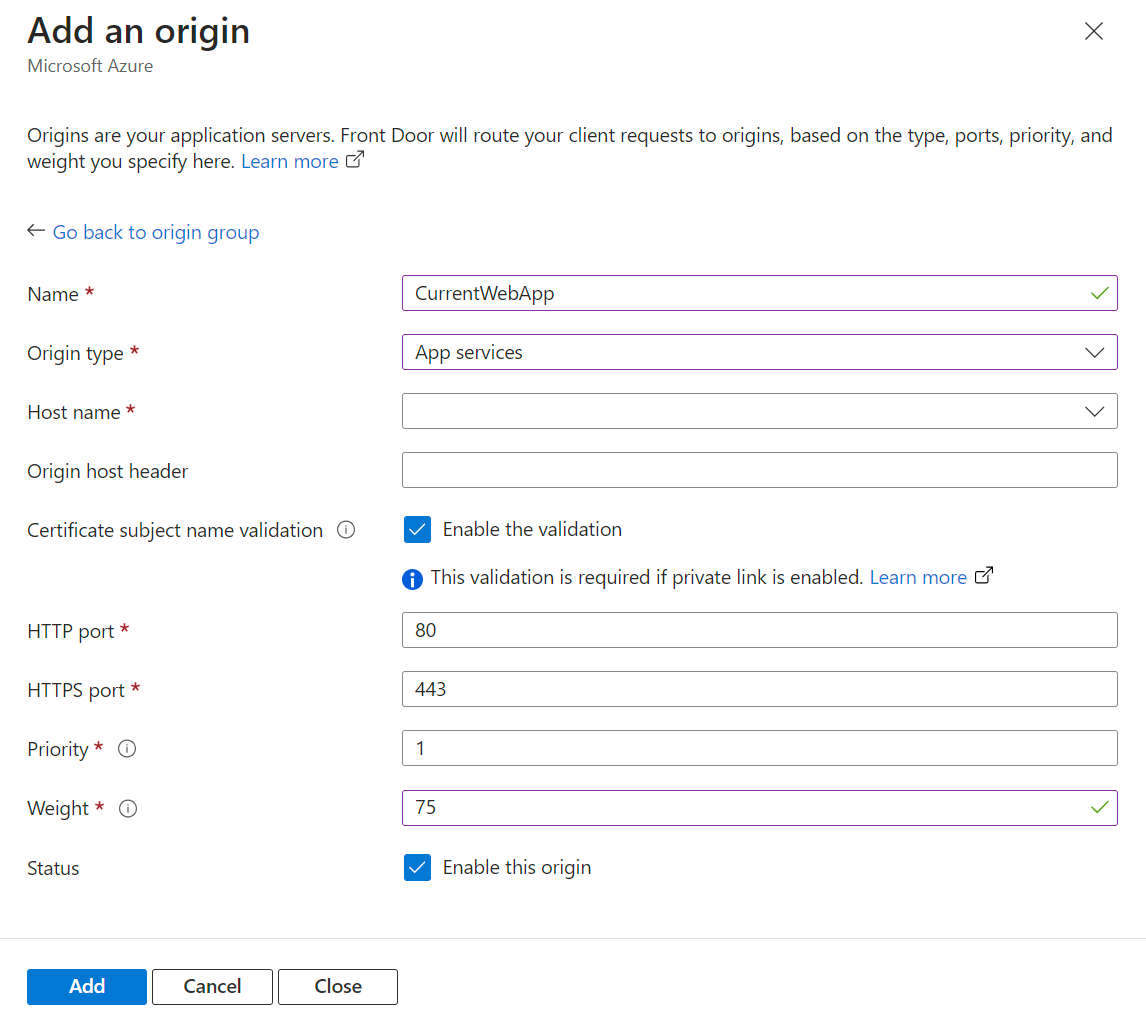
Select + Add to add an origin to the origin group. Enter the following information for the existing version of the application:
Settings
Values
Name
Enter CurrentWebApp for the name.
Origin type
Select App Service from the dropdown.
Hostname
Enter the hostname of your Web App. This example uses webapp-current.azurewebsites.net.
Priority
Enter 1.
Weight
Enter 75.
Status
Select the check box for Enable this origin.
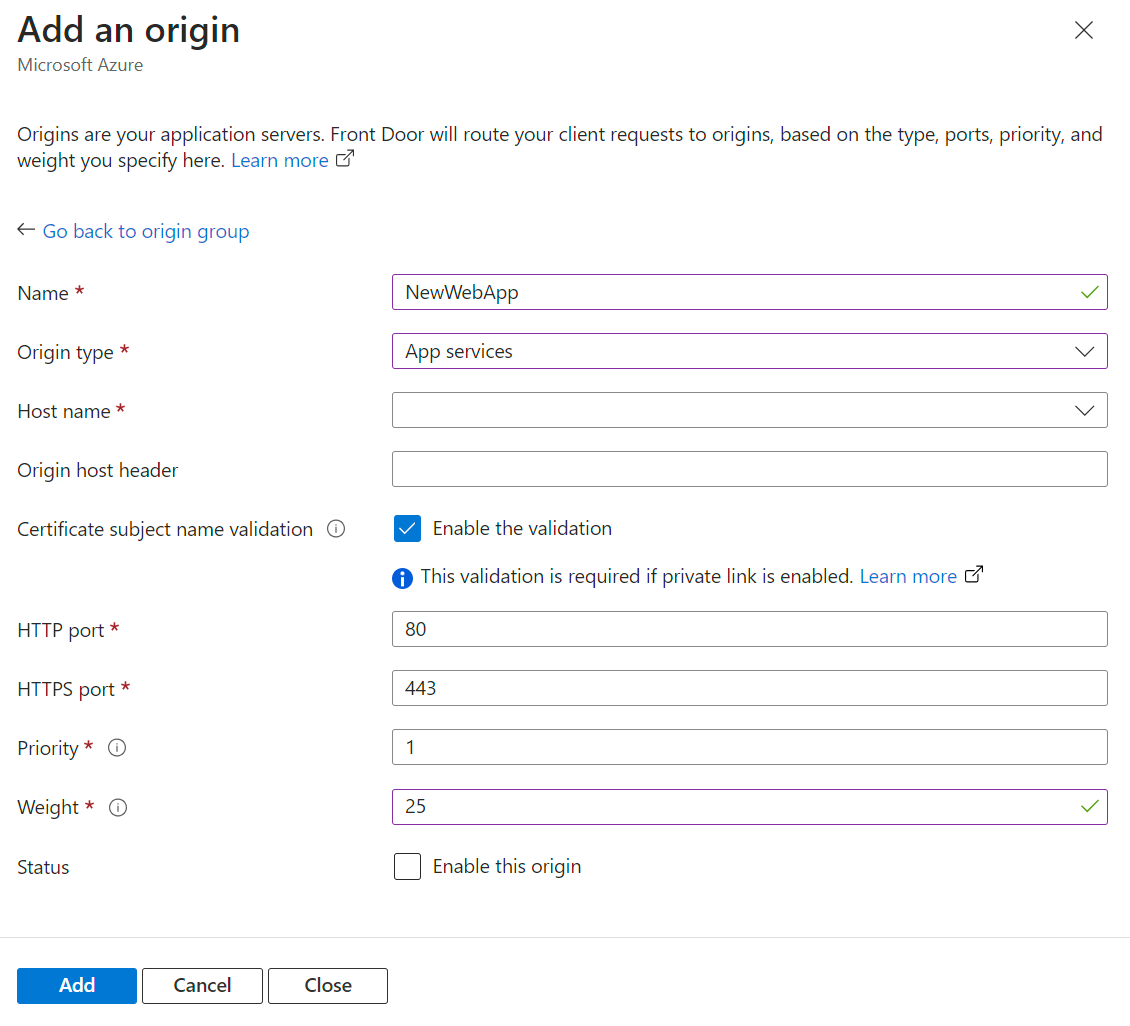
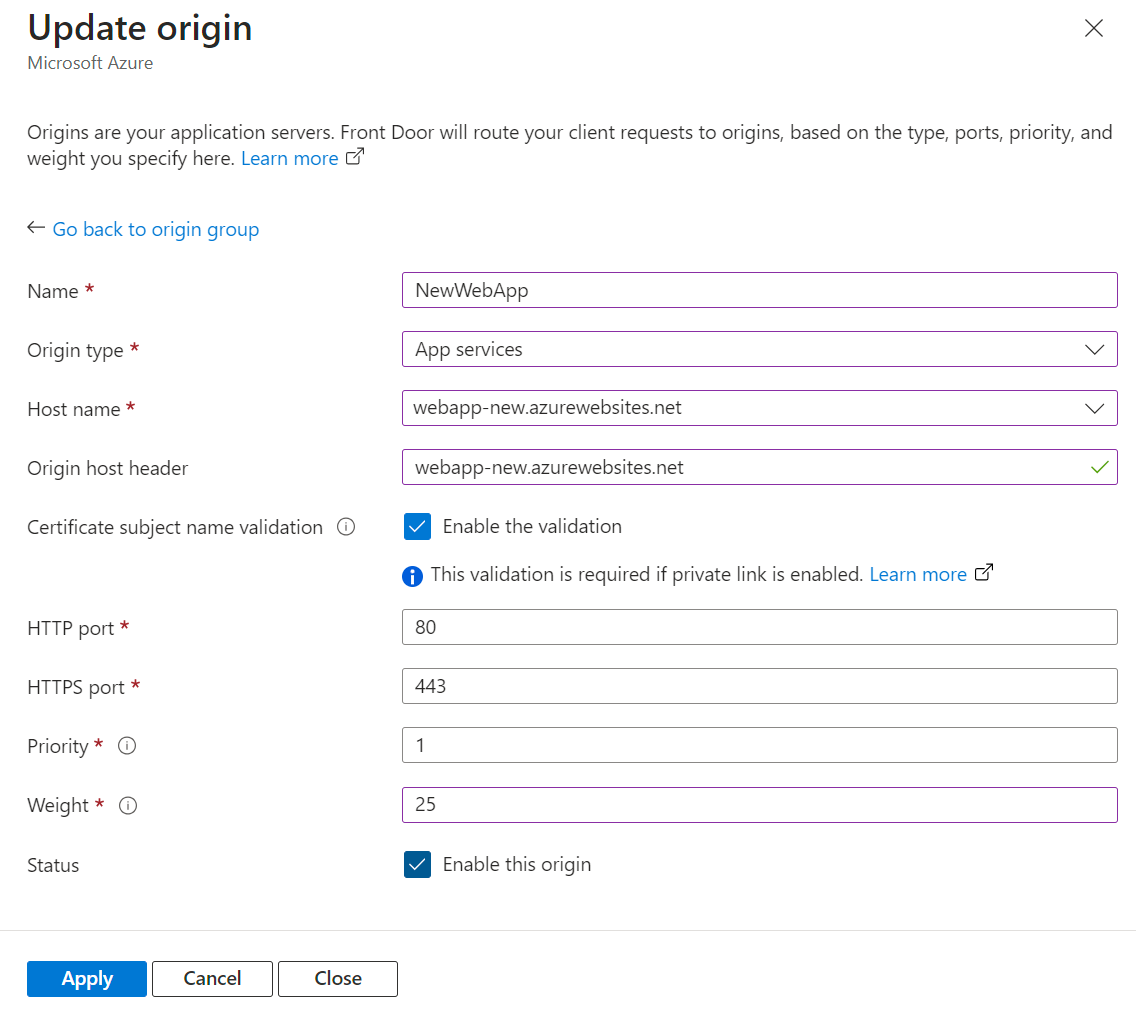
Select + Add to add another origin to the origin group. Enter the following information for the new version of the application:
Settings
Values
Name
Enter NewWebApp for the name.
Origin type
Select App Service from the dropdown.
Hostname
Enter the hostname of your Web App. This example uses webapp-new.azurewebsites.net.
Priority
Enter 1.
Weight
Enter 25.
Status
Leave Enable this origin unchecked.
Note
Initially you want to set the weight of the current origin higher than the new origin. This ensures that most of the traffic is routed to the current origin. As you test the new origin, you can gradually increase the weight of the new origin and decrease the weight of the current origin. The total weight doesn't have to add up to be 100, although it will help you visualize the traffic distribution. The example sets the existing origin to receive three times as much traffic as the new origin.
Enable session affinity if your application requires it. For more information, see Session affinity.
Note
Session affinity determines if the end user gets routed to the same origin after the first first request goes through Azure Front Door. Whether or not you enable this feature depends on your application, and the type of enhancements being rolled out. If it is a major revision, you might want to enable session affinity, so that if users were initially routed to the new codebase they will continue to use it. If the enhancement is relatively minor, for example, involving a single page with no dependencies on other parts of the application, you can potentially leave session affinity disabled. When in doubt, have session affinity enabled.
Health probe settings can be left at the default values. You can adjust the probe settings based on the needs of your application. For more information, see Health probes.
Under Load balancing settings, enter the following information:
Settings
Values
Sample size
Enter 4.
Successful samples required
Enter 3.
Latency sensitivity (in milliseconds)
Enter 500.
Note
We recommend setting the latency sensitivity to 500 milliseconds (half a second) or higher. This ensures that both origins gets used, as it is possible that one origin is faster than the other.
Select Add to add the origin group. Then select Review + create to review the settings of your Front Door profile. Select Create to create the profile.
Start Blue/Green deployment
When you're ready to begin the blue/green deployment, you can start by enabling the new origin. This starts routing traffic to the new origin, while still allowing you to revert back to the old origin if needed.
After the Front Door profile gets created, go to the origin group you created earlier. Select the new origin, and then select Enable this origin. This starts routing traffic to the new origin.
Monitor the new origin to ensure that it's working as expected. Once you're confident that the new origin is working as expected, you can gradually increase the weight of the new origin and decrease the weight of the old origin. Keep increasing the weight of the new origin until all traffic is routed to the new origin.
If you experience any issues with the new origin, you can disable the new origin to route all traffic back to the old origin. This process allows you to investigate and fix the issues without impacting your users.
Build end-to-end solutions in Microsoft Azure to create Azure Functions, implement and manage web apps, develop solutions utilizing Azure storage, and more.