Note
Access to this page requires authorization. You can try signing in or changing directories.
Access to this page requires authorization. You can try changing directories.
The first step in understanding compliance in Azure is to identify the status of your resources. In this quickstart, you create a policy assignment to identify non-compliant resources using Azure portal. The policy is assigned to a resource group and audits virtual machines that don't use managed disks. After you create the policy assignment, you identify non-compliant virtual machines.
When assigning a built-in policy or initiative definition, it's optional to reference a version. Policy assignments of built-in definitions default to the latest version and automatically inherit minor version changes unless otherwise specified.
Prerequisites
- If you don't have an Azure account, create a free account before you begin.
- A resource group with at least one virtual machine that doesn't use managed disks.
Create a policy assignment
In this quickstart, you create a policy assignment with a built-in policy definition, Audit VMs that do not use managed disks.
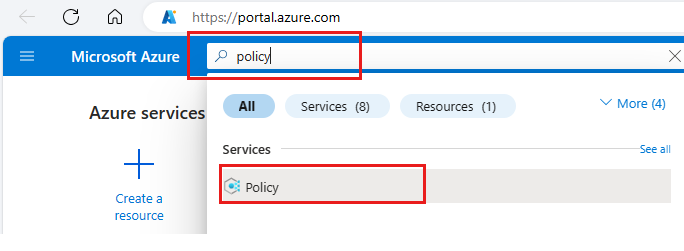
Sign in to the Azure portal.
Search for policy and select it from the list.
Select Assignments on the Policy pane.
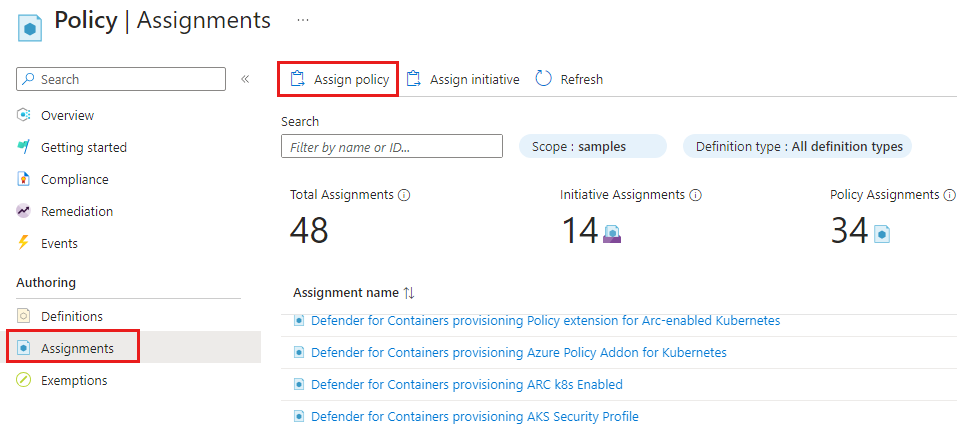
Select Assign Policy from the Policy Assignments pane.
On the Assign Policy pane Basics tab configure the following options:
Field Action Scope Use the ellipsis ( ...) and then select a subscription and a resource group. Then choose Select to apply the scope.Exclusions Optional and isn't used in this example. Resource selectors Skip resource selectors for this example. Resource selectors let you refine the resources affected by the policy assignment. Policy definition Select the ellipsis ( ...) to open the list of available definitions.Available Definitions Search the policy definitions list for Audit VMs that do not use managed disks definition, select the policy, and select Add. There's a column that shows the latest version of the definition. Version (preview) Accept the version in format 1.*.*to ingest major, minor, and patch versions.
Select the ellipsis (...) to view available versions and the options to enroll in minor version updates or preview versions. You must select a version to change the options. For more information, go to definition version within assignment.Assignment name By default uses the name of the selected policy. You can change it but for this example, use the default name. Description Optional to provide details about this policy assignment. Policy enforcement Defaults to Enabled. For more information, go to enforcement mode. 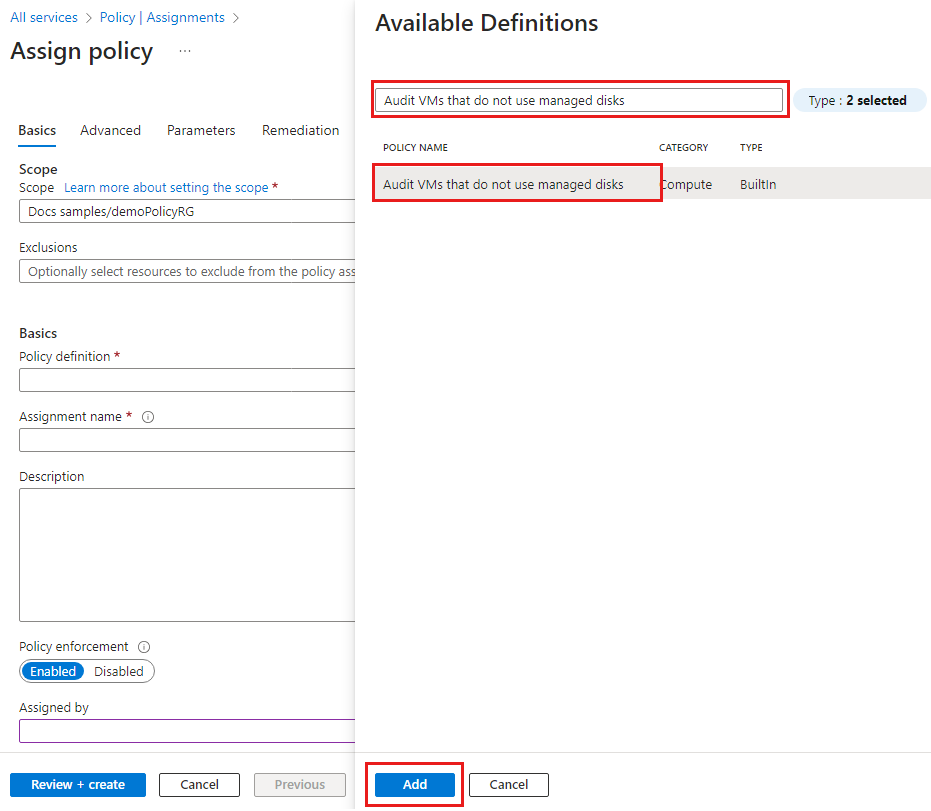
After a Policy definition is selected, you can change the Version (preview) options.
For example, if you select the options shown in the image, the Version (preview) is changed to
1.0.*.
Select Next to view each tab for Parameters and Remediation. No changes are needed for this example.
Tab name Options Parameters If the policy definition you selected on the Basics tab has parameters, you configure them on the Parameters tab. This example doesn't use parameters. Remediation You can create a managed identity. For this example, Create a Managed Identity is unchecked.
This box must be checked when a policy or initiative includes a policy with either the deployIfNotExists or modify effect. For more information, go to managed identities and how remediation access control works.Select Next and on the Non-compliance messages tab create a Non-compliance message like Virtual machines should use managed disks.
This custom message is displayed when a resource is denied or for non-compliant resources during regular evaluation.
Select Next and on the Review + create tab, review the policy assignment details.
Select Create to create the policy assignment.


Identify non-compliant resources
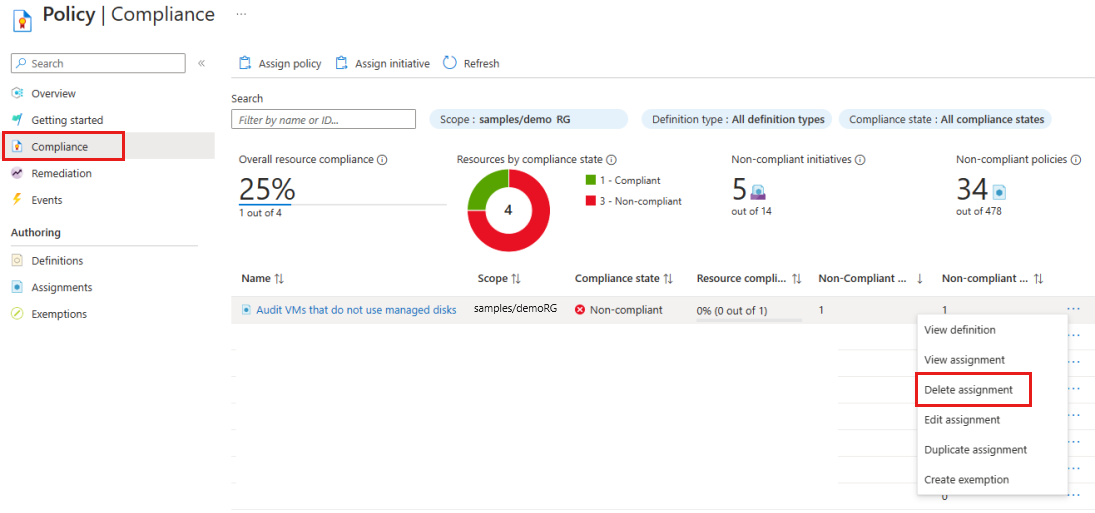
On the Policy pane, select Compliance and locate the Audit VMs that do not use managed disks policy assignment. The compliance state for a new policy assignment takes a few minutes to become active and provide results about the policy's state.

The policy assignment shows resources that aren't compliant with a Compliance state of Non-compliant. To get more details, select the policy assignment name to view the Resource Compliance.
When a condition is evaluated against your existing resources and found true, then those resources are marked as non-compliant with the policy. The following table shows how different policy effects work with the condition evaluation for the resulting compliance state. Although you don't see the evaluation logic in the Azure portal, the compliance state results are shown. The compliance state result is either compliant or non-compliant.
| Resource State | Effect | Policy Evaluation | Compliance State |
|---|---|---|---|
| New or Updated | Audit, Modify, AuditIfNotExist | True | Non-Compliant |
| New or Updated | Audit, Modify, AuditIfNotExist | False | Compliant |
| Exists | Deny, Audit, Append, Modify, DeployIfNotExist, AuditIfNotExist | True | Non-Compliant |
| Exists | Deny, Audit, Append, Modify, DeployIfNotExist, AuditIfNotExist | False | Compliant |
The DeployIfNotExist and AuditIfNotExist effects require the IF statement to be TRUE and the existence condition to be FALSE to be non-compliant. When TRUE, the IF condition triggers evaluation of the existence condition for the related resources.
Clean up resources
You can delete a policy assignment from Compliance or from Assignments.
To remove the policy assignment created in this article, follow these steps:
On the Policy pane, select Compliance and locate the Audit VMs that do not use managed disks policy assignment.
Select the policy assignment's ellipsis and select Delete assignment.

Next steps
In this quickstart, you assigned a policy definition to identify non-compliant resources in your Azure environment.
To learn more about how to assign policies that validate resource compliance, continue to the tutorial.