How to use Azure Pipelines with Apache Flink® on HDInsight on AKS
Note
We will retire Azure HDInsight on AKS on January 31, 2025. Before January 31, 2025, you will need to migrate your workloads to Microsoft Fabric or an equivalent Azure product to avoid abrupt termination of your workloads. The remaining clusters on your subscription will be stopped and removed from the host.
Only basic support will be available until the retirement date.
Important
This feature is currently in preview. The Supplemental Terms of Use for Microsoft Azure Previews include more legal terms that apply to Azure features that are in beta, in preview, or otherwise not yet released into general availability. For information about this specific preview, see Azure HDInsight on AKS preview information. For questions or feature suggestions, please submit a request on AskHDInsight with the details and follow us for more updates on Azure HDInsight Community.
In this article, you'll learn how to use Azure Pipelines with HDInsight on AKS to submit Flink jobs with the cluster's REST API. We guide you through the process using a sample YAML pipeline and a PowerShell script, both of which streamline the automation of the REST API interactions.
Prerequisites
Azure subscription. If you do not have an Azure subscription, create a free account.
A GitHub account where you can create a repository. Create one for free.
Create
.pipelinedirectory, copy flink-azure-pipelines.yml and flink-job-azure-pipeline.ps1Azure DevOps organization. Create one for free. If your team already has one, then make sure you are an administrator of the Azure DevOps project that you want to use.
Ability to run pipelines on Microsoft-hosted agents. To use Microsoft-hosted agents, your Azure DevOps organization must have access to Microsoft-hosted parallel jobs. You can either purchase a parallel job or you can request a free grant.
A Flink Cluster. If you don’t have one, Create a Flink Cluster in HDInsight on AKS.
Create one directory in cluster storage account to copy job jar. This directory later you need to configure in pipeline YAML for job jar location (<JOB_JAR_STORAGE_PATH>).
Steps to set up pipeline
Create a service principal for Azure Pipelines
Create Microsoft Entra service principal to access Azure – Grant permission to access HDInsight on AKS Cluster with Contributor role, make a note of appId, password, and tenant from the response.
az ad sp create-for-rbac -n <service_principal_name> --role Contributor --scopes <Flink Cluster Resource ID>`
Example:
az ad sp create-for-rbac -n azure-flink-pipeline --role Contributor --scopes /subscriptions/abdc-1234-abcd-1234-abcd-1234/resourceGroups/myResourceGroupName/providers/Microsoft.HDInsight/clusterpools/hiloclusterpool/clusters/flinkcluster`
Reference
Note
Apache, Apache Flink, Flink, and associated open source project names are trademarks of the Apache Software Foundation (ASF).
Create a key vault
Create Azure Key Vault, you can follow this tutorial to create a new Azure Key Vault.
Create three Secrets
cluster-storage-key for storage key.
service-principal-key for principal clientId or appId.
service-principal-secret for principal secret.

Grant permission to access Azure Key Vault with the “Key Vault Secrets Officer” role to service principal.

Setup pipeline
Navigate to your Project and click Project Settings.
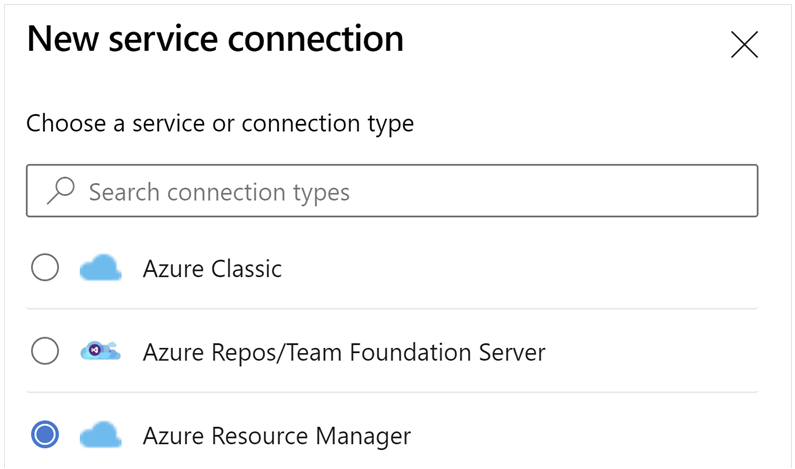
Scroll down and select Service Connections, and then New Service Connection.
Select Azure Resource Manager.
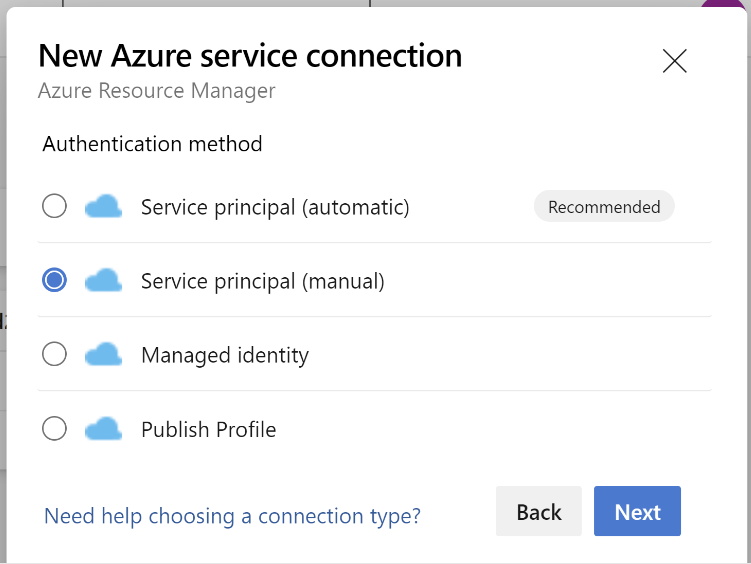
In the authentication method, select Service Principal (manual).
Edit the service connection properties. Select the service principal you recently created.

Click Verify to check whether the connection was set up correctly. If you encounter the following error:
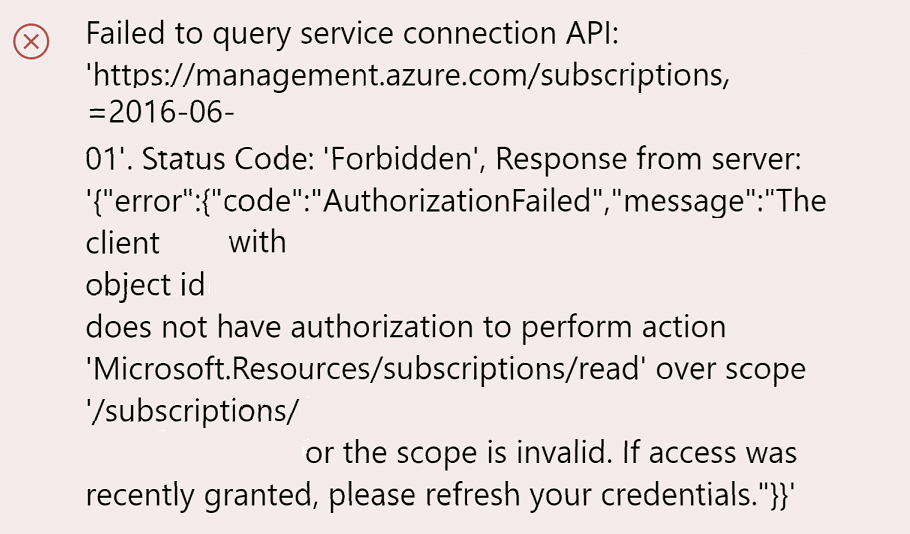
Then you need to assign the Reader role to the subscription.
After that, the verification should be successful.
Save the service connection.

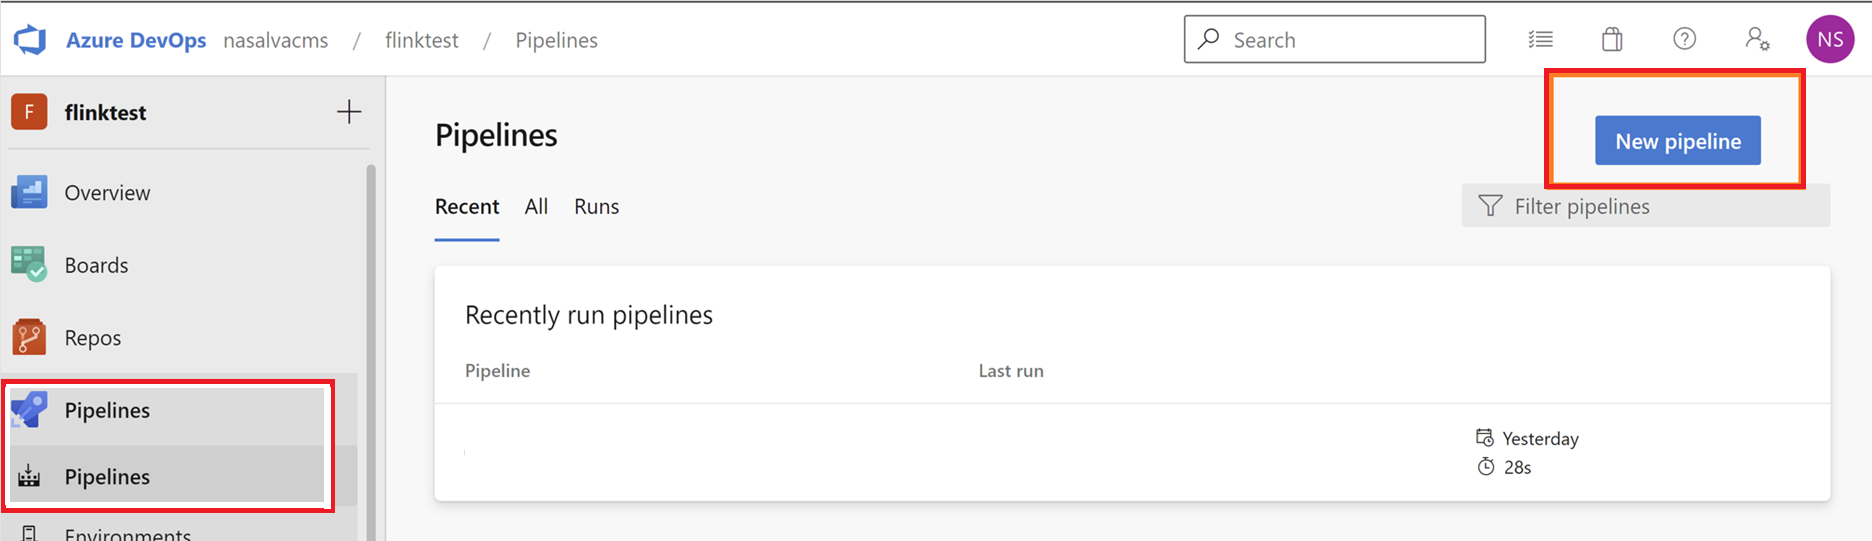
Navigate to pipelines and click on New Pipeline.
Select GitHub as the location of your code.
Select the repository. See how to create a repository in GitHub. select-github-repo image.
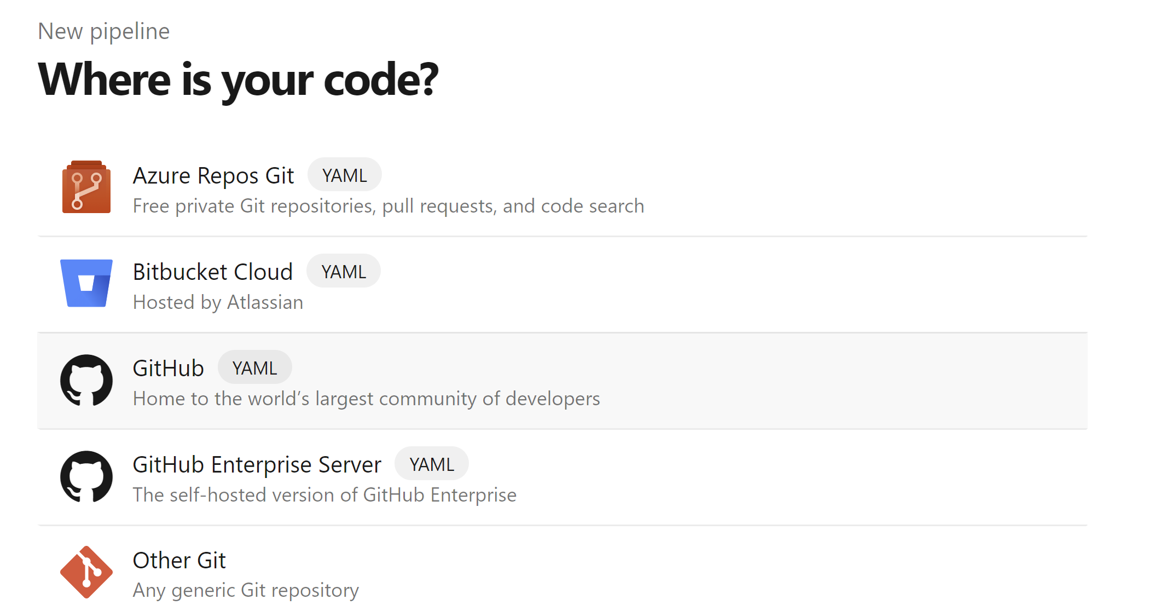
Select the repository. For more information, see How to create a repository in GitHub.

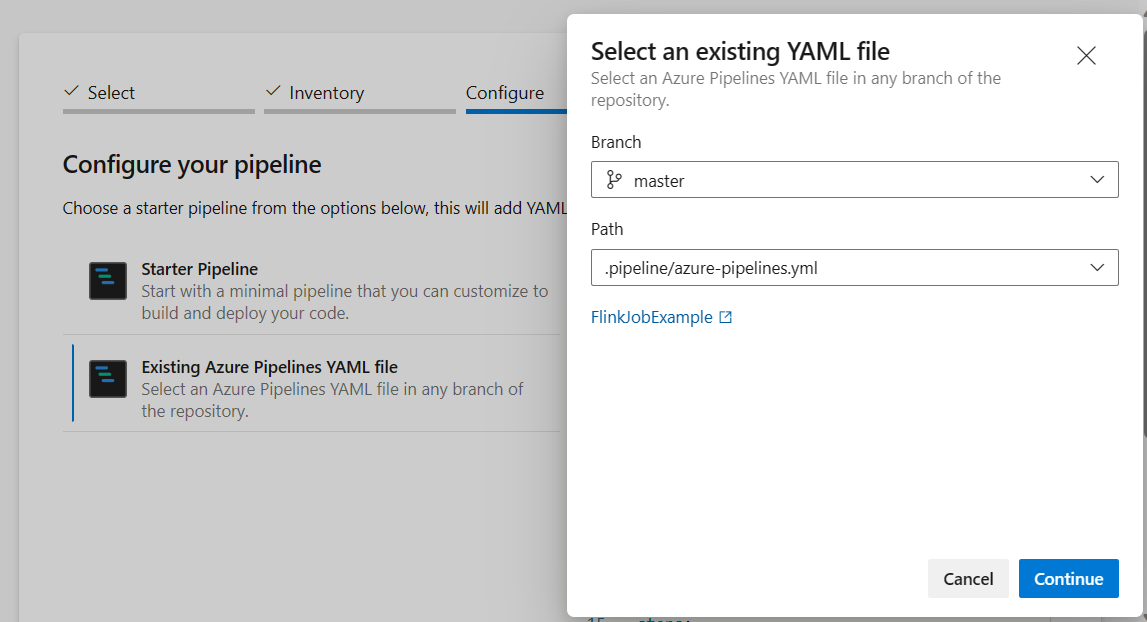
From configure your pipeline option, you can choose Existing Azure Pipelines YAML file. Select branch and pipeline script that you copied earlier. (.pipeline/flink-azure-pipelines.yml)
Replace value in variable section.
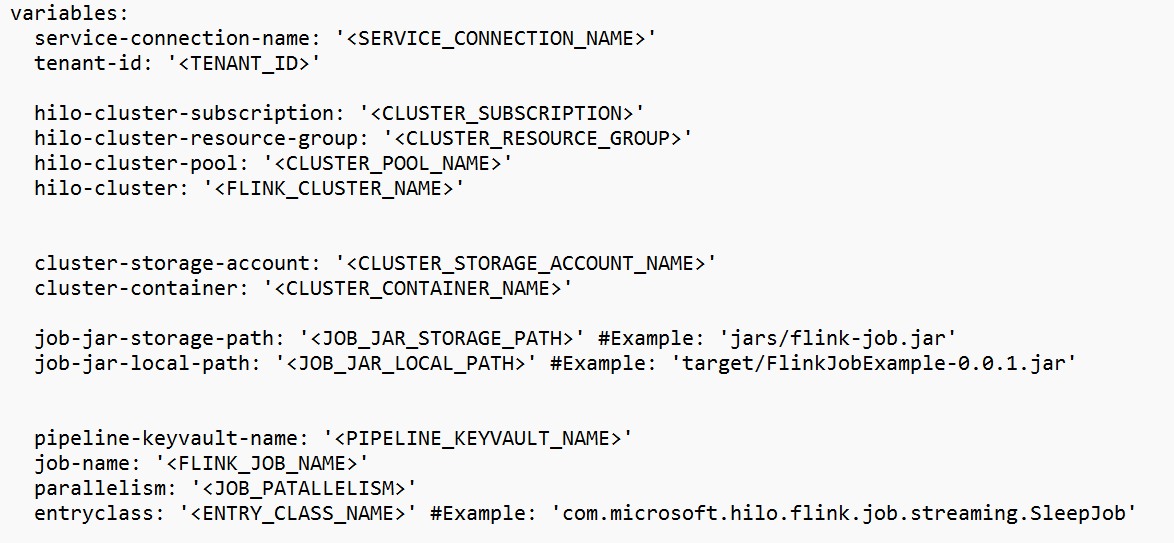
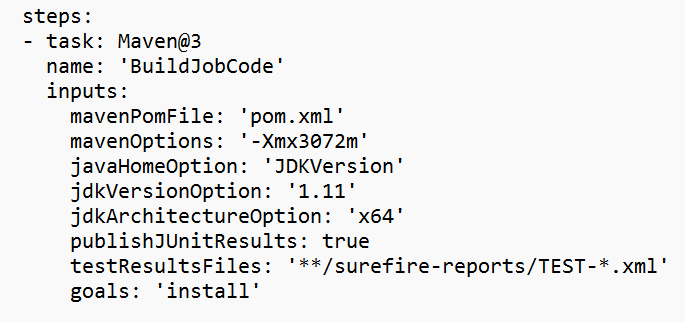
Correct code build section based on your requirement and configure <JOB_JAR_LOCAL_PATH> in variable section for job jar local path.
Add pipeline variable "action" and configure value "RUN."
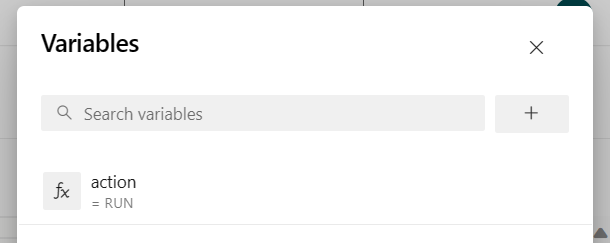
you can change the values of variable before running pipeline.
NEW: This value is default. It launches new job and if the job is already running then it updates the running job with latest jar.
SAVEPOINT: This value takes the save point for running job.
DELETE: Cancel or delete the running job.
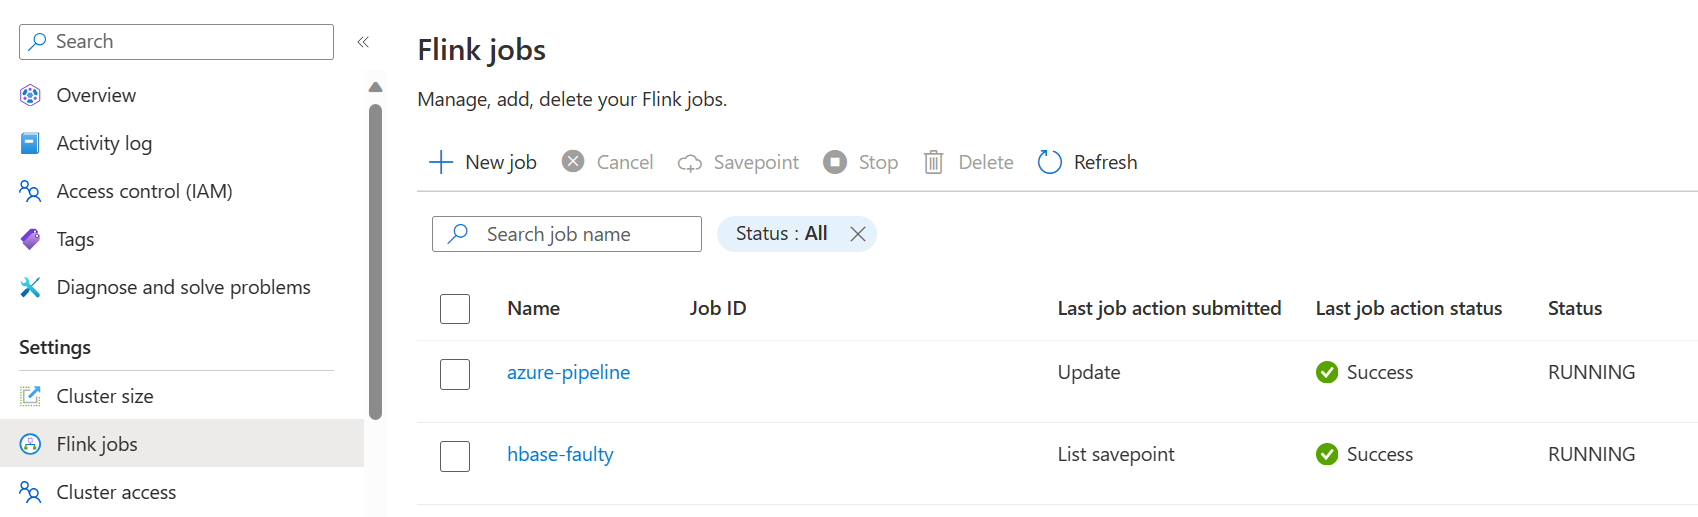
Save and run the pipeline. You can see the running job on portal in Flink Job section.


Note
This is one sample to submit the job using pipeline. You can follow the Flink REST API doc to write your own code to submit job.