Note
Access to this page requires authorization. You can try signing in or changing directories.
Access to this page requires authorization. You can try changing directories.
Learn how to connect an Apache Spark cluster in Azure HDInsight with Azure SQL Database. Then read, write, and stream data into the SQL database. The instructions in this article use a Jupyter Notebook to run the Scala code snippets. However, you can create a standalone application in Scala or Python and do the same tasks.
Prerequisites
Azure HDInsight Spark cluster. Follow the instructions at Create an Apache Spark cluster in HDInsight.
Azure SQL Database. Follow the instructions at Create a database in Azure SQL Database. Make sure you create a database with the sample AdventureWorksLT schema and data. Also, make sure you create a server-level firewall rule to allow your client's IP address to access the SQL database. The instructions to add the firewall rule is available in the same article. Once you've created your SQL database, make sure you keep the following values handy. You need them to connect to the database from a Spark cluster.
- Server name.
- Database name.
- Azure SQL Database admin user name / password.
SQL Server Management Studio (SSMS). Follow the instructions at Use SSMS to connect and query data.
Create a Jupyter Notebook
Start by creating a Jupyter Notebook associated with the Spark cluster. You use this notebook to run the code snippets used in this article.
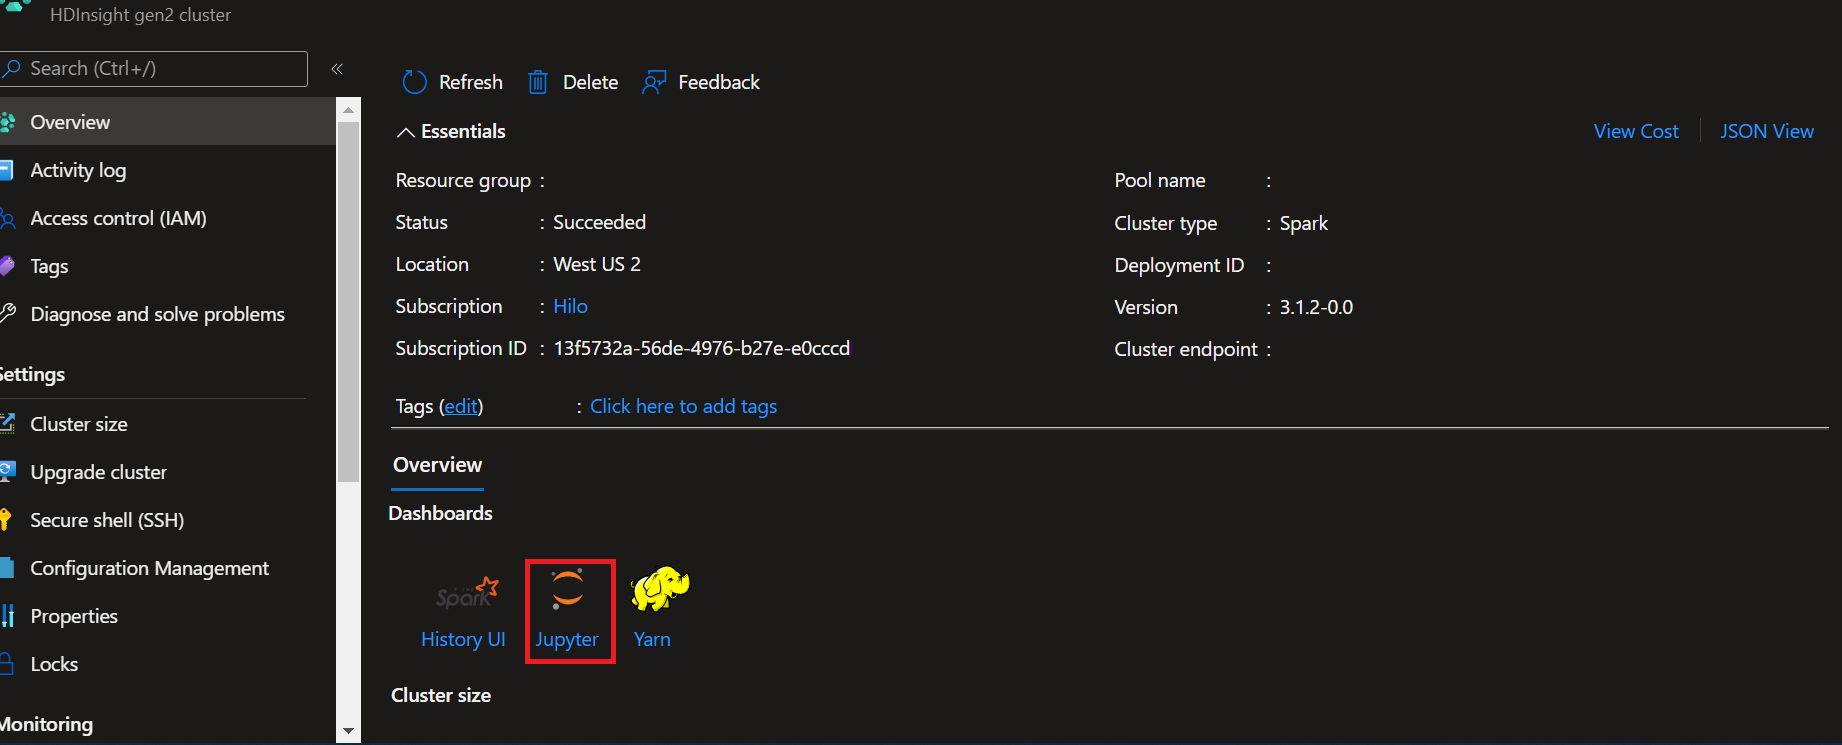
- From the Azure portal, open your cluster.
- Select Jupyter Notebook underneath Cluster dashboards on the right side. If you don't see Cluster dashboards, select Overview from the left menu. If prompted, enter the admin credentials for the cluster.
Note
You can also access the Jupyter Notebook on Spark cluster by opening the following URL in your browser. Replace CLUSTERNAME with the name of your cluster:
https://CLUSTERNAME.azurehdinsight.net/jupyter
- In the Jupyter Notebook, from the top-right corner, click New, and then click Spark to create a Scala notebook. Jupyter Notebooks on HDInsight Spark cluster also provide the PySpark kernel for Python2 applications, and the PySpark3 kernel for Python3 applications. For this article, we create a Scala notebook.
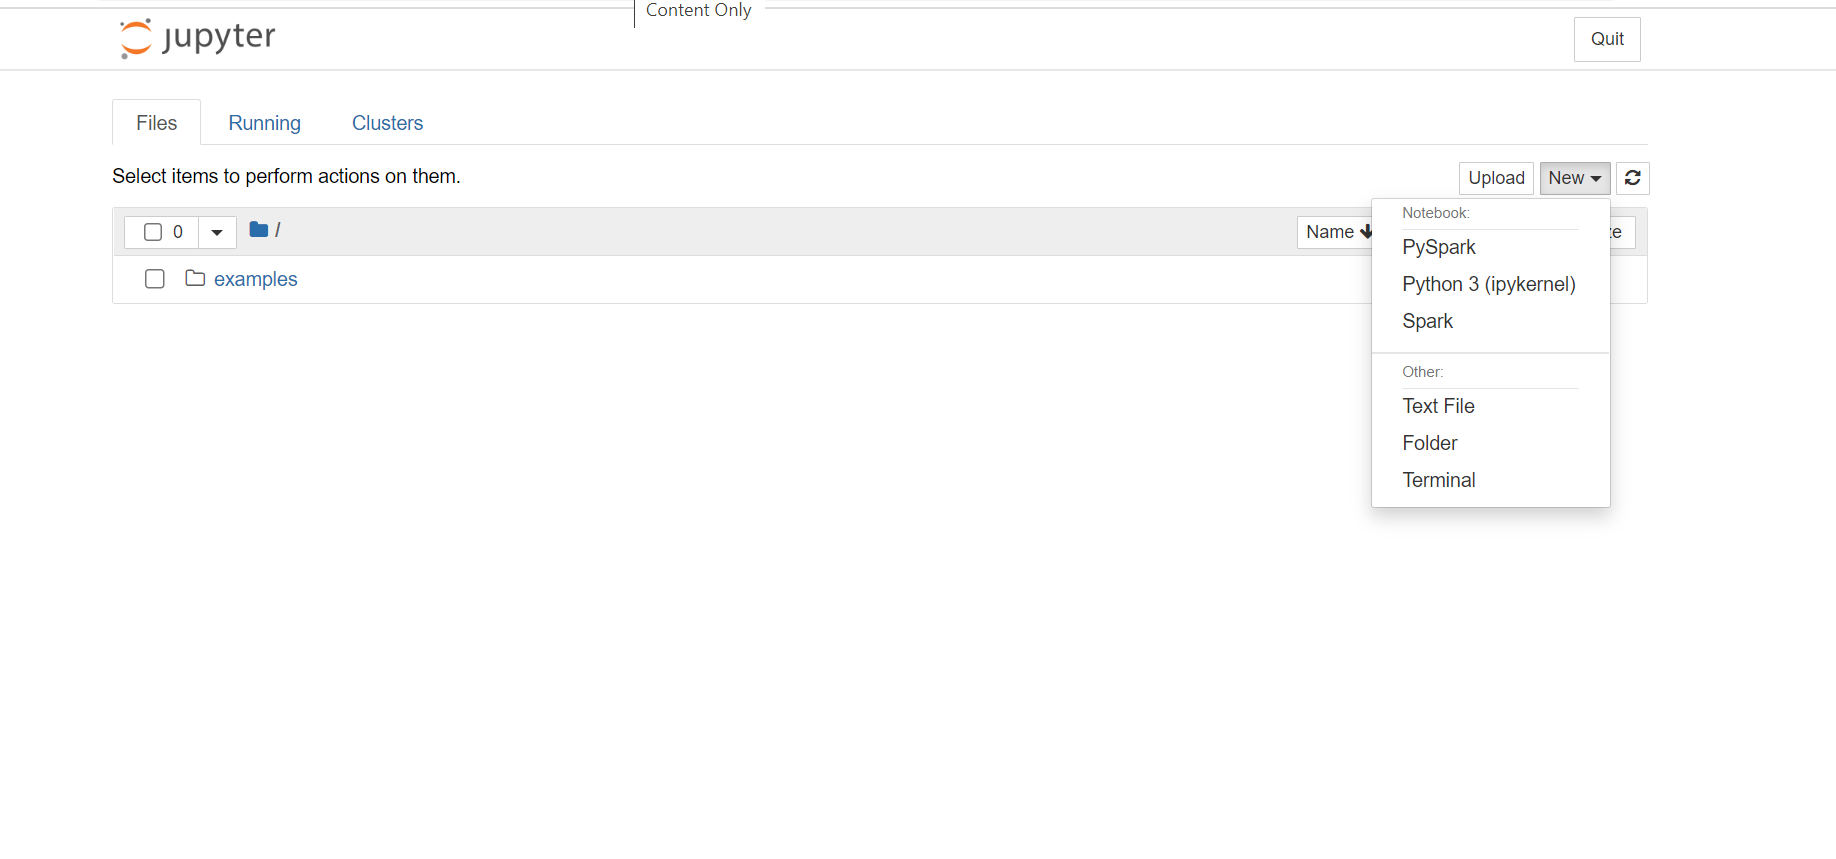
For more information about the kernels, see Use Jupyter Notebook kernels with Apache Spark clusters in HDInsight.
Note
In this article, we use a Spark (Scala) kernel because streaming data from Spark into SQL Database is only supported in Scala and Java currently. Even though reading from and writing into SQL can be done using Python, for consistency in this article, we use Scala for all three operations.
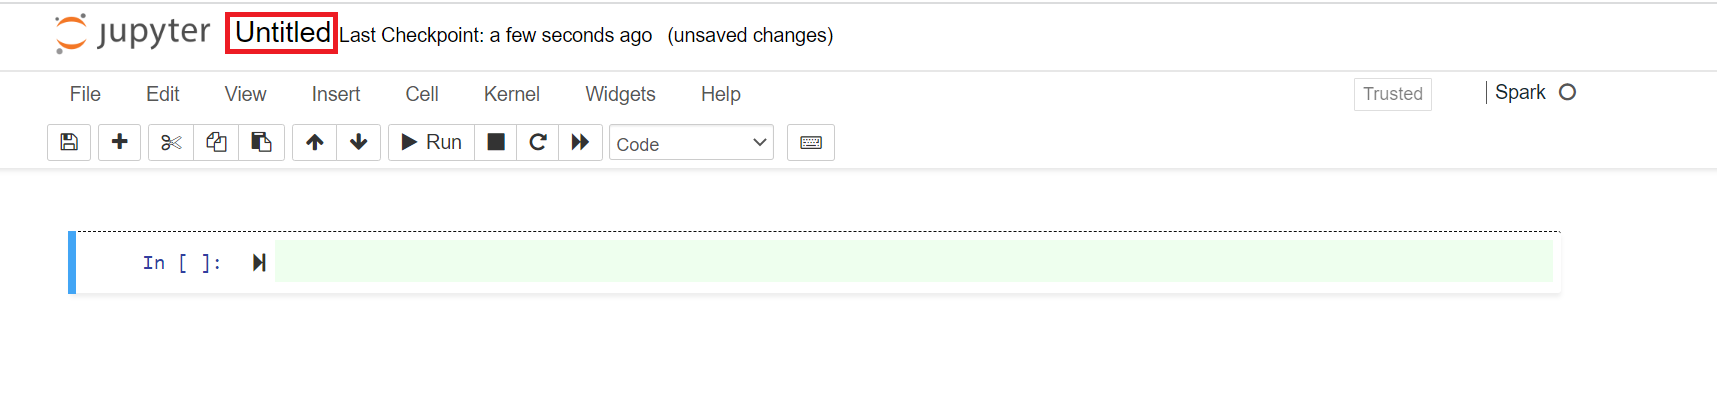
A new notebook opens with a default name, Untitled. Click the notebook name and enter a name of your choice.
You can now start creating your application.
Read data from Azure SQL Database
In this section, you read data from a table (for example, SalesLT.Address) that exists in the AdventureWorks database.
In a new Jupyter Notebook, in a code cell, paste the following snippet and replace the placeholder values with the values for your database.
// Declare the values for your database

val jdbcUsername = "<SQL DB ADMIN USER>"
val jdbcPassword = "<SQL DB ADMIN PWD>"
val jdbcHostname = "<SQL SERVER NAME HOSTING SDL DB>" //typically, this is in the form or servername.database.windows.net
val jdbcPort = 1433
val jdbcDatabase ="<AZURE SQL DB NAME>"
Press SHIFT + ENTER to run the code cell.
Use the following snippet to build a JDBC URL that you can pass to the Spark dataframe APIs. The code creates a
Propertiesobject to hold the parameters. Paste the snippet in a code cell and press SHIFT + ENTER to run.import java.util.Properties val jdbc_url = s"jdbc:sqlserver://${jdbcHostname}:${jdbcPort};database=${jdbcDatabase};encrypt=true;trustServerCertificate=false;hostNameInCertificate=*.database.windows.net;loginTimeout=60;" val connectionProperties = new Properties() connectionProperties.put("user", s"${jdbcUsername}") connectionProperties.put("password", s"${jdbcPassword}")Use the following snippet to create a dataframe with the data from a table in your database. In this snippet, we use a
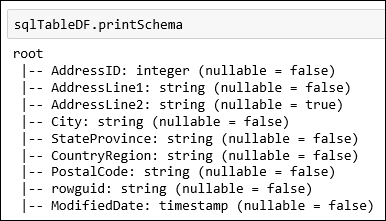
SalesLT.Addresstable that is available as part of the AdventureWorksLT database. Paste the snippet in a code cell and press SHIFT + ENTER to run.val sqlTableDF = spark.read.jdbc(jdbc_url, "SalesLT.Address", connectionProperties)You can now do operations on the dataframe, such as getting the data schema:
sqlTableDF.printSchemaYou see an output similar to the following image:
You can also do operations like, retrieve the top 10 rows.
sqlTableDF.show(10)Or, retrieve specific columns from the dataset.
sqlTableDF.select("AddressLine1", "City").show(10)
Write data into Azure SQL Database
In this section, we use a sample CSV file available on the cluster to create a table in your database and populate it with data. The sample CSV file (HVAC.csv) is available on all HDInsight clusters at HdiSamples/HdiSamples/SensorSampleData/hvac/HVAC.csv.
In a new Jupyter Notebook, in a code cell, paste the following snippet and replace the placeholder values with the values for your database.
// Declare the values for your database

val jdbcUsername = "<SQL DB ADMIN USER>"
val jdbcPassword = "<SQL DB ADMIN PWD>"
val jdbcHostname = "<SQL SERVER NAME HOSTING SDL DB>" //typically, this is in the form or servername.database.windows.net
val jdbcPort = 1433
val jdbcDatabase ="<AZURE SQL DB NAME>"
Press SHIFT + ENTER to run the code cell.
The following snippet builds a JDBC URL that you can pass to the Spark dataframe APIs. The code creates a
Propertiesobject to hold the parameters. Paste the snippet in a code cell and press SHIFT + ENTER to run.import java.util.Properties val jdbc_url = s"jdbc:sqlserver://${jdbcHostname}:${jdbcPort};database=${jdbcDatabase};encrypt=true;trustServerCertificate=false;hostNameInCertificate=*.database.windows.net;loginTimeout=60;" val connectionProperties = new Properties() connectionProperties.put("user", s"${jdbcUsername}") connectionProperties.put("password", s"${jdbcPassword}")Use the following snippet to extract the schema of the data in HVAC.csv and use the schema to load the data from the CSV in a dataframe,
readDf. Paste the snippet in a code cell and press SHIFT + ENTER to run.val userSchema = spark.read.option("header", "true").csv("wasbs:///HdiSamples/HdiSamples/SensorSampleData/hvac/HVAC.csv").schema val readDf = spark.read.format("csv").schema(userSchema).load("wasbs:///HdiSamples/HdiSamples/SensorSampleData/hvac/HVAC.csv")Use the
readDfdataframe to create a temporary table,temphvactable. Then use the temporary table to create a hive table,hvactable_hive.readDf.createOrReplaceTempView("temphvactable") spark.sql("create table hvactable_hive as select * from temphvactable")Finally, use the hive table to create a table in your database. The following snippet creates
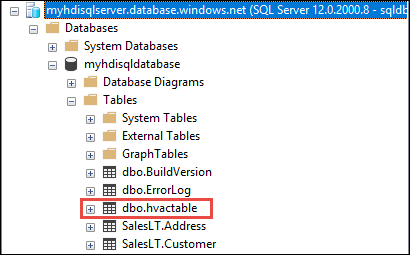
hvactablein Azure SQL Database.spark.table("hvactable_hive").write.jdbc(jdbc_url, "hvactable", connectionProperties)Connect to the Azure SQL Database using SSMS and verify that you see a
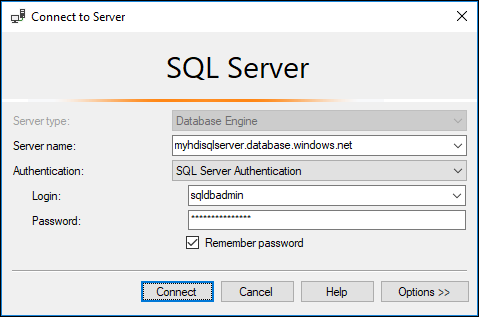
dbo.hvactablethere.a. Start SSMS and connect to the Azure SQL Database by providing connection details as shown in the following screenshot.
b. From Object Explorer, expand the database and the table node to see the dbo.hvactable created.
Run a query in SSMS to see the columns in the table.
SELECT * from hvactable
Stream data into Azure SQL Database
In this section, we stream data into the hvactable that you created in the previous section.
As a first step, make sure there are no records in the
hvactable. Using SSMS, run the following query on the table.TRUNCATE TABLE [dbo].[hvactable]Create a new Jupyter Notebook on the HDInsight Spark cluster. In a code cell, paste the following snippet and then press SHIFT + ENTER:
import org.apache.spark.sql._
import org.apache.spark.sql.types._
import org.apache.spark.sql.functions._
import org.apache.spark.sql.streaming._
import java.sql.{Connection,DriverManager,ResultSet}
We stream data from the HVAC.csv into the
hvactable. HVAC.csv file is available on the cluster at/HdiSamples/HdiSamples/SensorSampleData/HVAC/. In the following snippet, we first get the schema of the data to be streamed. Then, we create a streaming dataframe using that schema. Paste the snippet in a code cell and press SHIFT + ENTER to run.val userSchema = spark.read.option("header", "true").csv("wasbs:///HdiSamples/HdiSamples/SensorSampleData/hvac/HVAC.csv").schema val readStreamDf = spark.readStream.schema(userSchema).csv("wasbs:///HdiSamples/HdiSamples/SensorSampleData/hvac/") readStreamDf.printSchemaThe output shows the schema of HVAC.csv. The
hvactablehas the same schema as well. The output lists the columns in the table.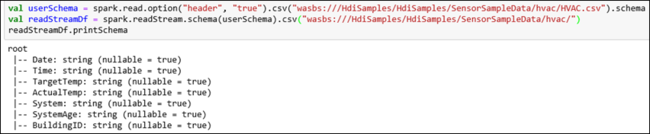
Finally, use the following snippet to read data from the HVAC.csv and stream it into the
hvactablein your database. Paste the snippet in a code cell, replace the placeholder values with the values for your database, and then press SHIFT + ENTER to run.val WriteToSQLQuery = readStreamDf.writeStream.foreach(new ForeachWriter[Row] { var connection:java.sql.Connection = _ var statement:java.sql.Statement = _ val jdbcUsername = "<SQL DB ADMIN USER>" val jdbcPassword = "<SQL DB ADMIN PWD>" val jdbcHostname = "<SQL SERVER NAME HOSTING SDL DB>" //typically, this is in the form or servername.database.windows.net val jdbcPort = 1433 val jdbcDatabase ="<AZURE SQL DB NAME>" val driver = "com.microsoft.sqlserver.jdbc.SQLServerDriver" val jdbc_url = s"jdbc:sqlserver://${jdbcHostname}:${jdbcPort};database=${jdbcDatabase};encrypt=true;trustServerCertificate=false;hostNameInCertificate=*.database.windows.net;loginTimeout=30;" def open(partitionId: Long, version: Long):Boolean = { Class.forName(driver) connection = DriverManager.getConnection(jdbc_url, jdbcUsername, jdbcPassword) statement = connection.createStatement true } def process(value: Row): Unit = { val Date = value(0) val Time = value(1) val TargetTemp = value(2) val ActualTemp = value(3) val System = value(4) val SystemAge = value(5) val BuildingID = value(6) val valueStr = "'" + Date + "'," + "'" + Time + "'," + "'" + TargetTemp + "'," + "'" + ActualTemp + "'," + "'" + System + "'," + "'" + SystemAge + "'," + "'" + BuildingID + "'" statement.execute("INSERT INTO " + "dbo.hvactable" + " VALUES (" + valueStr + ")") } def close(errorOrNull: Throwable): Unit = { connection.close } }) var streamingQuery = WriteToSQLQuery.start()Verify that the data is being streamed into the
hvactableby running the following query in SQL Server Management Studio (SSMS). Every time you run the query, it shows the number of rows in the table increasing.SELECT COUNT(*) FROM hvactable