Note
Access to this page requires authorization. You can try signing in or changing directories.
Access to this page requires authorization. You can try changing directories.
Important
Azure API for FHIR will be retired on September 30, 2026. Follow the migration strategies to transition to Azure Health Data Services FHIR® service by that date. Due to the retirement of Azure API for FHIR, new customer deployments won't be allowed beginning April 1, 2025. Azure Health Data Services FHIR service is the evolved version of Azure API for FHIR that enables customers to manage FHIR, DICOM, and MedTech services with integrations into other Azure services.
In this article, you learn how to register a public application in Microsoft Entra ID.
Client application registrations are Microsoft Entra representations of applications that can authenticate and ask for API permissions on behalf of a user. Public clients are applications such as mobile applications and single page JavaScript applications that can't keep secrets confidential. The procedure is similar to registering a confidential client, but since public clients can't be trusted to hold an application secret, there's no need to add one.
This quickstart provides general information about how to register an application with the Microsoft identity platform.
App registrations in Azure portal
In the Azure portal, on the left navigation panel, select Microsoft Entra ID.
In the Microsoft Entra ID blade, select App registrations:
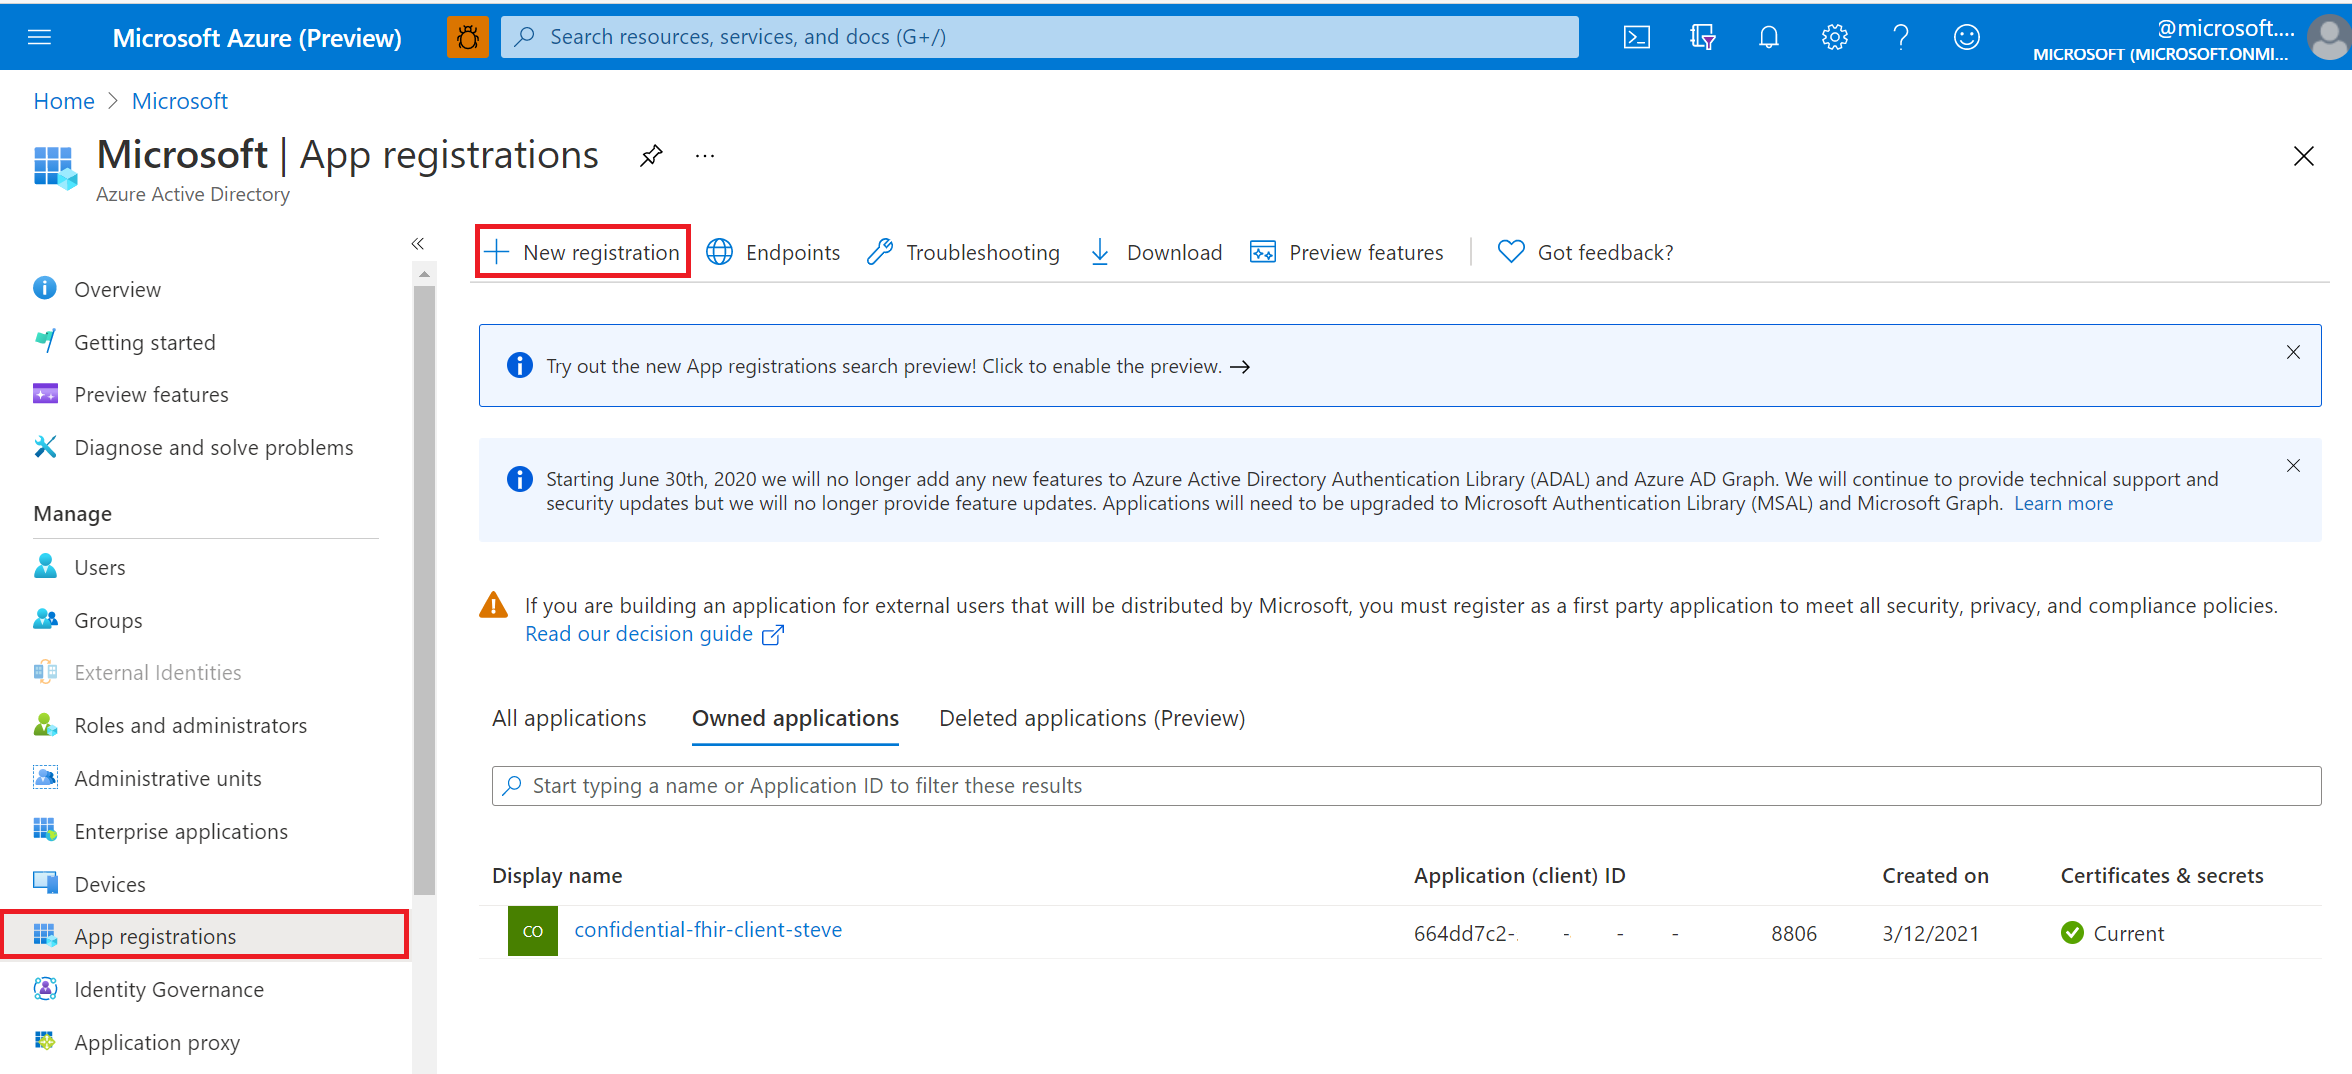
Select New registration.
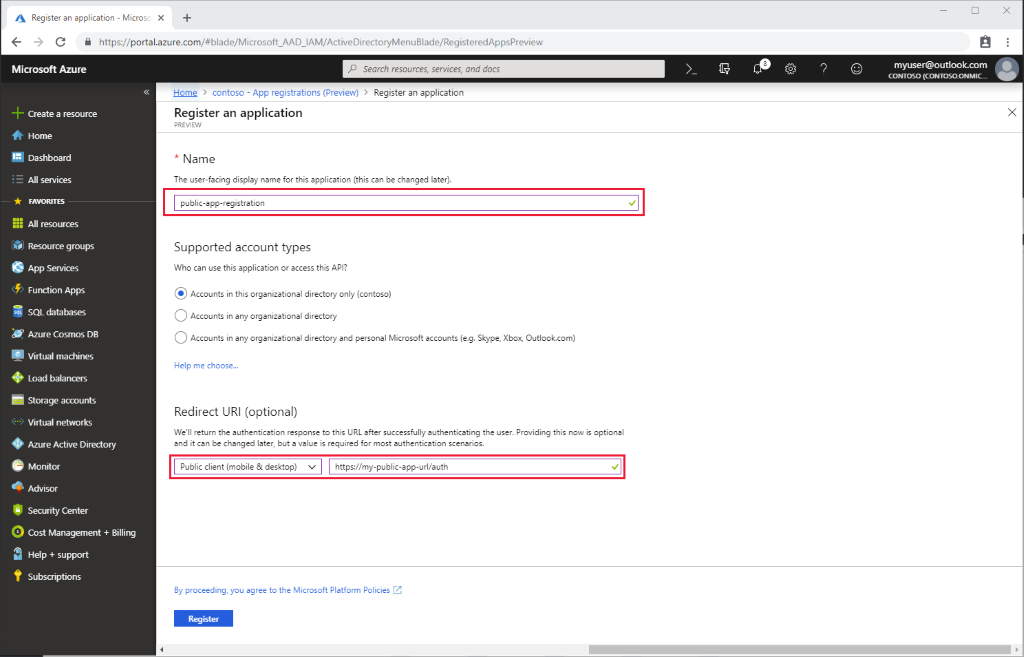
Application registration overview
Give the application a display name.
Provide a reply URL. The reply URL is where authentication codes are returned to the client application. You can add more reply URLs and edit existing ones later.
To configure your desktop, mobile or single-page application as public application:
In the Azure portal, in App registrations, select your app, and then select Authentication.
Select Advanced settings > Default client type. For Treat application as a public client, select Yes.
For a single-page application, select Access tokens and ID tokens to enable implicit flow.
- If your application signs in users, select ID tokens.
- If your application also needs to call a protected web API, select Access tokens.
API permissions
Permissions for Azure API for FHIR are managed through role-based access control (RBAC). For more details, visit Configure Azure RBAC for FHIR.
Note
Use a grant_type of client_credentials when trying to obtain an access token for Azure API for FHIR using tools for intuitive querying.
Validate FHIR server authority
If the application you registered and your FHIR server are in the same Microsoft Entra tenant, you're good to proceed to the next steps.
If you configure your client application in a different Microsoft Entra tenant from your FHIR server, you need to update the Authority. In Azure API for FHIR, you do set the Authority under Settings > Authentication. Set your Authority to https://login.microsoftonline.com/\<TENANT-ID>.
Next steps
In this article, you learned how to register a public client application in Microsoft Entra ID. Next, test access to your FHIR Server using REST Client.
Note
FHIR® is a registered trademark of HL7 and is used with the permission of HL7.