Configure multiple authentications in a single instance
Many organizations might want to support multiple authentication options to be available for their learners. Community Training now supports adding more than one authentication option for a single platform instance.
To be able to configure multiple authentications to your instance you need to first create AD B2C tenant and register an application. If your instance is already setup to use social login via ADB2C then you can proceed configuring your tenant to add phone login and work email login support to your instance.
Note
We would strongly recommend that an MFA (Multi Factor Authentication) or a 2FA (2 Factor Authentication) be implemented, if your instance is using ADB2C based authentication, especially for the Admin accounts.
Add Phone-based login to existing Social Account login Instance
If your instance is already setup to accept social login via AD B2C, below are the steps to configure your AD B2C tenant to be able to support CT platform's Phone authentication along side your social account login.
Please refer to the AD B2C Documentation for guidance on link here
Add Work email based Authentication to existing Social Account login instance
If your instance is already setup to accept social login via AD B2C, below are the steps to add Azure Active Directory/Work email based authentication along side social account login by configuring your existing Azure ADB2C tenant.
Login to your Azure portal
Note down your AD B2C tenant’s name i.e., for example, if the default domain for your Azure AD B2C tenant is contoso.onmicrosoft.com, then contoso is your tenant’s name.
Create an Azure Active Directory App (can be from different tenant) configure login identity for the platform by creating Azure AD application, copy your Client ID, Client Secret and Tenant ID.
While in your AAD app, Click on ‘Authentication’ to add your Reply URL
https://<adb2c_tenant_name>.b2clogin.com/<adb2c_tenant_name>.onmicrosoft.com/oauth2/authrespreplace <adb2c_tenant_name> with your AD B2C tenant name from Step 2.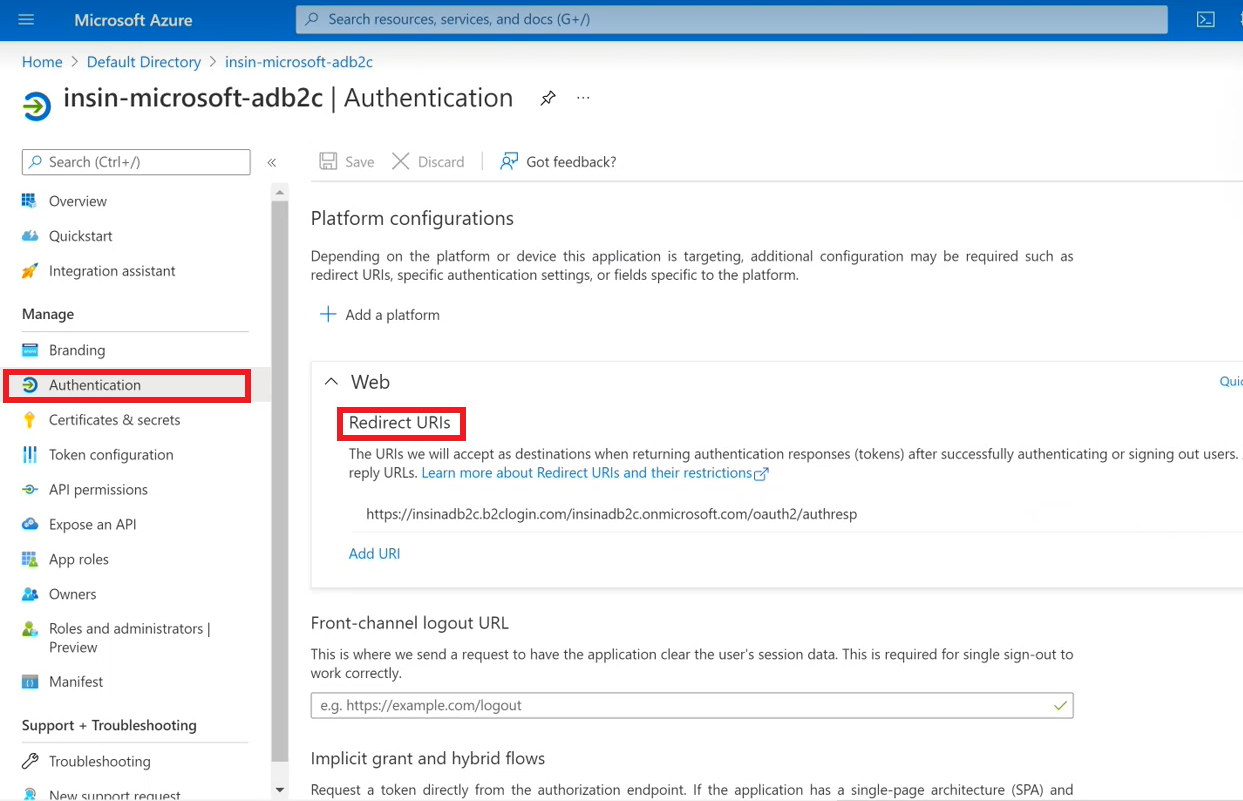
Now switch to your AD B2C tenant, under Manage section, in ‘Identity Providers’ click on ‘New Open ID Connect Provider’ and provide following values in Configure custom IDP window and click save.
Value Description Name This name will appear in UI on login page, provide user friendly name example: Active Directory Login Metadata URL https://login.microsoftonline.com/<tenant_id>/v2.0/.well-known/openid-configurationReplace <tenant_id> with Tenant ID of AAD from Step3 (for AAD application)Client ID Paste the ClientId that you copied from Step3 (for AAD application) Client Secret Paste the ClientSecret that you copied from Step3 (for AAD application) Scope Enter email openid profile User.ReadResponse Type From dropdown select codeResponse mode From dropdown select form_postDomain hint Optional, leave blank. User ID Enter subDisplay Name Enter nameGiven Name Enter given_nameSurname Enter family_nameEmail Enter email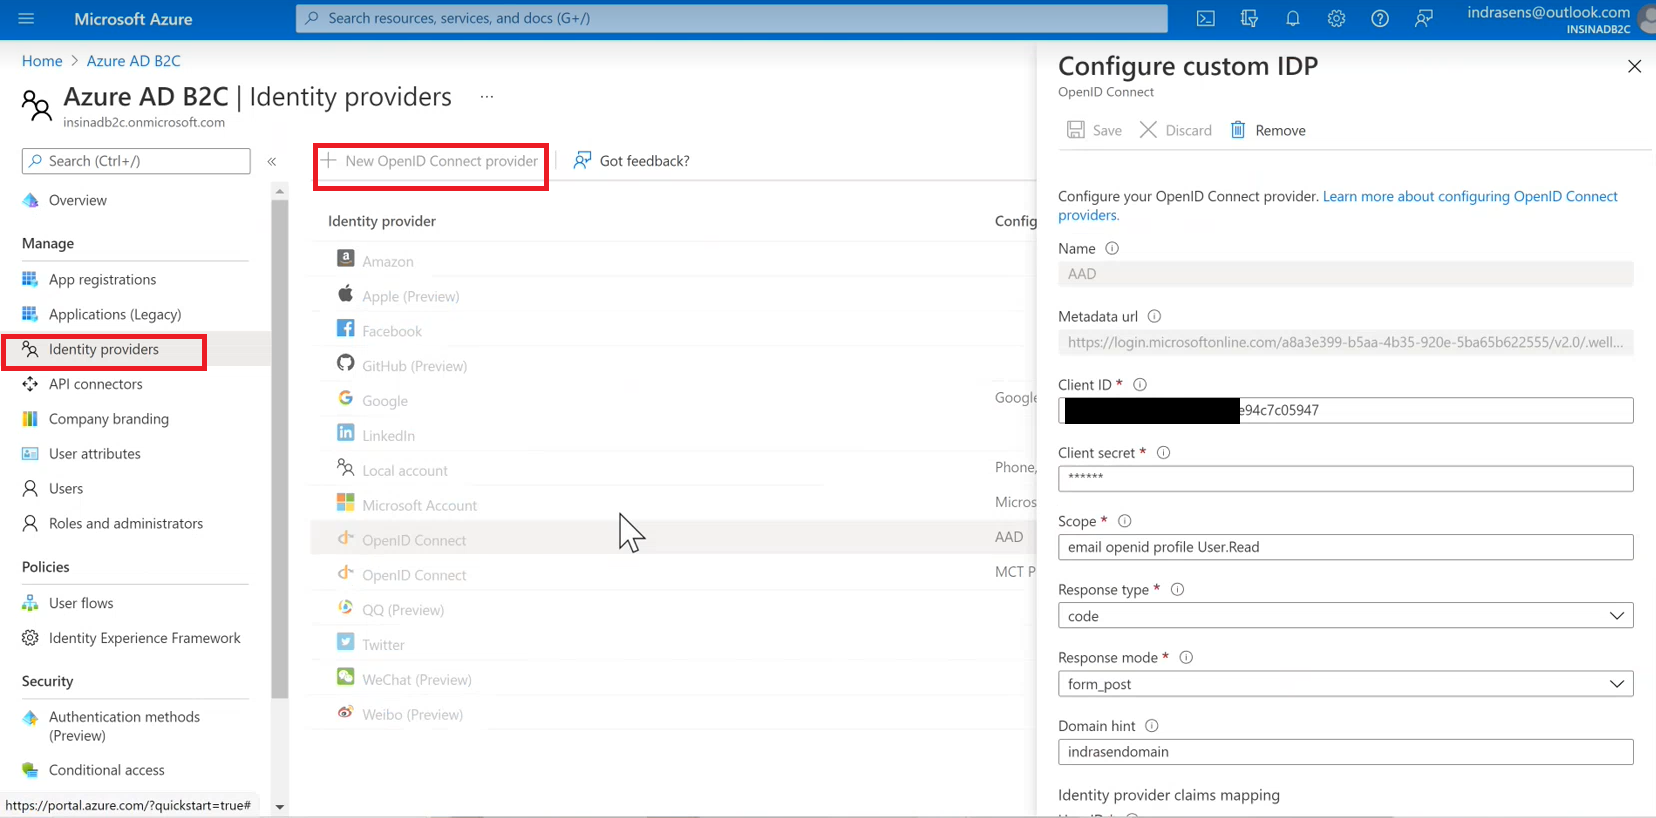
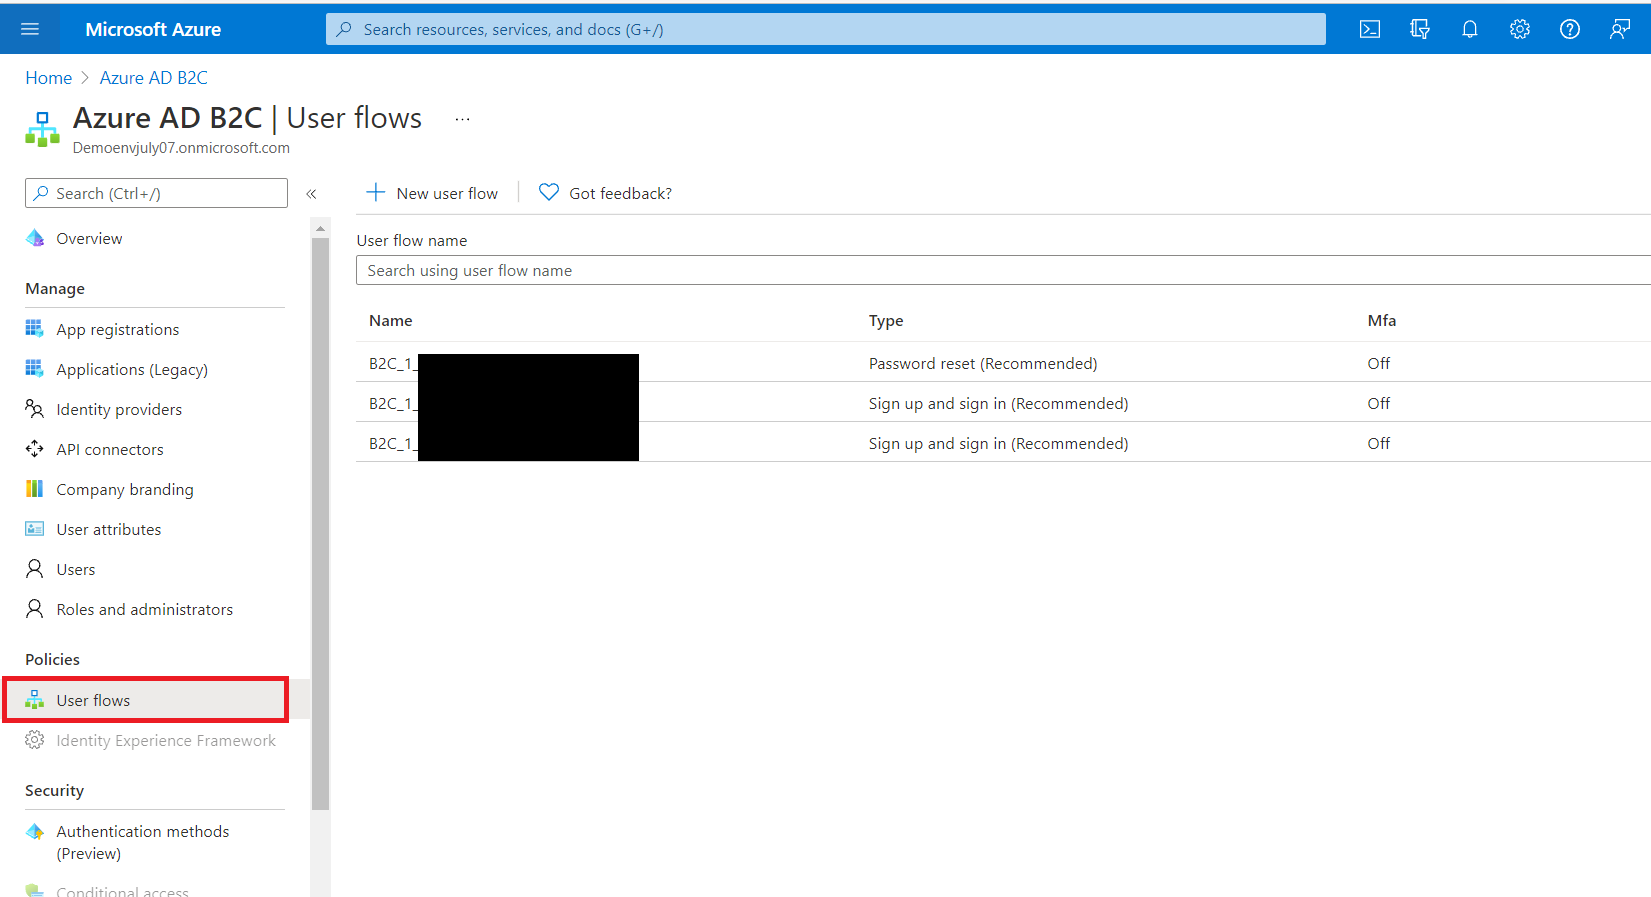
Navigate back to your ADB2C resource, under Policies, click on User Flows and click on your instance's “Sign up and Sign in” User flow.
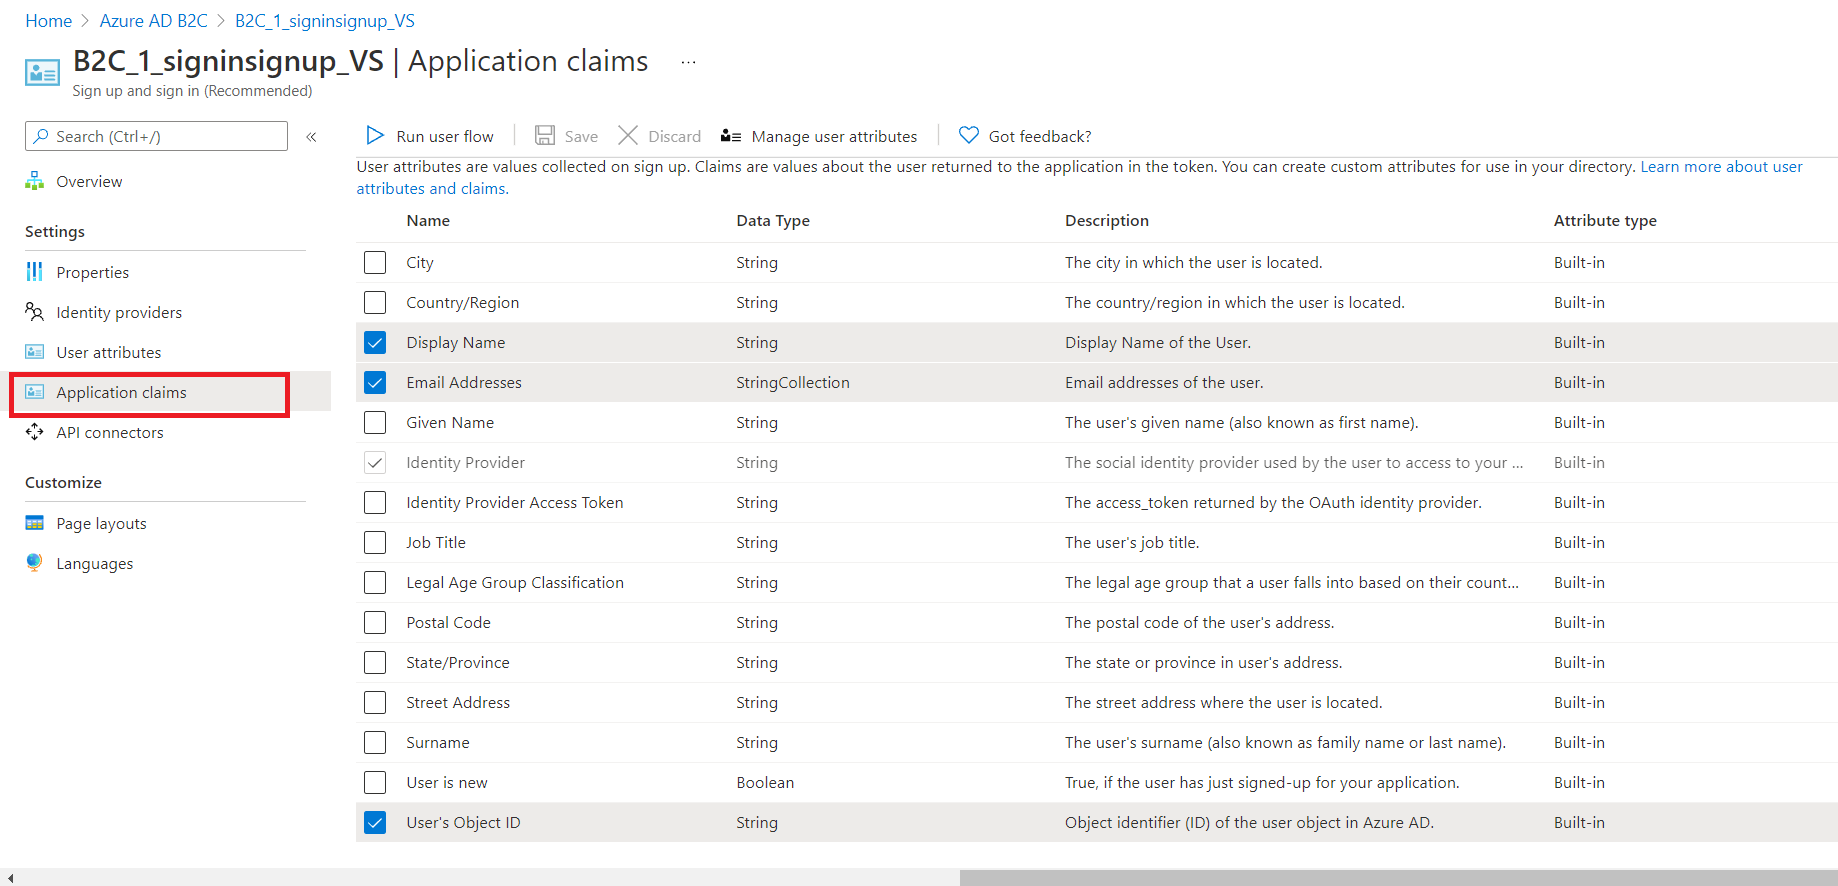
Inside your instance’s Sign-up and Sign-in user flow, click on ‘Application Claims’ and ensure you have ‘Display Name’, ‘Email Address’, ‘User’s Object ID’ selected and saved.
While in your Sign-up Sign-in user flow, navigate to ‘Identity Providers’ and select on newly configured OpenID Connect under Custom Identity Providers and click save.
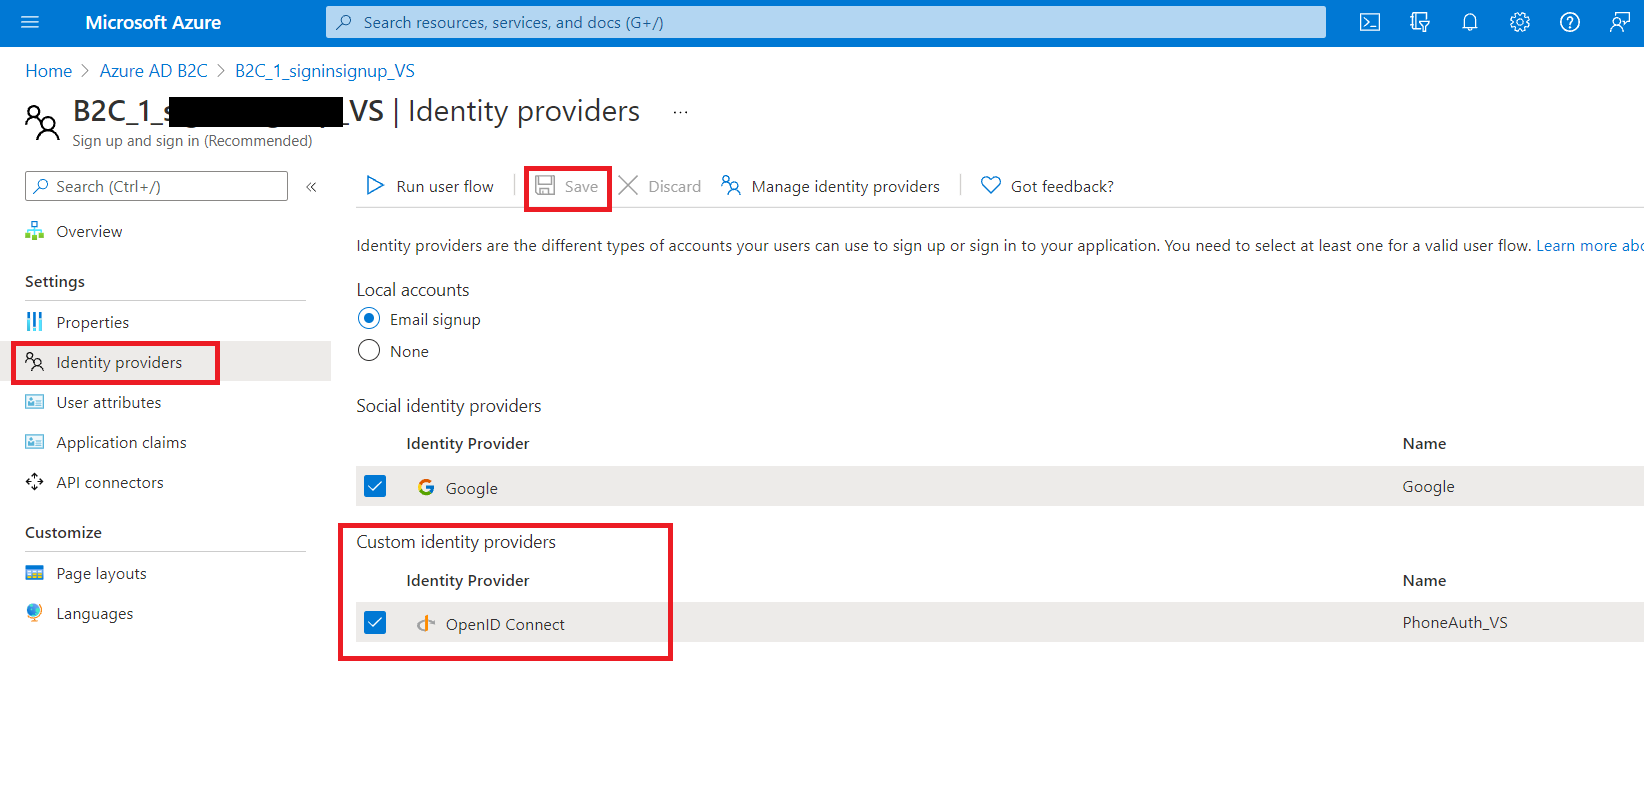
Now in the login page of your instance, you should see an option that enables users to login through their work email (Azure AD email) alongside Social Account login.
Note
Please note that learner should use only one mode of authentication (social email, work email) for registering. If a learner uses multiple modes of authentication for registration, the accounts will be treated as different users.
Please reach out to us via HelpDesk if you have any further queries.
Note
Make sure to add the Global admin contact info(Email or Phone Number) before changing the Authentication method.
Feedback
Coming soon: Throughout 2024 we will be phasing out GitHub Issues as the feedback mechanism for content and replacing it with a new feedback system. For more information see: https://aka.ms/ContentUserFeedback.
Submit and view feedback for