Customize profile information for the learners on the platform
By default, learners will be asked for their first name, last name and profile photo on sign up. As an organization, you can capture additional information at the time of login and display privacy terms and conditions for learners. This will be useful when managing and organizing users, assigning them courses, and tracking analytics. Examples of additional information include location, job role, language, topics of interest, and more.
For example, a healthcare organization has different course content for different job roles: staff, admins, nurses, and doctors. They would like to assign a respective course to every learner depending on their job role. To achieve this, they would create an additional profile field called Role and provide four values as options: staff, admin, nurse, and doctor. When a learner signs up on the portal for the first time, they will be asked to fill their profile by populating the role field.
For more information on auto-enrolling users to a specific course based on their profile information see the following articles:
In this article, you'll learn how to customize profile information by creating additional profile fields and adding privacy terms and conditions on the management portal.
Permissions Level
The Community Training management portal provides role-based permission levels. The table below shows which administrative roles can customize profile information for learners.
| Access Level | Customize profile information |
|---|---|
| Global Administrator | Yes |
| Organization Administrator | No |
| Category Administrator | No |
| Learning Path Administrator | No |
| Course Administrator | No |
| Group Administrator | No |
Steps to create additional profile fields
Sign in to the Community Training portal and switch to administrator view
Select Settings from the left navigation panel then Additional Profile fields from the list.
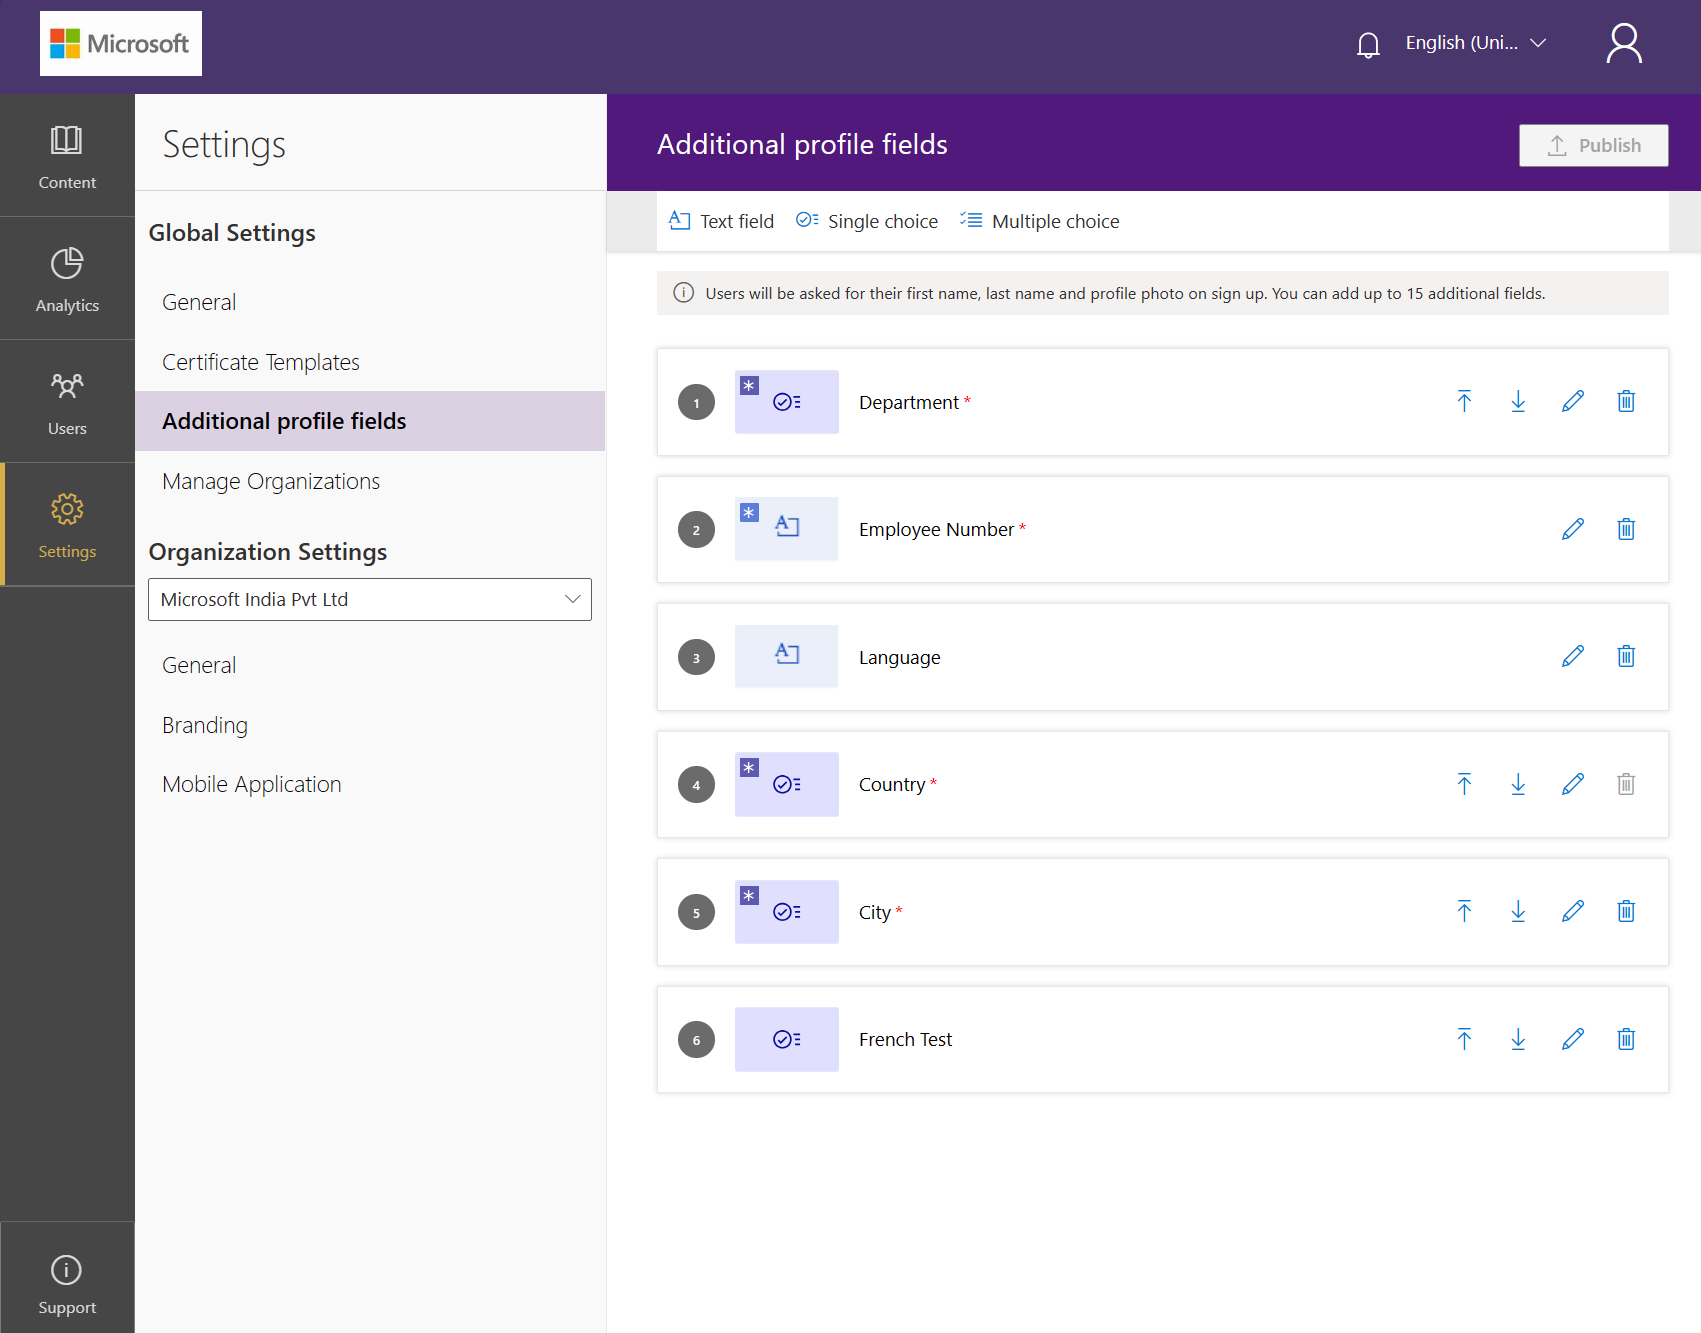
Select the type of profile field to add. Profile fields can be of three types:
Text field - Use this type of field to capture details which are unique to every learner such as email address, phone number, employee/student ID, and more. You may add validation as well to this profile field value.
Single choice - Use this type of field when you want learners to choose 1 value among the finite set of options. Use this field to capture learner information such as Job Role, Department, Center Location, etc.
Multiple choice - Use this type of field when you want learners to choose one or more values among the finite set of options. Use this field to capture learner information such as Topics of Interest, Learning Preferences, and more.
Warning
- For Single and Multiple choice fields, you can add as many options as you prefer.
- In total, you can add up to 15 additional fields.
- Additionally, for Single/Multiple Choice - when a list contains more than 10 options, using the Upload List feature (explained below, in step 6) is recommended.
Set validation criteria - This option is only available for the Text field type of profile field.

There are three validation criteria that can be selected using this option:
- Date: This criteria will restrict the learner to add values only in the format DD/MM/YYYY.
- Numerals: This criteria will restrict the learner to add only numeric values to the profile field.
- Regular Expression: This format allows the administrator to define the validation criteria from his end using a regular expression format.
Note
- Each element of criteria will allow the administrator to enter the description in various languages. This description is shown to the users in the text field input box in the profile panel.
- The administrator can also enter error messages in various languages. This message will be shown to the users if they input any value that does not fulfil the validation criteria.

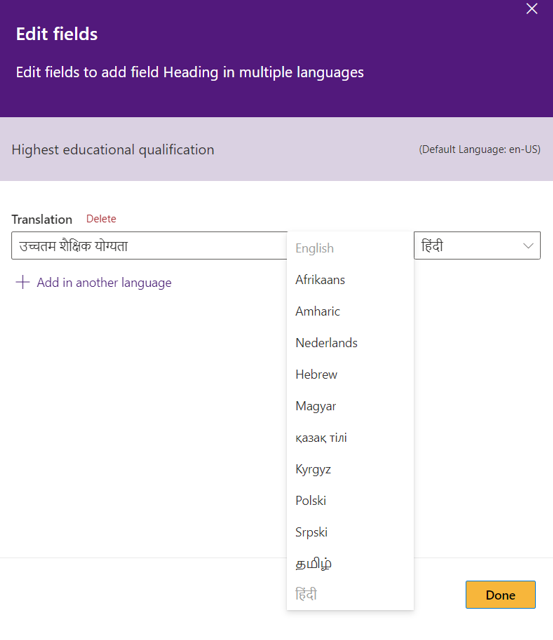
Add localization to Profile field name - You can add translations to the profile field name using the Edit option to the right side of the profile field.
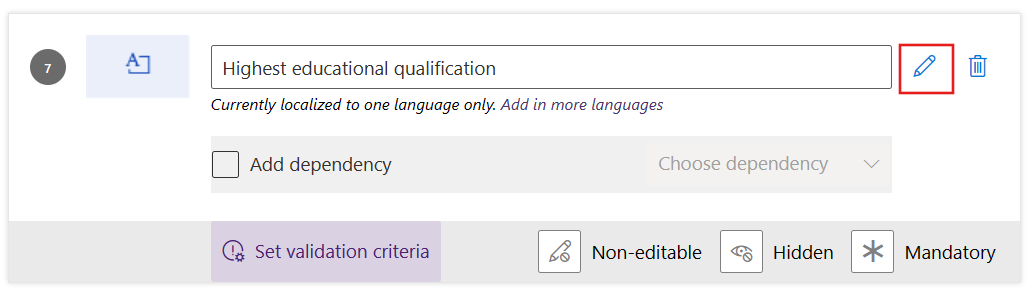
Enter the translated string along with the language.
Upload/Download List - This option is only available for Single Choice and Multiple choice type of profile fields. Use this option to add a large number of values to any specific profile field.

Note
You can download the sample .csv file using the download list option and modify the file and upload it with the new values.
Toggle the required option to mark each profile field as either,
- Mandatory: Learners are required to fill in mandatory fields after logging in.
- Hidden: Learners will not be able to view this field, such fields can be used by administrators for internal management.
- Non-editable: Learners will be able to view the profile field but not edit it.
.png)
Note
Any change in a new or existing profile field will be applicable to new and existing learners on the platform.
Once you have added the fields, select Publish. You’ll be asked to confirm by typing Publish again in the prompt.
Caution
- Ensure you select Publish. Otherwise, the changes you made will be lost.
- Note that, while making any change in existing profile field data, this could impact learner association with a smart group (if present).
Associated Profile Fields
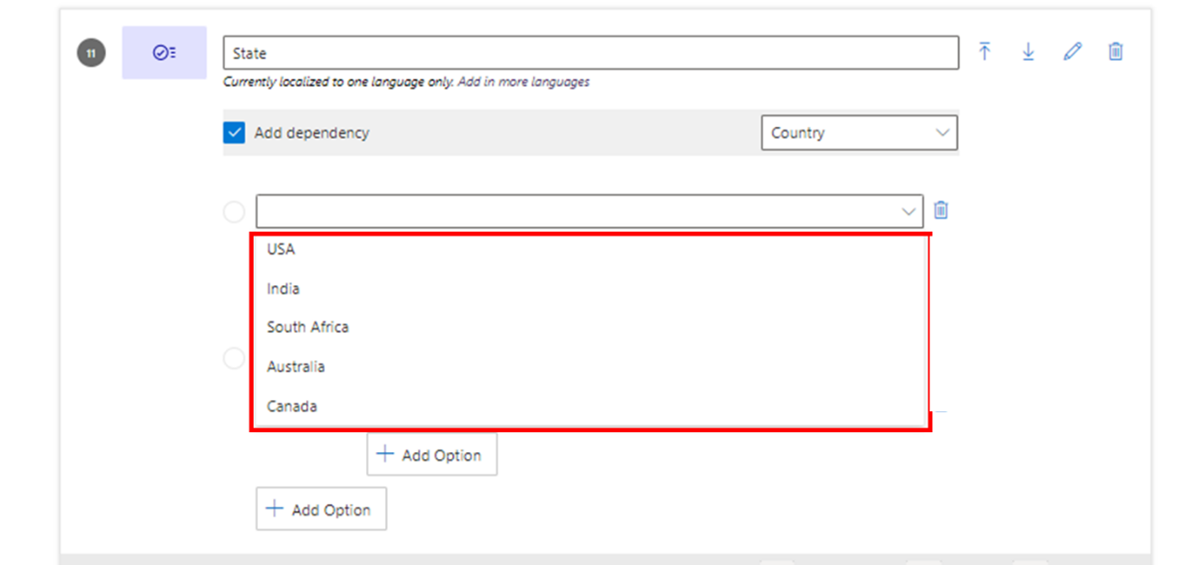
Community Training supports adding associated profile fields. These help in defining relationships and create dependencies between profile fields. Select a particular profile field value to determine the options in the dependent profile field.
For example, if there are two profile fields State and City and if City is a dependent on State, then selecting a particular State will show the cities specific to that State.
Steps to create associated profile fields
Sign in to the Community Training portal and switch to administrator view
Select Settings from the left navigation panel then select Additional Profile fields from the list.
To make association between profile fields:
- Select an existing profile field or create new additional profile fields
- Check the Add Dependency checkbox.

Warning
Please note that changing/adding associations to an existing field will result in loss of the profile data for users.
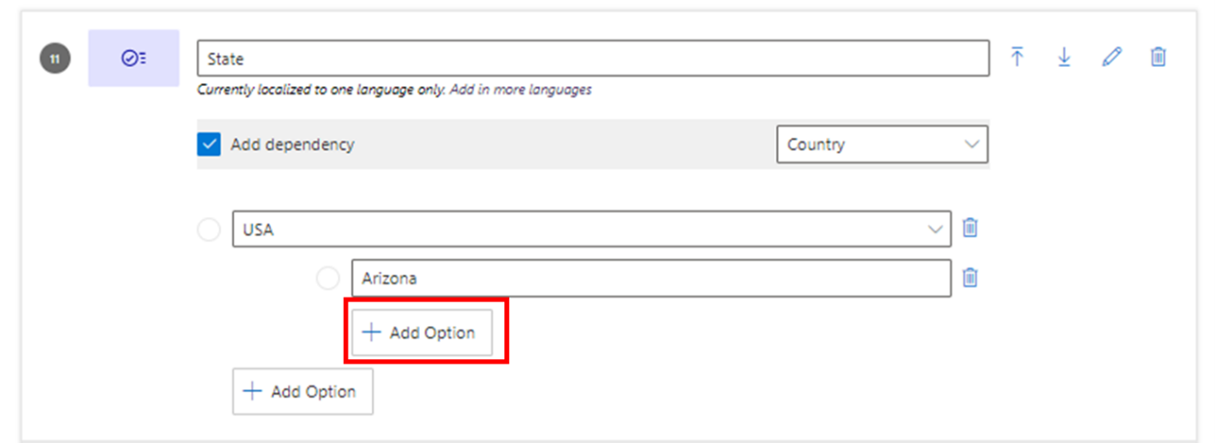
From the Choose dependency dropdown list, select the profile field which this profile field should be dependent on.

Note
Only Single Choice type profile fields can be chosen as dependency fields. By default, associated profile fields can be set with a dependency of up to two levels. For example, if an organization wants to have
City,StateandCountryto be associated, then below are the steps to take:Country–State-Cityis a two-level hierarchy of associated profile fields.- First create a Single choice profile field for
Country. - Create a field for
Stateby choosingCountryfor dependency. - Then create a profile field for
Cityby choosingStateas dependency field.
After selecting the dependent profile field, choose the profile field option from the dropdown list to add associated field options.
Note
Associated field options can also be added through bulk upload flow via a .csv file with the options listed as example format given below for associating State with Country.
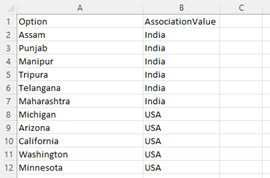
Add the associated profile field option(s) under the selected dependency profile field option, select Add Option.
Caution
The combined option count that you can add via UI for a dependent field is capped at 10, to add more than 10 options use bulk upload.
Follow step 5 to add associated profile field options for all the dependency field options.
Select Publish once you have added all associated options for a dependent profile field.
Add Privacy Terms and Conditions
You can include a link to your privacy terms and conditions that will be shown to users when they view their profile information.
Sign in to the Community Training portal and switch to administrator view.
Select Settings from the left navigation panel then General from the list.
Select the Show Privacy Terms toggle and add a link to your organizations privacy terms and conditions. An example of Microsoft's privacy terms is here.
.png)
Once you have made the changes, select Publish. You’ll be asked to confirm by typing Publish again in the prompt.
Caution
Ensure you click on Publish. Otherwise, the changes you made will be lost.
Learners can access the privacy terms along with the profile fields selecting the User Image on top right corner and selecting My Profile
.png)
Please reach out to us via HelpDesk if you have any further queries.