Note
Access to this page requires authorization. You can try signing in or changing directories.
Access to this page requires authorization. You can try changing directories.
Note
This capability is in preview and is subject to the Supplemental Terms of Use for Microsoft Azure Previews.
After you create an integration environment, create one or more application groups to organize existing Azure resources related to your integration solutions. These groups help you break down your environment even further so that you can manage your resources at more a granular level.
Prerequisites
The Azure account and subscription for the integration environment where you want to create an application group.
Existing Azure resources to add and organize in your application group
Note
Your integration environment and all Azure resources that you want to organize into application groups must use the same Azure subscription, including any Business Process resources that you want to link your application group. See Supported Azure resources.
Create an application group with resources
In the Azure portal, find and open your integration environment resource.
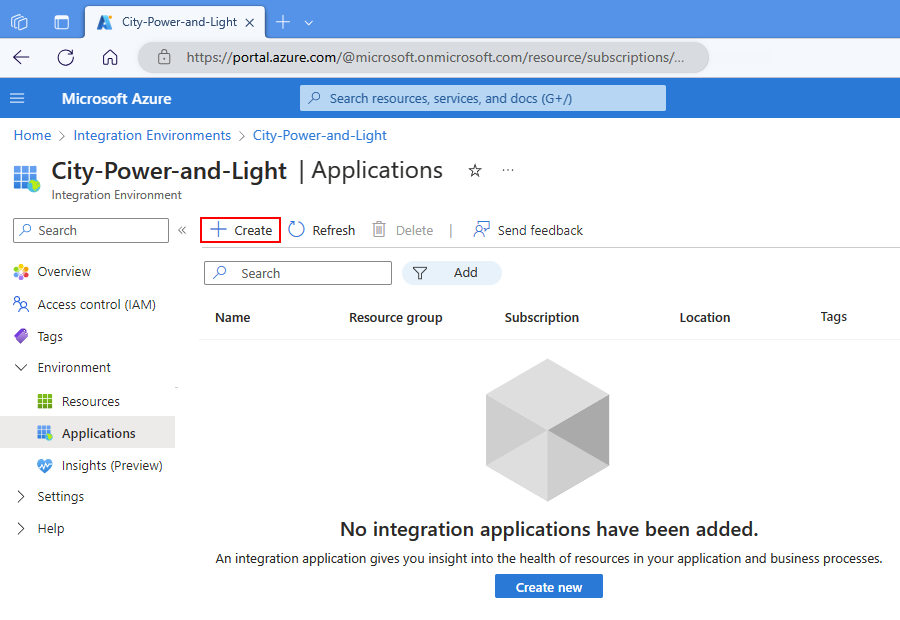
On the resource sidebar, under Environment, select Applications.
On the Applications page toolbar, select Create.
On the Basics tab, provide the following information:
Property Required Value Description Name Yes <application-name> A name for your application group that uses only alphanumeric characters, hyphens, underscores, or periods. Description No <application-description> The purpose for your application group. Default log analytics workspace No <Log-Analytics-workspace> The name for the Log Analytics workspace to use as the central store where your application group sends performance metrics and other telemetry.
If you don't have a workspace, select Create new. For more information, see the following articles:
- Create a Log Analytics workspace
- Monitor health and performance for Azure resources in applicationsSelect Next: Resources or the Resources tab, and then select Add resource.
On the Add resources to this application pane that opens, follow these steps:
Leave the selected option Resources in this subscription.
From the Resource type list, select one of the following types, and then select the respective property values for the resource to add:
Resource type Properties Logic App Name: The name for the Standard logic app resource. API - Name: The name for the API Management instance.
- API: The name for the API.Service Bus - Name: The name for the service bus.
- Topic: The name for the topic.
- Queue: The name for the queue.Business Process - Name: The name for the business process.
When you're done, select Add.
To add another resource, repeat steps 4-6.
Select the Review + create tab, and review all the information.
When you're done, select Create.
Your integration environment now shows the application group that you created with the selected Azure resources.
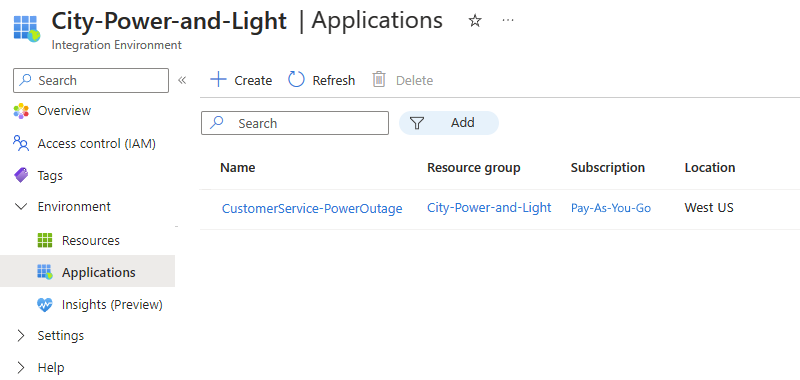


View Azure resources in your application group
After you add resources to your application group, you can view those resources through either of the following views:
| View | Description |
|---|---|
| Applications | Organized by application group. |
| Resources | Organized by all the Azure resources across application groups in your integration environment. |
For a business process, you can view and open the process editor directly from an integration environment by following these steps:
In the Azure portal, on the integration environment sidebar, under Environment, select either option:
Resources > <business-process-name> > Editor.
Applications > <application-group-name> > Business process tracking > Business processes > <business-process-name> > Editor.