Associate your ASN with an Azure subscription using the Azure portal
In this article, you learn how to associate your Autonomous System Number (ASN) with an Azure subscription using the Azure portal. To learn how to associate your ASN with an Azure subscription using Azure PowerShell, see Associate peer ASN to Azure subscription using PowerShell.
As an Internet Service Provider or Internet Exchange Provider, you must associate your peer ASN with an Azure subscription before you submit a peering request.
Prerequisites
An Azure account with an active subscription. Create an account for free.
Peering provider. For more information, see Register Peering provider.
Register Peering provider
In this section, you learn how to check if the peering provider is registered in your subscription and how to register it if not registered. Peering provider is required to set up peering. If you previously registered the peering provider, you can skip this section.
Sign in to the Azure portal.
In the search box at the top of the portal, enter Subscriptions. Select Subscriptions in the search results.

Select the Azure subscription that you want to enable the provider for.
Under Settings, select Resource providers.
Enter peering in the filter box.
Confirm the status of the provider is Registered. If the status is NotRegistered, select the Microsoft.Peering provider then select Register.


Create PeerAsn to associate your ASN with Azure Subscription
As an Internet Service Provider or Internet Exchange Provider, you can create a new PeerAsn resource to associate an Autonomous System Number (ASN) with an Azure subscription. You can associate multiple ASNs to a subscription by creating a PeerAsn for each ASN you need to associate.
Sign in to the Azure portal.
Go to the Associate a Peer ASN page.
On the Associate a Peer ASN, enter or select the following values in the Basics tab:
Setting Value Project details Name Enter a name for the PeerASN resource that you're creating. Subscription Select your Azure subscription that you want to associate the ASN with. Instance details Peer name Enter your company name. This name must be as close as possible to your PeeringDB profile. Peer ASN Enter your ASN. 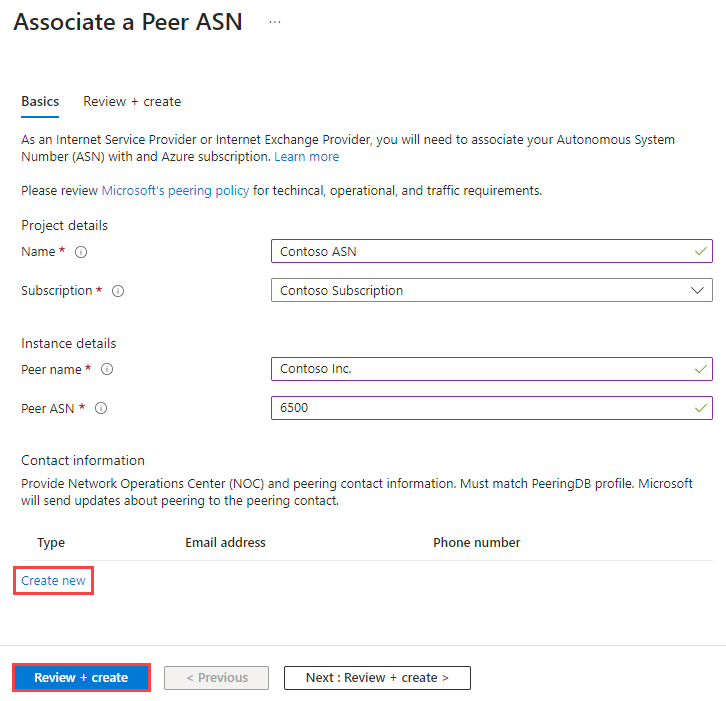
Select Create new and enter Email address and Phone number of your Network Operations Center (NOC).
Select Review + create.
Review the settings, and then select Create. If deployment fails, contact Microsoft peering.

View status of a PeerAsn
Once PeerAsn resource is deployed successfully, you must wait for Microsoft to approve the association request. It might take up to 12 hours for approval. Once approved, you receive a notification to the email address you entered during the creation of PeerASN resource.
Important
Wait for the ValidationState to turn Approved before submitting a peering request. It may take up to 12 hours for this approval.
Modify PeerAsn
Modifying a PeerAsn isn't currently supported. If you need to modify a PeerASN, contact Microsoft peering.
Delete PeerAsn
Deleting a PeerAsn isn't currently supported. If you need to delete a PeerAsn, contact Microsoft peering.
Related content
Feedback
Coming soon: Throughout 2024 we will be phasing out GitHub Issues as the feedback mechanism for content and replacing it with a new feedback system. For more information see: https://aka.ms/ContentUserFeedback.
Submit and view feedback for