Note
Access to this page requires authorization. You can try signing in or changing directories.
Access to this page requires authorization. You can try changing directories.
To restrict access to a private endpoint for DPS in your virtual network, disable public network access. To do so, use the Azure portal or the publicNetworkAccess API. You can also allow public access by using the portal or the publicNetworkAccess API.
Turn off public network access using the Azure portal
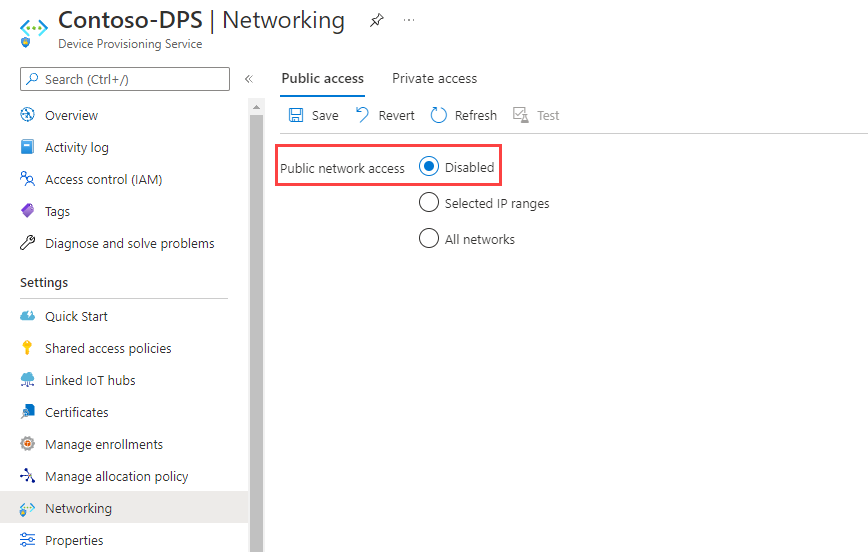
To turn off public network access:
Sign in to the Azure portal.
From either the portal menu or the portal page, select All resources.
Select your Device Provisioning Service instance.
From the service menu, under Settings, select Networking.
From the working pane, under Public network access, select Disabled
Select Save.
To turn on public network access:
- Select All networks.
- Select Save.
Disable public network access limitations
Note the following limitations when public network access is disabled:
The DPS instance is accessible only through its virtual network private endpoint using Azure Private Link.
You can no longer use the Azure portal to manage enrollments for the DPS instance. Instead you can manage enrollments using the Azure CLI, PowerShell, or service APIs from machines inside the virtual networks configured on the DPS instance. To learn more, see Private endpoint limitations.
DPS endpoint, IP address, and ports after disabling public network access
DPS is a multitenant Platform-as-a-Service (PaaS), where different customers share the same pool of compute, networking, and storage hardware resources. DPS's hostnames map to a public endpoint with a publicly routable IP address over the internet. Different customers share this DPS public endpoint, and IoT devices in wide-area networks and on-premises networks can all access it.
Disabling public network access is enforced on a specific DPS resource, ensuring isolation. To keep the service active for other customer resources using the public path, its public endpoint remains resolvable, IP addresses discoverable, and ports remain open. This discoverability isn't a cause for concern as Microsoft integrates multiple layers of security to ensure complete isolation between tenants. To learn more, see Isolation in the Azure Public Cloud.
IP Filter
If public network access is disabled, all IP filter rules are ignored. This behavior occurs because all IPs from the public internet are blocked. To use IP filtering, select the Selected IP ranges option.
Turn on all network ranges
To turn on all network ranges:
- Sign in to the Azure portal.
- From either the portal menu or the portal page, select All resources.
- Select your Device Provisioning Service instance.
- From the service menu, under Settings, select Networking.
- From the working pane, under Public network access, select All networks
- Select Save.