Tutorial: Generate simulated device data
Applies to: ![]() IoT Edge 1.1
IoT Edge 1.1
Important
IoT Edge 1.1 end of support date was December 13, 2022. Check the Microsoft Product Lifecycle for information about how this product, service, technology, or API is supported. For more information about updating to the latest version of IoT Edge, see Update IoT Edge.
In this article, we use machine learning training data to simulate a device sending telemetry to Azure IoT Hub. As stated in the introduction, this tutorial uses the Turbofan engine degradation simulation data set to simulate data from a set of airplane engines for training and testing.
In our experimental scenario, we know that:
- The data consists of multiple multivariate time series.
- Each data set is divided into training and test subsets.
- Each time series is from a different engine.
- Each engine starts with different degrees of initial wear and manufacturing variation.
For this tutorial, we use the training data subset of a single data set (FD003).
In reality, each engine would be an independent IoT device. Assuming you do not have a collection of internet-connected turbofan engines available, we will build a software stand-in for these devices.
The simulator is a C# program that uses the IoT Hub APIs to programmatically register virtual devices with IoT Hub. We then read the data for each device from the NASA-provided data subset and send it to your IoT hub using a simulated IoT Device. All the code for this portion of the tutorial can be found in the DeviceHarness directory of the repository.
The DeviceHarness project is a .NET core project written in C# consisting of four classes:
- Program: The entry point for execution responsible for handling user input and overall coordination.
- TrainingFileManager: Responsible for reading and parsing the selected data file.
- CycleData: Represents a single row of data in a file converted to message format.
- TurbofanDevice: Responsible for creating an IoT Device, that corresponds to a single device (time series), in the data and transmitting the data to IoT Hub.
The tasks described in this article should take about 20 minutes to complete.
The real-world equivalent to the work in this step would likely be performed by device developers and cloud developers.
In this section of the tutorial, you learn how to:
- Incorporate an external project into your development environment.
- Use the sample DeviceHarness project to generate simulated IoT device data.
- View generated data in your IoT Hub.
Prerequisites
This article is part of a series for a tutorial about using Azure Machine Learning on IoT Edge. Each article in the series builds on the work in the previous article. If you have arrived at this article directly, visit the first article in the series.
Configure Visual Studio Code and build DeviceHarness project
Open a remote desktop session to your development VM.
In Visual Studio code, open the
C:\source\IoTEdgeAndMlSample\DeviceHarnessfolder.Since you're using extensions on this machine for the first time, some extensions will update and install their dependencies. You may be prompted to update extension. If so, select Reload Window.
If OmniSharp errors appear in the output window, you'll need to uninstall the C# extension.
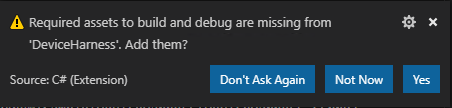
You will be prompted to add required assets for DeviceHarness. Select Yes to add them.
- The notification may take a few seconds to appear.
- If you missed this notification, check the bell icon in the lower right-hand corner.
Select Restore to restore the package dependencies.

If you do not get these notifications, close Visual Studio Code, delete the bin and obj directories in
C:\source\IoTEdgeAndMlSample\DeviceHarness, open Visual Studio Code, and reopen the DeviceHarness folder.Validate that your environment is properly set up by triggering a build, Ctrl + Shift + B, or Terminal > Run Build Task.
You're prompted to select the build task to run. Select Build.
The build runs and outputs a success message.

You can make this build the default build task by selecting Terminal > Configure Default Build Task... and choosing Build from the prompt.
Connect to IoT Hub and run DeviceHarness
Now that we have the project building, connect to your IoT hub to access the connection string and monitor the progress of the data generation.
Sign in to Azure in Visual Studio Code
Sign into your Azure subscription in Visual Studio Code by opening the command palette,
Ctrl + Shift + Por View > Command Palette.Search for the Azure: Sign In command.
A browser window opens and prompts you for your credentials. When you're redirected to a success page, you can close the browser.
Connect to your IoT hub and retrieve hub connection string
In the bottom section of the Visual Studio Code explorer, select the Azure IoT Hub frame to expand it.
In the expanded frame, click on Select IoT Hub.
When prompted, select your Azure subscription and then your IoT hub.
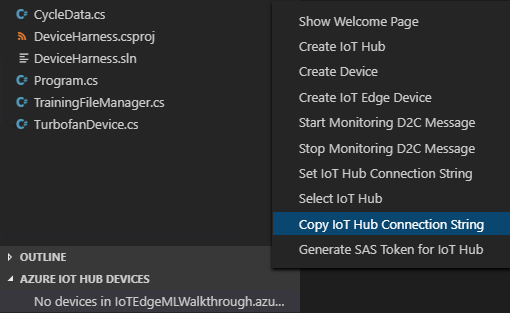
Click the ... to the right of Azure IoT Hub for more actions. Select Copy IoT Hub connection string.
Run the DeviceHarness project
Select View > Terminal to open the Visual Studio Code terminal.
If you do not see a prompt, press Enter.
Enter
dotnet runin the terminal.When prompted for the IoT Hub Connection String, paste the connection string copied in the previous section.
In the Azure IoT Hub devices frame, click on the refresh button.

Note that devices are added to the IoT Hub and that the devices show up in green to indicate that data is being sent via that device. After the devices send messages to the IoT hub, they disconnect and appear blue.
You can view messages sent to the hub by right-clicking on any device and selecting Start Monitoring Built-in Event Endpoint. The messages will show in the output pane in Visual Studio Code.
Stop monitoring by clicking in the Azure IoT Hub output pane and choose Stop Monitoring Built-in Event Endpoint.
Let the application run to completion, which takes a few minutes.
Check IoT Hub for activity
The data sent by the DeviceHarness went to your IoT hub, where you can verify in the Azure portal.
Open the Azure portal and navigate to the IoT hub created for this tutorial.
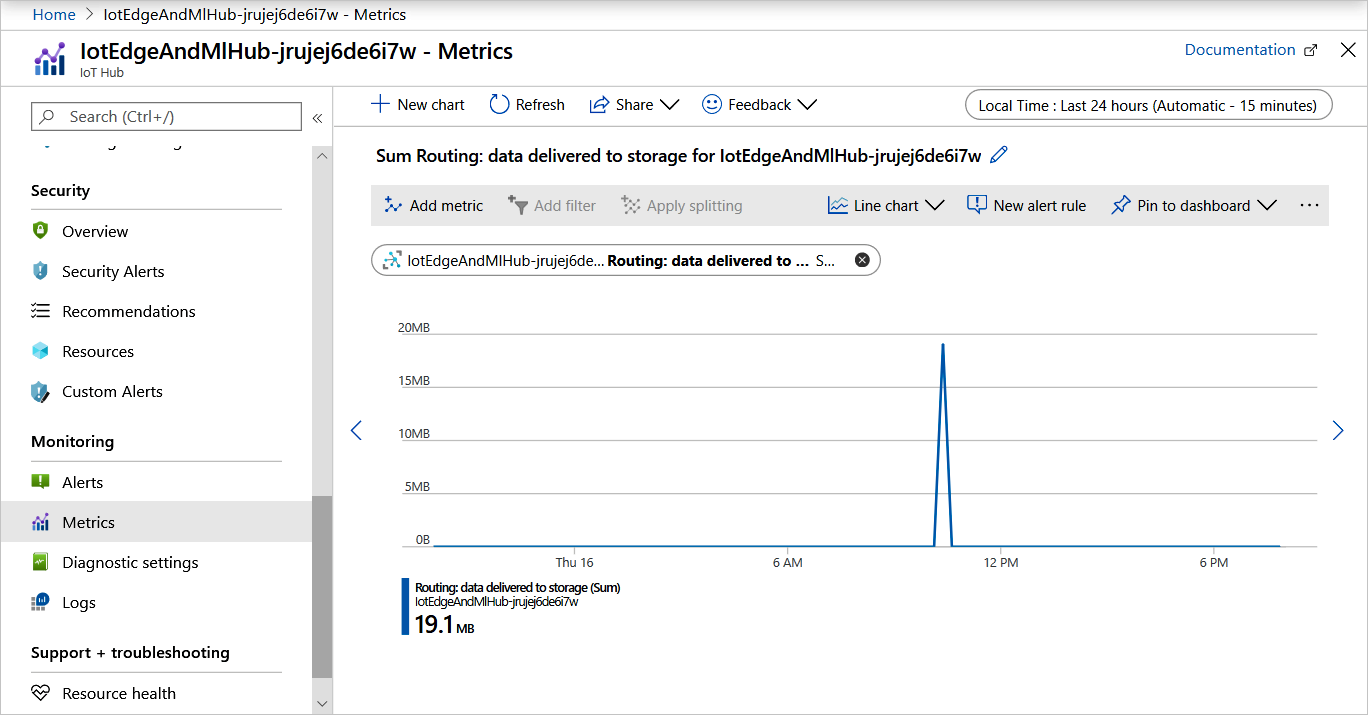
From the left pane menu, under Monitoring, select Metrics.
On the chart definition page, click the Metric drop down, scroll down the list, and select Routing: data delivered to storage. The chart should show the spike of when the data was routed to storage.
Validate data in Azure Storage
The data we just sent to your IoT hub was routed to the storage container that we created in the previous article. Let's look at the data in our storage account.
In the Azure portal, navigate to your storage account.
From the storage account navigator, select Storage Explorer (preview).
In the storage explorer, select Blob Containers then
devicedata.In the content pane, click on the folder for the name of the IoT hub, followed by year, month, day, and hour. You will see several folders representing the minutes when the data was written.
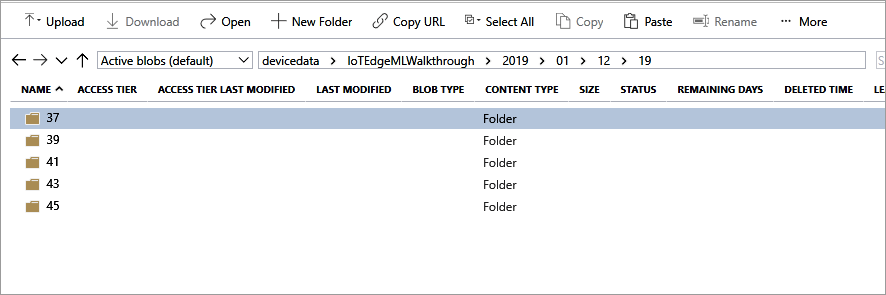
Click into one of those folders to find data files labeled 00 and 01 corresponding to the partition.
The files are written in Avro format. Double-click on one of these files to open another browser tab and partially render the data. If you're prompted to open the file in a program, you can choose VS Code and it will render correctly.
There is no need to try to read or interpret the data right now; we will do it in next article.
Clean up resources
This tutorial is part of a set where each article builds on the work done in the previous ones. Please wait to clean up any resources until you complete the final tutorial.
Next steps
In this article, we used a .NET Core project to create a set of virtual IoT devices and send data through them to our IoT hub and into an Azure Storage container. This project simulates a real-world scenario where physical IoT devices send data to an IoT Hub and onward into a curated storage. This data includes sensor readings, operational settings, failure signals and modes, and so on. Once enough data has been collected, we use it to train models that predict the remaining useful life (RUL) for the device. We'll demonstrate this machine learning in the next article.
Continue to the next article to train a machine learning model with the data.