Note
Access to this page requires authorization. You can try signing in or changing directories.
Access to this page requires authorization. You can try changing directories.
Applies to: ![]() IoT Edge 1.4
IoT Edge 1.4
Important
IoT Edge 1.5 LTS and IoT Edge 1.4 are supported releases. If you are on an earlier release, see Update IoT Edge.
Deploy a SQL Server module to store data on a device running Azure IoT Edge with Linux containers.
Use Azure IoT Edge and SQL Server to store and query data at the edge. Azure IoT Edge has basic storage capabilities to cache messages if a device goes offline, and then forward them when the connection is reestablished. However, you may want more advanced storage capabilities, like being able to query data locally. Your IoT Edge devices can use local databases to perform more complex computing without having to maintain a connection to IoT Hub.
This article provides instructions for deploying a SQL Server database to an IoT Edge device. Azure Functions, running on the IoT Edge device, structures the incoming data then sends it to the database. The steps in this article can also be applied to other databases that work in containers, like MySQL or PostgreSQL.
In this tutorial, you learn how to:
- Use Visual Studio Code to create an Azure Function
- Deploy a SQL database to your IoT Edge device
- Use Visual Studio Code to build modules and deploy them to your IoT Edge device
- View generated data
If you don't have an Azure account, create a free account before you begin.
Prerequisites
Before beginning this tutorial, you should have gone through the previous tutorial to set up your development environment for Linux container development: Develop Azure IoT Edge modules using Visual Studio Code. By completing that tutorial, you should have the following prerequisites in place:
- A free or standard-tier IoT Hub in Azure.
- An AMD64 device running Azure IoT Edge with Linux containers. You can use the quickstarts to set up a Linux device or Windows device.
- ARM devices, like Raspberry Pis, cannot run SQL Server. If you want to use SQL on an ARM device, you can use Azure SQL Edge.
- A container registry, like Azure Container Registry.
- Visual Studio Code configured with the Azure IoT Edge and Azure IoT Hub extensions. The Azure IoT Edge tools for Visual Studio Code extension is in maintenance mode.
- Download and install a Docker compatible container management system on your development machine. Configure it to run Linux containers.
This tutorial uses an Azure Functions module to send data to the SQL Server. To develop an IoT Edge module with Azure Functions, install the following additional prerequisites on your development machine:
Create a function project
To send data into a database, you need a module that can structure the data properly and then stores it in a table.
Create a new project
The following steps show you how to create an IoT Edge function using Visual Studio Code and the Azure IoT Edge extension.
Open Visual Studio Code.
Open the Visual Studio Code command palette by selecting View > Command palette.
In the command palette, type and run the command Azure IoT Edge: New IoT Edge solution. In the command palette, provide the following information to create your solution:
Field Value Select folder Choose the location on your development machine for Visual Studio Code to create the solution files. Provide a solution name Enter a descriptive name for your solution, like SqlSolution, or accept the default. Select module template Choose Azure Functions - C#. Provide a module name Name your module sqlFunction. Provide Docker image repository for the module An image repository includes the name of your container registry and the name of your container image. Your container image is prepopulated from the last step. Replace localhost:5000 with the Login server value from your Azure container registry. You can retrieve the Login server from the Overview page of your container registry in the Azure portal.
The final string looks like <registry name>.azurecr.io/sqlfunction.The Visual Studio Code window loads your IoT Edge solution workspace.
Add your registry credentials
The environment file stores the credentials for your container registry and shares them with the IoT Edge runtime. The runtime needs these credentials to pull your private images onto the IoT Edge device.
The IoT Edge extension tries to pull your container registry credentials from Azure and populates them in the environment file. Check to see if your credentials are already included. If not, add them now:
- In the Visual Studio Code explorer, open the .env file.
- Update the fields with the username and password values that you copied from your Azure container registry.
- Save this file.
Note
This tutorial uses admin login credentials for Azure Container Registry, which are convenient for development and test scenarios. When you're ready for production scenarios, we recommend a least-privilege authentication option like service principals. For more information, see Manage access to your container registry.
Select your target architecture
You need to select which architecture you're targeting with each solution, because the container is built and run differently for each architecture type. The default is Linux AMD64.
Open the command palette and search for Azure IoT Edge: Set Default Target Platform for Edge Solution, or select the shortcut icon in the side bar at the bottom of the window.
In the command palette, select the target architecture from the list of options. For this tutorial, we're using an Ubuntu virtual machine as the IoT Edge device, so will keep the default amd64.
Update the module with custom code
In the Visual Studio Code explorer, open modules > sqlFunction > sqlFunction.csproj.
Find the group of package references, and add a new one to include SqlClient.
<PackageReference Include="System.Data.SqlClient" Version="4.5.1"/>Save the sqlFunction.csproj file.
Open the sqlFunction.cs file.
Replace the entire contents of the file with the following code:
using System;
using System.Collections.Generic;
using System.IO;
using System.Text;
using System.Threading.Tasks;
using Microsoft.Azure.Devices.Client;
using Microsoft.Azure.WebJobs;
using Microsoft.Azure.WebJobs.Extensions.EdgeHub;
using Microsoft.Azure.WebJobs.Host;
using Microsoft.Extensions.Logging;
using Newtonsoft.Json;
using Sql = System.Data.SqlClient;

namespace Functions.Samples
{
    public static class sqlFunction
    {
        [FunctionName("sqlFunction")]
        public static async Task FilterMessageAndSendMessage(
            [EdgeHubTrigger("input1")] Message messageReceived,
            [EdgeHub(OutputName = "output1")] IAsyncCollector<Message> output,
            ILogger logger)
        {
            const int temperatureThreshold = 20;
            byte[] messageBytes = messageReceived.GetBytes();
            var messageString = System.Text.Encoding.UTF8.GetString(messageBytes);

            if (!string.IsNullOrEmpty(messageString))
            {
                logger.LogInformation("Info: Received one non-empty message");
                // Get the body of the message and deserialize it.
                var messageBody = JsonConvert.DeserializeObject<MessageBody>(messageString);

                //Store the data in SQL db
                const string str = "<sql connection string>";
                using (Sql.SqlConnection conn = new Sql.SqlConnection(str))
                {
                    conn.Open();
                    var insertMachineTemperature = "INSERT INTO MeasurementsDB.dbo.TemperatureMeasurements VALUES (CONVERT(DATETIME2,'" + messageBody.timeCreated + "', 127), 'machine', " + messageBody.machine.temperature + ");";
                    var insertAmbientTemperature = "INSERT INTO MeasurementsDB.dbo.TemperatureMeasurements VALUES (CONVERT(DATETIME2,'" + messageBody.timeCreated + "', 127), 'ambient', " + messageBody.ambient.temperature + ");";
                    using (Sql.SqlCommand cmd = new Sql.SqlCommand(insertMachineTemperature + "\n" + insertAmbientTemperature, conn))
                    {
                        //Execute the command and log the # rows affected.
                        var rows = await cmd.ExecuteNonQueryAsync();
                        logger.LogInformation($"{rows} rows were updated");
                    }
                }

                if (messageBody != null && messageBody.machine.temperature > temperatureThreshold)
                {
                    // Send the message to the output as the temperature value is greater than the threshold.
                    using (var filteredMessage = new Message(messageBytes))
                    {
                         // Copy the properties of the original message into the new Message object.
                         foreach (KeyValuePair<string, string> prop in messageReceived.Properties)
                         {filteredMessage.Properties.Add(prop.Key, prop.Value);}
                         // Add a new property to the message to indicate it is an alert.
                         filteredMessage.Properties.Add("MessageType", "Alert");
                         // Send the message.
                         await output.AddAsync(filteredMessage);
                         logger.LogInformation("Info: Received and transferred a message with temperature above the threshold");
                    }
                }
            }
        }
    }
    //Define the expected schema for the body of incoming messages.
    class MessageBody
    {
        public Machine machine {get; set;}
        public Ambient ambient {get; set;}
        public string timeCreated {get; set;}
    }
    class Machine
    {
        public double temperature {get; set;}
        public double pressure {get; set;}
    }
    class Ambient
    {
        public double temperature {get; set;}
        public int humidity {get; set;}
    }
}
In line 35, replace the string <sql connection string> with the following string. The Data Source property references the SQL Server container, which doesn't exist yet. You will create it with the name SQL in the next section. Choose a strong password for the Password keyword.
Data Source=tcp:sql,1433;Initial Catalog=MeasurementsDB;User Id=SA;Password=<YOUR-STRONG-PASSWORD>;TrustServerCertificate=False;Connection Timeout=30;Save the sqlFunction.cs file.
Add the SQL Server container
A Deployment manifest declares which modules the IoT Edge runtime will install on your IoT Edge device. You provided the code to make a customized Function module in the previous section, but the SQL Server module is already built and available in the Microsoft Artifact Registry. You just need to tell the IoT Edge runtime to include it, then configure it on your device.
In Visual Studio Code, open the command palette by selecting View > Command palette.
In the command palette, type and run the command Azure IoT Edge: Add IoT Edge module. In the command palette, provide the following information to add a new module:
Field Value Select deployment template file The command palette highlights the deployment.template.json file in your current solution folder. Select that file. Select module template Select Existing Module (Enter Full Image URL). Provide a Module Name Enter sql. This name matches the container name declared in the connection string in the sqlFunction.cs file. Provide Docker Image for the Module Enter the following URI to pull the SQL Server container image from the Microsoft Artifact Registry. For Ubuntu based images, use mcr.microsoft.com/mssql/server:latest. For Red Hat Enterprise Linux (RHEL) based images, usemcr.microsoft.com/mssql/rhel/server:latest.The Azure SQL Edge container image is a lightweight, containerized version of SQL Server that can run on IoT Edge devices. It's optimized for edge scenarios and can run on ARM and AMD64 devices.
In your solution folder, open the deployment.template.json file.
Find the modules section. You should see three modules. The module SimulatedTemperatureSensor is included by default in new solutions, and provides test data to use with your other modules. The module sqlFunction is the module that you initially created and updated with new code. Finally, the module sql was imported from the the Microsoft Artifact Registry.
Tip
The SQL Server module comes with a default password set in the environment variables of the deployment manifest. Any time that you create a SQL Server container in a production environment, you should change the default system administrator password.
Close the deployment.template.json file.
Build your IoT Edge solution
In the previous sections, you created a solution with one module, and then added another to the deployment manifest template. The SQL Server module is hosted publicly by Microsoft, but you need to containerize the code in the Functions module. In this section, you build the solution, create container images for the sqlFunction module, and push the image to your container registry.
In Visual Studio Code, open the integrated terminal by selecting View > Terminal.
Sign in to your container registry in Visual Studio Code so that you can push your images to your registry. Use the same Azure Container Registry (ACR) credentials that you added to the .env file. Enter the following command in the integrated terminal:
docker login -u <ACR username> -p <ACR password> <ACR login server>You might see a security warning recommending the use of the --password-stdin parameter. While its use is outside the scope of this article, we recommend following this best practice. For more information, see the docker login command reference.
In the Visual Studio Code explorer, right-click the deployment.template.json file and select Build and Push IoT Edge solution.
The build and push command starts three operations. First, it creates a new folder in the solution called config that holds the full deployment manifest, which is built out of information in the deployment template and other solution files. Second, it runs
docker buildto build the container image based on the appropriate dockerfile for your target architecture. Then, it runsdocker pushto push the image repository to your container registry.This process may take several minutes the first time, but is faster the next time that you run the commands.
You can verify that the sqlFunction module was successfully pushed to your container registry. In the Azure portal, navigate to your container registry. Select repositories and search for sqlFunction. The other two modules, SimulatedTemperatureSensor and sql, won't be pushed to your container registry because their repositories are already in the Microsoft registries.
Deploy the solution to a device
You can set modules on a device through the IoT Hub, but you can also access your IoT Hub and devices through Visual Studio Code. In this section, you set up access to your IoT Hub then use Visual Studio Code to deploy your solution to your IoT Edge device.
In the Visual Studio Code explorer, under the Azure IoT Hub section, expand Devices to see your list of IoT devices.
Right-click on the device that you want to target with your deployment and select Create Deployment for Single Device.
Select the deployment.amd64.json file in the config folder and then click Select Edge Deployment Manifest. Do not use the deployment.template.json file.
Under your device, expand Modules to see a list of deployed and running modules. Click the refresh button. You should see the new sql and sqlFunction modules running along with the SimulatedTemperatureSensor module and the $edgeAgent and $edgeHub.
You can also check to see that all the modules are up and running on your device. On your IoT Edge device, run the following command to see the status of the modules.
iotedge listIt may take a few minutes for the modules to start. The IoT Edge runtime needs to receive its new deployment manifest, pull down the module images from the container runtime, then start each new module.
Create the SQL database
When you apply the deployment manifest to your device, you get three modules running. The SimulatedTemperatureSensor module generates simulated environment data. The sqlFunction module takes the data and formats it for a database. This section guides you through setting up the SQL database to store the temperature data.
Run the following commands on your IoT Edge device. These commands connect to the sql module running on your device and create a database and table to hold the temperature data being sent to it. Replace <YOUR-STRONG-PASSWORD> with the strong password you chose in your connection string.
In a command-line tool on your IoT Edge device, connect to your database.
sudo docker exec -it sql bashOpen the SQL command tool.
/opt/mssql-tools/bin/sqlcmd -S localhost -U SA -P '<YOUR-STRONG-PASSWORD>'Create your database:
CREATE DATABASE MeasurementsDB
ON
(NAME = MeasurementsDB, FILENAME = '/var/opt/mssql/measurementsdb.mdf')
GO
Define your table.
CREATE TABLE MeasurementsDB.dbo.TemperatureMeasurements (measurementTime DATETIME2, location NVARCHAR(50), temperature FLOAT)
GO
You can customize your SQL Server docker file to automatically set up your SQL Server to be deployed on multiple IoT Edge devices. For more information, see the Microsoft SQL Server container demo project.
View the local data
Once your table is created, the sqlFunction module starts storing data in a local SQL Server 2017 database on your IoT Edge device.
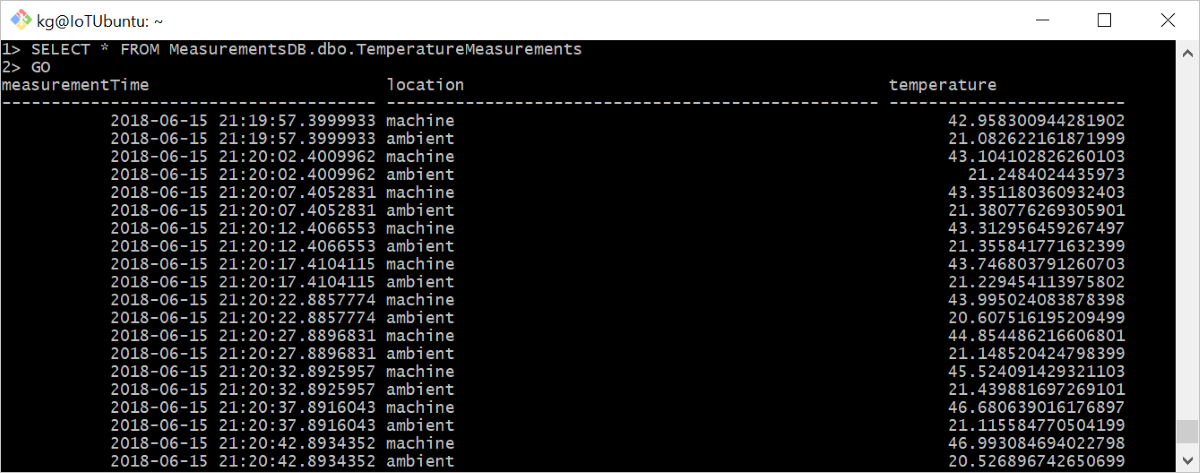
From inside the SQL command tool, run the following command to view your formatted table data:
SELECT * FROM MeasurementsDB.dbo.TemperatureMeasurements
GO
Clean up resources
If you plan to continue to the next recommended article, you can keep the resources and configurations that you created and reuse them. You can also keep using the same IoT Edge device as a test device.
Otherwise, you can delete the local configurations and the Azure resources that you created in this article to avoid charges.
Delete Azure resources
Deleting Azure resources and resource groups is irreversible. Make sure that you don't accidentally delete the wrong resource group or resources. If you created the IoT hub inside an existing resource group that has resources that you want to keep, delete only the IoT hub resource itself, not the resource group.
To delete the resources:
Sign in to the Azure portal, and then select Resource groups.
Select the name of the resource group that contains your IoT Edge test resources.
Review the list of resources that are contained in your resource group. If you want to delete all of them, you can select Delete resource group. If you want to delete only some of them, you can click into each resource to delete them individually.
In this tutorial, you created an Azure Functions module that contains code to filter raw data generated by your IoT Edge device. When you're ready to build your own modules, you can learn more about how to Develop Azure IoT Edge modules using Visual Studio Code.
Next steps
If you want to try another storage method at the edge, read about how to use Azure Blob Storage on IoT Edge.