Configure private endpoints for Device Update for IoT Hub accounts
You can use private endpoints to allow traffic directly from your virtual network to your account securely over a private link without going through the public internet. The private endpoint uses an IP address from the VNet address space for your account. For more conceptual information, see Network security.
This article describes how to configure private endpoints for accounts.
You can either use the Azure portal or the Azure CLI to create a private endpoint for an account.
Prerequisites
No prerequisites for the Azure portal.

Configure private endpoints from the Device Update account
In the Azure portal, you can create a new private endpoint from within the Device Update account. These private endpoint connections are auto-approved and don't need the extra steps of being reviewed and approved described in the rest of this article.
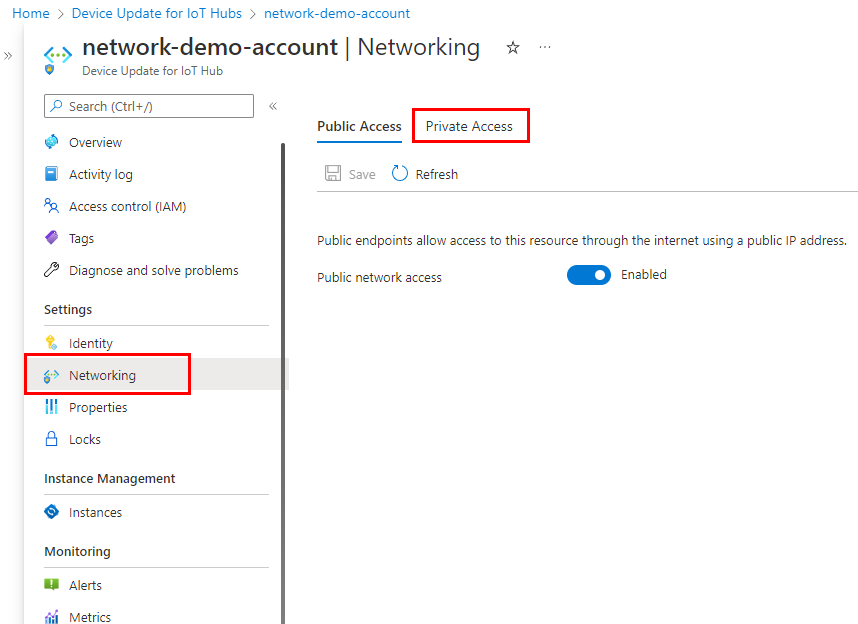
Sign in to the Azure portal and navigate to your account or domain.
Switch to the Networking tab of your account page. If you want to limit the access to only the private endpoint, disable the Public Network Access.
Switch to the Private Access tab, and then select + Add on the toolbar.
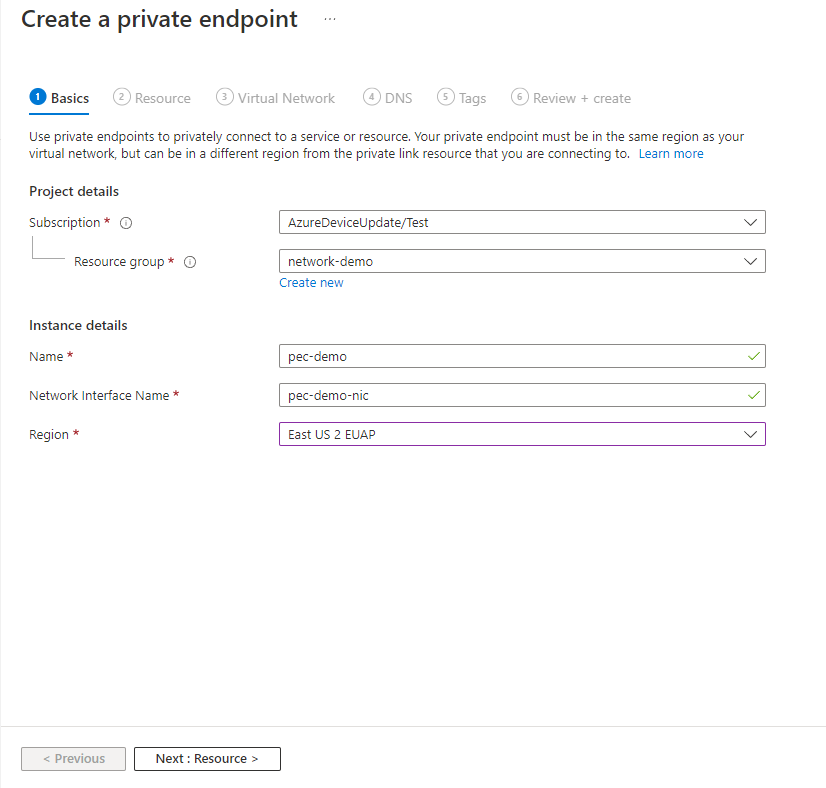
On the Basics page, provide the following information for your private endpoint:
Subscription: The Azure subscription in which you want to create the private endpoint.
Resource group: An existing or new resource group for the private endpoint.
Name: A name for the endpoint. This value is used to auto-generate the Network interface name.
Region: An Azure region for the endpoint. Your private endpoint must be in the same region as your virtual network, but can in a different region from the Device Update account.
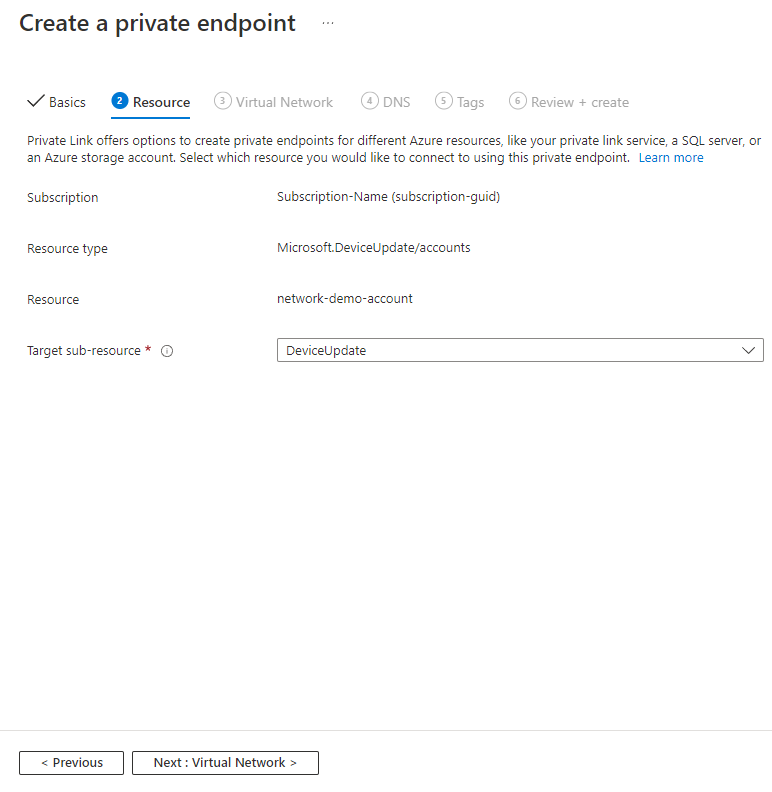
The Resource page is auto-populated
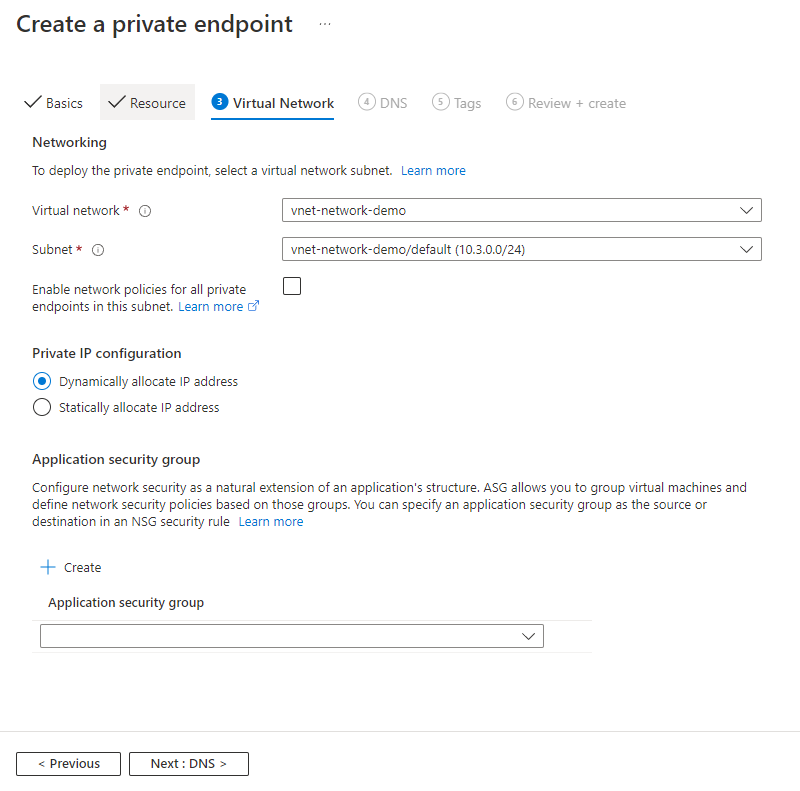
On the Virtual Network page, select the subnet and virtual network where you want to deploy the private endpoint.
Virtual network: Only virtual networks in the currently selected subscription and location are listed in the drop-down list.
Subnet: Select a subnet in the virtual network you selected.
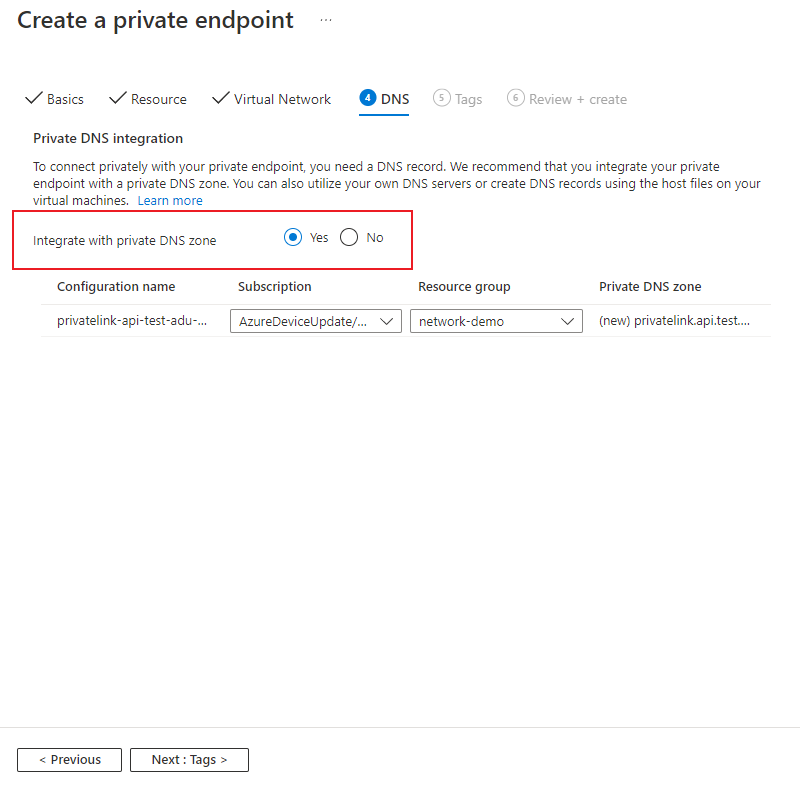
On the DNS page, use the pre-populated values unless you're using your own custom DNS.
On the Tags page, create any tags (names and values) that you want to associate with the private endpoint resource.
On the Review + create page, review all the settings and select Create to create the private endpoint.
Configure private endpoints from the Private Link Center
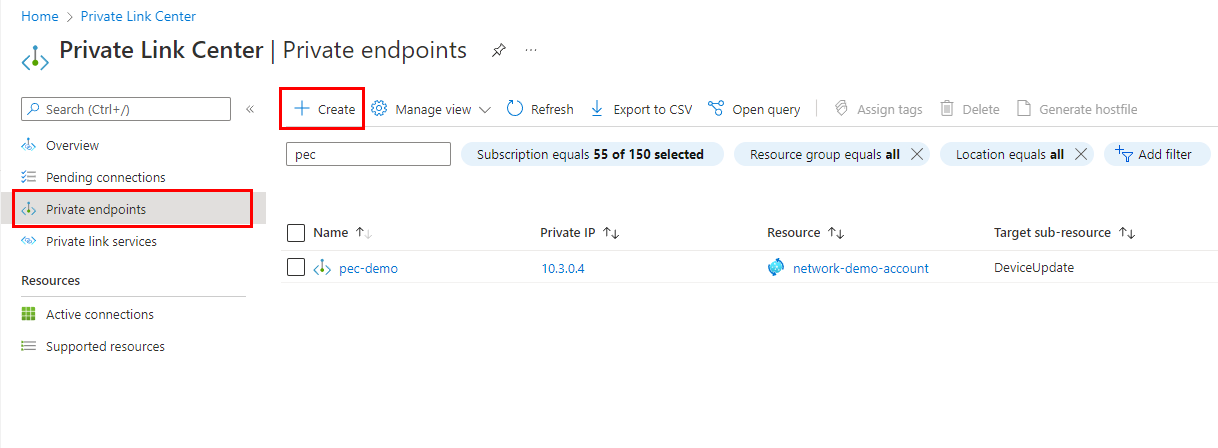
If you don't have access to the Device Update account, you can create private endpoints from the Private Link Center. In the case that the user creating the connection doesn't have the power to also approve it, the connection will be created in the pending state.
You can use either the Azure portal or the Azure CLI to create private endpoints.
From the Azure portal, navigate to Private Link Center > Private Endpoints and select +Create.
On the Basics page, provide the following information for your private endpoint:
- Subscription: The Azure subscription in which you want to create the private endpoint.
- Resource group: An existing or new resource group for the private endpoint.
- Name: A name for the endpoint. This value is used to auto-generate the Network interface name.
- Region: An Azure region for the endpoint. Your private endpoint must be in the same region as your virtual network, but can in a different region from the Device Update account.
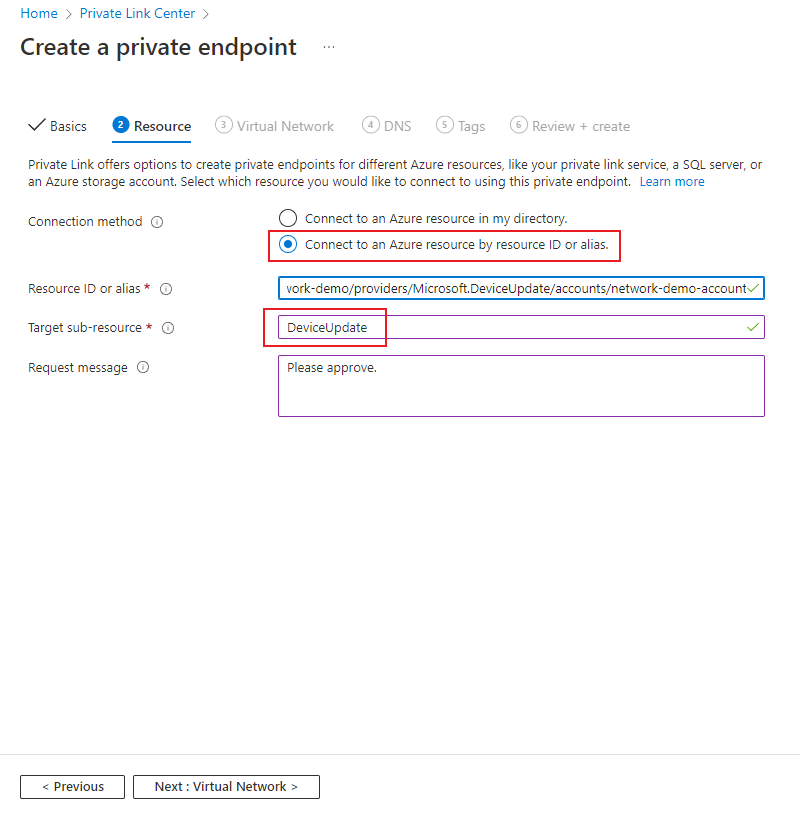
Fill all the required fields on the Resource tab
- Connection method: Select Connect to an Azure resource by resource ID or alias.
- Resource ID or alias: Enter the Resource ID of the Device Update account. You can retrieve the resource ID of a Device Update account from the Azure portal by selecting JSON View on the Overview page. Or, you can retrieve it by using the az iot du account show command and querying for the ID value:
az iot du account show -n <account_name> --query id. - Target sub-resource: Value must be DeviceUpdate
On the Virtual Network page, select the subnet and virtual network where you want to deploy the private endpoint.
- Virtual network: Only virtual networks in the currently selected subscription and location are listed in the drop-down list.
- Subnet: Select a subnet in the virtual network you selected.
On the DNS page, use the pre-populated values unless you're using your own custom DNS.
On the Tags page, create any tags (names and values) that you want to associate with the private endpoint resource.
On the Review + create page, review all the settings and select Create to create the private endpoint.
Manage private link connections
When you create a private endpoint awaiting the manual approval, the connection must be approved before it can be used. If the resource for which you're creating a private endpoint is in your directory, you can approve the connection request provided you have sufficient permissions. If you're connecting to an Azure resource in another directory, you must wait for the owner of that resource to approve your connection request.
There are four provisioning states:
| Service action | Service consumer private endpoint state | Description |
|---|---|---|
| None | Pending | Connection is created manually and is pending approval from the private Link resource owner. |
| Approve | Approved | Connection was automatically or manually approved and is ready to be used. |
| Reject | Rejected | Connection was rejected by the private link resource owner. |
| Remove | Disconnected | Connection was removed by the private link resource owner, the private endpoint becomes informative and should be deleted for cleanup. |
Review a pending connection from the Device Update account
From the Azure portal, navigate to the Device Update account that you want to manage.
Select the Networking tab.
If there are any connections that are pending, you'll see a connection listed with Pending in the provisioning state.
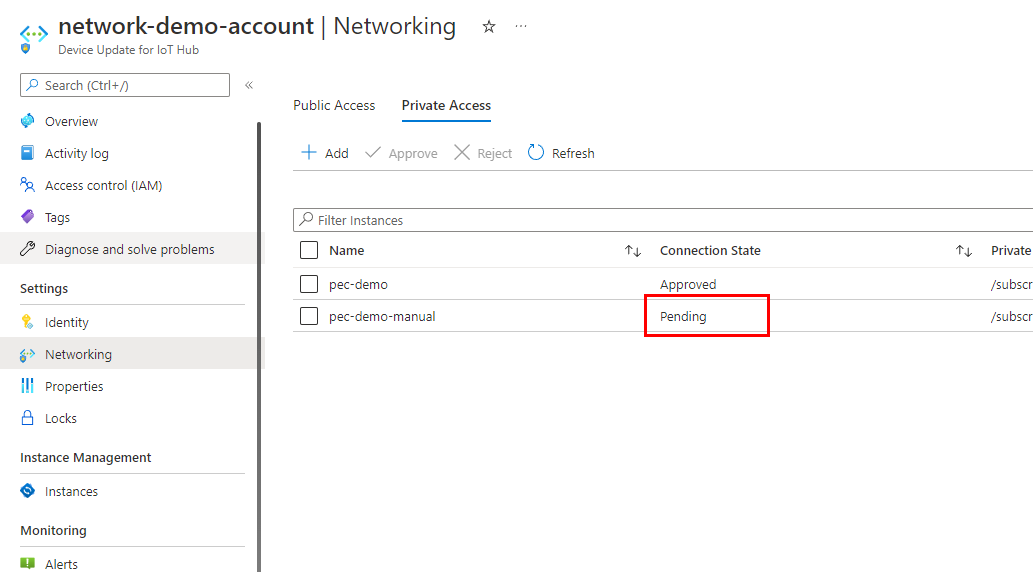
Use the checkbox to select the pending connection, then select either Approve or Reject.
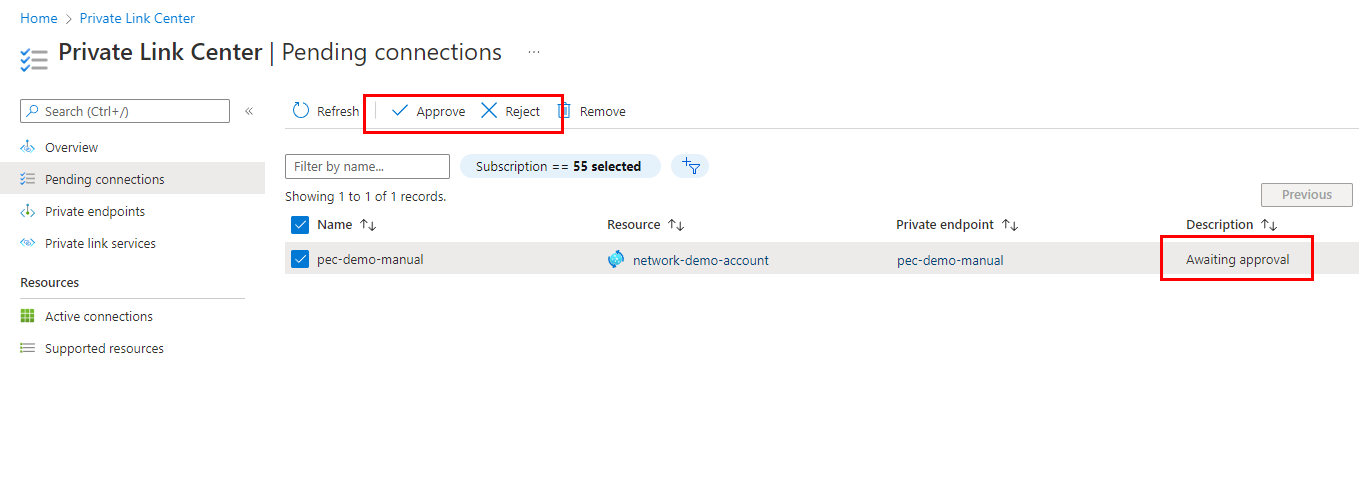
Review a pending connection from the Private Link Center
From the Azure portal, navigate to Private Link Center > Pending connections.
Use the checkbox to select the pending connection, then select either Approve or Reject.
Next steps
Feedback
Coming soon: Throughout 2024 we will be phasing out GitHub Issues as the feedback mechanism for content and replacing it with a new feedback system. For more information see: https://aka.ms/ContentUserFeedback.
Submit and view feedback for