Note
Access to this page requires authorization. You can try signing in or changing directories.
Access to this page requires authorization. You can try changing directories.
Visual Studio Code (VS Code) lets you add extensions, such as languages, debuggers, and tools, to your VS Code installation to support your development workflow. The Azure IoT Hub extension for Visual Studio Code lets you add Azure IoT Hub support to your VS Code installation, so you can manage and interact with your IoT hubs, devices, and modules during development. The Azure IoT Hub extension is available from the Visual Studio Code Marketplace.
Note
Some of the features mentioned in this article, like cloud-to-device messaging, device twins, and device management, are only available in the standard tier of IoT Hub. For more information about the basic and standard/free IoT Hub tiers, see Choose the right IoT Hub tier and size for your solution.
Install the extension
You can find and install the extension from either within Visual Studio Code or the Visual Studio Code Marketplace.
Install from Visual Studio Code
To find and install the extension from within Visual Studio Code, perform the following steps.
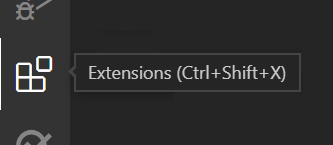
In VS Code, select the Extensions view by either selecting the Extensions view icon from the view bar or selecting Ctrl+Shift+X.
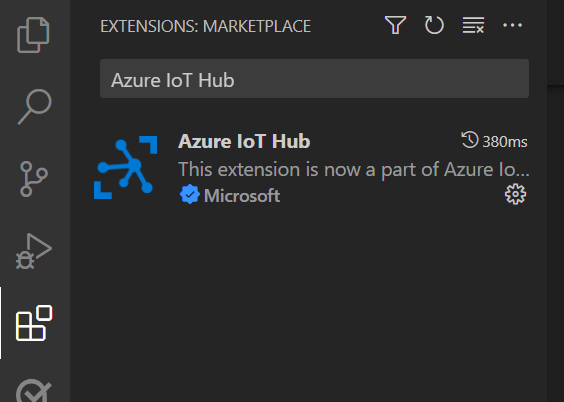
Enter Azure IoT Hub in the search box to filter the Marketplace offerings. You should see the Azure IoT Hub extension in the list. Select the extension from the list to display the extension details page.
Confirm that the unique identifier for the selected extension, displayed in the More Info section of the extension details page, is set to
vsciot-vscode.azure-iot-toolkit.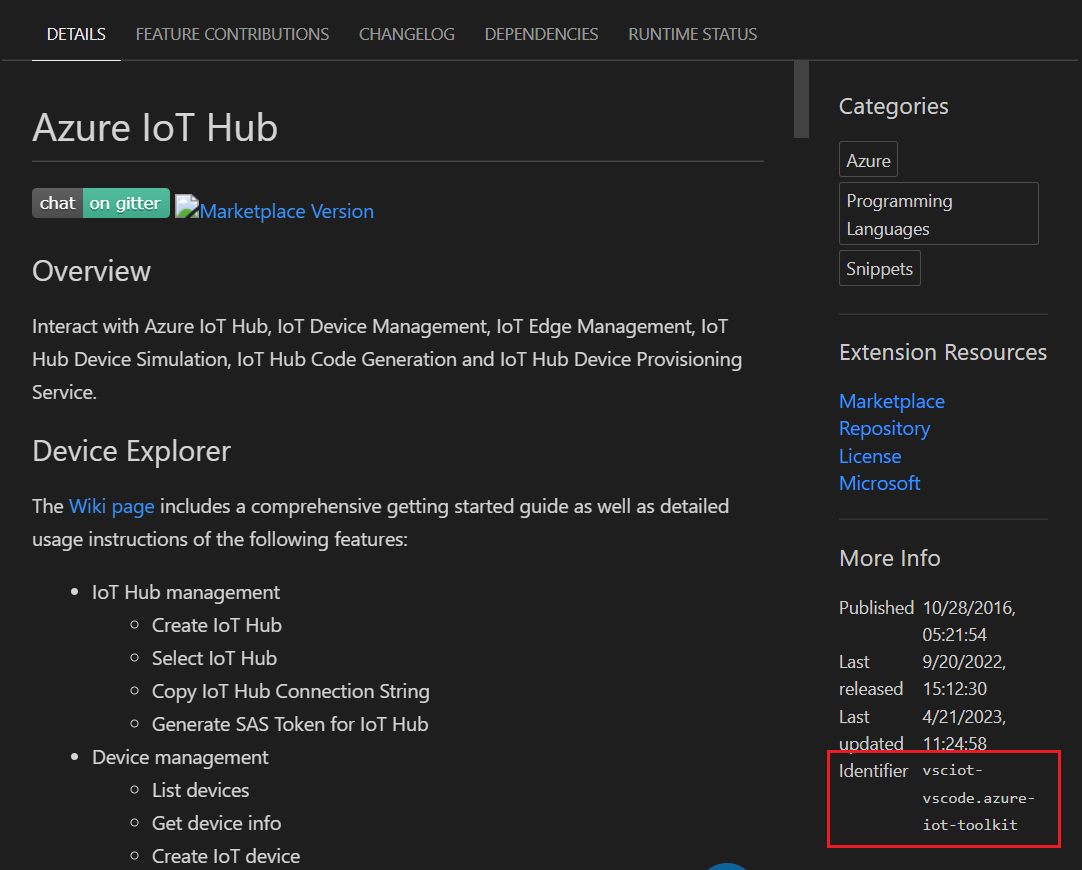
Select the Install button for the selected extension, either from the list or the extension details page, to install the extension.
Install from the Visual Studio Code Marketplace
To find and install the extension from the VS Code Marketplace, perform the following steps.
In your browser, navigate to the Azure IoT Hub extension page in the VS Code Marketplace.
Confirm that the unique identifier for the selected extension, displayed in the More Info section of the Azure IoT Hub extension page, is set to
vsciot-vscode.azure-iot-toolkit.Select the Install button to start Visual Studio Code, if it isn't already running, and display the extension details page for the extension in VS Code.
In VS Code, select the Install button from the extension details page to install the extension.
Installing the Azure IoT Hub extension for Visual Studio Code also installs the Azure Account extension for Visual Studio Code, which provides a single Azure sign in and subscription filtering experience for all other Azure extensions. The Azure Account extension also makes the Azure Cloud Shell service available in VS Code's integrated terminal.
Note
The Azure IoT Hub extension depends on the Azure Account extension for connectivity. You cannot uninstall the Azure Account extension without uninstalling the Azure IoT Hub extension.
Sign in to your Azure account
Before the extension can interact with Azure IoT Hub, you must sign in to your Azure account from Visual Studio Code. You can use the Azure Account extension to:
- Create an Azure account
- Sign in and out of your Azure account
- Filter the Azure subscriptions available to the Azure IoT Hub extension from your Azure account
- Upload a file to your Azure Cloud Shell storage account
Follow these steps to sign into Azure and select your IoT hub from your Azure subscription:
In the Explorer view of VS Code, expand the Azure IoT Hub section in the side bar.
Select the ellipsis (…) button of the Azure IoT Hub section to display the action menu, and then select Select IoT Hub from the action menu.
If you're not signed into Azure, a pop-up notification is shown in the bottom right corner to let you sign in to Azure. Select Sign In and follow the instructions to sign into Azure.
Select your Azure subscription from the Select Subscription dropdown list.
Select your IoT hub from the Select IoT Hub dropdown list.
The devices for your IoT hub are retrieved from IoT Hub and shown under the Devices node in the Azure IoT Hub section of the side bar.
Note
You can also use a connection string to access your IoT hub, by selecting Set IoT Hub Connection String from the action menu and entering the iothubowner policy connection string for your IoT hub in the IoT Hub Connection String input box.
Once signed in, you can interact with your hubs, devices, and modules from either the Command Palette or the action menu in the Explorer view of VS Code. For more information about interacting with the extension, including frequently asked questions and interaction examples, see the wiki for the Azure IoT Hub extension.
Manage your IoT hubs
You can perform the following IoT hub management tasks from the extension:
- Create a new IoT hub and select it as the current IoT hub for your extension
- Select an existing IoT hub as the current IoT hub for your extension
- List existing built-in and custom endpoints for the current IoT hub by selecting the Refresh button for the Azure IoT Hub section in the Explorer view
- Copy the connection string for the current IoT hub to your clipboard
- Generate an SAS token for the current IoT hub and copy it to your clipboard
Manage your devices
You can perform the following device management tasks for the current IoT hub from the extension:
- Create a new IoT Hub device
- Create a new IoT Edge device
- List existing devices either by selecting the Refresh button for the current IoT hub in the Explorer view or by specifying the Azure IoT Hub: List Devices command in the Command Palette
- Get information about the selected device as a JSON document, shown in the Output panel of VS Code
- Edit the device twin for the selected device, as a JSON document in the editor of VS Code
- Copy the connection string for the selected device to your clipboard
- Generate an SAS token for the selected device and copy it to your clipboard
- Invoke a direct method for the selected device and display the results in the Output panel of VS Code
- Delete the selected device from the current IoT hub
Tip
You can enable a lock on your IoT resources to prevent them being accidentally or maliciously deleted. For more information about resource locks in Azure, see Lock your resources to protect your infrastructure.
Manage your modules
You can perform the following module management tasks for the selected device in the current IoT hub:
- Create a new module
- List existing modules by selecting the Refresh button for the current device in the Explorer view of VS Code
- Get information about the selected module as a JSON document, shown in the Output panel of VS Code
- Edit the module twin for the selected module, as a JSON document in the editor of VS Code
- Copy the connection string for the selected module to your clipboard
- Invoke a direct method for the selected module and display the results in the Output panel of VS Code
- Delete the selected module from the current device
Note
Azure IoT Edge system modules are read-only and cannot be modified. Changes can be submitted by deploying a configuration for the related IoT Edge device.
Interact with IoT Hub
You can perform the following interactive tasks for the resources in your current IoT hub:
- Generate code in a selected programming language to perform a common task, such as sending a device-to-cloud message, for your selected resource
- Send a device-to-cloud (D2C) message to IoT Hub for your selected device
- Start and stop monitoring the built-in event endpoint for the current IoT hub and display the results in the Output panel of VS Code
- Send a cloud-to-device (C2D) message to the selected device for your current IoT hub and display the results in the Output panel of VS Code
- Start and stop monitoring C2D messages to the selected device for your current IoT hub and display the results in the Output panel of VS Code
- Update distributed tracing settings for devices
- Start and stop monitoring custom Event Hubs endpoints for the current IoT hub and display the results in the Output panel of VS Code
Interact with IoT Edge
You can perform the following interactive tasks for the Azure IoT Edge devices in your current IoT hub:
- Create a deployment for your selected IoT Edge device and display the results in the Output panel of VS Code
- If you have an appropriate deployment manifest, create a deployment at scale for multiple IoT Edge devices and display the results in the Output panel of VS Code