Note
Access to this page requires authorization. You can try signing in or changing directories.
Access to this page requires authorization. You can try changing directories.
Use the Azure portal, Azure Resource Manager templates, and Azure IoT Hub service SDKs to migrate an IoT hub to a new region, a new tier, or a new configuration.
The steps in this article are useful if you want to:
- Upgrade from the free tier to a basic or standard tier IoT hub.
- Move an IoT hub to a new region.
- Export IoT hub state information to have as a backup.
- Increase the number of partitions for an IoT hub.
- Set up a hub for a development, rather than production, environment.
- Enable a custom implementation of multi-hub high availability. For more information, see Reliability in Azure IoT Hub.
To migrate a hub, you need a subscription with administrative access to the original hub. You can put the new hub in a new resource group and region, in the same subscription as the original hub, or even in a new subscription. You just can't use the same name because the hub name has to be globally unique.
Compare automatic and manual migration steps
The outcome of this article is similar to How to automatically migrate an IoT hub using the Azure CLI, but with a different process. Before you begin, decide which process is right for your scenario.
The manual process (this article):
- Migrates your device registry and your routing and endpoint information. You have to manually recreate other configuration details in the new IoT hub.
- Is faster for migrating large numbers of devices (for example, more than 100,000).
- Uses an Azure Storage account to transfer the device registry.
- Scrubs connection strings for routing and file upload endpoints that use key-based authentication from the ARM template output, and you need to manually add them back in.
The Azure CLI process:
- Migrates your device registry, your routing and endpoint information, and other configuration details like IoT Edge deployments or automatic device management configurations.
- Is easier for migrating small numbers of devices (for example, up to 10,000).
- Doesn't require an Azure Storage account.
- Collects connection strings for routing and file upload endpoints that use key-based authentication and includes them in the ARM template output.
Things to consider
There are several things to consider before migrating an IoT hub.
Make sure that all of the features available in the original location are also available in the new location. Some services are in preview, and not all features are available everywhere.
Don't remove the original resources before creating and verifying the migrated version. Once you remove a hub, it's gone forever, and there's no way to recover it to check the settings or data to make sure the hub is replicated correctly.
Data for the original IoT hub isn't migrated. This data includes device messages, cloud-to-device (C2D) commands, and job-related information such as schedules and history. Metrics and logging results are also not migrated.
You need to schedule downtime for the migration. Cloning the devices to the new hub takes time. If you use the Import/Export method, benchmark testing has revealed that it could take around two hours to move 500,000 devices, and four hours to move a million devices.
You can copy devices to the new hub without shutting down or changing the devices.
If the devices were originally provisioned using DPS, update their enrollments to point to the new IoT hub. Then, reprovision the devices to update the connection information stored in each device.
Otherwise, you have to use the import/export method to move the devices, and then the devices have to be modified to use the new hub. For example, you can set up your device to consume the IoT Hub host name from the twin desired properties. The device takes that IoT Hub host name, disconnect the device from the old hub, and reconnect it to the new one.
You need to update any certificates so you can use them with the new resources. Also, you probably have the hub defined in a DNS table somewhere and need to update that DNS information.
Endpoints that use system-assigned managed identities for authentication can't be migrated. After migration, you need to give the new IoT hub's system-assigned managed identity access to the endpoint resources and then recreate the endpoints.
Methodology
This is the general method we recommend for migrating an IoT hub.
Export the hub and its settings to a Resource Manager template.
Make the necessary changes to the template, such as updating all occurrences of the name and the location for the migrated hub. For any resources in the template used for message routing endpoints, update the key in the template for that resource.
Import the template into a new resource group in the new location. This step creates the new IoT hub.
Debug as needed.
Add anything that wasn't exported to the template.
For example, consumer groups aren't exported to the template. You need to add the consumer groups to the template manually or use the Azure portal after the hub is created.
Copy the devices from the original hub to the new hub. This process is covered in the section Manage the devices registered to the IoT hub.
How to handle message routing
If your hub uses message routing, exporting the template for the hub includes the routing configuration, but it doesn't include the resources themselves. If you're migrating the IoT hub to a new region, you must choose whether to move the routing resources to the new location as well or to leave them in place and continue to use them as-is. There might be a small performance hit from routing messages to endpoint resources in a different region.
If the hub uses message routing, you have two choices.
Move the resources used for the routing endpoints to the new location.
Create the new resources yourself either manually in the Azure portal or by using Resource Manager templates.
Rename all of the resources when you create them in the new location, as they require globally unique names.
Update the resource names and the resource keys in the new hub's template before creating the new hub. The resources should be present when the new hub is created.
Don't move the resources used for the routing endpoints. Use them in-place.
In the step where you edit the template, you need to retrieve the keys for each routing resource and put them in the template before you create the new hub.
The hub still references the original routing resources and routes messages to them as configured. You'll have a small performance hit because the hub and the routing endpoint resources aren't in the same location.
Prepare to migrate the hub to another region
This section provides specific instructions for migrating the hub.
Export the original hub to a resource template
Sign in to the Azure portal.
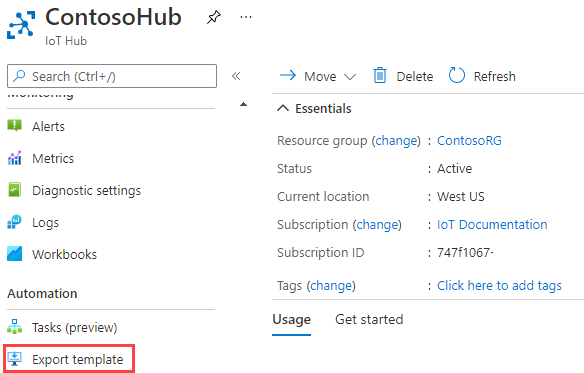
Navigate to the IoT hub that you want to move.
Select Export template from the list of properties and settings for the hub.
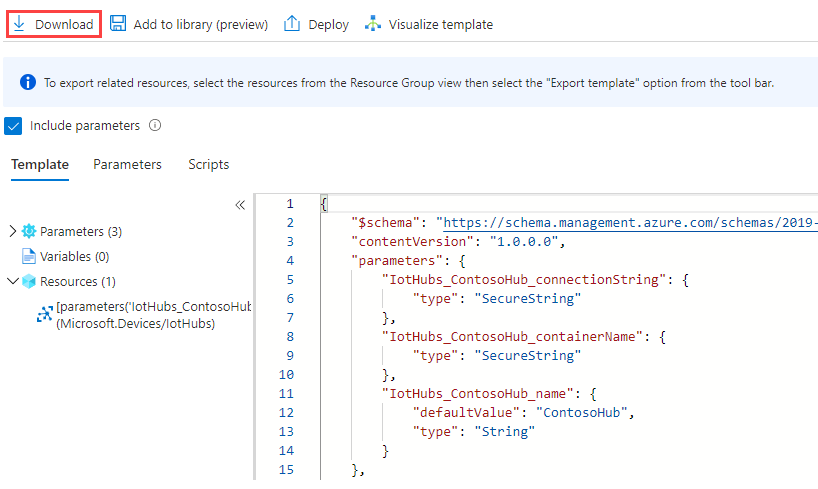
Select Download to download the template. Save the file somewhere you can find it again.
View the template
Go to the downloaded template, which is contained in a zip file. Extract the zip file and find the file called template.json.
The following example is for a generic hub with no routing configuration. It's an S1 tier hub (with 1 unit) called ContosoHub in region westus:
{
    "$schema": "https://schema.management.azure.com/schemas/2019-04-01/deploymentTemplate.json#",
    "contentVersion": "1.0.0.0",
    "parameters": {
        "IotHubs_ContosoHub_connectionString": {
            "type": "SecureString"
        },
        "IotHubs_ContosoHub_containerName": {
            "type": "SecureString"
        },
        "IotHubs_ContosoHub_name": {
            "defaultValue": "ContosoHub",
            "type": "String"
        }
    },
    "variables": {},
    "resources": [
        {
            "type": "Microsoft.Devices/IotHubs",
            "apiVersion": "2021-07-01",
            "name": "[parameters('IotHubs_ContosoHub_name')]",
            "location": "westus",
            "sku": {
                "name": "S1",
                "tier": "Standard",
                "capacity": 1
            },
            "identity": {
                "type": "None"
            },
            "properties": {
                "ipFilterRules": [],
                "eventHubEndpoints": {
                    "events": {
                        "retentionTimeInDays": 1,
                        "partitionCount": 4
                    }
                },
                "routing": {
                    "endpoints": {
                        "serviceBusQueues": [],
                        "serviceBusTopics": [],
                        "eventHubs": [],
                        "storageContainers": []
                    },
                    "routes": [],
                    "fallbackRoute": {
                        "name": "$fallback",
                        "source": "DeviceMessages",
                        "condition": "true",
                        "endpointNames": [
                            "events"
                        ],
                        "isEnabled": true
                    }
                },
                "storageEndpoints": {
                    "$default": {
                        "sasTtlAsIso8601": "PT1H",
                        "connectionString": "[parameters('IotHubs_ContosoHub_connectionString')]",
                        "containerName": "[parameters('IotHubs_ContosoHub_containerName')]"
                    }
                },
                "messagingEndpoints": {
                    "fileNotifications": {
                        "lockDurationAsIso8601": "PT1M",
                        "ttlAsIso8601": "PT1H",
                        "maxDeliveryCount": 10
                    }
                },
                "enableFileUploadNotifications": false,
                "cloudToDevice": {
                    "maxDeliveryCount": 10,
                    "defaultTtlAsIso8601": "PT1H",
                    "feedback": {
                        "lockDurationAsIso8601": "PT1M",
                        "ttlAsIso8601": "PT1H",
                        "maxDeliveryCount": 10
                    }
                },
                "features": "None",
                "disableLocalAuth": false,
                "allowedFqdnList": []
            }
        }
    ]
}
Edit the template
You have to make some changes before you can use the template to create the new hub in the new region. Use Visual Studio Code or a text editor to edit the template.
Edit the hub name and location
In the parameters section, remove the ...connectionString and ...containerName parameters.
"IotHubs_ContosoHub_connectionString": {
    "type": "SecureString"
},
"IotHubs_ContosoHub_containerName": {
    "type": "SecureString"
},
In the properties section, remove the storageEndpoints property.
"storageEndpoints": {
    "$default": {
        "sasTtlAsIso8601": "PT1H",
        "connectionString": "[parameters('IotHubs_ContosoHub_connectionString')]",
        "containerName": "[parameters('IotHubs_ContosoHub_containerName')]"
    }
},
If you're moving the hub to a new region, change the location property under resources.
"location": "westus",
Update the routing endpoint resources
When you export the Resource Manager template for a hub that has routing configured, you see that the keys for those resources aren't provided in the exported template. Their placement is denoted by asterisks. You must fill them in by going to those resources in the portal and retrieving the keys before you import the new hub's template and create the hub.
If you moved the routing resources as well, update the name, ID, and resource group of each endpoint as well.
- For endpoints with key-based authentication, retrieve the keys required for any of the routing resources and put them in the template. You can retrieve the key from each resource in the Azure portal.
- For endpoints with identity-based authentication:
- Those that use a user-assigned managed identity have the userAssignedIdentity value populated with the identity ID information as a parameter.
- Those that use a system-assigned managed identity can't be migrated. Delete these endpoints and their related routes from the template and make a note to recreate them in the new IoT hub.
Create the new hub by loading the template
Create the new hub using the edited template. If you have routing resources that are going to move, the resources should be set up in the new location and the references in the template updated to match. If you aren't moving the routing resources, they should be in the template with the updated keys.
Sign in to the Azure portal.
Select Create a resource.
In the search box, search for and select template deployment (deploy using custom templates). On the screen for the template deployment, select Create.
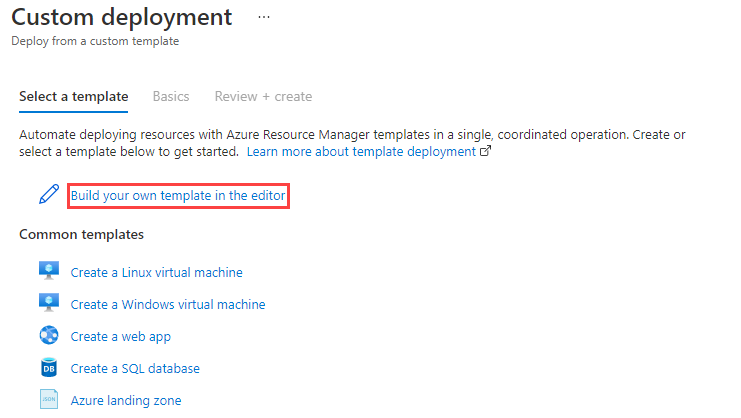
On the Custom deployment page, select Build your own template in the editor, which enables you to upload your template from a file.
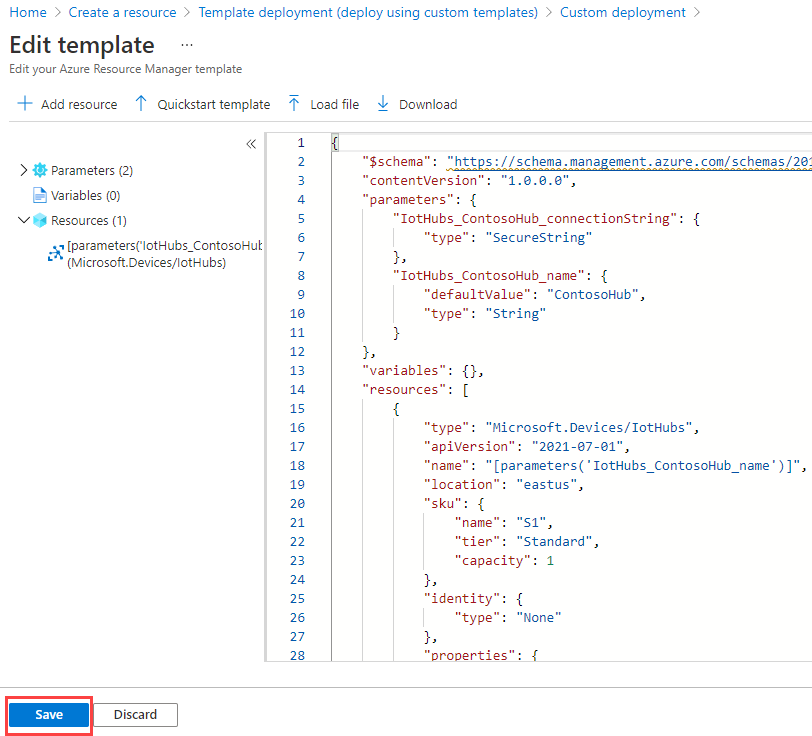
Select Load file.

Browse for the new template you edited and select it, then select Open. It loads your template in the edit window. Select Save.
Fill in the following fields on the custom deployment page.
Subscription: Select the subscription to use.
Resource group: Select an existing resource group or create a new one.
Region: If you selected an existing resource group, the region is filled in for you to match the location of the resource group. If you created a new resource group, this is its location.
Hub name: Give the new hub a name.
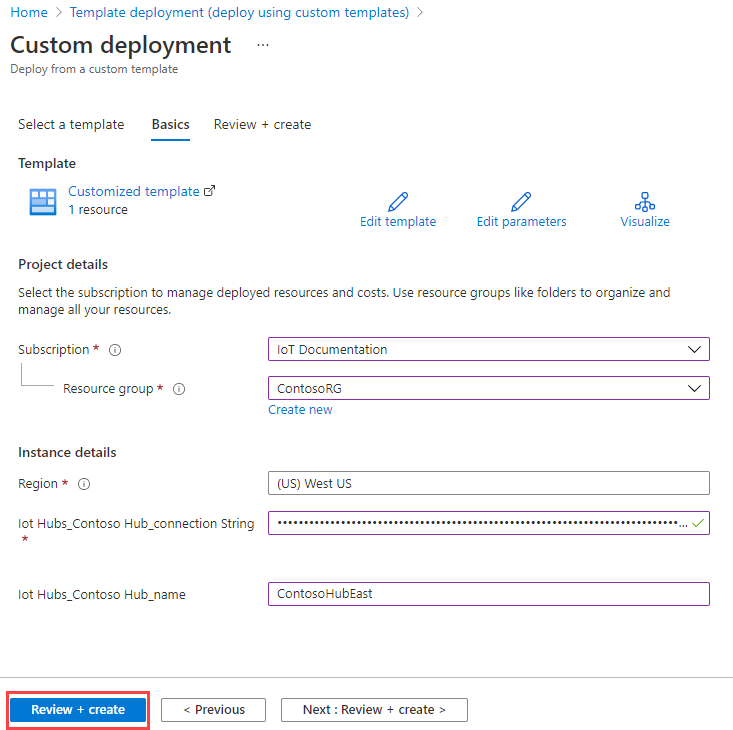
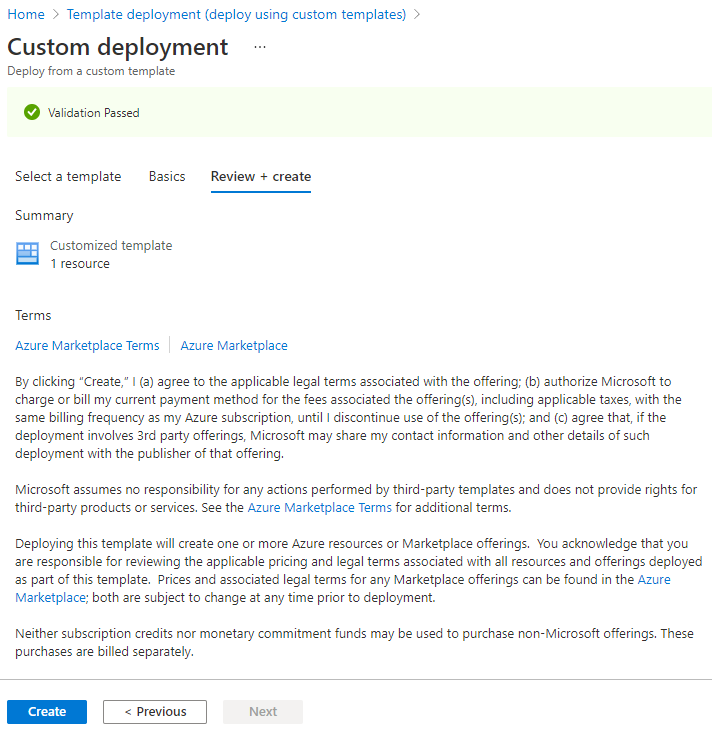
Select the Review + create button.
Select the Create button. The portal validates your template and deploys your new hub. If you have routing configuration data, it's included in the new hub, but points at the resources in the prior location.
Manage the devices registered to the IoT hub
Now that you have your new hub up and running, you need to copy all of the devices from the original hub to the new one.
There are multiple ways to copy the devices. You either originally used Device Provisioning Service (DPS) to provision the devices, or you didn't. If you did, this process isn't difficult. If you didn't, this process can be complicated.
If you didn't use DPS to provision your devices, you can skip the next section and start with Use Import/Export to move the devices to the new hub.
Use DPS to reprovision the devices in the new hub
To use DPS to move the devices to the new location, see How to reprovision devices. When you're finished, you can view the devices in the Azure portal and verify they are in the new location.
Go to the new hub using the Azure portal. Select your hub, then select IoT Devices. You see the devices that were reprovisioned to the new hub. You can also view the properties for the new hub.
If you have implemented routing, test and make sure your messages are routed to the resources correctly.
Roll back the changes after using DPS
If you want to roll back the changes, reprovision the devices from the new hub to the old one.
You're now finished migrating your hub and its devices. You can skip to Clean-up.
Use import-export to move the devices to the new hub
The application targets .NET Core, so you can run it on either Windows or Linux. You can download the sample, retrieve your connection strings, set the flags for which bits you want to run, and run it. You can do this without ever opening the code.
Download the sample
Use the IoT C# SDK's ImportExportDevicesSample. Clone or download the repo to get the sample code.
Options
To run the application, specify three connection strings and five options. You pass this data in as command-line arguments or use environment variables, or use a combination of the two. We're going to pass the options in as command line arguments, and the connection strings as environment variables. The reason for this is because the connection strings are long and ungainly, and unlikely to change, but you might want to change the options and run the application more than once. To change the value of an environment variable, you have to close the command window and Visual Studio or Visual Studio Code, whichever you're using.
Here are the five options you specify when you run the application:
addDevices (argument 1) - set this option to
Trueif you want to add virtual devices that are generated for you. These devices are added to the source hub. Also, set numToAdd (argument 2) to specify how many devices you want to add. The maximum number of devices you can register to a hub is one million. The purpose of this option is for testing. You can generate a specific number of devices, and then copy them to another hub.copyDevices (argument 3) - set this option to
Trueto copy the devices from one hub to another.deleteSourceDevices (argument 4) - set this option to
Trueto delete all of the devices registered to the source hub. We recommend waiting until you're certain that all of the devices were transferred before you run this. Once you delete the devices, you can't get them back.deleteDestDevices (argument 5) - set this option to
Trueto delete all of the devices registered to the destination hub. You might want to do this if you want to copy the devices more than once.
The basic command is dotnet run, which tells .NET to build the local csproj file and then run it. You add your command-line arguments to the end before you run it.
Your command-line looks like these examples:
    // Format: dotnet run add-devices num-to-add copy-devices delete-source-devices delete-destination-devices

    // Add 1000 devices, don't copy them to the other hub, or delete them.
    // The first argument is true, numToAdd is 50, and the other arguments are false.
    dotnet run true 1000 false false false

    // Copy the devices you just added to the other hub; don't delete anything.
    // The first argument is false, numToAdd is 0, copy-devices is true, and the delete arguments are both false
    dotnet run false 0 true false false
Use environment variables for the connection strings
To run the sample, you need the connection strings to the old and new IoT hubs, and to a storage account you can use for temporary work files. We'll store the values for these connection strings in environment variables.
To get the connection string values, sign in to the Azure portal.
Put the connection strings somewhere you can retrieve them, such as NotePad. If you copy the following, you can paste the connection strings in directly where they go. Don't add spaces around the equal sign, or it changes the variable name. Also, you don't need double-quotes around the connection strings. If you put quotes around the storage account connection string, the script fails.
Set the environment variables in Windows:
SET IOTHUB_CONN_STRING=<put connection string to original IoT hub here>
SET DEST_IOTHUB_CONN_STRING=<put connection string to destination IoT hub here>
SET STORAGE_ACCT_CONN_STRING=<put connection string to the storage account here>
Set the environment variables in Linux:
export IOTHUB_CONN_STRING="<put connection string to original IoT hub here>"
export DEST_IOTHUB_CONN_STRING="<put connection string to destination IoT hub here>"
export STORAGE_ACCT_CONN_STRING="<put connection string to the storage account here>"
For the IoT hub connection strings, go to each hub in the portal. You can search in Resources for the hub. If you know the Resource Group, you can go to Resource groups, select your resource group, and then select the hub from the list of assets in that resource group.
Select Shared access policies from the Settings for the hub, then select iothubowner and copy one of the connection strings. Do the same for the destination hub. Add them to the appropriate SET commands.
For the storage account connection string, find the storage account in Resources or under its Resource group and open it.
Under the Settings section, select Access keys and copy one of the connection strings. Put the connection string in your text file for the appropriate SET command.
Now you have the environment variables in a file with the SET commands, and you know what your command-line arguments are. Let's run the sample.
Run the sample application and using command-line arguments
Open a command prompt window. Select Windows and type in
command promptto get the command prompt window.Copy the commands that set the environment variables, one at a time, and paste them into the command prompt window and select Enter. When you're finished, type
SETin the command prompt window to see your environment variables and their values. Once you've copied these into the command prompt window, you don't have to copy them again, unless you open a new command prompt window.In the command prompt window, change directories until you are in ./ImportExportDevicesSample (where the ImportExportDevicesSample.csproj file exists). Then type the following, and include your command-line arguments.
// Format: dotnet run add-devices num-to-add copy-devices delete-source-devices delete-destination-devices
dotnet run arg1 arg2 arg3 arg4 arg5
The dotnet command builds and runs the application. Because you're passing in the options when you run the application, you can change the values of them each time you run the application. For example, you may want to run it once and create new devices, then run it again and copy those devices to a new hub, and so on. You can also perform all the steps in the same run, although we recommend not deleting any devices until you're certain you're finished with the migration. Here's an example that creates 1,000 devices and then copies them to the other hub.
// Format: dotnet run add-devices num-to-add copy-devices delete-source-devices delete-destination-devices

// Add 1000 devices, don't copy them to the other hub or delete them.
dotnet run true 1000 false false false

// Do not add any devices. Copy the ones you just created to the other hub; don't delete anything.
dotnet run false 0 true false false
After you verify that the devices were copied successfully, you can remove the devices from the source hub like this:
// Format: dotnet run add-devices num-to-add copy-devices delete-source-devices delete-destination-devices
// Delete the devices from the source hub.
dotnet run false 0 false true false
Run the sample application using Visual Studio
If you want to run the application in Visual Studio, change your current directory to the folder where the azureiot.sln file resides. Then run this command in the command prompt window to open the solution in Visual Studio. You must do this in the same command window where you set the environment variables, so those variables are known.
azureiot.slnRight-click on the project ImportExportDevicesSample and select Set as startup project.
Set the variables at the top of Program.cs in the ImportExportDevicesSample folder for the five options.
// Add randomly created devices to the source hub.
private static bool addDevices = true;
//If you ask to add devices, this will be the number added.
private static int numToAdd = 0;
// Copy the devices from the source hub to the destination hub.
private static bool copyDevices = false;
// Delete all of the devices from the source hub. (It uses the IoTHubConnectionString).
private static bool deleteSourceDevices = false;
// Delete all of the devices from the destination hub. (Uses the DestIotHubConnectionString).
private static bool deleteDestDevices = false;
Select F5 to run the application. After it finishes running, you can view the results.
View the results
You can view the devices in the Azure portal and verify they are in the new location.
Go to the new hub using the Azure portal. Select your hub, then select IoT Devices. You see the devices you copied from the old hub to the new hub. You can also view the properties for the new hub.
Check for import/export errors by going to the Azure storage account in the Azure portal and looking in the
devicefilescontainer for theImportErrors.log. If this file is empty (the size is 0), there were no errors. If you try to import the same device more than once, it rejects the device the second time and adds an error message to the log file.
Commit the changes
At this point, you have copied your hub to the new location and migrated the devices to the new hub. Now you need to make changes so the devices work with the new hub.
To commit the changes, here are the steps you need to perform:
Update each device to change the IoT Hub host name to point the IoT Hub host name to the new hub. You should do this using the same method you used when you first provisioned the device.
Change any applications you have that refer to the old hub to point to the new hub.
After you're finished, the new hub should be up and running. The old hub should have no active devices and be in a disconnected state.
Roll back the changes
If you decide to roll back the changes, here are the steps to perform:
Update each device to change the IoT Hub Hostname to point the IoT Hub Hostname for the old hub. You should do this using the same method you used when you first provisioned the device.
Change any applications you have that refer to the new hub to point to the old hub. For example, if you're using Azure Analytics, you might need to reconfigure your Azure Stream Analytics input.
Delete the new hub.
If you have routing resources, the configuration on the old hub should still point to the correct routing configuration, and should work with those resources after the hub is restarted.
Check the results
To check the results, change your IoT solution to point to your hub in the new location and run it. In other words, perform the same actions with the new hub that you performed with the previous hub and make sure they work correctly.
If you have implemented routing, test and make sure your messages are routed to the resources correctly.
Clean up
Don't clean up until you're certain the new hub is up and running and the devices are working correctly. Also be sure to test the routing if you're using that feature. When you're ready, clean up the old resources by performing these steps:
If you haven't already, delete the old hub. This removes all of the active devices from the hub.
If you have routing resources that you moved to the new location, you can delete the old routing resources.
Next steps
You have migrated an IoT hub into a new hub in a new region, complete with the devices. For more information about performing bulk operations against the identity registry in an IoT hub, see Import and export IoT Hub device identities in bulk.