Note
Access to this page requires authorization. You can try signing in or changing directories.
Access to this page requires authorization. You can try changing directories.
Azure IoT Operations uses TLS to encrypt communication between all components. This article describes how to manage certificates for internal and external communications, and how to bring your own certificate authority (CA) issuer for internal communications in a production deployment.
Prerequisites
To manage certificates for external communications, you need an Azure IoT Operations instance deployed with secure settings. If you deployed Azure IoT Operations with test settings, you need to first enable secure settings.
Manage certificates for internal communications
All communications within Azure IoT Operations are encrypted using TLS. To help you get started, Azure IoT Operations is deployed with a default root CA and issuer for TLS server certificates. You can use the default setup for development and testing purposes. For a production deployment, we recommend using your own CA issuer and an enterprise PKI solution.
Default self-signed issuer and root CA certificate for TLS server certificates
To help you get started, Azure IoT Operations is deployed with a default self-signed issuer and root CA certificate for TLS server certificates. You can use this issuer for development and testing. Azure IoT Operations uses cert-manager to manage TLS certificates, and trust-manager to distribute trust bundles to components.
The CA certificate is self-signed and not trusted by any clients outside of Azure IoT Operations. The subject of the CA certificate is
CN=Azure IoT Operations Quickstart Root CA - Not for Production. The CA certificate is automatically rotated by cert-manager.The root CA certificate is stored in a Kubernetes secret called
azure-iot-operations-aio-ca-certificateunder thecert-managernamespace.The public portion of the root CA certificate is stored in a ConfigMap called
azure-iot-operations-aio-ca-trust-bundleunder theazure-iot-operationsnamespace. You can retrieve the CA certificate from the ConfigMap and inspect it with kubectl and openssl. The ConfigMap is kept updated by trust-manager when the CA certificate is rotated by cert-manager.kubectl get configmap azure-iot-operations-aio-ca-trust-bundle -n azure-iot-operations -o "jsonpath={.data['ca\.crt']}" | openssl x509 -text -nooutCertificate: Data: Version: 3 (0x2) Serial Number: <SERIAL-NUMBER> Signature Algorithm: sha256WithRSAEncryption Issuer: O=Microsoft, CN=Azure IoT Operations Quickstart Root CA - Not for Production Validity Not Before: Sep 18 20:42:19 2024 GMT Not After : Sep 18 20:42:19 2025 GMT Subject: O=Microsoft, CN=Azure IoT Operations Quickstart Root CA - Not for Production Subject Public Key Info: Public Key Algorithm: rsaEncryption Public-Key: (2048 bit) Modulus: <MODULUS> Exponent: 65537 (0x10001) X509v3 extensions: X509v3 Key Usage: critical Certificate Sign, CRL Sign X509v3 Basic Constraints: critical CA:TRUE X509v3 Subject Key Identifier: <SUBJECT-KEY-IDENTIFIER> Signature Algorithm: sha256WithRSAEncryption [Signature]By default, there's already an issuer configured in the
azure-iot-operations namespacecalledazure-iot-operations-aio-certificate-issuer. It's used as the common issuer for all TLS server certificates for IoT Operations. MQTT broker uses an issuer created from the same CA certificate which is signed by the self-signed issuer to issue TLS server certificates for the default TLS listener on port 18883. You can inspect the issuer with the following command:kubectl get clusterissuer azure-iot-operations-aio-certificate-issuer -o yamlapiVersion: cert-manager.io/v1 kind: ClusterIssuer metadata: creationTimestamp: "2024-09-18T20:42:17Z" generation: 1 name: azure-iot-operations-aio-certificate-issuer resourceVersion: "36665" uid: 592700a6-95e0-4788-99e4-ea93934bd330 spec: ca: secretName: azure-iot-operations-aio-ca-certificate status: conditions: - lastTransitionTime: "2024-09-18T20:42:22Z" message: Signing CA verified observedGeneration: 1 reason: KeyPairVerified status: "True" type: Ready
Bring your own issuer
For production deployments, we recommend that you set up Azure IoT Operations with an enterprise PKI to manage certificates, and that you bring your own CA issuer which works with your enterprise PKI, instead of using the default self-signed issuer to issue TLS certificates for internal communications.
To set up Azure IoT Operations with your own issuer for internal communications, use the following steps before deploying an instance to your cluster:
Follow the steps in Prepare your cluster to set up your cluster.
Install cert-manager. Cert-manager manages TLS certificates.
Install trust-manager. While installing trust manager, set the
trust namespaceto cert-manager. For example:helm upgrade trust-manager jetstack/trust-manager --install --namespace cert-manager --set app.trust.namespace=cert-manager --waitTrust-manager is used to distribute a trust bundle to components.
Create the Azure IoT Operations namespace.
kubectl create namespace azure-iot-operationsDeploy an issuer that works with cert-manager. For a list of all supported issuers, see cert-manager issuers.
The issuer can be of type
ClusterIssuerorIssuer. If usingIssuer, the issuer resource must be created in the Azure IoT Operations namespace.Set up trust bundle in the Azure IoT Operations namespace.
To set up trust bundle, create a ConfigMap in the Azure IoT Operations namespace. Place the public key portion of your CA certificate into the config map with a key name of your choice.
Get the public key portion of your CA certificate. The steps to acquire the public key depend on the issuer you choose.
Create the ConfigMap. For example:
kubectl create configmap -n azure-iot-operations <YOUR_CONFIGMAP_NAME> --from-file=<CA_CERTIFICATE_FILENAME_PEM_OR_DER>
Follow steps in Deploy Azure IoT Operations to deploy, with a few changes.
Add the
--user-trustparameter while preparing cluster. For example:az iot ops init --subscription <SUBSCRIPTION_ID> --cluster <CLUSTER_NAME> -g <RESOURCE_GROUP> --user-trustAdd the
--trust-settingsparameter with the necessary information while deploying Azure IoT Operations. For example:az iot ops create --subscription <SUBSCRIPTION_ID> -g <RESOURCE_GROUP> --cluster <CLUSTER_NAME> --custom-location <CUSTOM_LOCATION> -n <INSTANCE_NAME> --sr-resource-id <SCHEMAREGISTRY_RESOURCE_ID> --trust-settings configMapName=<CONFIGMAP_NAME> configMapKey=<CONFIGMAP_KEY_WITH_PUBLICKEY_VALUE> issuerKind=<CLUSTERISSUER_OR_ISSUER> issuerName=<ISSUER_NAME>
Note
The custom location name has a maximum length of 63 characters.
Manage certificates for external communications
Azure IoT Operations uses Azure Key Vault as the managed vault solution on the cloud, and uses Azure Key Vault Secret Store extension for Kubernetes to sync the secrets down from the cloud and store them on the edge as Kubernetes secrets. You add your certificates to Azure Key Vault as secrets, and the extension synchronizes them to the edge as Kubernetes secrets.
Configure Azure Key Vault permissions
To use the operations experience to create secrets in the key vault, the user requires Key Vault Secrets Officer permissions at the resource level in Azure.
In a test or development environment, use the following steps to assign the Key Vault Secrets Officer role to your user at the resource group level where the Azure IoT Operations instance and Azure Key Vault instance are deployed:
To find the name of the resource group, go to the operations experience web UI, go to the Instances page and find your Azure IoT Operations instance. The resource group name is shown in the Resource group field.
Go to the Azure portal and then go to the resource group where your Azure IoT Operations instance and Azure Key Vault instance are deployed.
Tip
Use the search box at the top of the Azure portal to quickly find the resource group by typing in the name.
Select Access control (IAM) from the left-hand menu. Then select + Add > Add role assignment.
On the Role tab, select Key Vault Secrets Officer from the list of roles, and then select Next.
On the Members tab, select User, group, or service principal, select Select members, select the user you want to assign the Key Vault Secrets Officer role to, and then select Next.
Select Review + assign to complete the role assignment.
In a production environment, follow best practices to secure the Azure Key Vault you use with Azure IoT Operations. For more information, see Best practices for using Azure Key Vault.
Add and use certificates
Connectors use the certificate management experience to configure client application authentication to external servers. To learn more about how connectors use certificates to establish mutual trust with external servers, see the connector-specific certificate management documentation.
When you deploy Azure IoT Operations with secure settings, you can start adding certificates to Azure Key Vault, and sync them to the Kubernetes cluster to be used in the Trust list and Issuer list stores for external connections.
To manage certificates for external communications, follow these steps:
Go to Azure IoT Operations experience, and choose your site and Azure IoT Operations instance.
In the left navigation pane, select Devices.
Click on Manage certificates and secrets.

In the Certificates and Secrets page, click on Add new certificate.
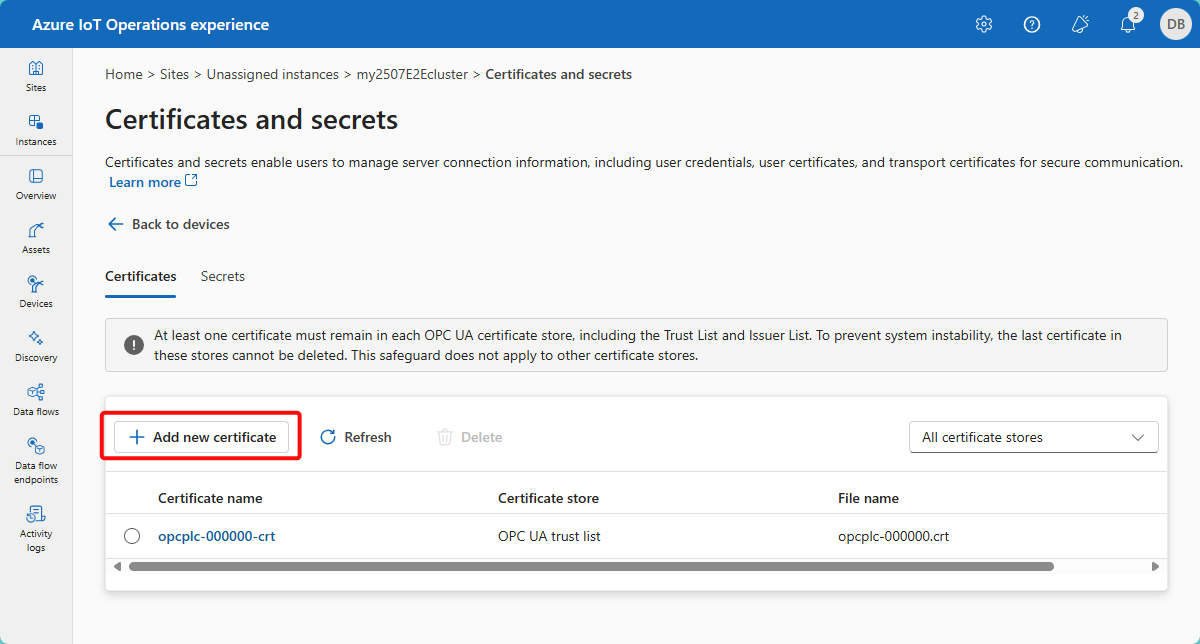
You can add a new certificate in two ways:
Upload Certificate: Uploads a certificate which is then added as a secret to Azure Key Vault and automatically synchronized to the cluster using Secret Store extension.
- View the certificate details once uploaded, to ensure you have the correct certificate before adding to Azure Key Vault and synchronizing to the cluster.
- Use an intuitive name so that you can recognize which secret represents your secret in the future.
- Select the appropriate certificate store for the connector that uses the certificate. For example, OPC UA trust list.

Note
Simply uploading the certificate won't add the secret to Azure Key Vault and synchronize to the cluster, you must select Apply for the changes to be applied.
Add from Azure Key Vault: Add an existing secret from the Azure Key vault to be synchronized to the cluster.

Note
Make sure to select the secret that holds the certificate you would like to synchronize to the cluster. Selecting a secret which isn't the correct certificate causes the connection to fail.
Using the list view you can manage the synchronized certificates. You can view all the synchronized certificates, and which certificate store it's synchronized to:
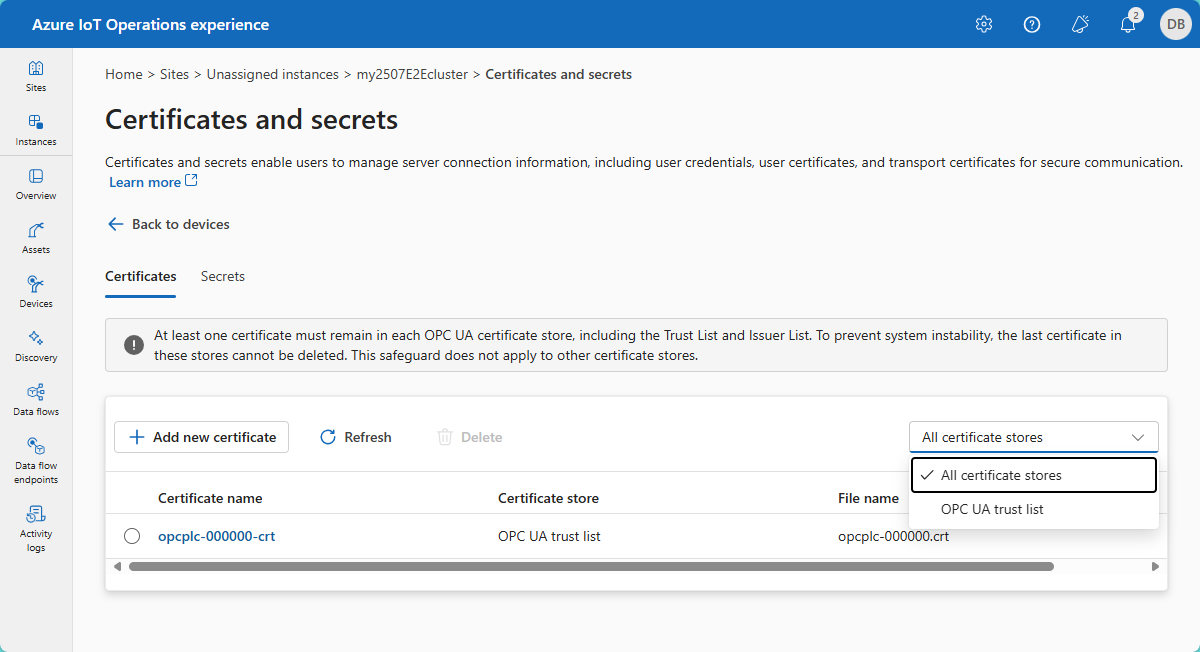


To learn more about how trust certificates are managed for specific connectors, see the connector-specific certificate management documentation.
You can delete synced certificates as well. When you delete a synced certificate, it only deletes the synced certificate from the Kubernetes cluster, and doesn't delete the contained secret reference from Azure Key Vault. You must delete the certificate secret manually from the key vault.