Upload MQTT data from Azure IoT MQ Preview to Microsoft Fabric lakehouse
Important
Azure IoT Operations Preview – enabled by Azure Arc is currently in PREVIEW. You shouldn't use this preview software in production environments.
See the Supplemental Terms of Use for Microsoft Azure Previews for legal terms that apply to Azure features that are in beta, preview, or otherwise not yet released into general availability.
In this walkthrough, you send MQTT data from Azure IoT MQ Preview directly to a Microsoft Fabric OneLake lakehouse. MQTT payloads are in the JSON format and automatically encoded into the Delta Lake format before uploading the lakehouse. This means data is ready for querying and analysis in seconds thanks to Microsoft Fabric's native support for the Delta Lake format. IoT MQ's data lake connector is configured with the desired batching behavior as well as enriching the output with additional metadata.
Azure IoT Operations Peview - enabled by Azure Arc can be deployed with the Azure CLI, Azure portal or with infrastructure-as-code (IaC) tools. This tutorial uses the IaC method using the Bicep language.
Prepare your Kubernetes cluster
This walkthrough uses a virtual Kubernetes environment hosted in a GitHub Codespace to help you get going quickly. If you want to use a different environment, all the artifacts are available in the explore-iot-operations GitHub repository so you can easily follow along.
Create the Codespace, optionally entering your Azure details to store them as environment variables for the terminal.

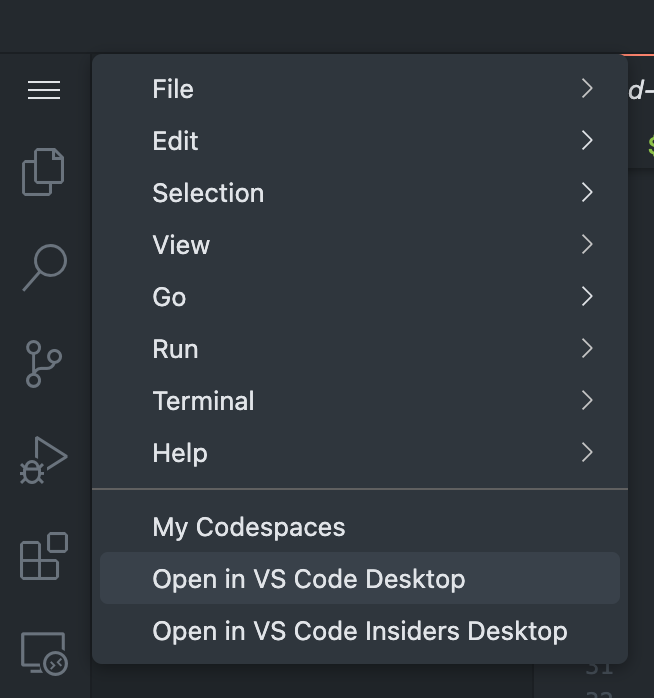
Once the Codespace is ready, select the menu button at the top left, then select Open in VS Code Desktop.

Deploy base edge resources
IoT MQ resources can be deployed as regular Azure resources as they have Azure Resource Provider (RP) implementations. First, deploy the base broker resources. Run this command in your Codespace terminal:
TEMPLATE_FILE_NAME=./tutorials/mq-onelake-upload/deployBaseResources.bicep
CLUSTER_NAME=xxx
RESOURCE_GROUP=xxx

az deployment group create --name az-resources \
    --resource-group $RESOURCE_GROUP \
    --template-file $TEMPLATE_FILE_NAME \
    --parameters clusterName=$CLUSTER_NAME
Important
The deployment configuration is for demonstration or development purposes only. It's not suitable for production environments.
The template deploys:
From the deployment JSON outputs, note the name of the IoT MQ extension. It should look like mq-resource-group-name.
Set up Microsoft Fabric resources
Next, create and set up the required Fabric resources.
Create a Fabric workspace and give access to Azure IoT MQ Preview
Create a new workspace in Microsoft Fabric, select Manage access from the top bar, and give Contributor access to IoT MQ's extension identity in the Add people sidebar.

That's all the steps you need to do start sending data from IoT MQ.
Create a new lakehouse

Make note of the resource names
Note the following names for later use: Fabric workspace name, Fabric lakehouse name, and Fabric endpoint URL. You can get the endpoint URL from the Properties of one of the precreated lakehouse folders.

The URL should look like https://xyz.dfs.fabric.microsoft.com.
Simulate MQTT messages
Simulate test data by deploying a Kubernetes workload. It simulates a sensor by sending sample temperature, vibration, and pressure readings periodically to the MQ broker using an MQTT client. Run the following command in the Codespace terminal:
kubectl apply -f tutorials/mq-onelake-upload/simulate-data.yaml
Deploy the data lake connector and topic map resources
Building on top of the previous Azure deployment, add the data lake connector and topic map. Supply the names of the previously created resources using environment variables.
TEMPLATE_FILE_NAME=./tutorials/mq-onelake-upload/deployDatalakeConnector.bicep
RESOURCE_GROUP=xxx
mqInstanceName=mq-instance
customLocationName=xxx
fabricEndpointUrl=xxx
fabricWorkspaceName=xxx
fabricLakehouseName=xxx

az deployment group create --name dl-resources \
    --resource-group $RESOURCE_GROUP \
    --template-file $TEMPLATE_FILE_NAME \
    --parameters mqInstanceName=$mqInstanceName \
    --parameters customLocationName=$customLocationName \
    --parameters fabricEndpointUrl=$fabricEndpointUrl \
    --parameters fabricWorkspaceName=$fabricWorkspaceName \
    --parameters fabricLakehouseName=$fabricLakehouseName
The template deploys:
The data lake connector uses the IoT MQ's system-assigned managed identity to write data to the lakehouse. No manual credentials are needed.
The topic map provides the mapping between the JSON fields in the MQTT payload and the Delta table columns. It also defines the batch size of the uploads to the lakehouse and built-in enrichments the data like a receive timestamp and topic name.
Confirm lakehouse ingest
In about a minute, you should see the MQTT payload along with the enriched fields in Fabric under the Tables folder.

The data is now available in Fabric for cleaning, creating reports, and further analysis.
In this walkthrough, you learned how to upload MQTT messages from IoT MQ directly to a Fabric lakehouse.
Next steps
Feedback
Coming soon: Throughout 2024 we will be phasing out GitHub Issues as the feedback mechanism for content and replacing it with a new feedback system. For more information see: https://aka.ms/ContentUserFeedback.
Submit and view feedback for