Note
Access to this page requires authorization. You can try signing in or changing directories.
Access to this page requires authorization. You can try changing directories.
Many manufacturers use on-premises SAP Enterprise Resource Planning (ERP) systems. Often, manufacturers connect SAP systems to Industrial IoT solutions, and use the connected system to retrieve data for manufacturing processes, customer orders, and inventory status. This article describes how to connect these SAP-based ERP systems.
This solution uses IEC 62541. Open Platform Communications (OPC) Unified Architecture (UA) for all operational technology data.
The following diagram shows an overview of the solution:

To learn more about the components in the solution, see the Azure Industrial IoT reference architecture tutorial.
Prerequisites
To complete the SAP connection as described in this article, you need an Azure Industrial IoT solution deployed in an Azure subscription as described in Azure Industrial IoT reference architecture
Connect the reference solution to on-premises SAP systems
The Azure Logic Apps service handles connectivity to your on-premises SAP systems. Azure Logic Apps is a no-code Azure service that orchestrates workflows that can trigger actions.
Note
If you want to try out SAP connectivity before connecting your real SAP system, you can deploy and use an SAP S/4 HANA Fully-Activated Appliance in your Azure subscription.
Configure Azure Logic Apps
The Azure Logic Apps workflow moves data from your on-premises SAP system to Azure Logic Apps. The workflow also stores the data the SAP system sends to your Azure Storage account. To create a new Azure Logic Apps workflow, follow these steps:
In the Azure portal, create a new Azure Storage account. Make a note of the name of your account, you use it later when you configure the workflow.
In your storage account, select Storage browser, select File shares > Add file share. Enter sap as the name and select Create.
Deploy an instance of Azure Logic Apps in the same region as your reference solution deployment. Select the consumption-based hosting option.
Navigate to the Logic app designer, select Add trigger, and then select the When a HTTP request is received trigger template.
To add a new step, select + > Add an action, select Azure File Storage, and then select Create file. Enter a name for the connection, the name of the storage account you created previously, and the storage account key.
On the next page, for Folder path enter sap, for File name enter IDoc.xml, and for File content select Body from the dynamic content.
Save your workflow.
Select Run and wait for the run to complete. Verify that there are green check marks on both components of your workflow. If you see any red exclamation marks, select the component for more information about the error.
Copy the HTTP URL from the HTTP trigger in your workflow. You need it when you configure your SAP system in the next step.
Create a table in Azure Data Explorer
To store the data from your SAP system, create a table in your Azure Data Explorer database. To create the table, follow these steps:
In the Azure portal, navigate to your Azure Data Explorer database. You can use the ontologies database that's part of the Azure Industrial IoT reference solution.
Run the following Azure Data Explorer query:
.create table SAP (name:string, label:string)This query creates a table named SAP with two columns: name and label.
Configure an on-premises SAP system
To configure an on-premises SAP system to send data to your Logic Apps workflow, follow these steps:
Sign in to the SAP Windows virtual machine.
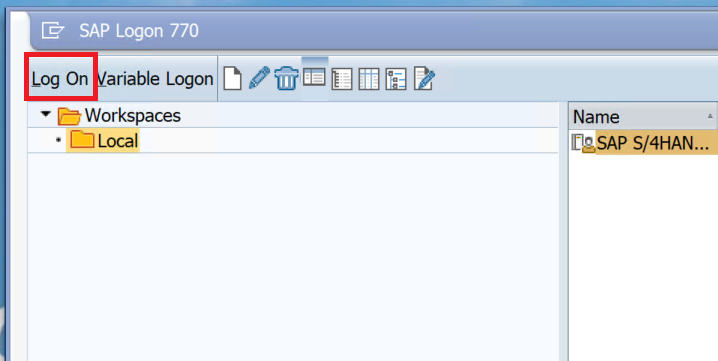
On the virtual machine desktop, select SAP Logon.
Select Log On and sign in with your username and password:
In the search box, enter SM59. This displays the Configuration of RFC Connections screen:

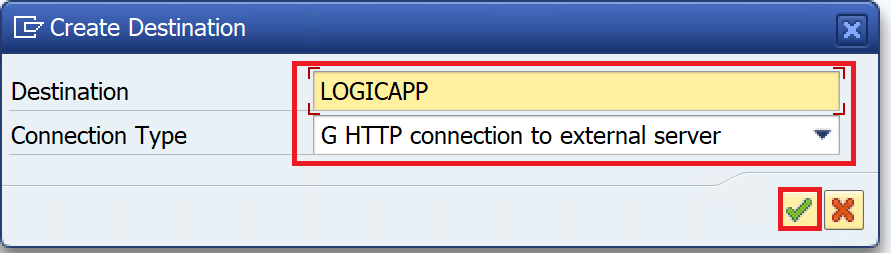
Select Edit > Create in the application menu.
Enter LOGICAPP in the Destination field.
In the Connection Type dropdown, select HTTP Connection to external server. To save your changes, select the green check mark:
Enter LOGICAPP in Description 1.
Select the Technical Settings tab and enter the first part of HTTP GET URL from your Logic app workflow in the Host field. For example:
https://example-18.westeurope.logic.azure.com. Enter 41 as the Port. In Path Prefix enter the rest of the HTTP GET URL starting with /workflows/...: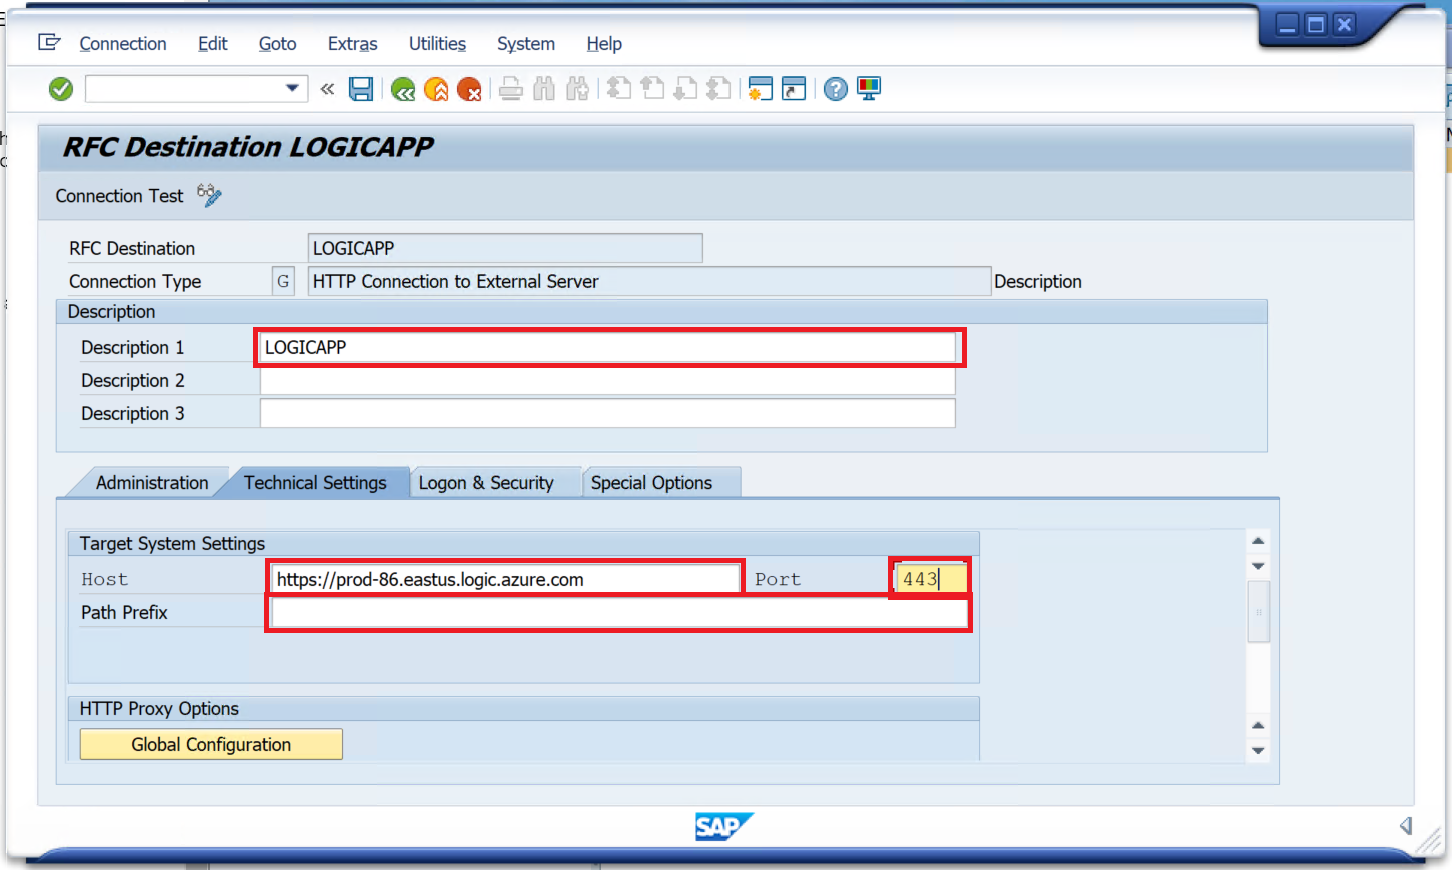
Select the Login & Security tab.
Scroll down to Security Options and set SSL to Active.
Select Save.
In the search box, enter WE21. The Ports in IDoc processing screen displays.
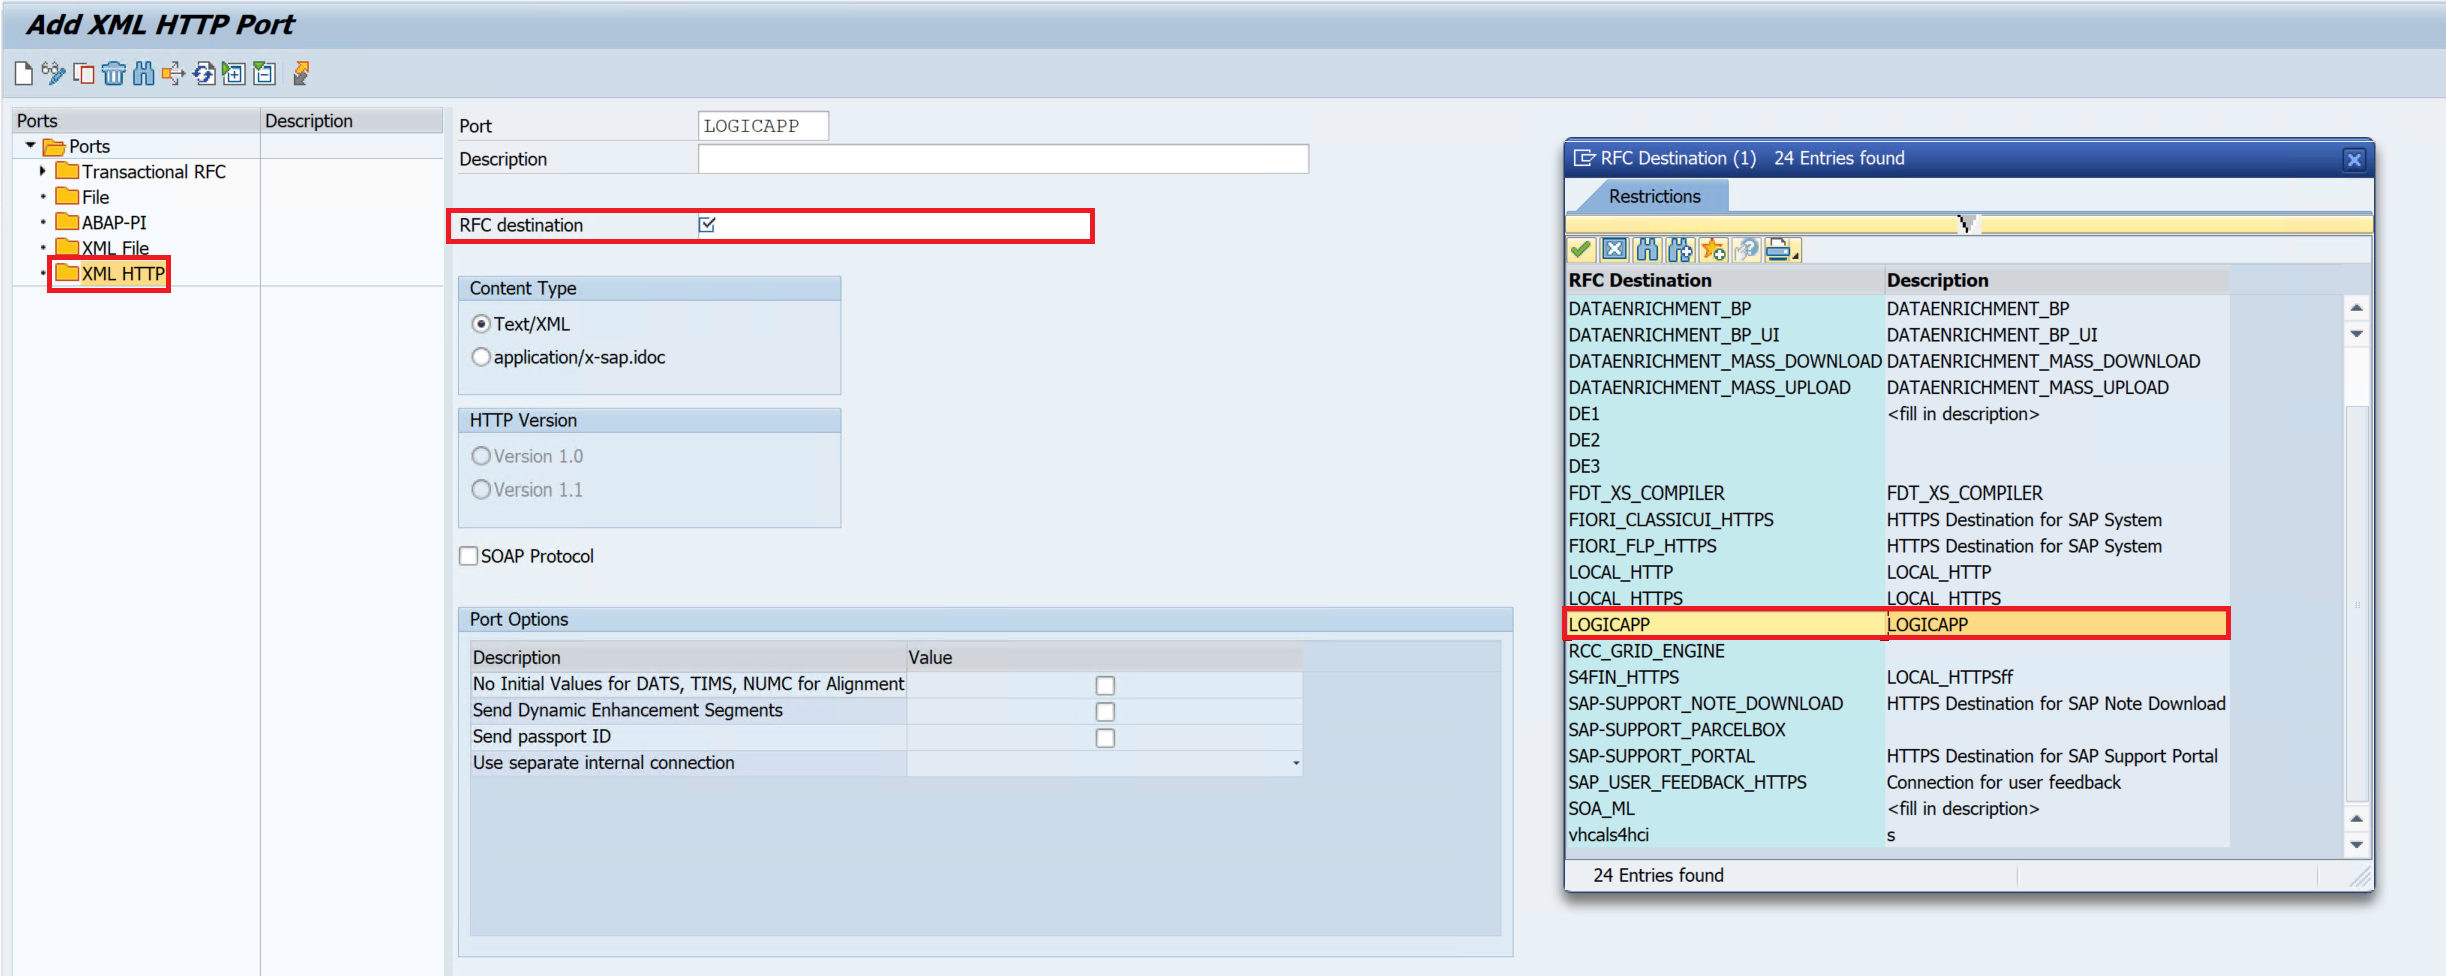
Select the XML HTTP folder and select Create.
In the Port field, enter LOGICAPP.
In the RFC destination, select LOGICAPP.
To save your changes, select the green check mark:
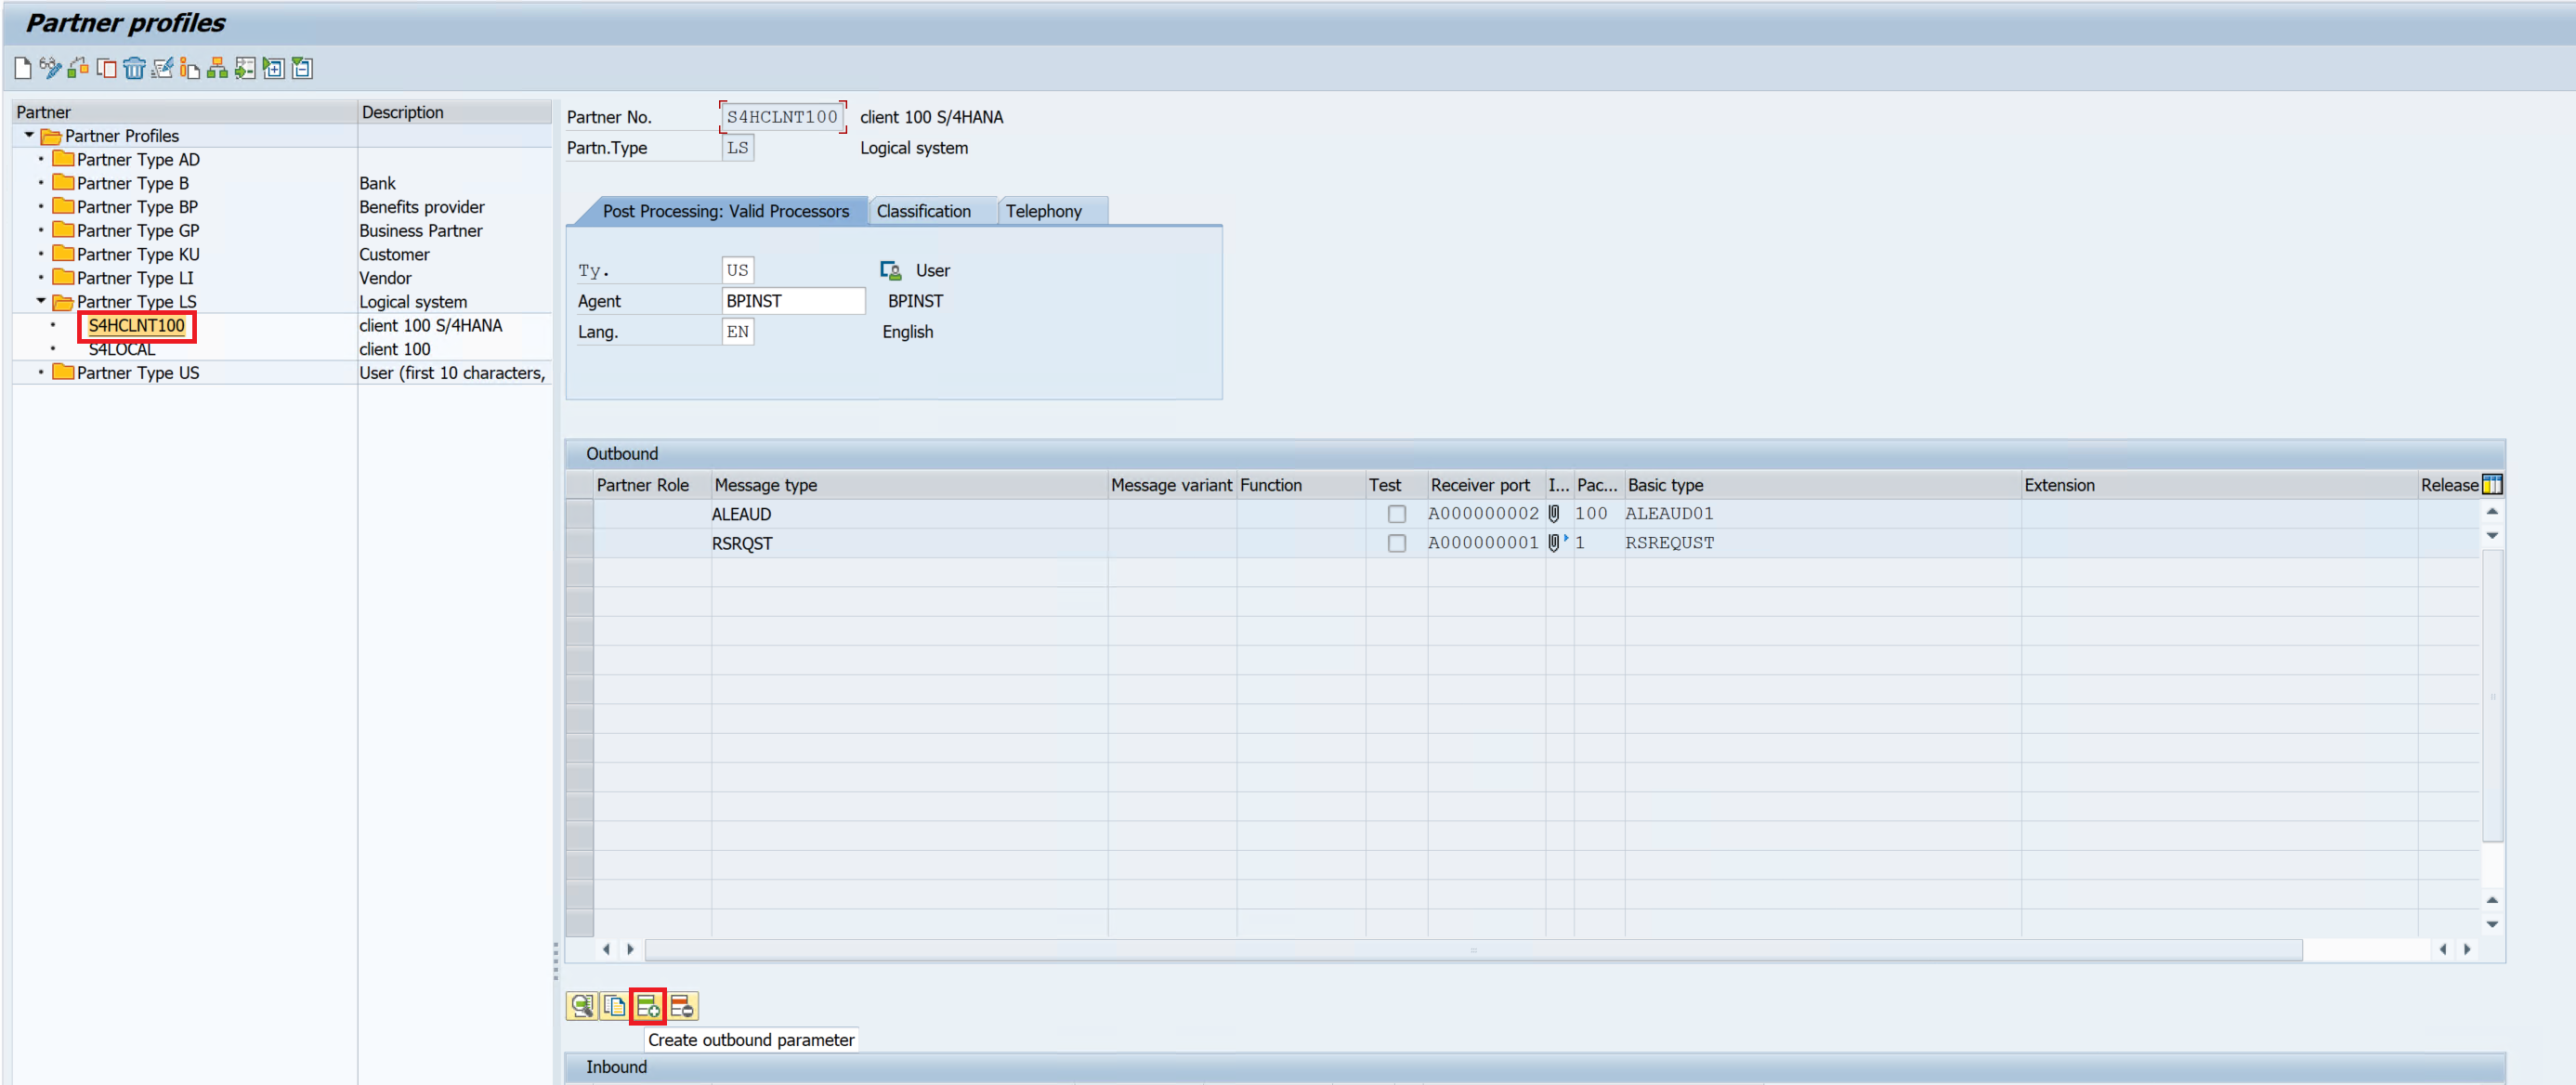
In the search box, enter WE20. The Partner profiles screen displays.
Expand the Partner Profiles folder and select the Partner Type LS folder.
In the Partner No. field, select the S4HCLNT100 partner profile.
Select the Create Outbound Parameter button:
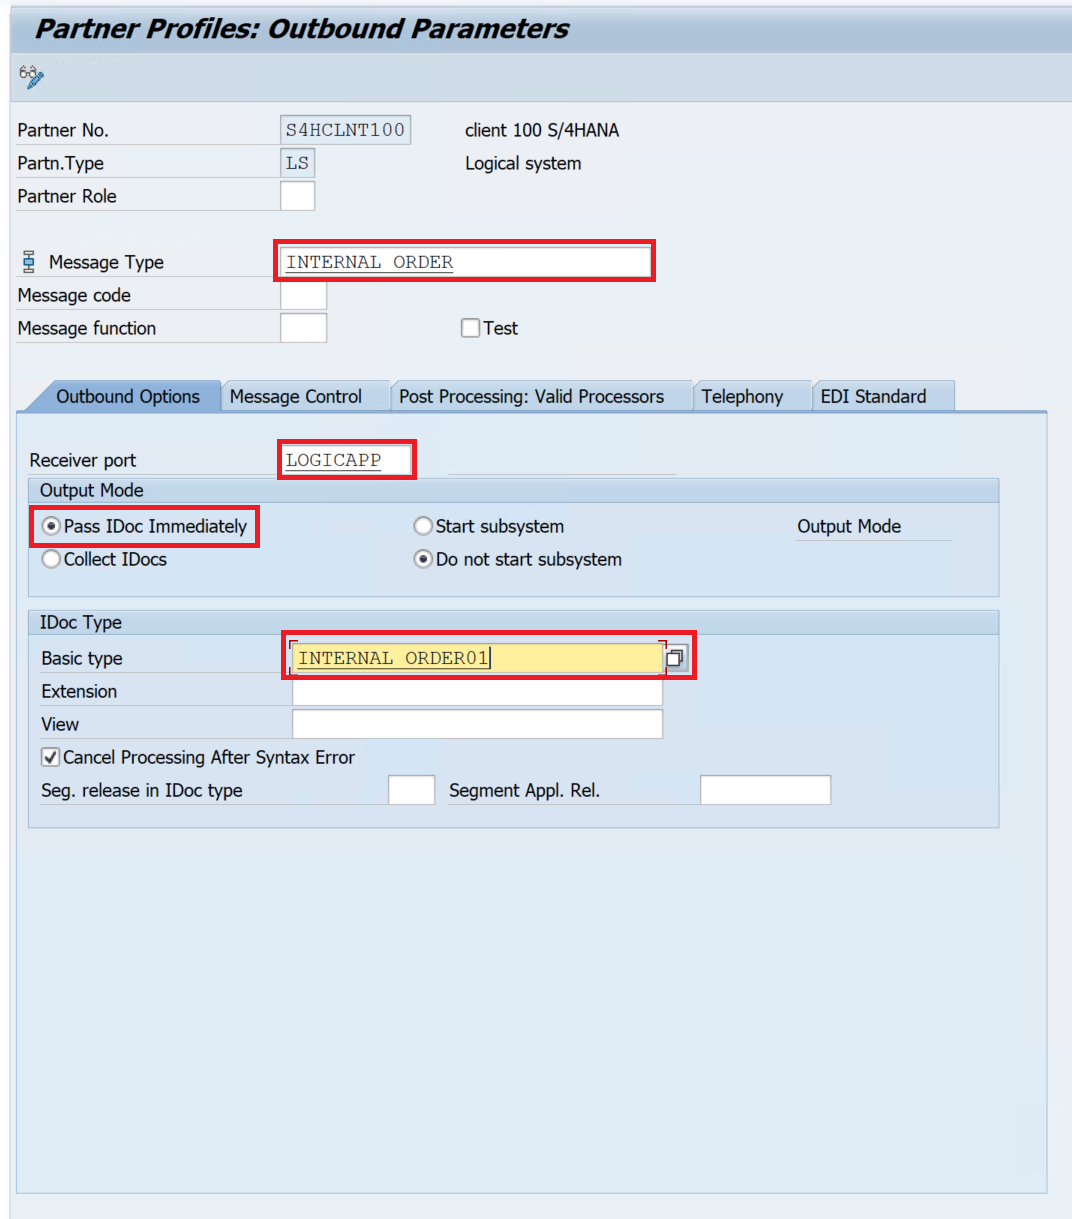
In the Partner Profiles: Outbound Parameters dialog, enter INTERNAL_ORDER as the Message Type. In the Outbound Options tab, enter LOGICAPP in the Receiver port field. Select the Pass IDoc Immediately radio button. For the Basic type, enter INTERNAL_ORDER01. Select the Save button:


Test your SAP to Azure Logic App Workflow
To test your SAP to Azure Logic App workflow, follow these steps:
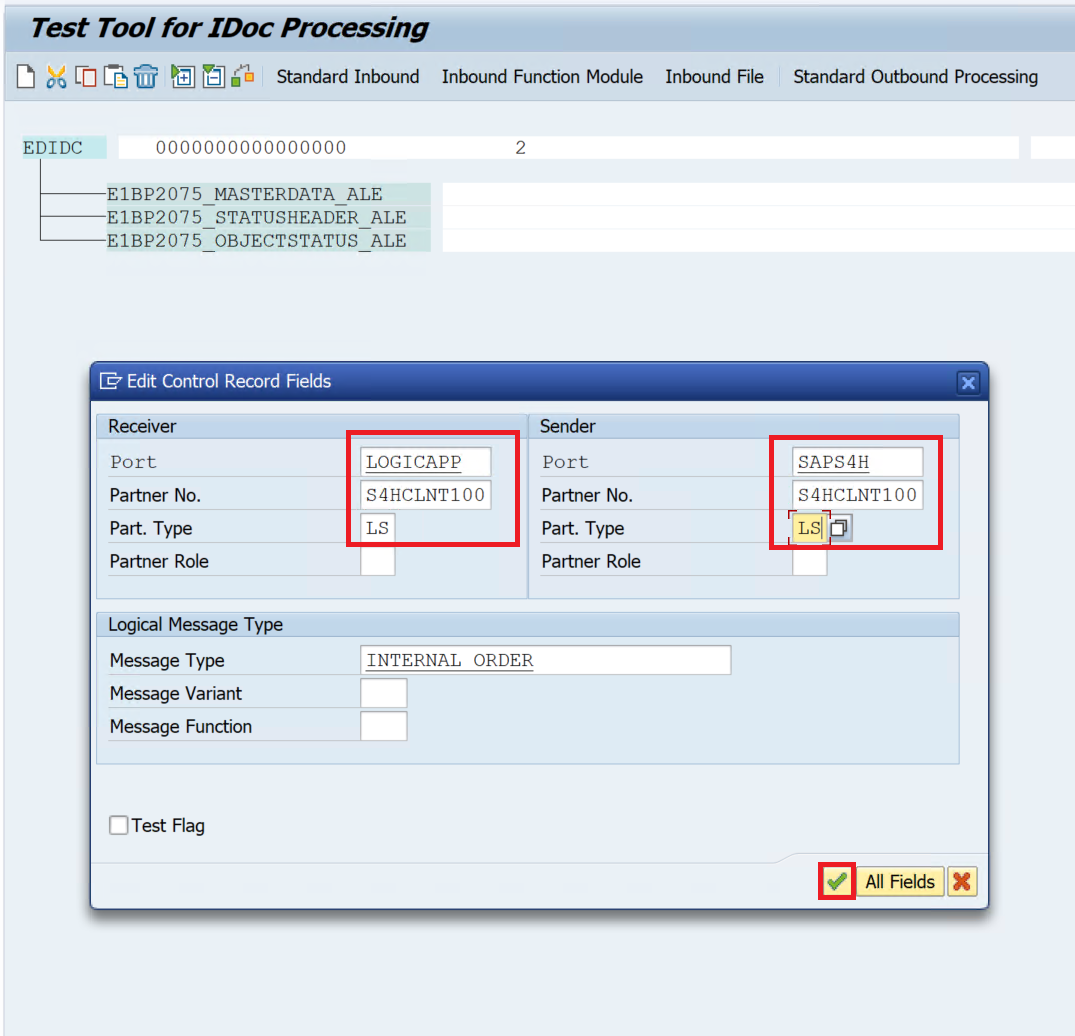
In the search box, enter WE19. This displays the Test Tool for IDoc Processing screen.
Select Using message type and enter INTERNAL_ORDER.
Select Create.
Select the EDICC field to open the Edit Control Record Fields screen.
In the Receiver section, enter LOGICAPP as the PORT, enter S4HCLNT100 as the Partner No. , and enter LS as the Part. Type.
In the Sender section, enter SAPS4H as the PORT, enter S4HCLNT100 as the Partner No. , and enter LS as the Part. Type.
To save your changes, select the green check mark:
Select Standard Outbound Processing tab at the top of the screen.
In the Outbound Processing of IDoc dialog, select the green check button to start the IDoc message processing.
Open the storage browser in your Azure Storage account, select File shares, and check that there's a new IDoc.xml file in the sap folder.
Note
To check for IDoc message processing errors, enter WE09 in the SAP application search box, select a time range, and then select the execute button. The IDoc Search for Business Content screen opens and you can select each IDoc for processing errors in the table displayed.

Microsoft on-premises data gateway
To send data to on-premises SAP systems from Azure Logic Apps, Microsoft provides an on-premises data gateway.
Note
The SAP connector and on-premises data gateway aren't required to receive data from on-premises SAP systems into Azure Logic Apps in the cloud.
To install the on-premises data gateway:
Follow the steps Install on-premises data gateway for Azure Logic Apps.
Follow the steps in SAP Connector for Microsoft .NET to install the SAP Connector for Microsoft .NET 3.0 for Windows x64. SAP download access for the SAP portal is required. Contact SAP support if you don't have access.
Copy the four libraries libicudecnumber.dll, rscp4n.dll, sapnco.dll, and sapnco_utils.dll from the SAP Connector installation location (typically C:\Program Files\SAP\SAP_DotNetConnector3_Net40_x64) to the installation location of the data gateway (typically C:\Program Files\On-premises data gateway).
Restart the data gateway through the On-premises data gateway configuration tool included with the on-premises data gateway installer package you installed previously.
Create the on-premises data gateway Azure resource in the same Azure region as selected during the data gateway installation in the previous step. Select the name of your data gateway under Installation Name.
To learn more, see Connect to SAP from workflows in Azure Logic Apps.
Note
If you encounter errors with the data gateway or the SAP connector, enable debug tracing.