Note
Access to this page requires authorization. You can try signing in or changing directories.
Access to this page requires authorization. You can try changing directories.
An Azure IoT solution lets you connect your IoT devices to a cloud-based IoT service. Devices send telemetry, such as temperature and humidity and respond to commands such as reboot and change delivery interval. Devices can also synchronize their internal state with the service, sharing properties such as device model and operating system.
The IoT Plug and Play phone app lets you quickly get started exploring Azure IoT capabilities without the need to configure a dedicated IoT device.
Azure IoT Plug and Play app
To get you started quickly, this article uses a smartphone app as an IoT device. The app sends telemetry collected from the phone's sensors, responds to commands invoked from the service, and reports property values.
You can use this smartphone app to:
- Explore a basic IoT scenario.
- Manage and interact with your phone remotely.
- Test your configuration.
- As a starting point for your custom device development.
Install the app
Install the app on your smartphone from one of the app stores:
![]()
![]()
App features
Connect
You can connect to an IoT Central application by scanning a QR code in IoT Central.
To learn more, see Connect the app later in this guide.
Telemetry
The app collects data from sensors on the phone to send as telemetry to the IoT service you're using. Sensor data is aggregated every five seconds by default, but you can change this period on the app settings page:

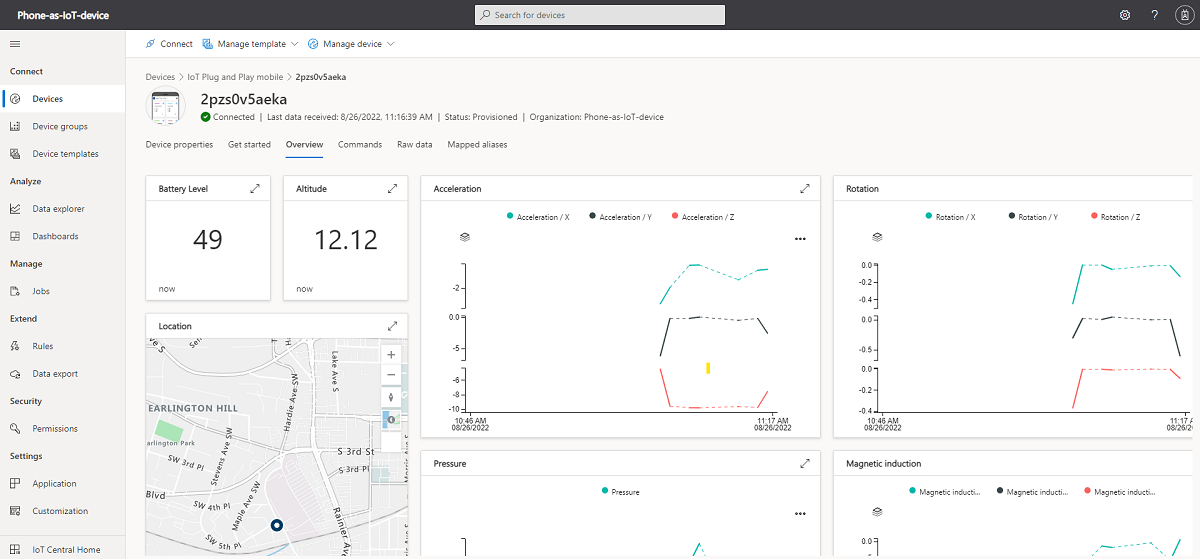
The following screenshot shows a device view in IoT Central that displays some of the device telemetry:
Properties
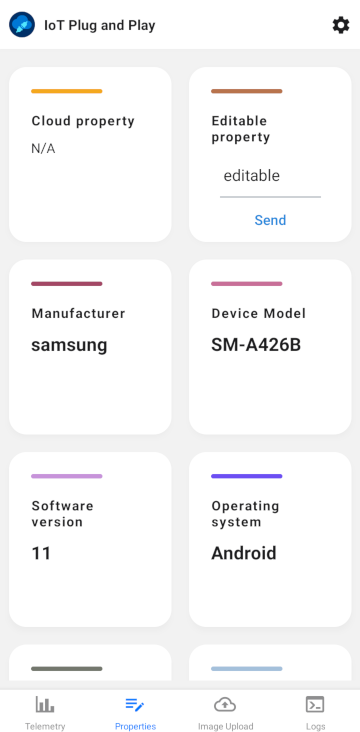
The app reports device status, such as device model and manufacturer. There's also an editable property that you can modify and see the change synchronize in your AzureIoT solution:
The following screenshot shows the writable property in IoT Central after the property was sent to the device:
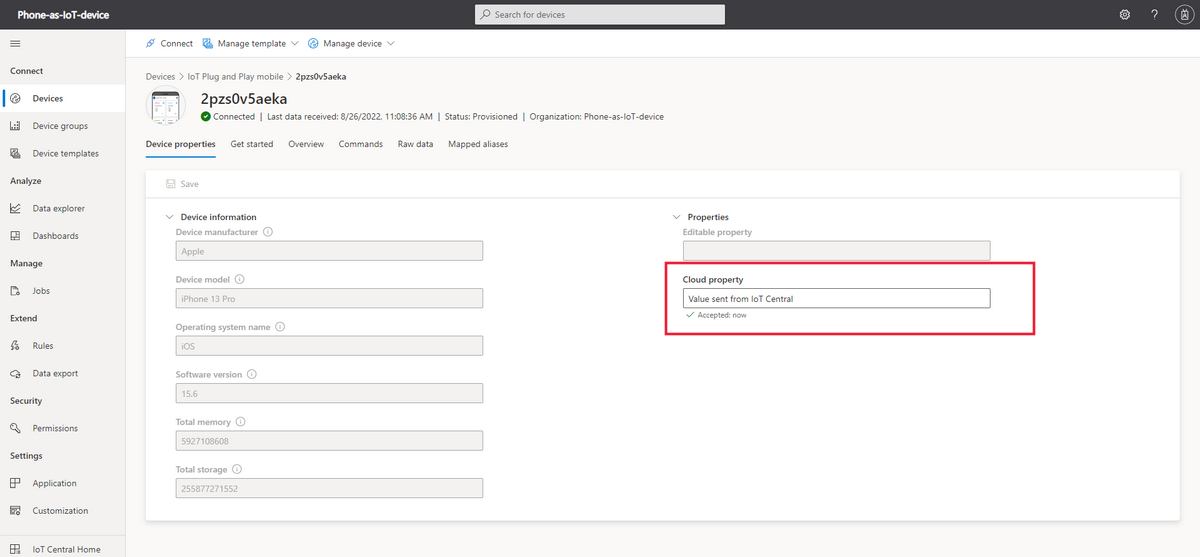
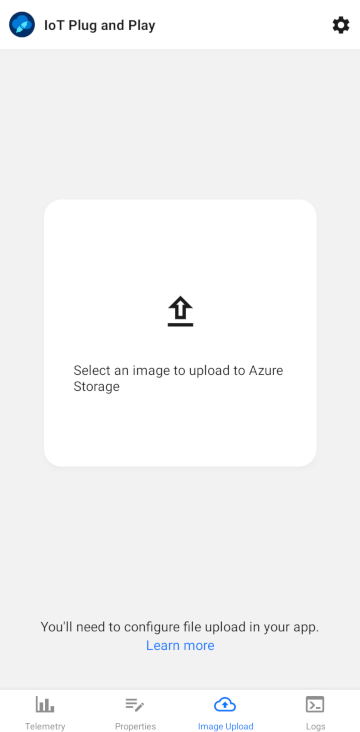
Image upload
Both IoT Central and IoT Hub enable file upload to Azure storage from a device. The smartphone app lets you upload an image from the device.
To learn more about configuring your service to support file uploads from a device, see:
- Upload files from your device to the cloud with IoT Hub.
- Upload files from your device to the cloud with IoT Central.
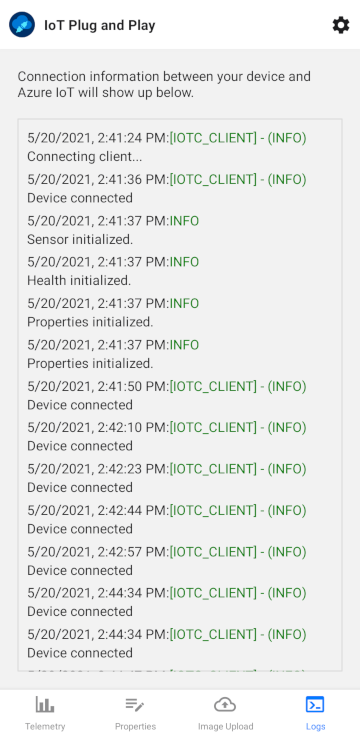
Logs
The smartphone app writes events to a local log file that you can view from within the app. Use the log file to troubleshoot and better understand what the app is doing:
Settings
The settings page in the app lets you:
- Connect the app to your Azure IoT solution.
- Review the current device registration information.
- Reset the app by clearing the stored data.
- Customize the app appearance.
- Set the frequency that the app sends telemetry to your IoT service.

Connect the app
Prerequisites
If you don't have an Azure subscription, create a free account before you begin.
Create an IoT Central application. To learn more, see Create an IoT Central application.
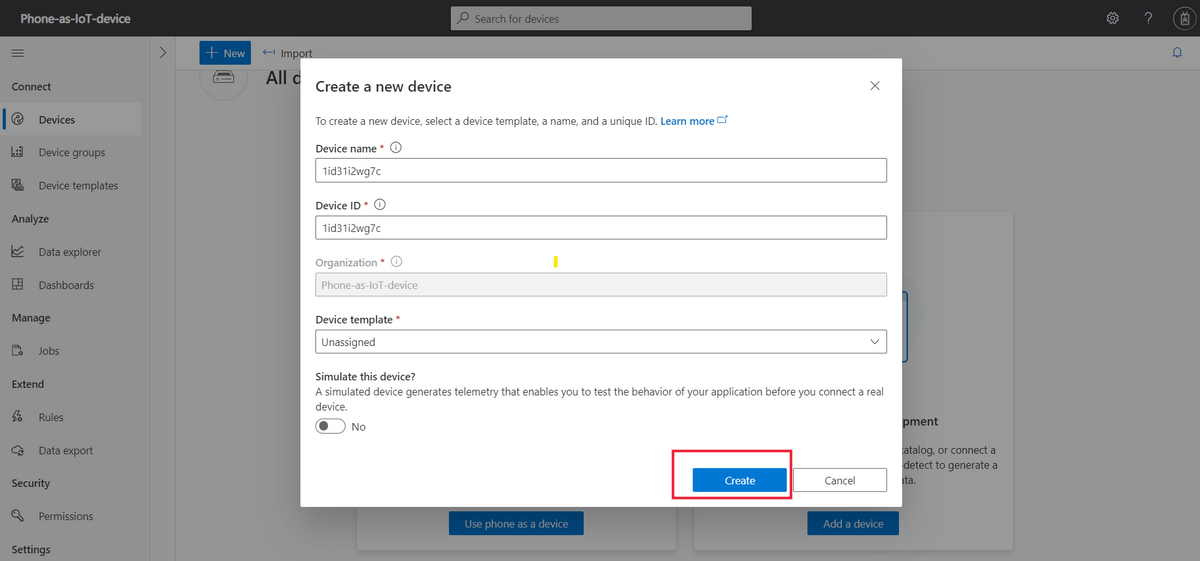
Register a device
Before you connect the phone app, you need to register a device in your IoT Central application. When you create a device registration, IoT Central generates the device connection information.
To register the device in IoT Central:
Sign in to your IoT Central application and navigate to the Devices page.
Select Create a device.
On the Create a new device page, select Create:
On the list of devices, click on the device name and then select Connect. On the Device connection page you can see the QR code to scan in the smartphone app in the next section:
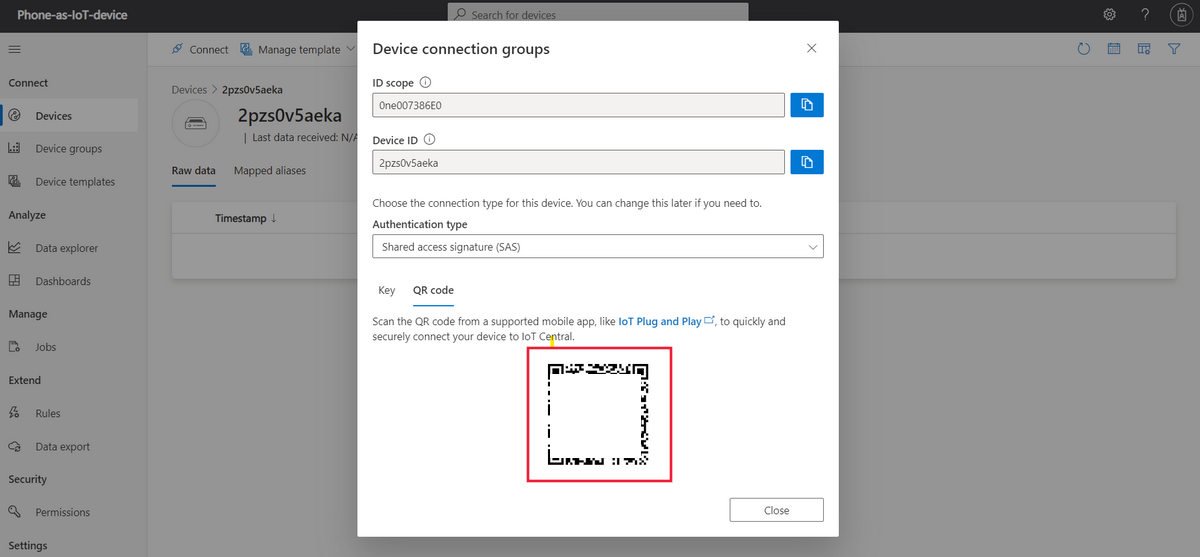
Connect the device
After you register the device in IoT Central, you can connect the smartphone app by scanning the QR code. To connect the app:
Open the IoT PnP app on your smartphone.
On the welcome page, select Scan QR code. Point the phone's camera at the QR code. Then wait for a few seconds while the connection is established.
On the telemetry page in the app, you can see the data the app is sending to IoT Central. On the logs page, you can see the device connecting and several initialization messages.
On the Settings > Registration page, you can see the device ID and ID scope that the app used to connect to IoT Central.
To learn more about how devices connect to IoT Central, see How devices connect.
Verify the connection
To view the data the device is sending in your IoT Central application:
Sign in to your IoT Central application and navigate to the Devices page. Your device is automatically assigned to the Smartphone device template.
Tip
You might need to refresh the page in your web browser to see when the device is assigned to the Smartphone device template.
On the list of devices, click on the device name and then select Overview. The Overview page shows the telemetry from the smartphone sensors:

View the About page to see the properties sent by the device.
On the Commands page, run the LightOn command to turn on the phone's flashlight.
Tip
The Raw data page shows all the data coming from the device.
Next steps
Now that your smartphone app is connected to IoT Central, a suggested next step is to learn more about IoT Central.