Note
Access to this page requires authorization. You can try signing in or changing directories.
Access to this page requires authorization. You can try changing directories.
Important
Azure Lab Services will be retired on June 28, 2027. For more information, see the retirement guide. To simplify your migration, Microsoft has published automation scripts to help you clean up Lab Services resources, these are available in the Azure Lab Services Retirement Scripts GitHub repository.
This article shows you how to configure the locations where you can create labs by enabling or disabling regions associated with the lab plan. Enabling a region allows lab creators to create labs within that region. You cannot create labs in disabled regions.
When you create a lab plan, you have to set an initial region for the labs, but you can enable or disable more regions for your lab at any time. If you create a lab plan by using the Azure portal, enable regions initially includes the same region as the location of the lab plan. If you create a lab plan by using the API or SDKs, you must set the AllowedRegion property when you create the lab plan.
You might need to change the region for your labs in these circumstances:
- Regulatory compliance. Choosing where your data resides, such as organizations choosing specific regions to help ensure that they are compliant with local regulations.
- Service availability. Providing the optimal lab experience for your students by ensuring the Azure Lab Service is available in the region closest to them. For more information about service availability, see Products available by region.
- New region. You may acquire quota in a region different than the regions already enabled.
Note
The default limit for the total number of regions you can use for creating labs varies by offer category type. If you have reached the Azure regions limit for your subscription, you can only create labs in regions that you're already using. Learn more about region restrictions in Azure Lab Services.
Prerequisites
- To perform these steps, you must have an existing lab plan.
Enable regions
To enable one or more regions after lab creation, follow these steps:
- In the Azure portal, navigate to your lab plan.
- On the Lab plan overview page, select Lab settings from the left menu or select Adjust settings. Both go to the Lab settings page.
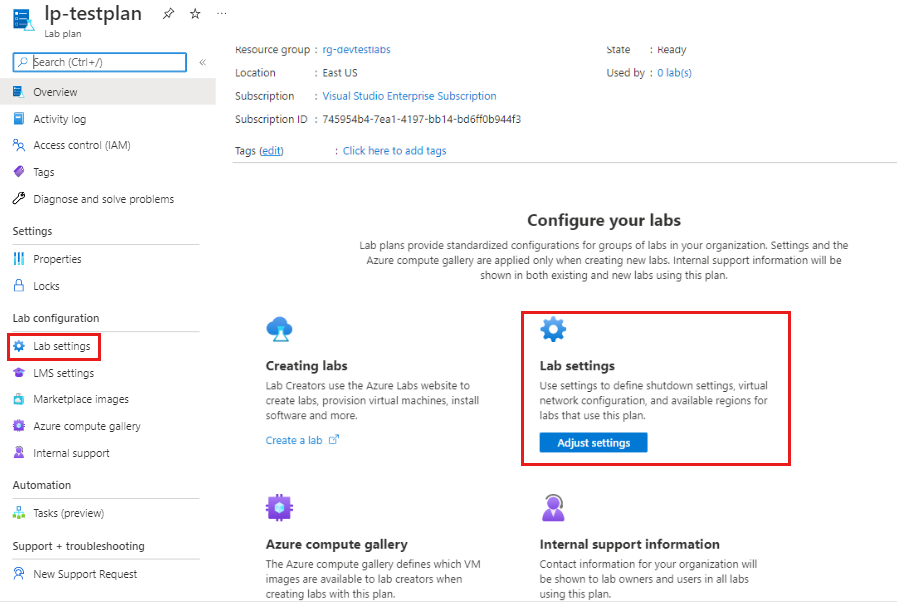
- On the Lab settings page, under Location selection, select Select regions.

- On the Enabled regions page, select the region(s) you want to add, select Enable.
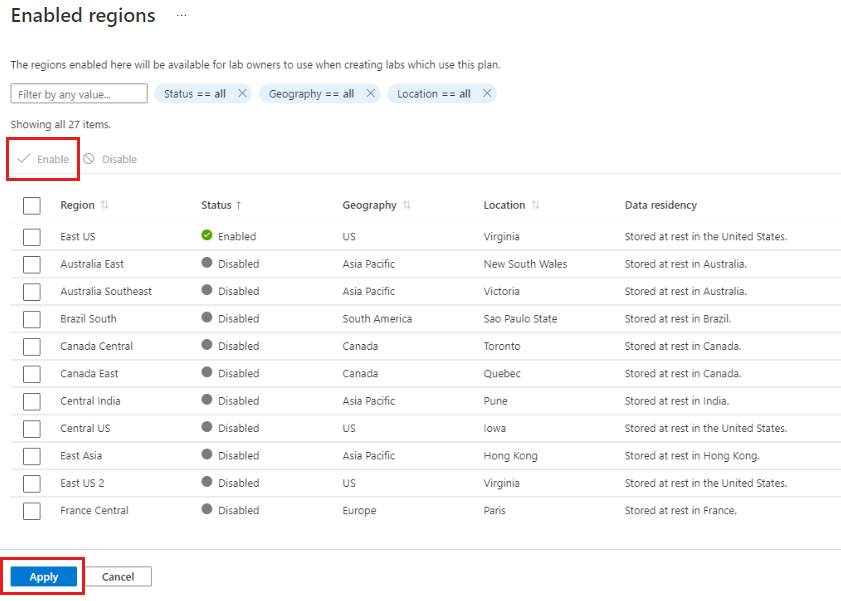
- Enabled regions are displayed at the top of the list. Check that your desired regions are displayed and then select Apply to confirm your selection.
Note
There are two steps to saving your enabled regions:
- At the top of the regions list select Enable
- At the bottom of the page, select Apply
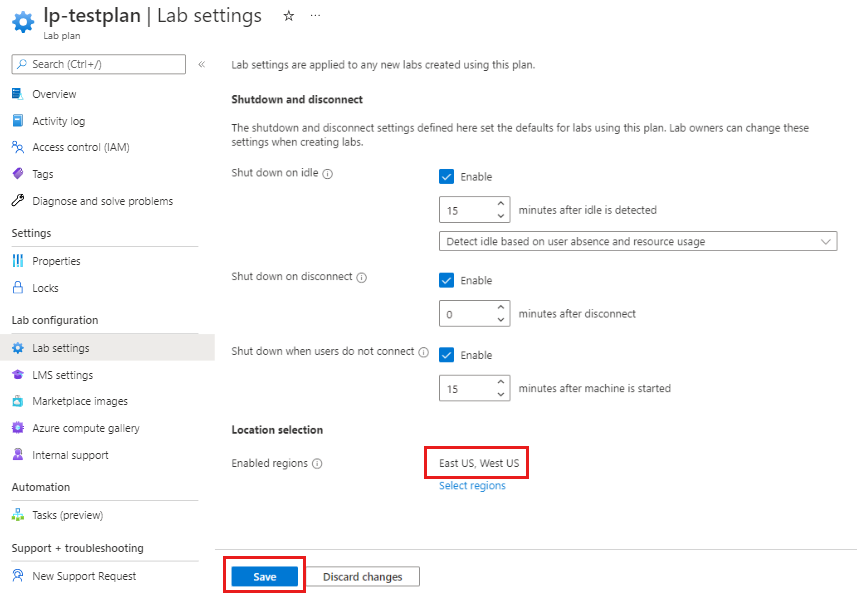
- On the Lab settings page, verify that the regions you enabled are listed and then select Save.
Note
You must select Save to save your lab plan configuration.
Disable regions
To disable one or more regions after lab creation, follow these steps:
- In the Azure portal, navigate to your lab plan.
- On the Lab plan overview page, select Lab settings from the left menu or select Adjust settings. Both go to the Lab settings page.
- On the Lab settings page, under Location selection, select Select regions.
- On the Enabled regions page, clear the check box of the region(s) you want to disable, select Disable.
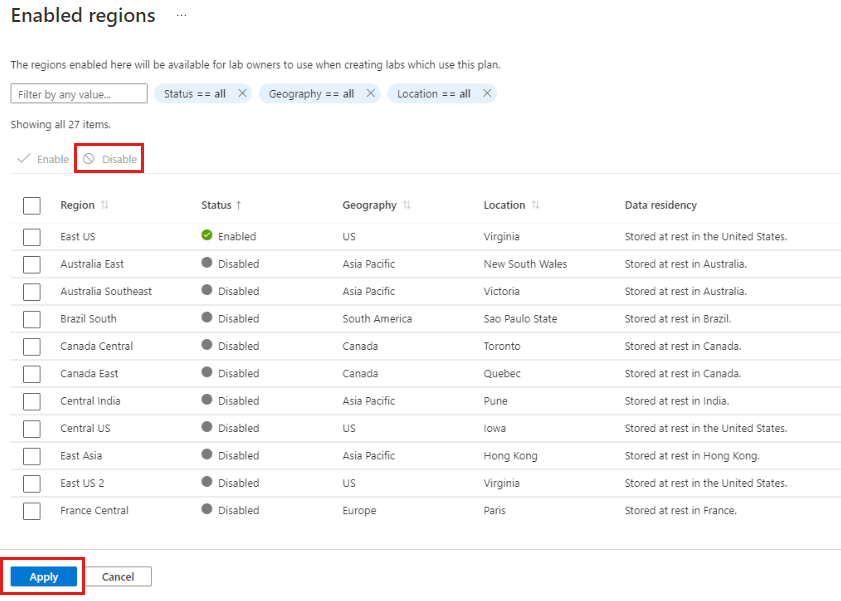
- Enabled regions are displayed at the top of the list. Check that your desired regions are displayed and then select Apply to confirm your selection.
Note
There are two steps to saving your disabled regions:
- At the top of the regions list select Disable
- At the bottom of the page, select Apply
- On the Lab settings page, verify that the regions you enabled are listed and then select Save.
Note
You must select Save to save your lab plan configuration.
Next steps
Learn how to choose the right regions for your Lab plan at Azure geographies.
Check Products available by region For Azure Lab Services availability near you.
Learn more about region restrictions in Azure Lab Services.