Note
Access to this page requires authorization. You can try signing in or changing directories.
Access to this page requires authorization. You can try changing directories.
Important
This preview capability is subject to the Supplemental Terms of Use for Microsoft Azure Previews. During preview, this capability is available in select Azure regions only.
When you build solutions that need to connect with other services, systems, apps, and data, you usually have to set up and manage the authentication, credential management, end system polling, webhook delivery, and Model Context Protocol (MCP) server hosting yourself. Azure Connector Namespace is a fully managed service that removes overhead and complexity by handling these security and management tasks for you.
When you create a connector namespace resource, you get a managed environment and a connector catalog so you can create and organize reusable connections, event triggers, actions, AI agent tools, and MCP server tools that your solutions can use to integrate with other components. Connector namespaces make integration easy so your solutions can work with other components without needing custom API client code or tool wrappers.
This guide shows how to create and manage a connector namespace resource in the Azure portal, and then create the components that your solutions can use for integration.
Prerequisites
- An Azure account and subscription. Get a free Azure account.
- Permissions to create resources and resource groups in your Azure subscription.
1: Create your connector namespace
To create a connector namespace by using the Azure portal, follow these steps:
In the Azure portal search box, enter
connector namespace, and select Connector Namespace.On the Connector Namespaces page toolbar, select Create.
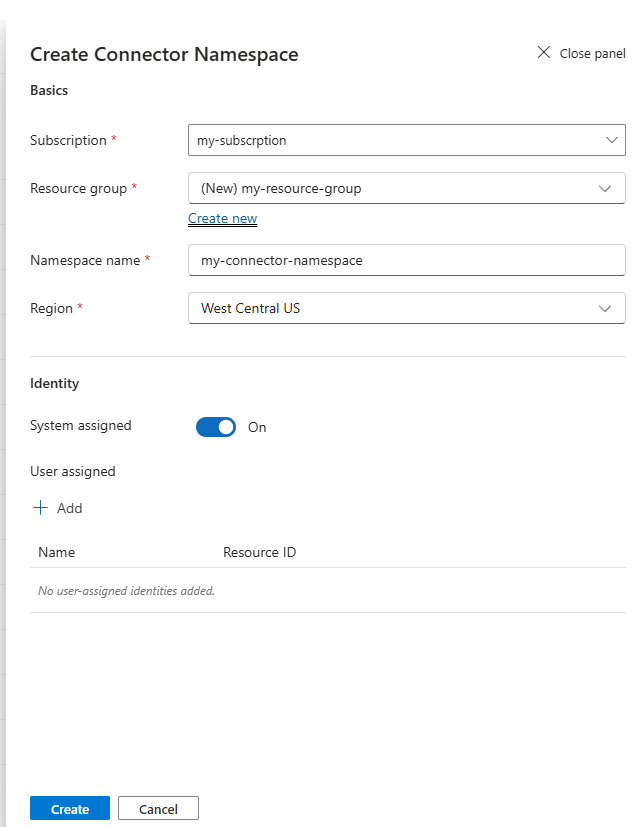
On the creation pane, provide the following information:
Property Description Subscription Your Azure subscription. Resource group An existing resource group or to create a new one, select Create new, and then enter a name. Namespace name A unique name with 2-64 characters for your connector namespace resource.
Tip: Use only alphanumeric, hyphen, or underscore characters.Region The Azure region where you want to create the connector namespace. Note
The Identity section shows that by default, the system assigned managed identity is enabled for your new connector namespace resource. You can also add any existing user assigned managed identities to your resource. Currently, during preview, managed identity authentication for connections isn't available yet but is planned for later release.
When you finish, select Create to deploy the connector namespace resource to Azure.
After deployment completes, the Connector Namespaces page shows your connector namespace. If not, on the page toolbar, select Refresh.
Continue to the next section to sign in to the Connector Namespaces portal.

2: Sign in to Connector Namespaces portal
To access your connector namespace, follow these steps:
If you navigated away from the Connector Namespaces page in the Azure portal, in the portal search box, enter
connector namespace, and select Connector Namespace.From the Connector Namespaces page, select your namespace resource.
The Azure portal redirects you to the Connector Namespaces portal.
On the portal entry page, under Welcome, select Sign in with Microsoft, for example:
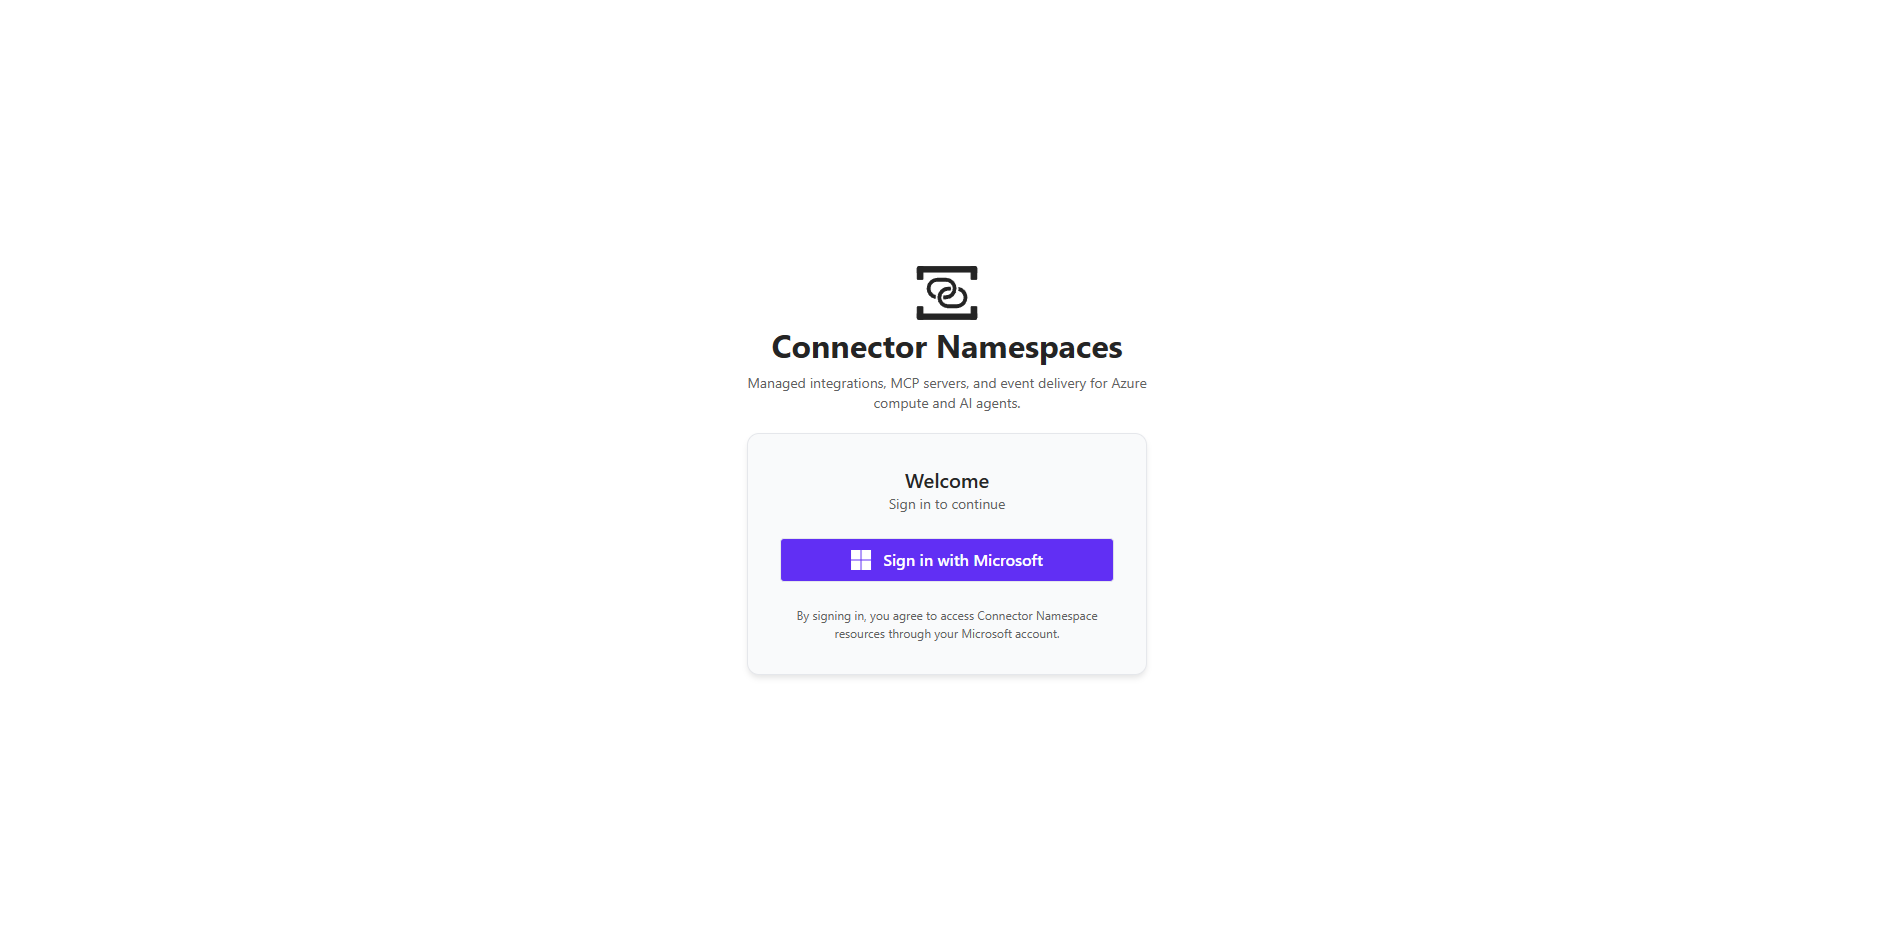
From the sign-in window, select the Microsoft account associated with your connector namespace.
The Connector Namespaces portal shows your connector namespaces.
From the connector namespaces list, select your namespace.
The portal shows the main information page for your connector namespace.
Continue to the next section so you can manage your connector namespace along with any connections, triggers, actions, or MCP servers.

3: Manage your connector namespace
The main page for your namespace shows the following sidebar sections:
| Section | Description |
|---|---|
| General | - Overview: Shows information about your connector namespace, such as resource group, region, subscription, and any enabled managed identities. The Resources subsections also appear on this page. - Identity: View and manage any enabled managed identities. |
| Resources | - Connections: Create and manage connections to other services, systems, apps, and data, such as Office 365 Outlook, GitHub, or SQL Server. - Triggers: Create event-based triggers that run automated workflows with event-driven actions. - MCP servers: Expose connectors as tools for AI agents to use. |

To manage your connector namespace and any connections, triggers, and MCP servers, follow these steps:
In the Connector Namespaces portal, sign in and select your connector namespace if you didn't complete this step.
On the main page for your connector namespace, select the section for the component that you want to create or manage.
To create the component you want, follow the UX and wizards for creating that component.
Important
Before you can use specific triggers, you need to first create any necessary connections.