Note
Access to this page requires authorization. You can try signing in or changing directories.
Access to this page requires authorization. You can try changing directories.
Important
This article provides information on using the Azure Machine Learning SDK v1. SDK v1 is deprecated as of March 31, 2025. Support for it will end on June 30, 2026. You can install and use SDK v1 until that date. Your existing workflows using SDK v1 will continue to operate after the end-of-support date. However, they could be exposed to security risks or breaking changes in the event of architectural changes in the product.
We recommend that you transition to the SDK v2 before June 30, 2026. For more information on SDK v2, see What is Azure Machine Learning CLI and Python SDK v2? and the SDK v2 reference.
In this article, you learn how to transform and save datasets in the Azure Machine Learning designer, to prepare your own data for machine learning.
You'll use the sample Adult Census Income Binary Classification dataset to prepare two datasets. One dataset includes adult census information from only the United States, and another dataset includes census information from non-US adults.
In this article, you learn how to:
- Transform a dataset to prepare it for training.
- Export the resulting datasets to a datastore.
- View the results.
This how-to guide is a prerequisite for the Use pipeline inputs to retrain models article. In that article, you learn how to use the transformed datasets to train multiple models with pipeline inputs.
Important
If you don't see graphical elements mentioned in this document, such as buttons in studio or designer, you might not have the right level of permissions to the workspace. Contact your Azure subscription administrator to verify that you have been granted the correct level of access. For more information, see Manage users and roles.
Transform a dataset
In this section, you learn how to import the sample dataset, and split the data into US and non-US datasets. For more information, see Import data into Azure Machine Learning designer.
Import data
Use these steps to import the sample dataset:
Sign in to Azure Machine Learning studio, and select the workspace you want to use.
Select Designer from the sidebar menu. Under Classic prebuilt, choose Create a new pipeline using classic prebuilt components.
To the left of the pipeline canvas, in the Component tab, expand the Sample data node.
Drag and drop the Adult Census Income Binary classification dataset onto the canvas.
Right-select the Adult Census Income dataset component, and select Preview data.
Use the data preview window to explore the dataset. Take special note of the native-country column values.
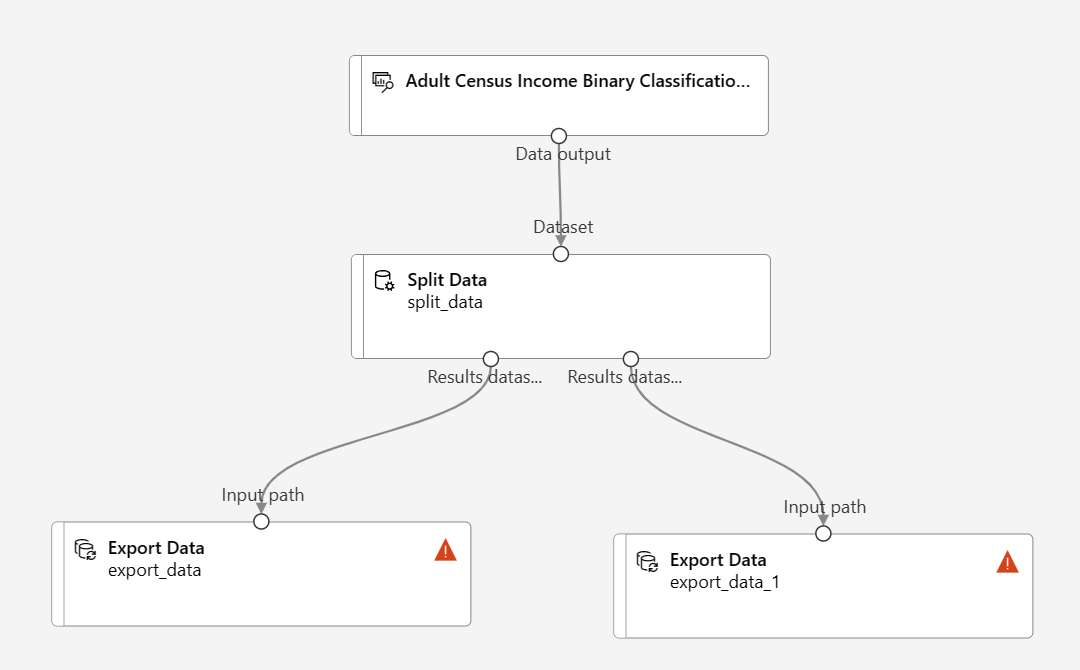
Split the data
Use the Split Data component to identify and split rows that contain United-States in the native-country column.
To the left of the canvas, in the component tab, expand the Data Transformation section, and find the Split Data component.
Drag the Split Data component onto the canvas, and drop that component below the dataset component.
Connect the output of the dataset component to the input of the Split Data component.
Double-click the Split Data component to open the Split Data pane.
Set Splitting mode to Regular Expression.
Enter the Regular Expression:
\"native-country" United-States.The Regular expression mode tests a single column for a value. Visit the related algorithm component reference page for more information on the Split Data component.
Your pipeline should resemble this screenshot:

Save the datasets
After you set up your pipeline to split the data, you must specify where to persist the datasets. For this example, use the Export Data component to save your dataset to a datastore. For more information about datastores, see Connect to Azure storage services.
To the left of the canvas in the component palette, expand the Data Input and Output section, and find the Export Data component.
Drag and drop two Export Data components below the Split Data component.
Connect each output port of the Split Data component to a different Export Data component.
Your pipeline should resemble the following:
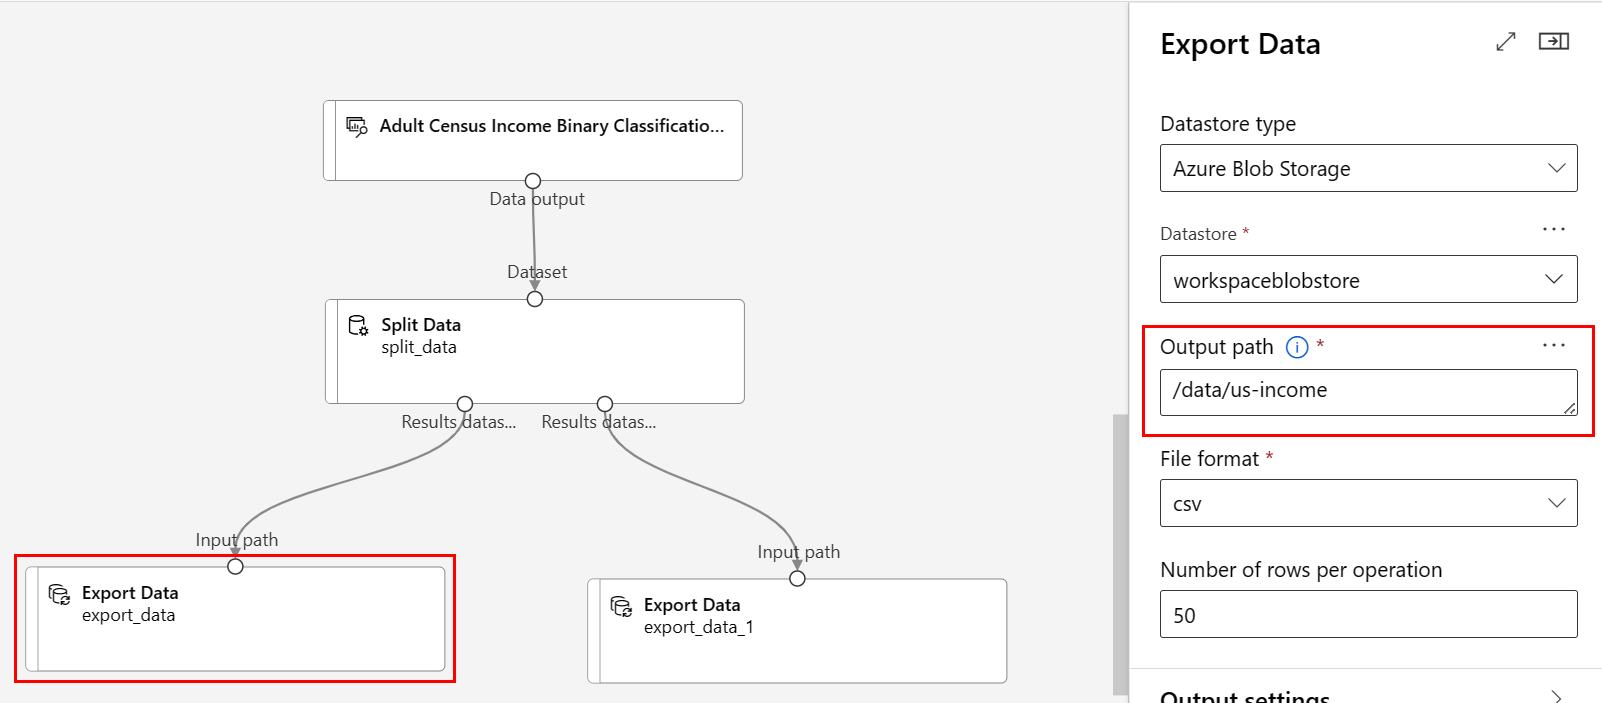
Double-click the Export Data component connected to the left-most port of the Split Data component, to open the Export Data configuration pane.
For the Split Data component, the output port order is important. The first output port contains the rows where the regular expression is true. In this case, the first port contains rows for US-based income, and the second port contains rows for non-US based income.
Set the following options:
Datastore type: Azure Blob Storage
Datastore: Select an existing datastore, or select New datastore to create a new one
Output path:
/data/us-incomeFile format: csv
Note
This article assumes that you have access to a datastore registered to the current Azure Machine Learning workspace. For datastore setup instructions, see Connect to Azure storage services.
You can create a datastore if you don't have one. For example purposes, this article saves the datasets to the default blob storage account associated with the workspace. It saves the datasets into the
azuremlcontainer, in a new folder nameddata.Double-click the Export Data component connected to the right-most port of the Split Data component, to open the Export Data configuration pane.
Set the following options:
Datastore type: Azure Blob Storage
Datastore: Select the earlier datastore
Output path:
/data/non-us-incomeFile format: csv
Verify that the Export Data component connected to the left port of the Split Data has the Path
/data/us-income.Verify that the Export Data component connected to the right port has the Path
/data/non-us-income.Your pipeline and settings should look like this:


Submit the job
After you set up your pipeline to split and export the data, submit a pipeline job.
Select Configure & Submit at the top of the canvas.
Select the Create new option in the Basics pane of Set up pipeline job to create an experiment.
Experiments logically group related pipeline jobs together. If you run this pipeline in the future, you should use the same experiment for logging and tracking purposes.
Provide a descriptive experiment name--for example, split-census-data.
In the Runtime settings pane, select or create a compute resource.
Select Review + Submit, and then select Submit.
View results
After the pipeline finishes running, you can navigate to your Azure portal blob storage to view your results. You can also view the intermediary results of the Split Data component to confirm that your data split correctly.
Select Jobs from the sidebar menu, then choose your job.
Double-click the Split Data component.
In the component details pane to the right of the canvas, select the Outputs + logs tab.
Select the Show data outputs dropdown.
Select the visualize icon next to Results dataset1.
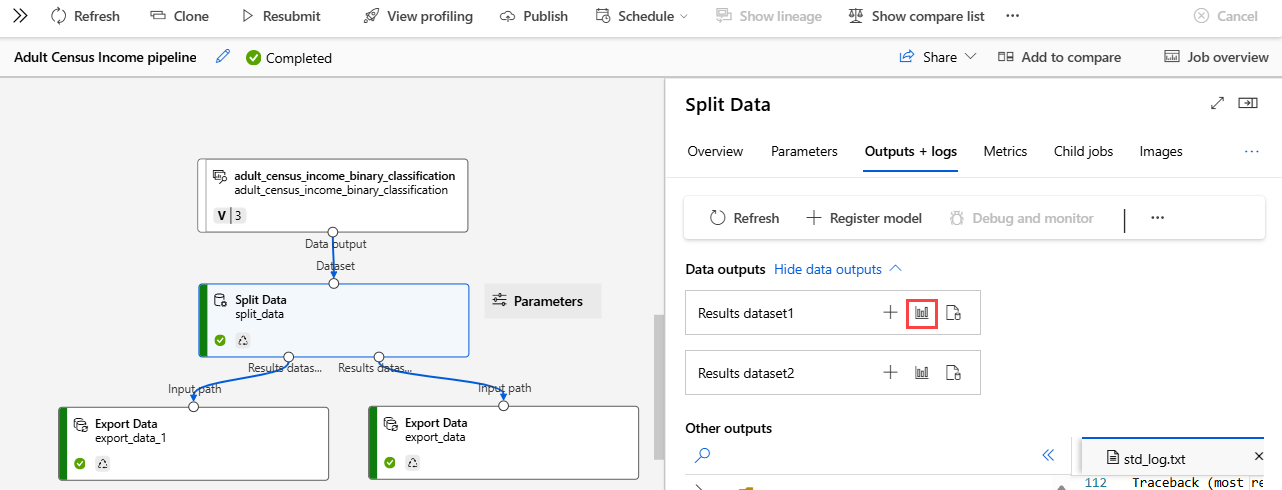
Verify that the native-country column contains only the value United-States.
Select the visualize icon
 next to Results dataset2.
Verify that the native-country column doesn't contain the value United-States.

Clean up resources
If you want to continue with part two of this how-to guide, skip this section.
Important
You can use the resources that you created as prerequisites for other Azure Machine Learning tutorials and how-to articles.
Delete everything
If you don't plan to use anything that you created, delete the entire resource group so you don't incur any charges.
In the Azure portal, select Resource groups under Azure services.
Select the resource group that you created.
Select Delete resource group.
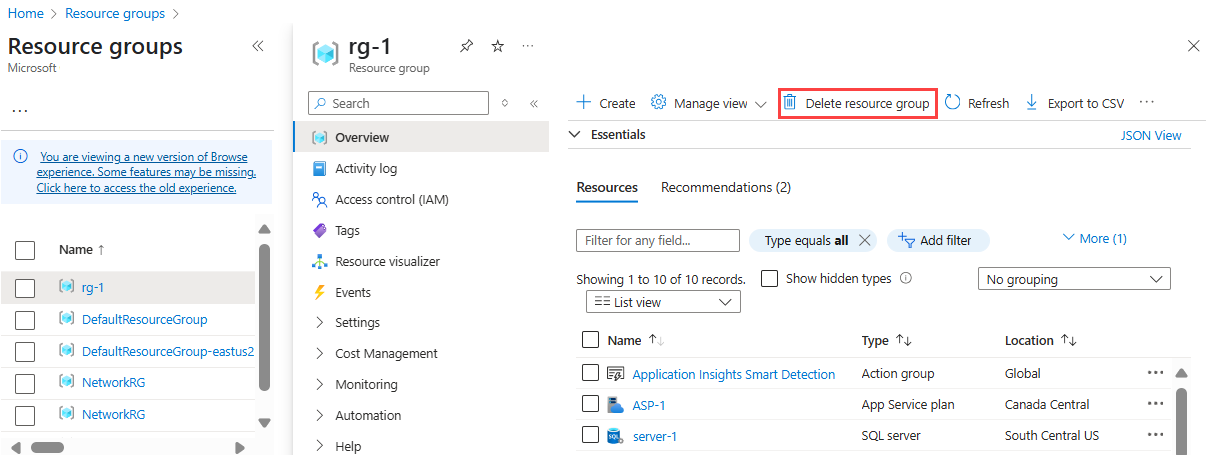
Deleting the resource group also deletes all resources that you created in the designer.
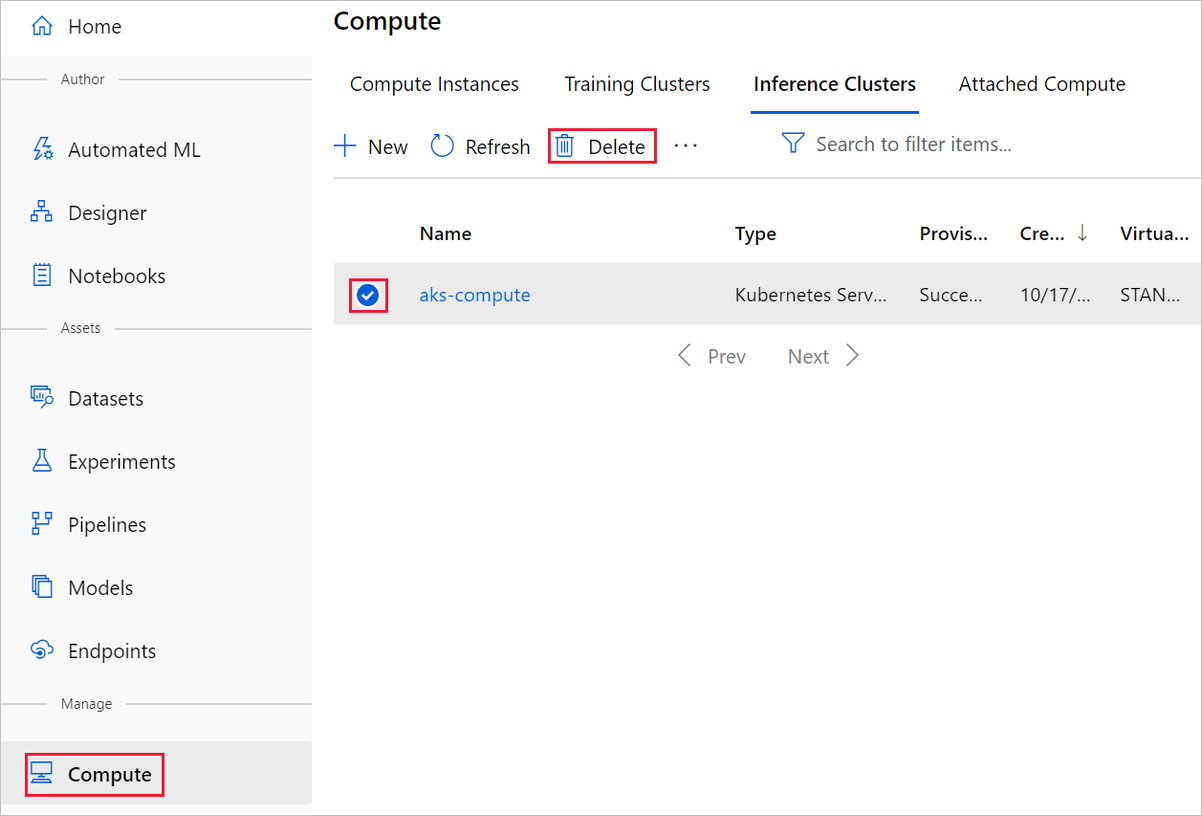
Delete individual assets
In the designer where you created your experiment, delete individual assets by selecting them and then selecting the Delete button.
The compute target that you created here automatically autoscales to zero nodes when it's not being used. This action is taken to minimize charges. If you want to delete the compute target, take these steps:
To delete a dataset, go to the storage account by using the Azure portal or Azure Storage Explorer and manually delete those assets.
Next step
Continue to the next part of this how-to series.