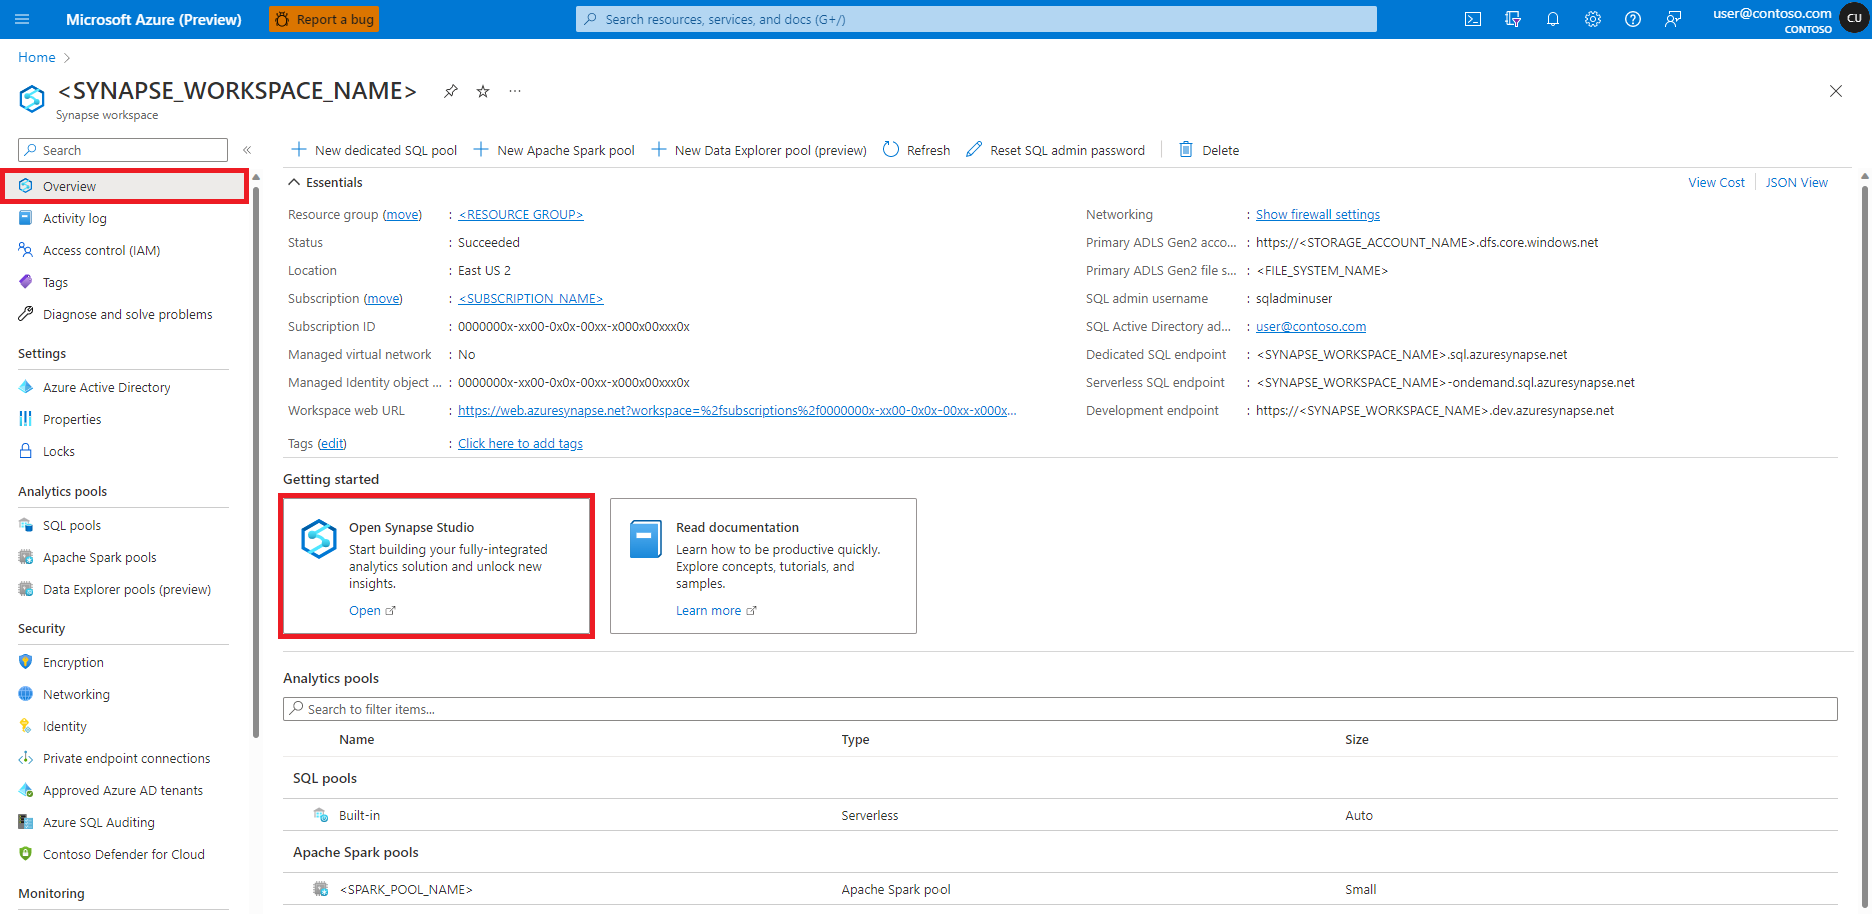
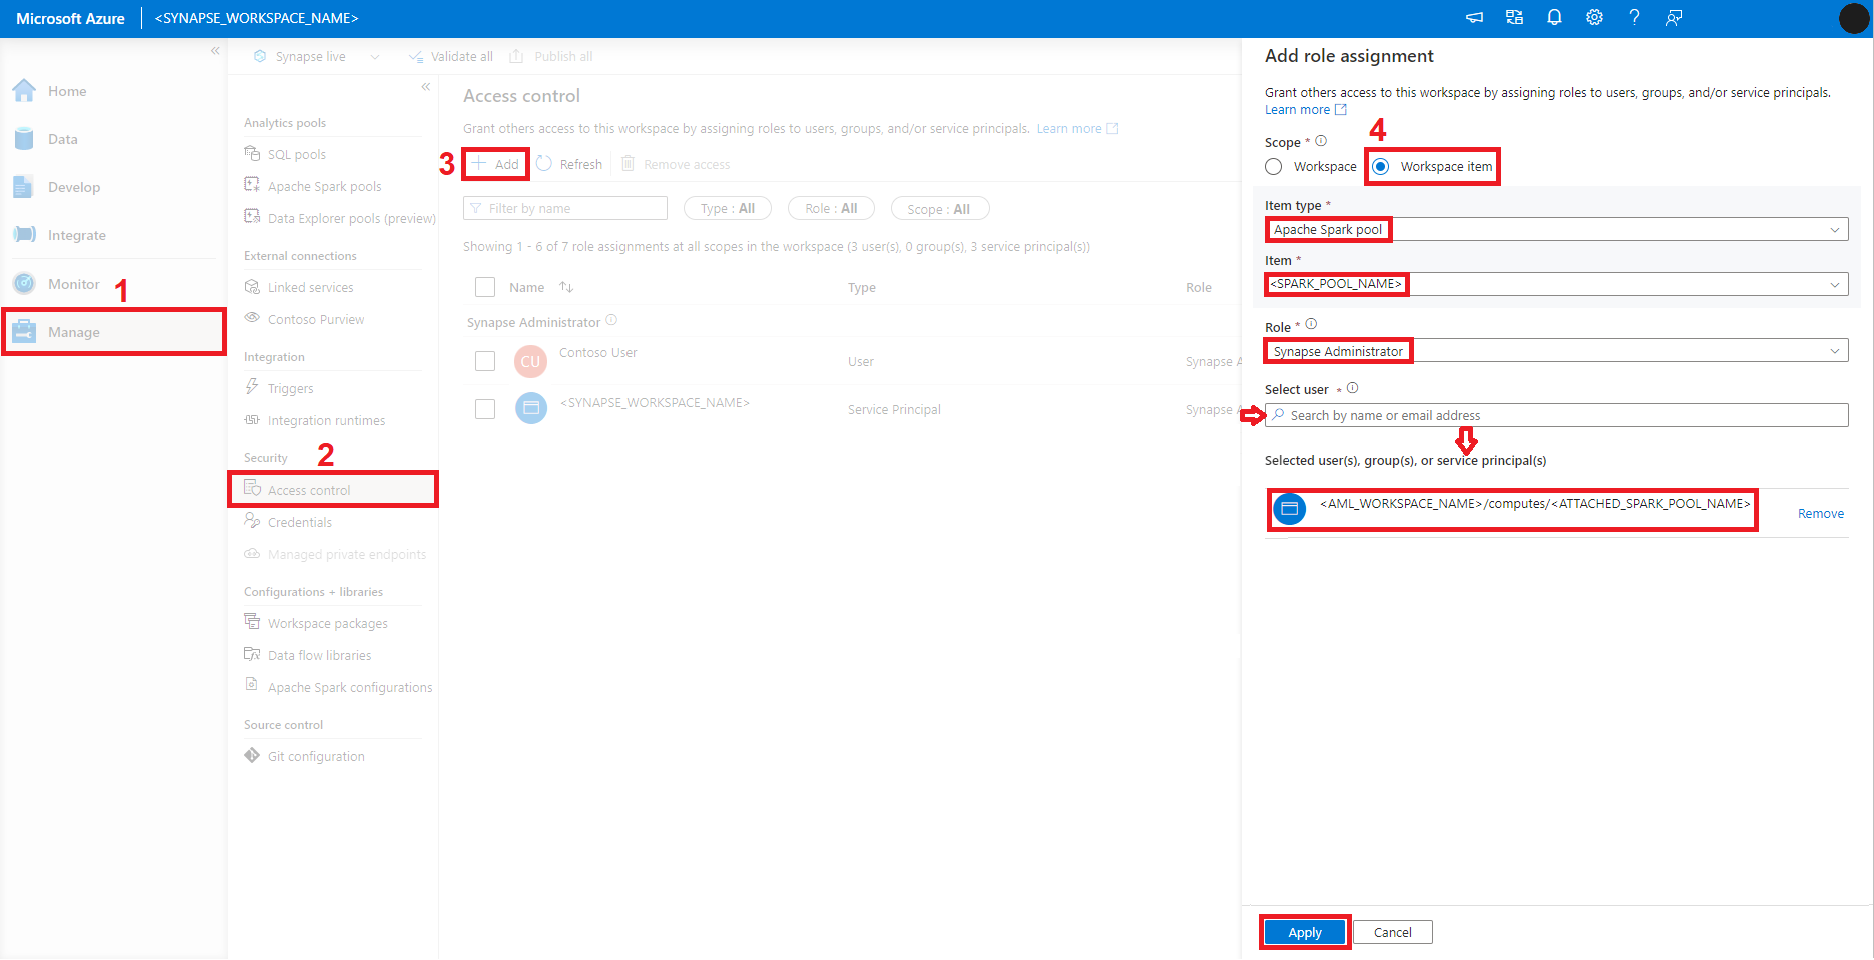
APPLIES TO:  Azure CLI ml extension v2 (current)
With the Azure Machine Learning CLI, we can use intuitive YAML syntax and commands from the command line interface, to attach and manage a Synapse Spark pool.
To define an attached Synapse Spark pool using YAML syntax, the YAML file should cover these properties:
name – name of the attached Synapse Spark pool.
type – set this property to synapsespark.
resource_id – this property should provide the resource ID value of the Synapse Spark pool created in the Azure Synapse Analytics workspace. The Azure resource ID includes
Azure Subscription ID,
resource Group Name,
Azure Synapse Analytics Workspace Name, and
name of the Synapse Spark Pool.
name: <ATTACHED_SPARK_POOL_NAME>

type: synapsespark

resource_id: /subscriptions/<SUBSCRIPTION_ID>/resourceGroups/<RESOURCE_GROUP>/providers/Microsoft.Synapse/workspaces/<SYNAPSE_WORKSPACE_NAME>/bigDataPools/<SPARK_POOL_NAME>
identity – this property defines the identity type to assign to the attached Synapse Spark pool. It can take one of these values:
For the identity type user_assigned, you should also provide a list of user_assigned_identities values. Each user-assigned identity should be declared as an element of the list, by using the resource_id value of the user-assigned identity. The first user-assigned identity in the list is used to submit a job by default.
name: <ATTACHED_SPARK_POOL_NAME>

type: synapsespark

resource_id: /subscriptions/<SUBSCRIPTION_ID>/resourceGroups/<RESOURCE_GROUP>/providers/Microsoft.Synapse/workspaces/<SYNAPSE_WORKSPACE_NAME>/bigDataPools/<SPARK_POOL_NAME>

identity:
  type: user_assigned
  user_assigned_identities:
    - resource_id: /subscriptions/<SUBSCRIPTION_ID>/resourceGroups/<RESOURCE_GROUP>/providers/Microsoft.ManagedIdentity/userAssignedIdentities/<AML_USER_MANAGED_ID>
The YAML files above can be used in the az ml compute attach command as the --file parameter. A Synapse Spark pool can be attached to an Azure Machine Learning workspace, in a specified resource group of a subscription, with the az ml compute attach command as shown here:
az ml compute attach --file <YAML_SPECIFICATION_FILE_NAME>.yaml --subscription <SUBSCRIPTION_ID> --resource-group <RESOURCE_GROUP> --workspace-name <AML_WORKSPACE_NAME>
This sample shows the expected output of the above command:
Class SynapseSparkCompute: This is an experimental class, and may change at any time. Please visit https://aka.ms/azuremlexperimental for more information.

{
    "auto_pause_settings": {
    "auto_pause_enabled": true,
    "delay_in_minutes": 15
    },
    "created_on": "2022-09-13 19:01:05.109840+00:00",
    "id": "/subscriptions/<SUBSCRIPTION_ID>/resourceGroups/<RESOURCE_GROUP>/providers/Microsoft.MachineLearningServices/workspaces/<AML_WORKSPACE_NAME>/computes/<ATTACHED_SPARK_POOL_NAME>",
    "location": "eastus2",
    "name": "<ATTACHED_SPARK_POOL_NAME>",
    "node_count": 5,
    "node_family": "MemoryOptimized",
    "node_size": "Small",
    "provisioning_state": "Succeeded",
    "resourceGroup": "<RESOURCE_GROUP>",
    "resource_id": "/subscriptions/<SUBSCRIPTION_ID>/resourceGroups/<RESOURCE_GROUP>/providers/Microsoft.Synapse/workspaces/<SYNAPSE_WORKSPACE_NAME>/bigDataPools/<SPARK_POOL_NAME>",
    "scale_settings": {
    "auto_scale_enabled": false,
    "max_node_count": 0,
    "min_node_count": 0
    },
    "spark_version": "3.2",
    "type": "synapsespark"
}
If the attached Synapse Spark pool, with the name specified in the YAML specification file, already exists in the workspace, then az ml compute attach command execution updates the existing pool with the information provided in the YAML specification file. You can update the
- identity type
- user assigned identities
- tags
values through YAML specification file.
To display details of an attached Synapse Spark pool, execute the az ml compute show command. Pass the name of the attached Synapse Spark pool with the --name parameter, as shown:
az ml compute show --name <ATTACHED_SPARK_POOL_NAME> --subscription <SUBSCRIPTION_ID> --resource-group <RESOURCE_GROUP> --workspace-name <AML_WORKSPACE_NAME>
This sample shows the expected output of the above command:
<ATTACHED_SPARK_POOL_NAME>
{
    "auto_pause_settings": {
    "auto_pause_enabled": true,
    "delay_in_minutes": 15
    },
    "created_on": "2022-09-13 19:01:05.109840+00:00",
    "id": "/subscriptions/<SUBSCRIPTION_ID>/resourceGroups/<RESOURCE_GROUP>/providers/Microsoft.MachineLearningServices/workspaces/<AML_WORKSPACE_NAME>/computes/<ATTACHED_SPARK_POOL_NAME>",
    "location": "eastus2",
    "name": "<ATTACHED_SPARK_POOL_NAME>",
    "node_count": 5,
    "node_family": "MemoryOptimized",
    "node_size": "Small",
    "provisioning_state": "Succeeded",
    "resourceGroup": "<RESOURCE_GROUP>",
    "resource_id": "/subscriptions/<SUBSCRIPTION_ID>/resourceGroups/<RESOURCE_GROUP>/providers/Microsoft.Synapse/workspaces/<SYNAPSE_WORKSPACE_NAME>/bigDataPools/<SPARK_POOL_NAME>",
    "scale_settings": {
    "auto_scale_enabled": false,
    "max_node_count": 0,
    "min_node_count": 0
    },
    "spark_version": "3.2",
    "type": "synapsespark"
}
To see a list of all computes, including the attached Synapse Spark pools in a workspace, use the az ml compute list command. Use the name parameter to pass the name of the workspace, as shown:
az ml compute list --subscription <SUBSCRIPTION_ID> --resource-group <RESOURCE_GROUP> --workspace-name <AML_WORKSPACE_NAME>
This sample shows the expected output of the above command:
[
    {
    "auto_pause_settings": {
        "auto_pause_enabled": true,
        "delay_in_minutes": 15
    },
    "created_on": "2022-09-09 21:28:54.871251+00:00",
    "id": "/subscriptions/<SUBSCRIPTION_ID>/resourceGroups/<RESOURCE_GROUP>/providers/Microsoft.MachineLearningServices/workspaces/<AML_WORKSPACE_NAME>/computes/<ATTACHED_SPARK_POOL_NAME>",
    "identity": {
        "principal_id": "<PRINCIPAL_ID>",
        "tenant_id": "<TENANT_ID>",
        "type": "system_assigned"
    },
    "location": "eastus2",
    "name": "<ATTACHED_SPARK_POOL_NAME>",
    "node_count": 5,
    "node_family": "MemoryOptimized",
    "node_size": "Small",
    "provisioning_state": "Succeeded",
    "resourceGroup": "<RESOURCE_GROUP>",
    "resource_id": "/subscriptions/<SUBSCRIPTION_ID>/resourceGroups/<RESOURCE_GROUP>/providers/Microsoft.Synapse/workspaces/<SYNAPSE_WORKSPACE_NAME>/bigDataPools/<SPARK_POOL_NAME>",
    "scale_settings": {
        "auto_scale_enabled": false,
        "max_node_count": 0,
        "min_node_count": 0
    },
    "spark_version": "3.2",
    "type": "synapsespark"
    },
    ...
]
APPLIES TO:  Python SDK azure-ai-ml v2 (current)
Azure Machine Learning Python SDK provides convenient functions for attaching and managing Synapse Spark pool, using Python code in Azure Machine Learning Notebooks.
To attach a Synapse Compute using Python SDK, first create an instance of azure.ai.ml.MLClient class. This provides convenient functions for interaction with Azure Machine Learning services. The following code sample uses azure.identity.DefaultAzureCredential to connect to a workspace in the resource group of a specified Azure subscription. In the following code sample, define the SynapseSparkCompute with these parameters:
name - user-defined name of the new attached Synapse Spark pool.resource_id - resource ID of the Synapse Spark pool created earlier in the Azure Synapse Analytics workspace
An azure.ai.ml.MLClient.begin_create_or_update() function call attaches the defined Synapse Spark pool to the Azure Machine Learning workspace.
from azure.ai.ml import MLClient
from azure.ai.ml.entities import SynapseSparkCompute
from azure.identity import DefaultAzureCredential

subscription_id = "<SUBSCRIPTION_ID>"
resource_group = "<RESOURCE_GROUP>"
workspace_name = "<AML_WORKSPACE_NAME>"

ml_client = MLClient(
    DefaultAzureCredential(), subscription_id, resource_group, workspace_name
)

synapse_name = "<ATTACHED_SPARK_POOL_NAME>"
synapse_resource = "/subscriptions/<SUBSCRIPTION_ID>/resourceGroups/<RESOURCE_GROUP>/providers/Microsoft.Synapse/workspaces/<SYNAPSE_WORKSPACE_NAME>/bigDataPools/<SPARK_POOL_NAME>"

synapse_comp = SynapseSparkCompute(name=synapse_name, resource_id=synapse_resource)
ml_client.begin_create_or_update(synapse_comp)
To attach a Synapse Spark pool that uses system-assigned identity, pass IdentityConfiguration, with type set to SystemAssigned, as the identity parameter of the SynapseSparkCompute class. This code snippet attaches a Synapse Spark pool that uses system-assigned identity:
# import required libraries
from azure.ai.ml import MLClient
from azure.ai.ml.entities import SynapseSparkCompute, IdentityConfiguration
from azure.identity import DefaultAzureCredential

subscription_id = "<SUBSCRIPTION_ID>"
resource_group = "<RESOURCE_GROUP>"
workspace_name = "<AML_WORKSPACE_NAME>"

ml_client = MLClient(
    DefaultAzureCredential(), subscription_id, resource_group, workspace_name
)

synapse_name = "<ATTACHED_SPARK_POOL_NAME>"
synapse_resource = "/subscriptions/<SUBSCRIPTION_ID>/resourceGroups/<RESOURCE_GROUP>/providers/Microsoft.Synapse/workspaces/<SYNAPSE_WORKSPACE_NAME>/bigDataPools/<SPARK_POOL_NAME>"
synapse_identity = IdentityConfiguration(type="SystemAssigned")

synapse_comp = SynapseSparkCompute(
    name=synapse_name, resource_id=synapse_resource, identity=synapse_identity
)
ml_client.begin_create_or_update(synapse_comp)
A Synapse Spark pool can also use a user-assigned identity. For a user-assigned identity, you can pass a managed identity definition, using the IdentityConfiguration class, as the identity parameter of the SynapseSparkCompute class. For the managed identity definition used in this way, set the type to UserAssigned. In addition, pass a user_assigned_identities parameter. The parameter user_assigned_identities is a list of objects of the UserAssignedIdentity class. The resource_id of the user-assigned identity populates each UserAssignedIdentity class object. This code snippet attaches a Synapse Spark pool that uses a user-assigned identity:
# import required libraries
from azure.ai.ml import MLClient
from azure.ai.ml.entities import (
    SynapseSparkCompute,
    IdentityConfiguration,
    UserAssignedIdentity,
)
from azure.identity import DefaultAzureCredential

subscription_id = "<SUBSCRIPTION_ID>"
resource_group = "<RESOURCE_GROUP>"
workspace_name = "<AML_WORKSPACE_NAME>"

ml_client = MLClient(
    DefaultAzureCredential(), subscription_id, resource_group, workspace_name
)

synapse_name = "<ATTACHED_SPARK_POOL_NAME>"
synapse_resource = "/subscriptions/<SUBSCRIPTION_ID>/resourceGroups/<RESOURCE_GROUP>/providers/Microsoft.Synapse/workspaces/<SYNAPSE_WORKSPACE_NAME>/bigDataPools/<SPARK_POOL_NAME>"
synapse_identity = IdentityConfiguration(
    type="UserAssigned",
    user_assigned_identities=[
        UserAssignedIdentity(
            resource_id="/subscriptions/<SUBSCRIPTION_ID/resourceGroups/<RESOURCE_GROUP>/providers/Microsoft.ManagedIdentity/userAssignedIdentities/<AML_USER_MANAGED_ID>"
        )
    ],
)

synapse_comp = SynapseSparkCompute(
    name=synapse_name, resource_id=synapse_resource, identity=synapse_identity
)
ml_client.begin_create_or_update(synapse_comp)
Note
The azure.ai.ml.MLClient.begin_create_or_update() function attaches a new Synapse Spark pool, if a pool with the specified name does not already exist in the workspace. However, if a Synapse Spark pool with that specified name is already attached to the workspace, a call to the azure.ai.ml.MLClient.begin_create_or_update() function will update the existing attached pool with the new identity or identities.
 Azure CLI ml extension v2 (current)
 Python SDK azure-ai-ml v2 (current)


