RAG from cloud to local - bring your own data QnA (preview)
In this article, you'll learn how to transition your RAG created flows from cloud in your Azure Machine Learning workspace to local using the prompt flow VS Code extension.
Important
Retrieval Augmented Generation (RAG) is currently in public preview. This preview is provided without a service-level agreement, and are not recommended for production workloads. Certain features might not be supported or might have constrained capabilities. For more information, see Supplemental Terms of Use for Microsoft Azure Previews.
Prerequisites
Install prompt flow SDK:
pip install promptflow promptflow-toolTo learn more, see prompt flow local quick start
Install promptflow-vectordb SDK:
pip install promptflow-vectordbInstall the prompt flow extension in VS Code

Download your flow files to local
For example, there's already a flow "Bring Your Own Data QnA" in the workspace, which uses the Vector index lookup tool to search question from the indexed docs.
The index docs are stored in the workspace binding storage blog.

Go to the flow authoring, select the Download icon in the file explorer. It downloads the flow zip package to local, such as "Bring Your Own Data Qna.zip" file, which contains the flow files.

Open the flow folder in VS Code
Unzip the "Bring Your Own Data Qna.zip" locally, and open the "Bring Your Own Data QnA" folder in VS Code desktop.
Tip
If you don't depend on the prompt flow extension in VS Code, you can open the folder in any IDE you like.
Create a local connection
To use the vector index lookup tool locally, you need to create the same connection to the vector index service as you did in the cloud.

Open the "flow.dag.yaml" file, search the "connections" section, you can find the connection configuration you used in your Azure Machine Learning workspace.
Create a local connection same as the cloud one.
If you have the prompt flow extension installed in VS Code desktop, you can create the connection in the extension UI.
Select the prompt flow extension icon to go to the prompt flow management central place. Select the + icon in the connection explorer, and select the connection type "AzureOpenAI".

Create a connection with Azure CLI
If you prefer to use Azure CLI instead of the VS Code extension you can create a connection yaml file "AzureOpenAIConnection.yaml", then run the connection create CLI command in the terminal:
   $schema: https://azuremlschemas.azureedge.net/promptflow/latest/AzureOpenAIConnection.schema.json
   name: azure_open_ai_connection
   type: azure_open_ai
   api_key: "<aoai-api-key>" #your key
   api_base: "aoai-api-endpoint"
   api_type: "azure"
   api_version: "2023-03-15-preview"
pf connection create -f AzureOpenAIConnection.yaml
Note
The rest of this article details how to use the VS code extension to edit the files, you can follow this quick start on how to edit your files with CLI instructions.
Check and modify the flow files
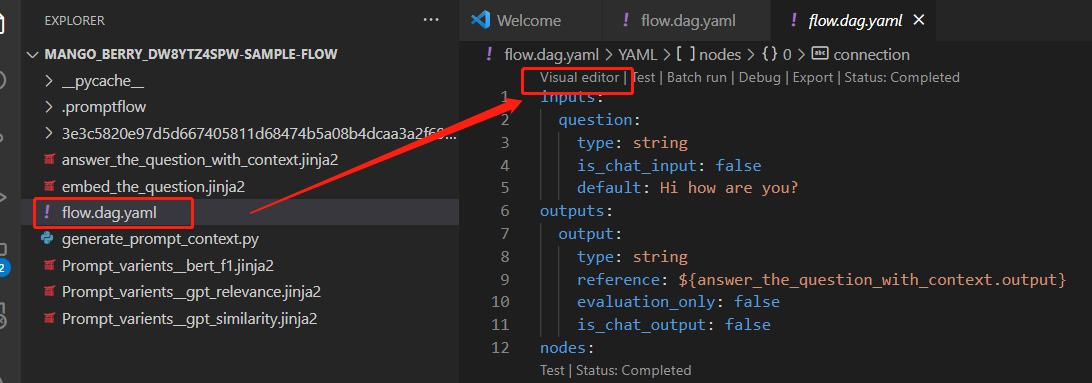
Open "flow.dag.yaml" and select "Visual editor"
Note
When legacy tools switching to code first mode, "not found" error may occur, refer to Vector DB/Faiss Index/Vector Index Lookup tool rename reminder
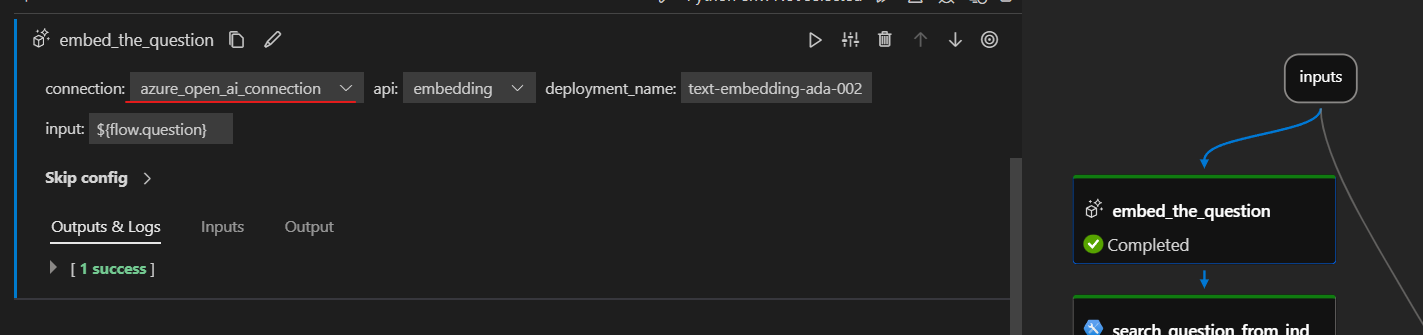
Jump to the "embed_the_question" node, make sure the connection is the local connection you have created, and double check the deployment_name, which is the model you use here for the embedding.
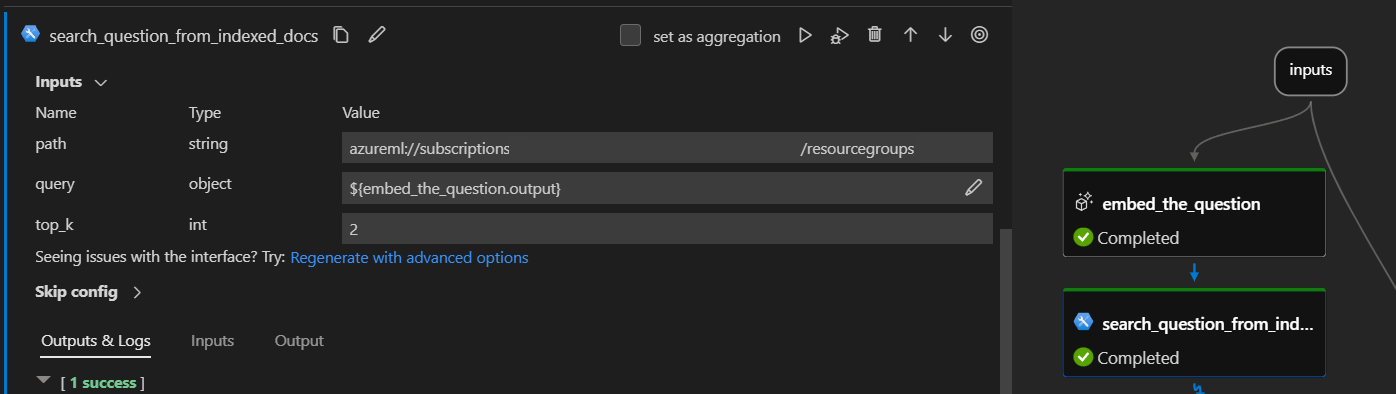
Jump to the "search_question_from_indexed_docs" node, which consumes the Vector Index Lookup Tool in this flow. Check the path of your indexed docs you specify. All public accessible path is supported, such as:
https://github.com/Azure/azureml-assets/tree/main/assets/promptflow/data/faiss-index-lookup/faiss_index_sample.Note
If your indexed docs is the data asset in your workspace, the local consume of it need Azure authentication.
Before run the flow, make sure you have
az loginand connect to the Azure Machine Learning workspace.To learn more, see Connect to Azure Machine Learning workspace
Then select on the Edit button located within the "query" input box. This will take you to the raw flow.dag.yaml file and locate to the definition of this node.
Check the "tool" section within this node. Ensure that the value of the "tool" section is set to
promptflow_vectordb.tool.vector_index_lookup.VectorIndexLookup.search. This tool package name of the VectorIndexLookup local version.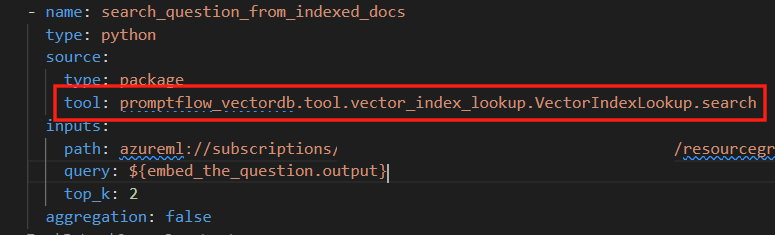
Jump to the "generate_prompt_context" node, check the package name of the vector tool in this python node is
promptflow_vectordb.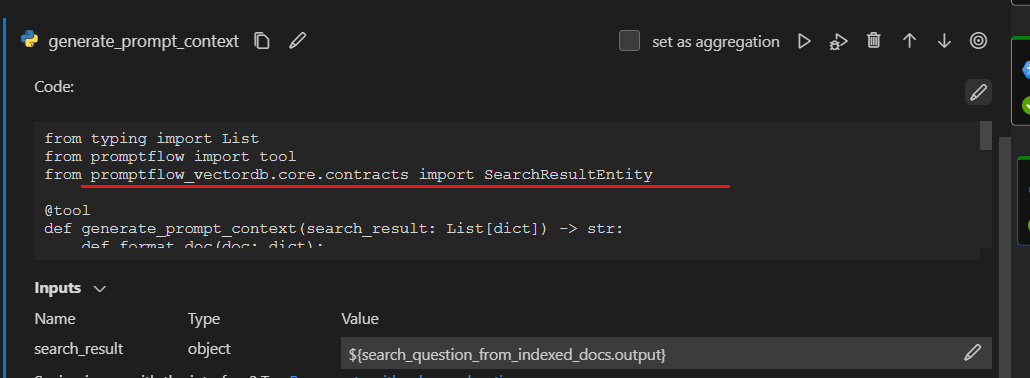
Jump to the "answer_the_question_with_context" node, check the connection and deployment_name as well.


Test and run the flow
Scroll up to the top of the flow, fill in the "Inputs" value of this single run for testing, for example "How to use SDK V2?", then run the flows. Then select the Run button in the top right corner. This will trigger a single run of the flow.

For batch run and evaluation, you can refer to Submit flow run to Azure Machine Learning workspace
Next steps
Feedback
Coming soon: Throughout 2024 we will be phasing out GitHub Issues as the feedback mechanism for content and replacing it with a new feedback system. For more information see: https://aka.ms/ContentUserFeedback.
Submit and view feedback for