Note
Access to this page requires authorization. You can try signing in or changing directories.
Access to this page requires authorization. You can try changing directories.
Important
This article provides information on using the Azure Machine Learning SDK v1. The SDK v1 is deprecated as of March 31, 2025 and support for it will end on June 30, 2026. You're able to install and use the SDK v1 until that date.
We recommend that you transition to the SDK v2 before June 30, 2026. For more information on the SDK v2, see What is the Azure Machine Learning Python SDK v2 and the SDK v2 reference.
In this article, you learn how to use the designer to create a batch prediction pipeline. Batch prediction lets you continuously score large datasets on demand by using a web service that can be triggered from any HTTP library.
In this how-to guide, you learn to do the following tasks:
- Create and publish a batch inference pipeline.
- Consume a pipeline endpoint.
- Manage endpoint versions.
To learn how to set up batch scoring services using the SDK, see Tutorial: Build an Azure Machine Learning pipeline for image classification.
Prerequisites
This how-to assumes you already have a training pipeline. For a guided introduction to the designer, complete part one of the designer tutorial.
Important
If you don't see graphical elements mentioned in this document, such as buttons in studio or designer, you might not have the right level of permissions to the workspace. Contact your Azure subscription administrator to verify that you have been granted the correct level of access. For more information, see Manage users and roles.
Create a batch inference pipeline
Your training pipeline must be run at least once to be able to create an inferencing pipeline.
Sign in to the Machine Learning studio, then select Designer.
Select the training pipeline that trains the model you want to use to make prediction.
Submit the pipeline.
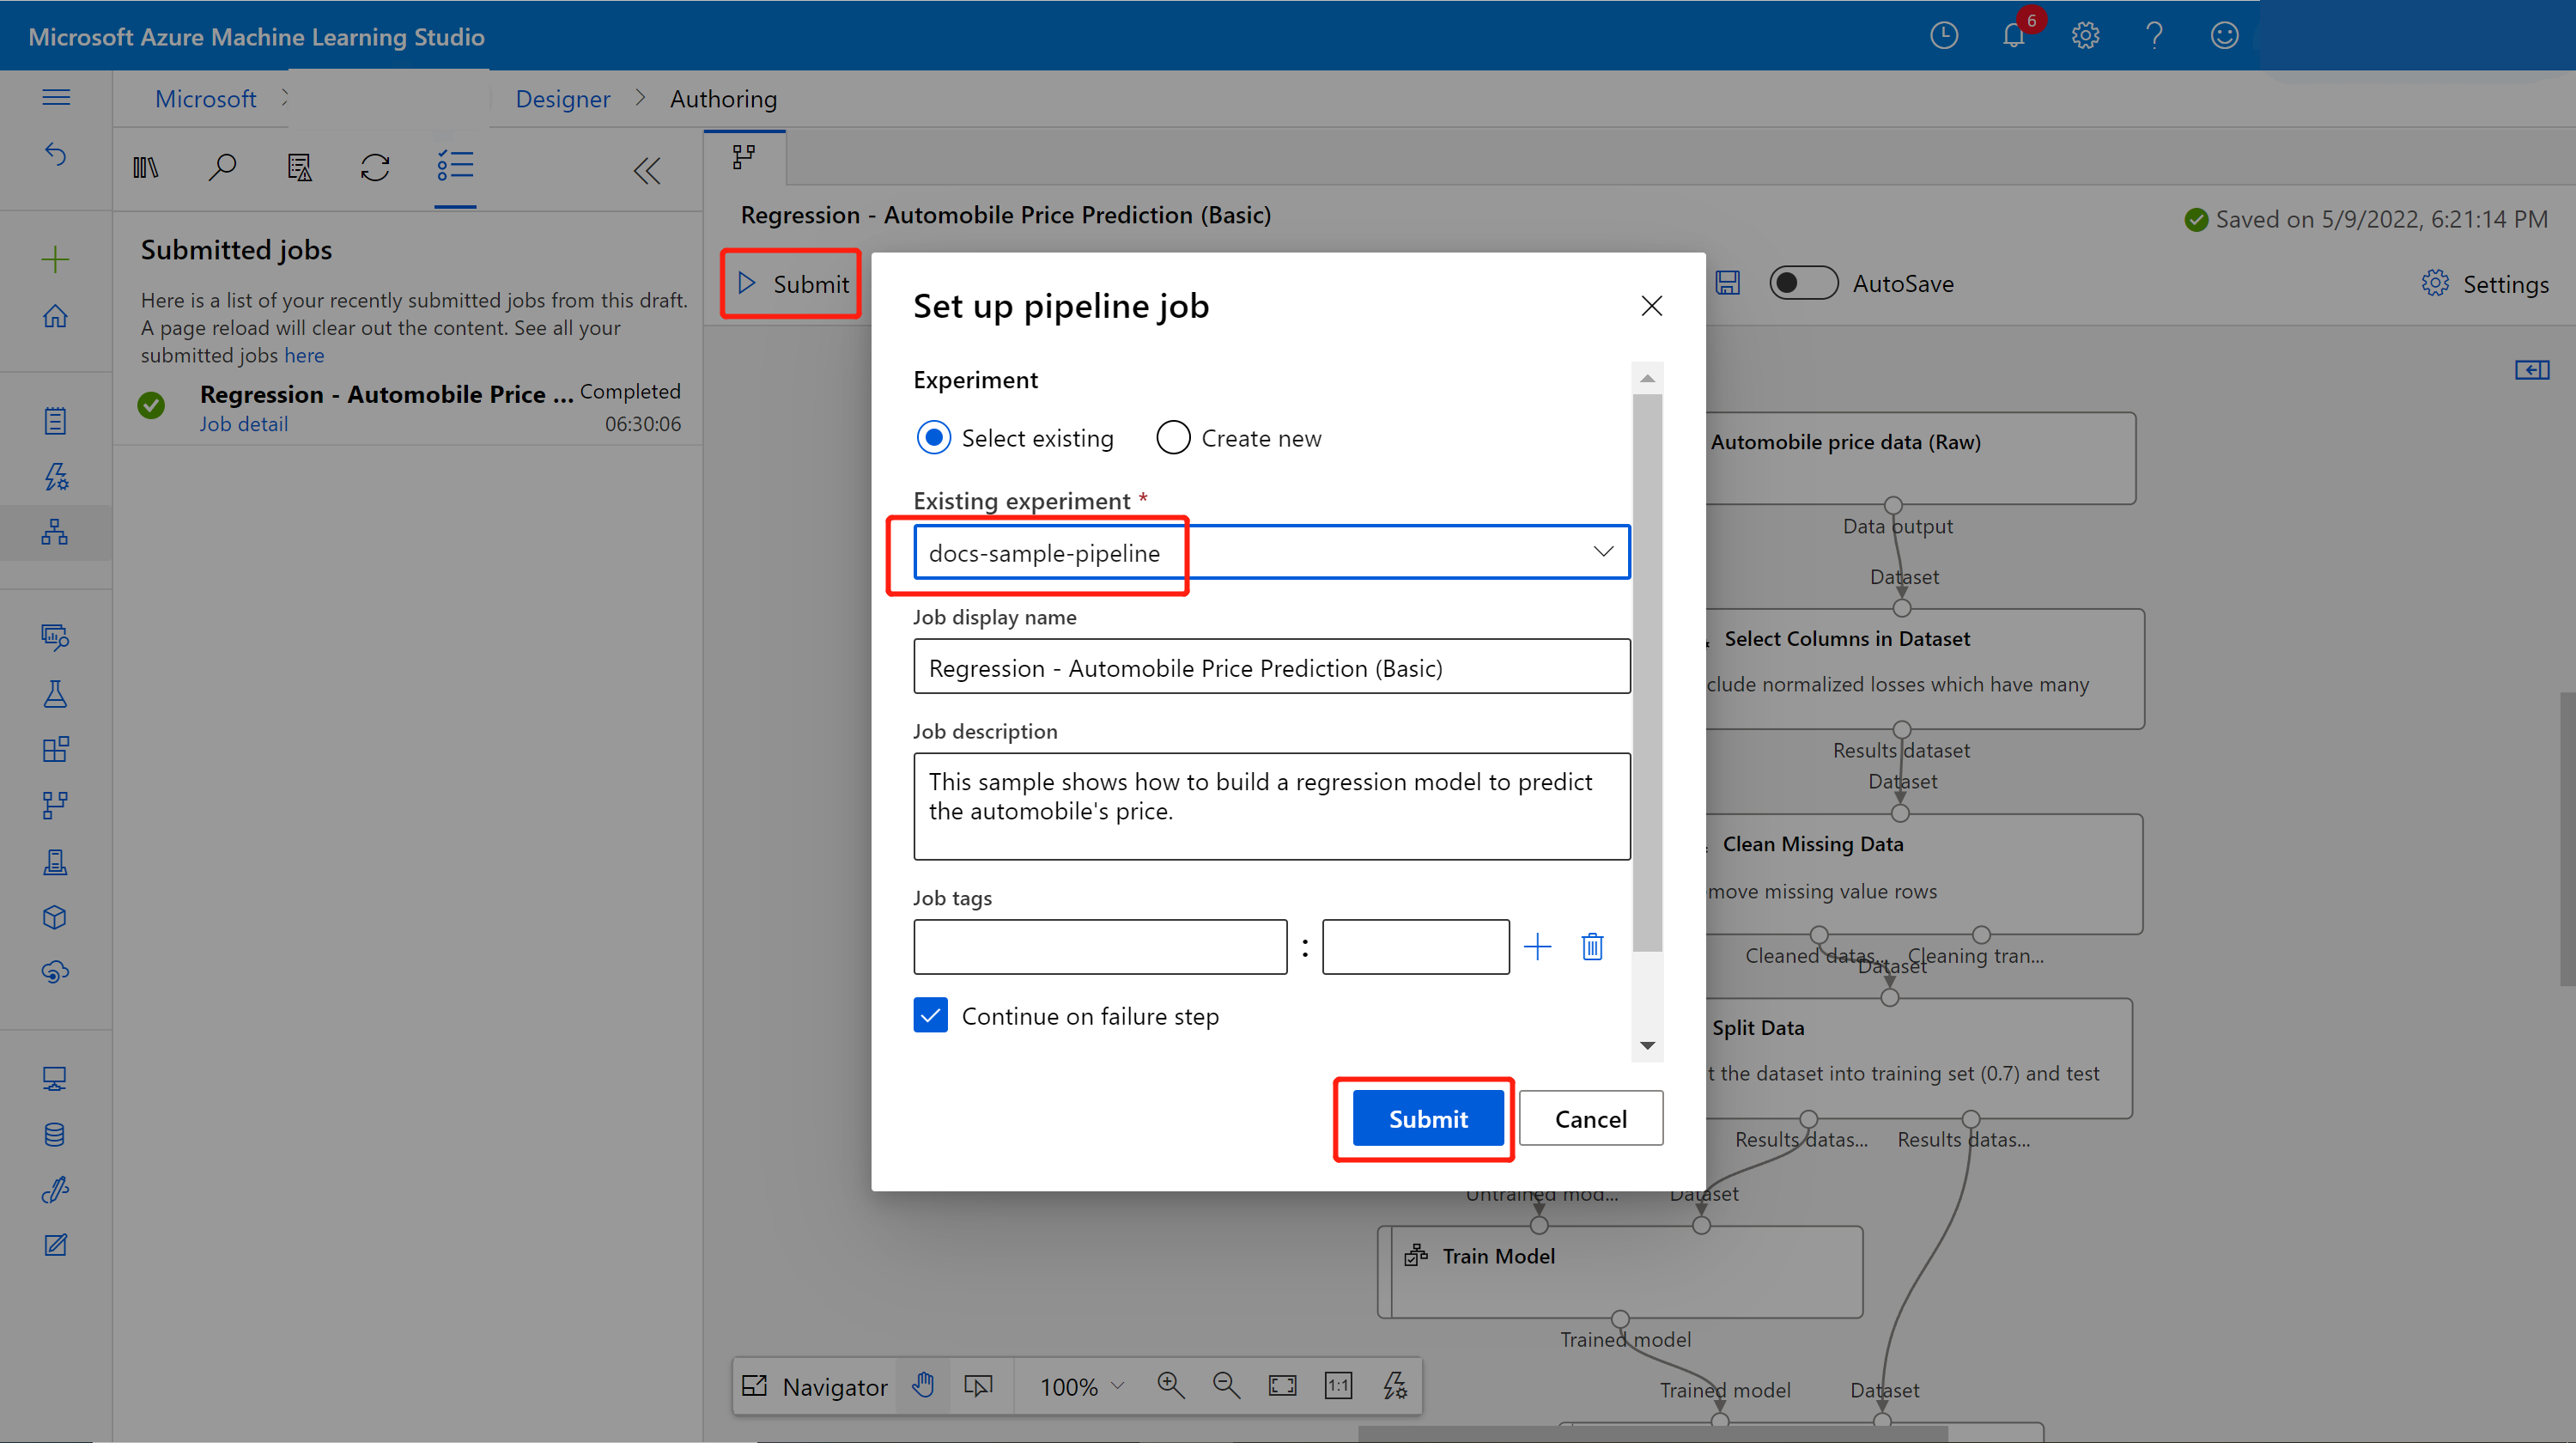

You can select the job detail link to go to the job detail page, and after the training pipeline job completes, you can create a batch inference pipeline.
Select Jobs in the sidebar menu and choose your job. Above the canvas, select the dropdown Create inference pipeline. Select Batch inference pipeline.
Note
Currently auto-generating inference pipeline only works for training pipeline built purely by the designer built-in components.
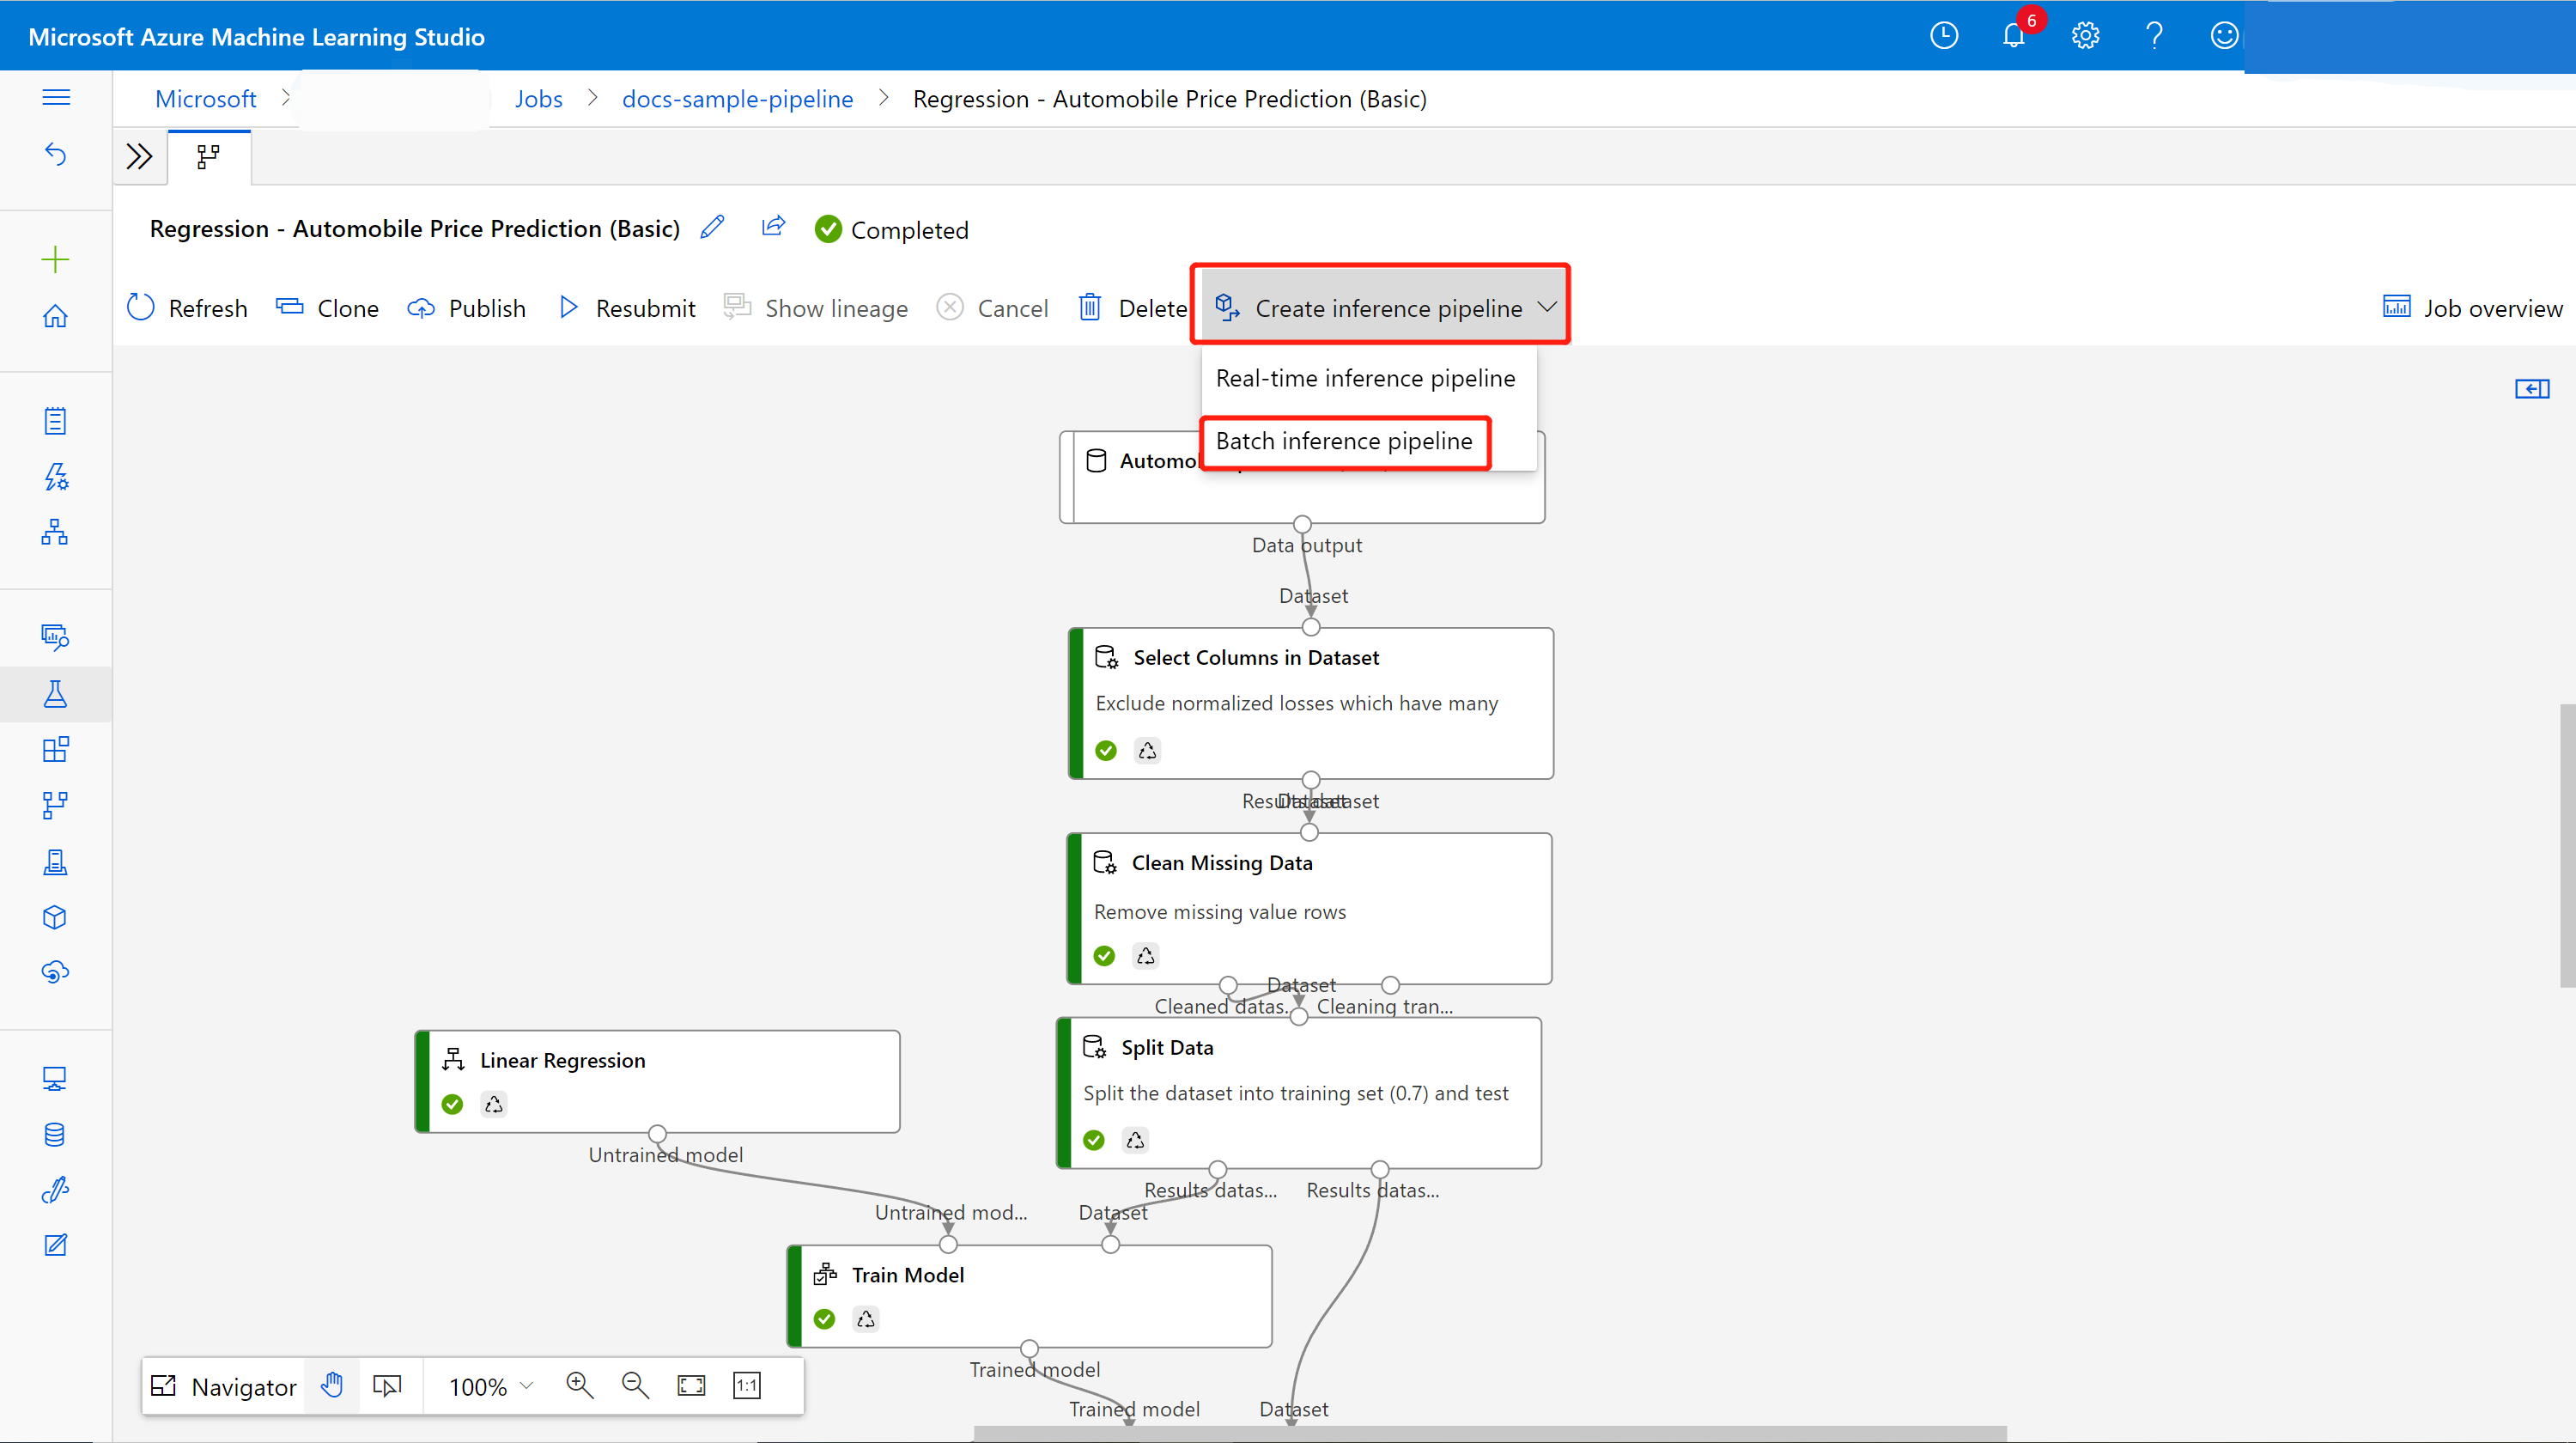
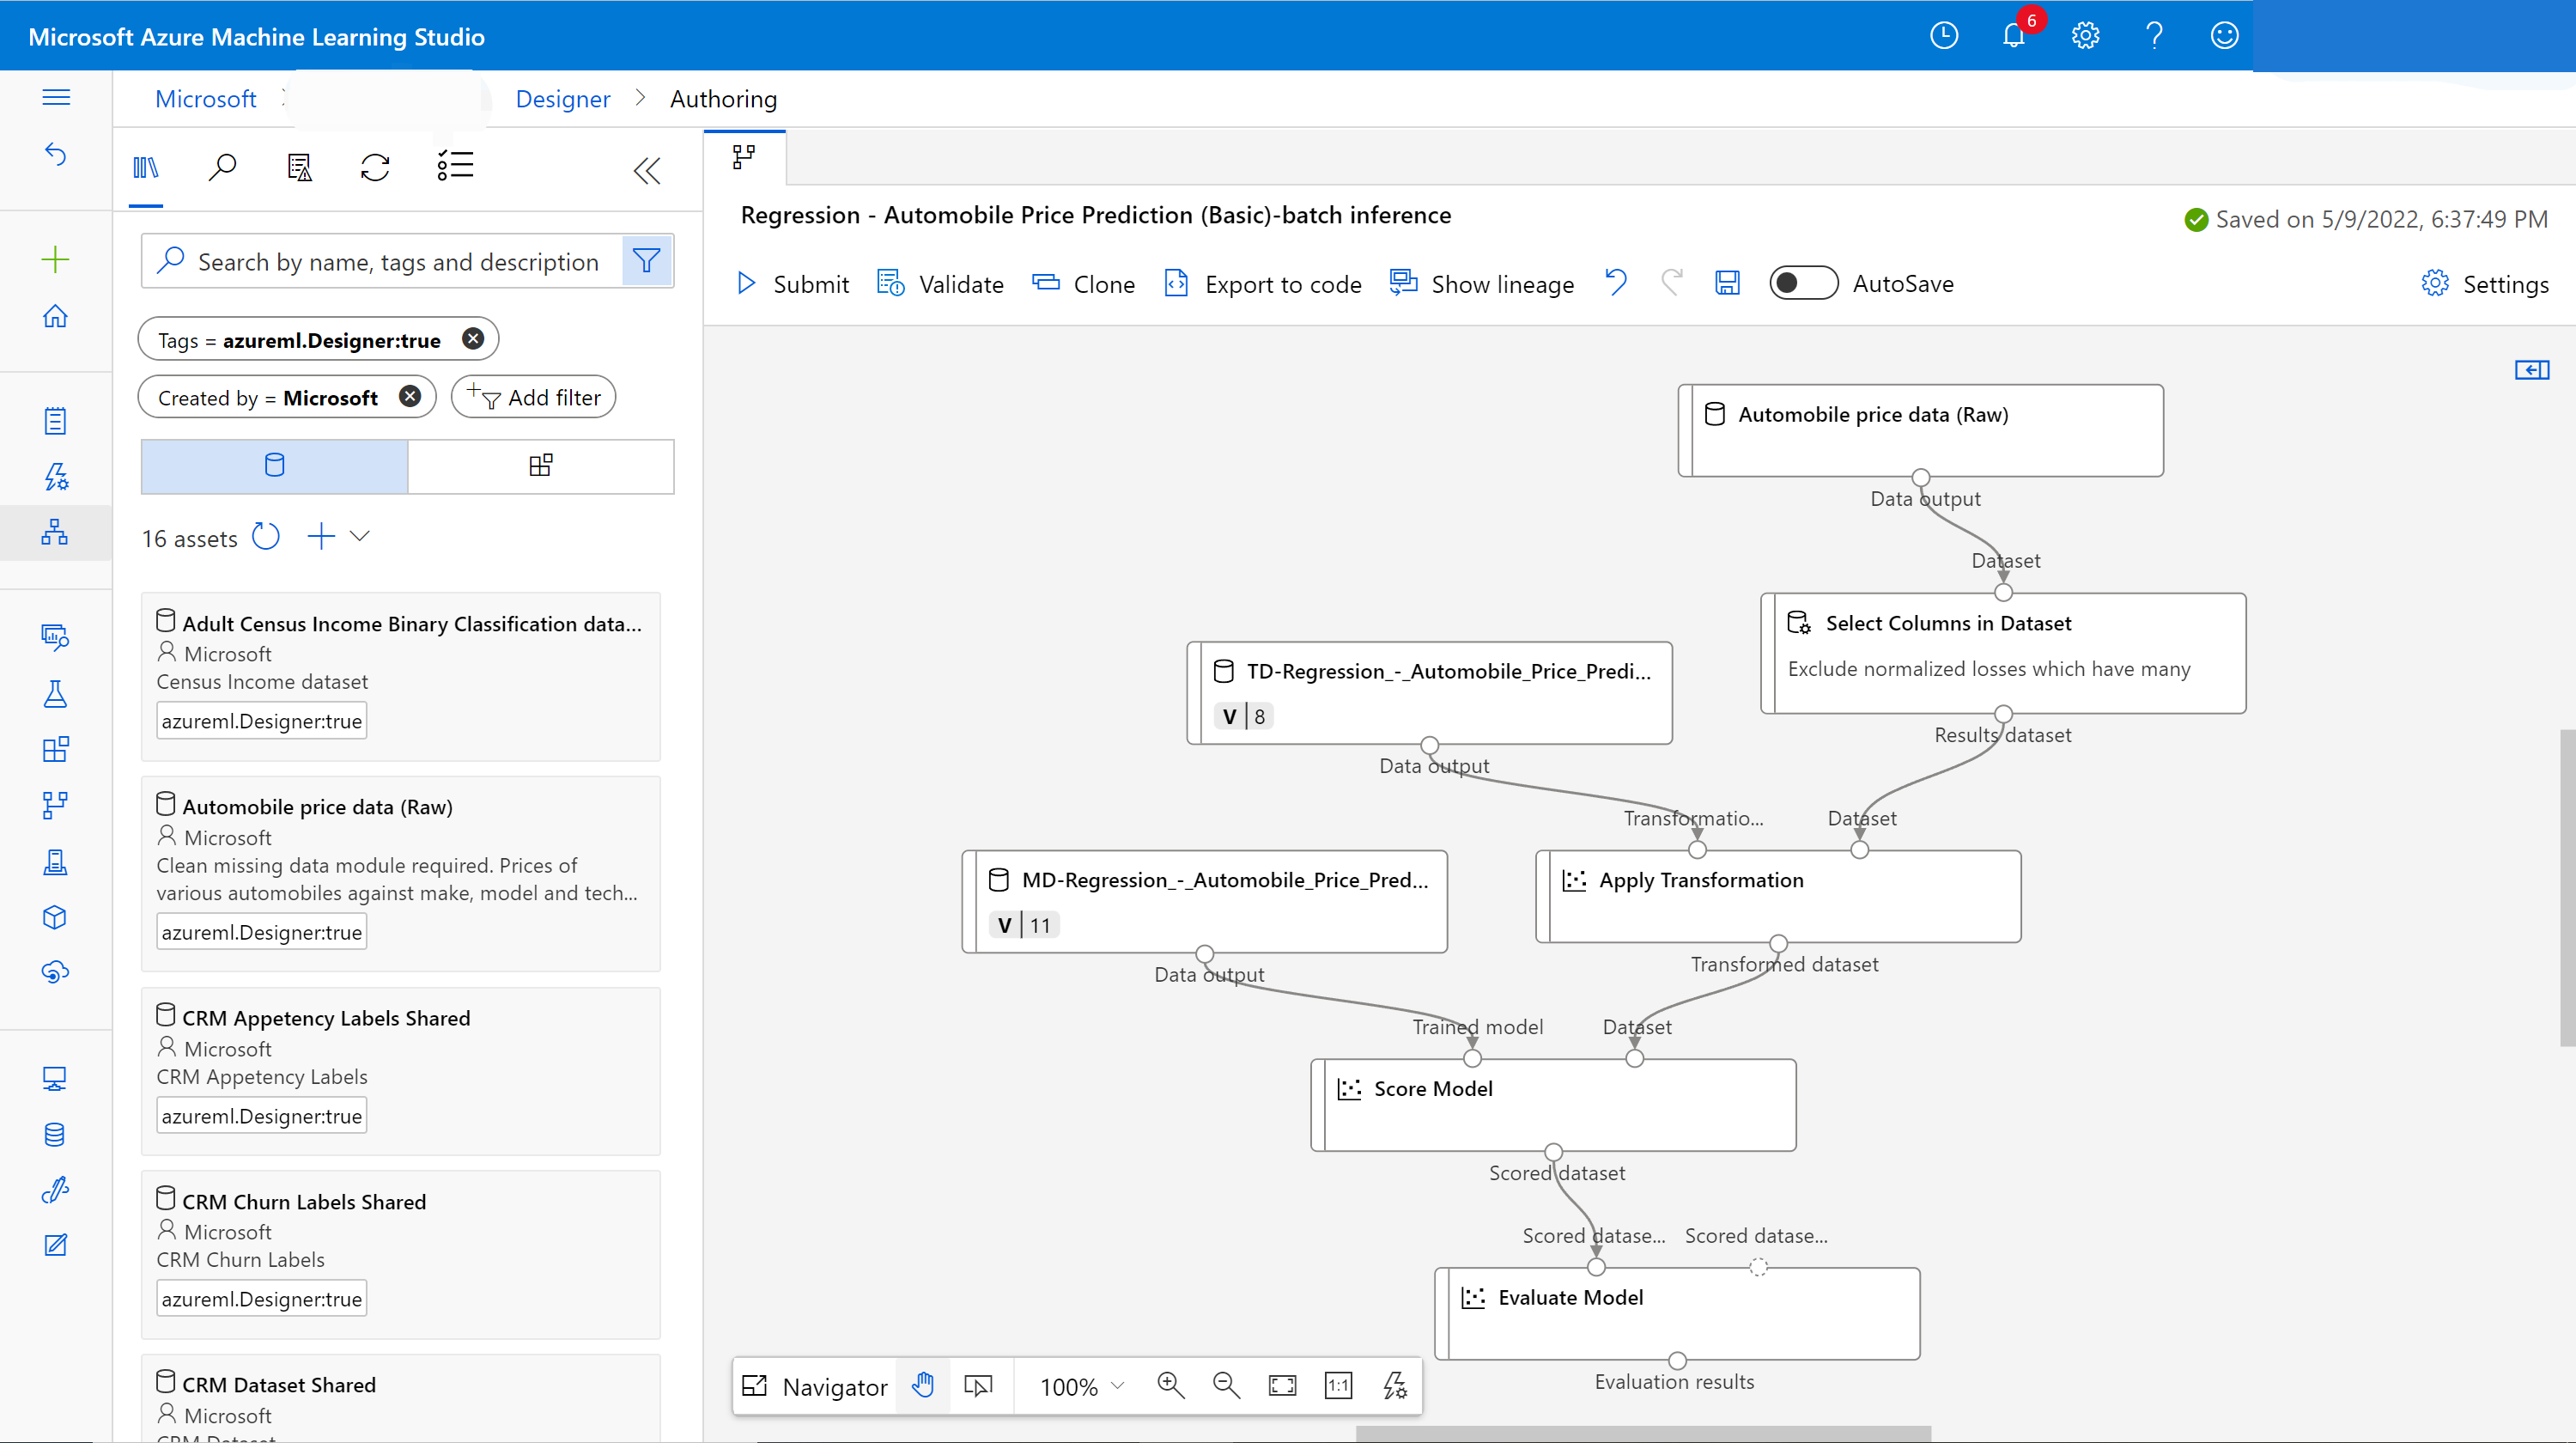
It creates a batch inference pipeline draft for you. The batch inference pipeline draft uses the trained model as MD- node and transformation as TD- node from the training pipeline job.
You can also modify this inference pipeline draft to better handle your input data for batch inference.


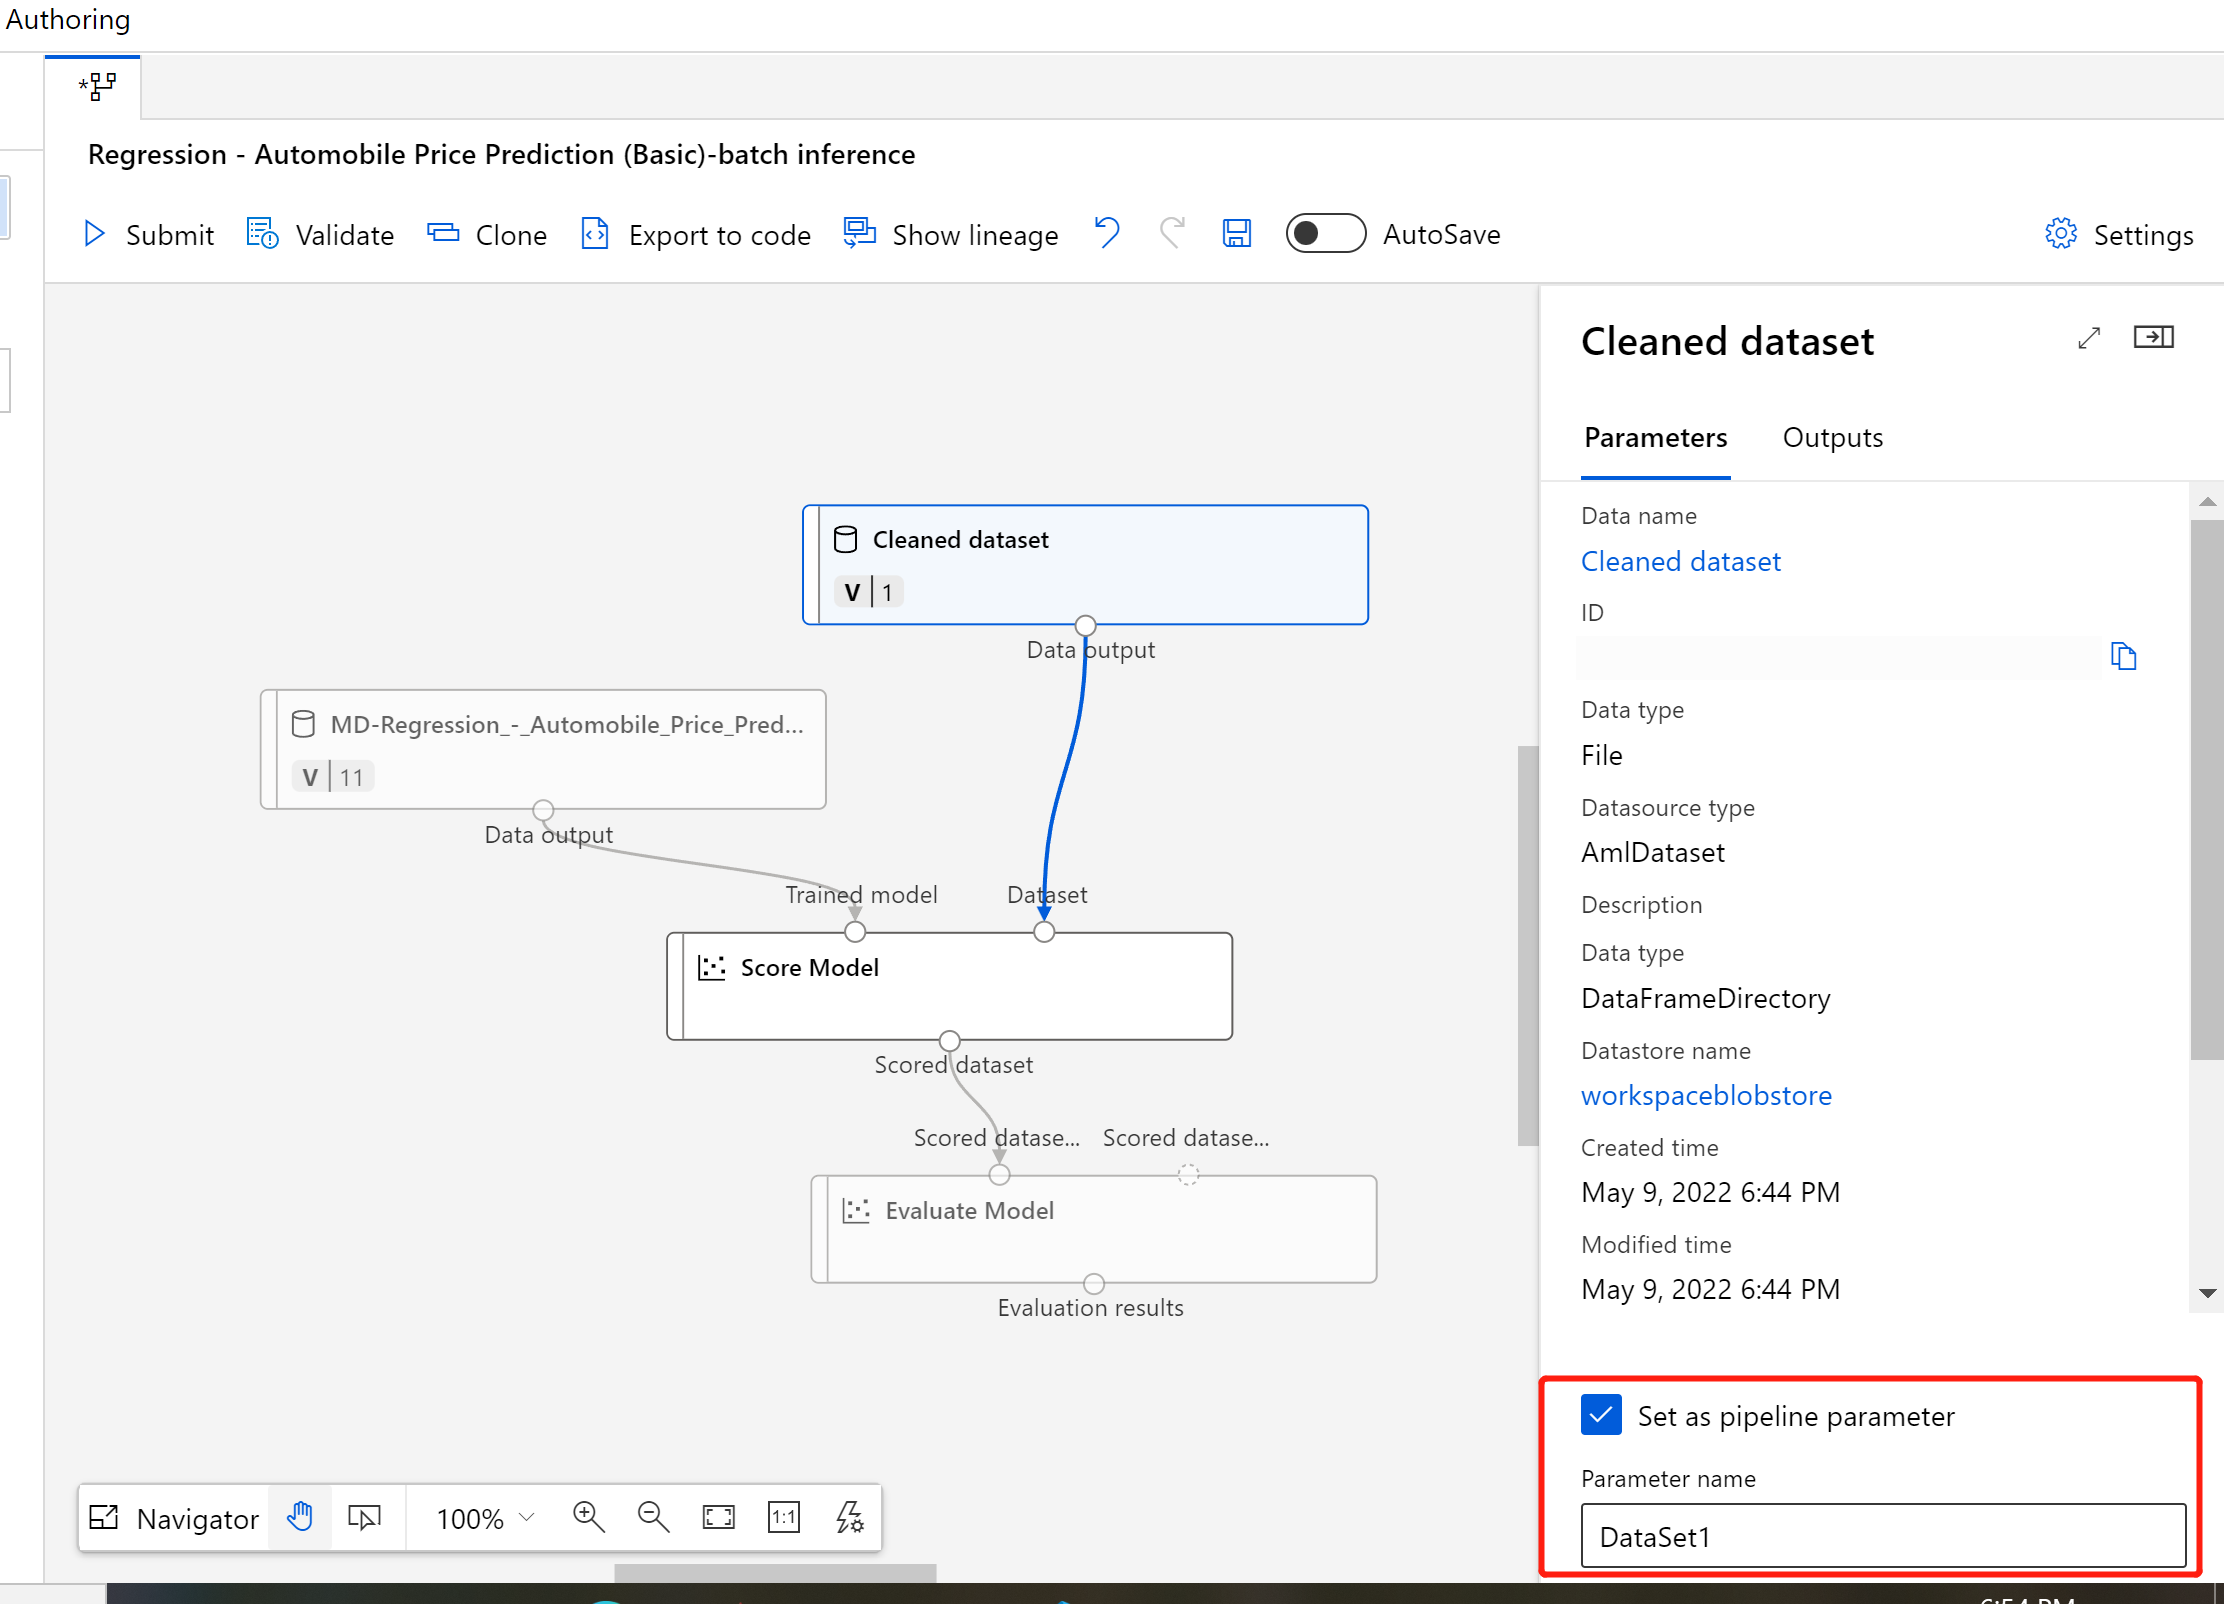
Add a pipeline input
To create predictions on new data, you can either manually connect a different dataset in this pipeline draft view or create an input parameter for your dataset. Inputs let you change the behavior of the batch inferencing process at runtime.
In this section, you create a pipeline input to specify a different dataset to make predictions on.
Double-click the dataset component.
A pane appears to the right of the canvas. At the bottom of the pane, select Set as pipeline input.
Enter a name for the input, or accept the default value.
Submit the batch inference pipeline.

Publish your batch inference pipeline
Now you're ready to deploy the inference pipeline. This deploys the pipeline and makes it available for others to use.
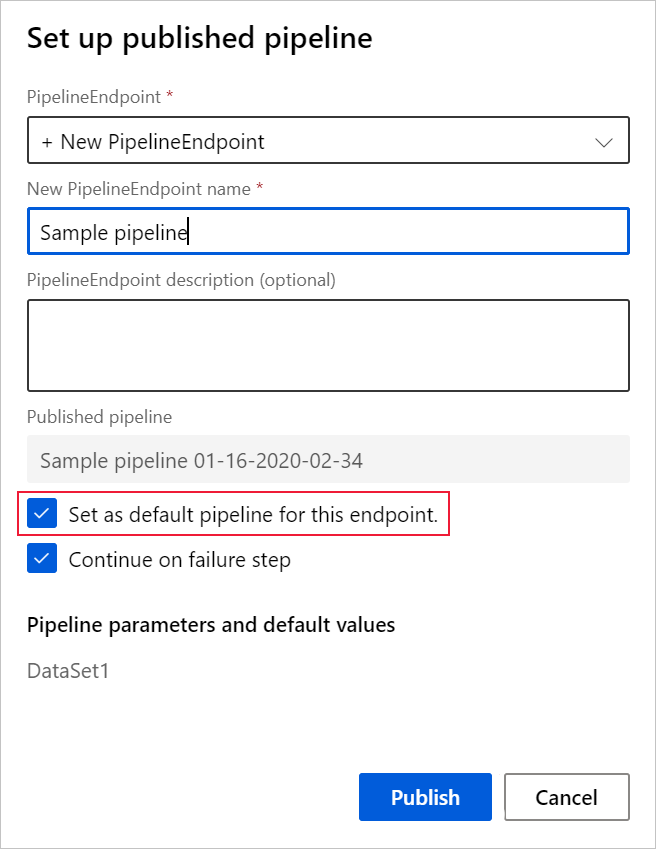
On the job detail page, select the Publish button in the ribbon menu.
In the dialog that appears, select Create new.
Provide an endpoint name and optional description.
Near the bottom of the dialog, you can see the input you configured with a default value of the dataset ID used during training.
Select Publish.


Consume an endpoint
Now, you have a published pipeline with a dataset parameter. The pipeline uses the trained model created in the training pipeline to score the dataset you provide as a parameter.
Submit a pipeline job
In this section, you set up a manual pipeline job and alter the pipeline parameter to score new data.
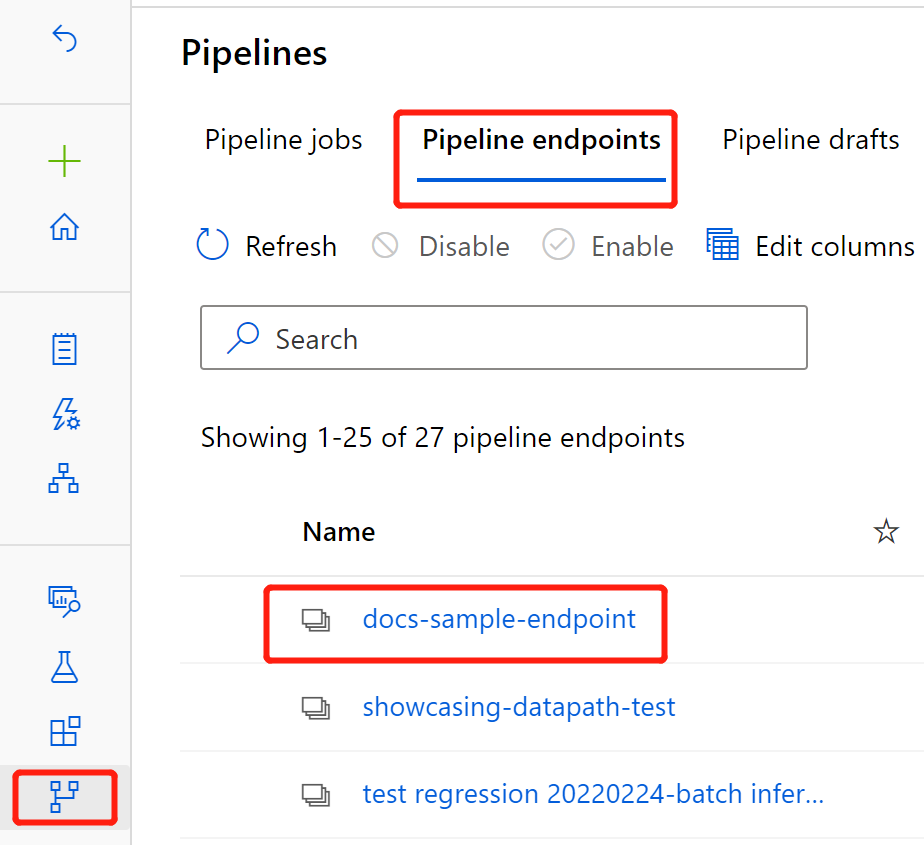
After the deployment is complete, select Pipelines in the sidebar menu.
Select the Pipeline endpoints tab.
Select the name of the endpoint you created.
Select Published pipelines.
This screen shows all published pipelines published under this endpoint.
Select the pipeline you published.
The pipeline details page shows you a detailed job history and connection string information for your pipeline.
Select Submit to create a manual run of the pipeline.

Change the parameter to use a different dataset.
Select Submit to run the pipeline.

Use the REST endpoint
You can find information on how to consume pipeline endpoints and published pipeline in the Endpoints section.
You can find the REST endpoint of a pipeline endpoint in the job overview panel. By calling the endpoint, you're consuming its default published pipeline.
You can also consume a published pipeline in the Published pipelines page. Select a published pipeline and you can find the REST endpoint of it in the Published pipeline overview panel to the right of the graph.
To make a REST call, you need an OAuth 2.0 bearer-type authentication header. See the following tutorial section for more detail on setting up authentication to your workspace and making a parameterized REST call.
Versioning endpoints
The designer assigns a version to each subsequent pipeline that you publish to an endpoint. You can specify the pipeline version that you want to execute as a parameter in your REST call. If you don't specify a version number, the designer uses the default pipeline.
When you publish a pipeline, you can choose to make it the new default pipeline for that endpoint.
You can also set a new default pipeline in the Published pipelines tab of your endpoint.
Update pipeline endpoint
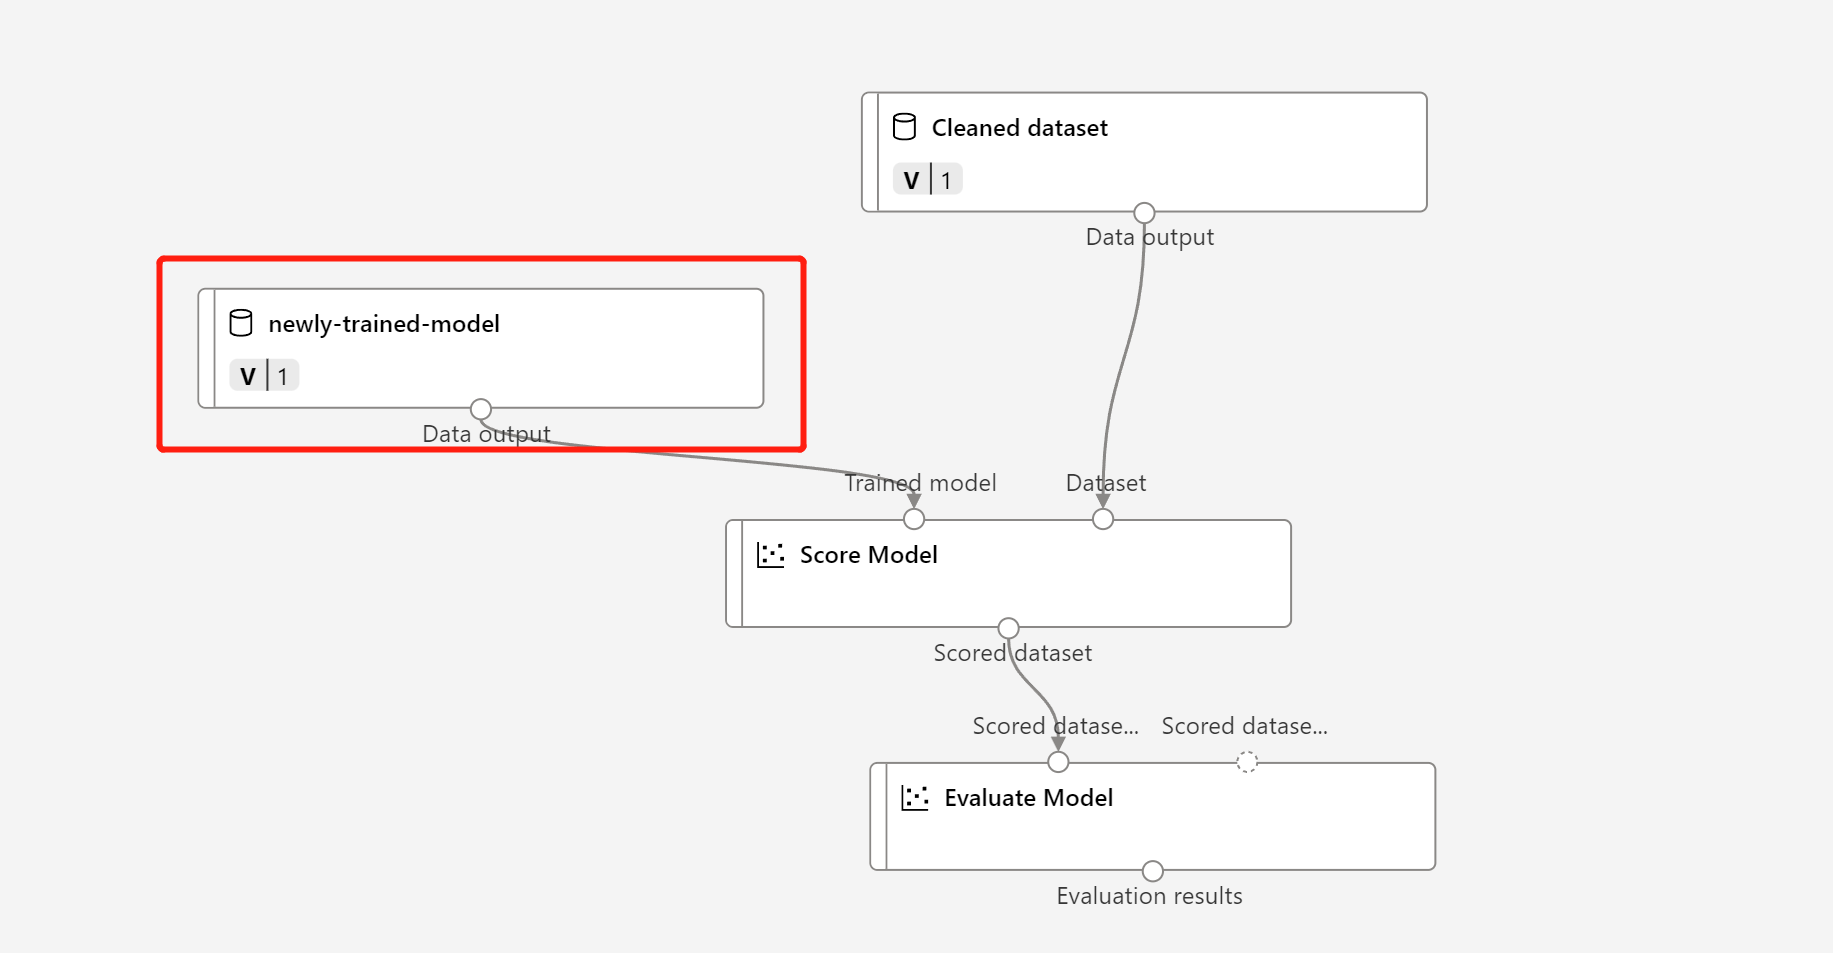
If you make some modifications in your training pipeline, you might want to update the newly trained model to the pipeline endpoint.
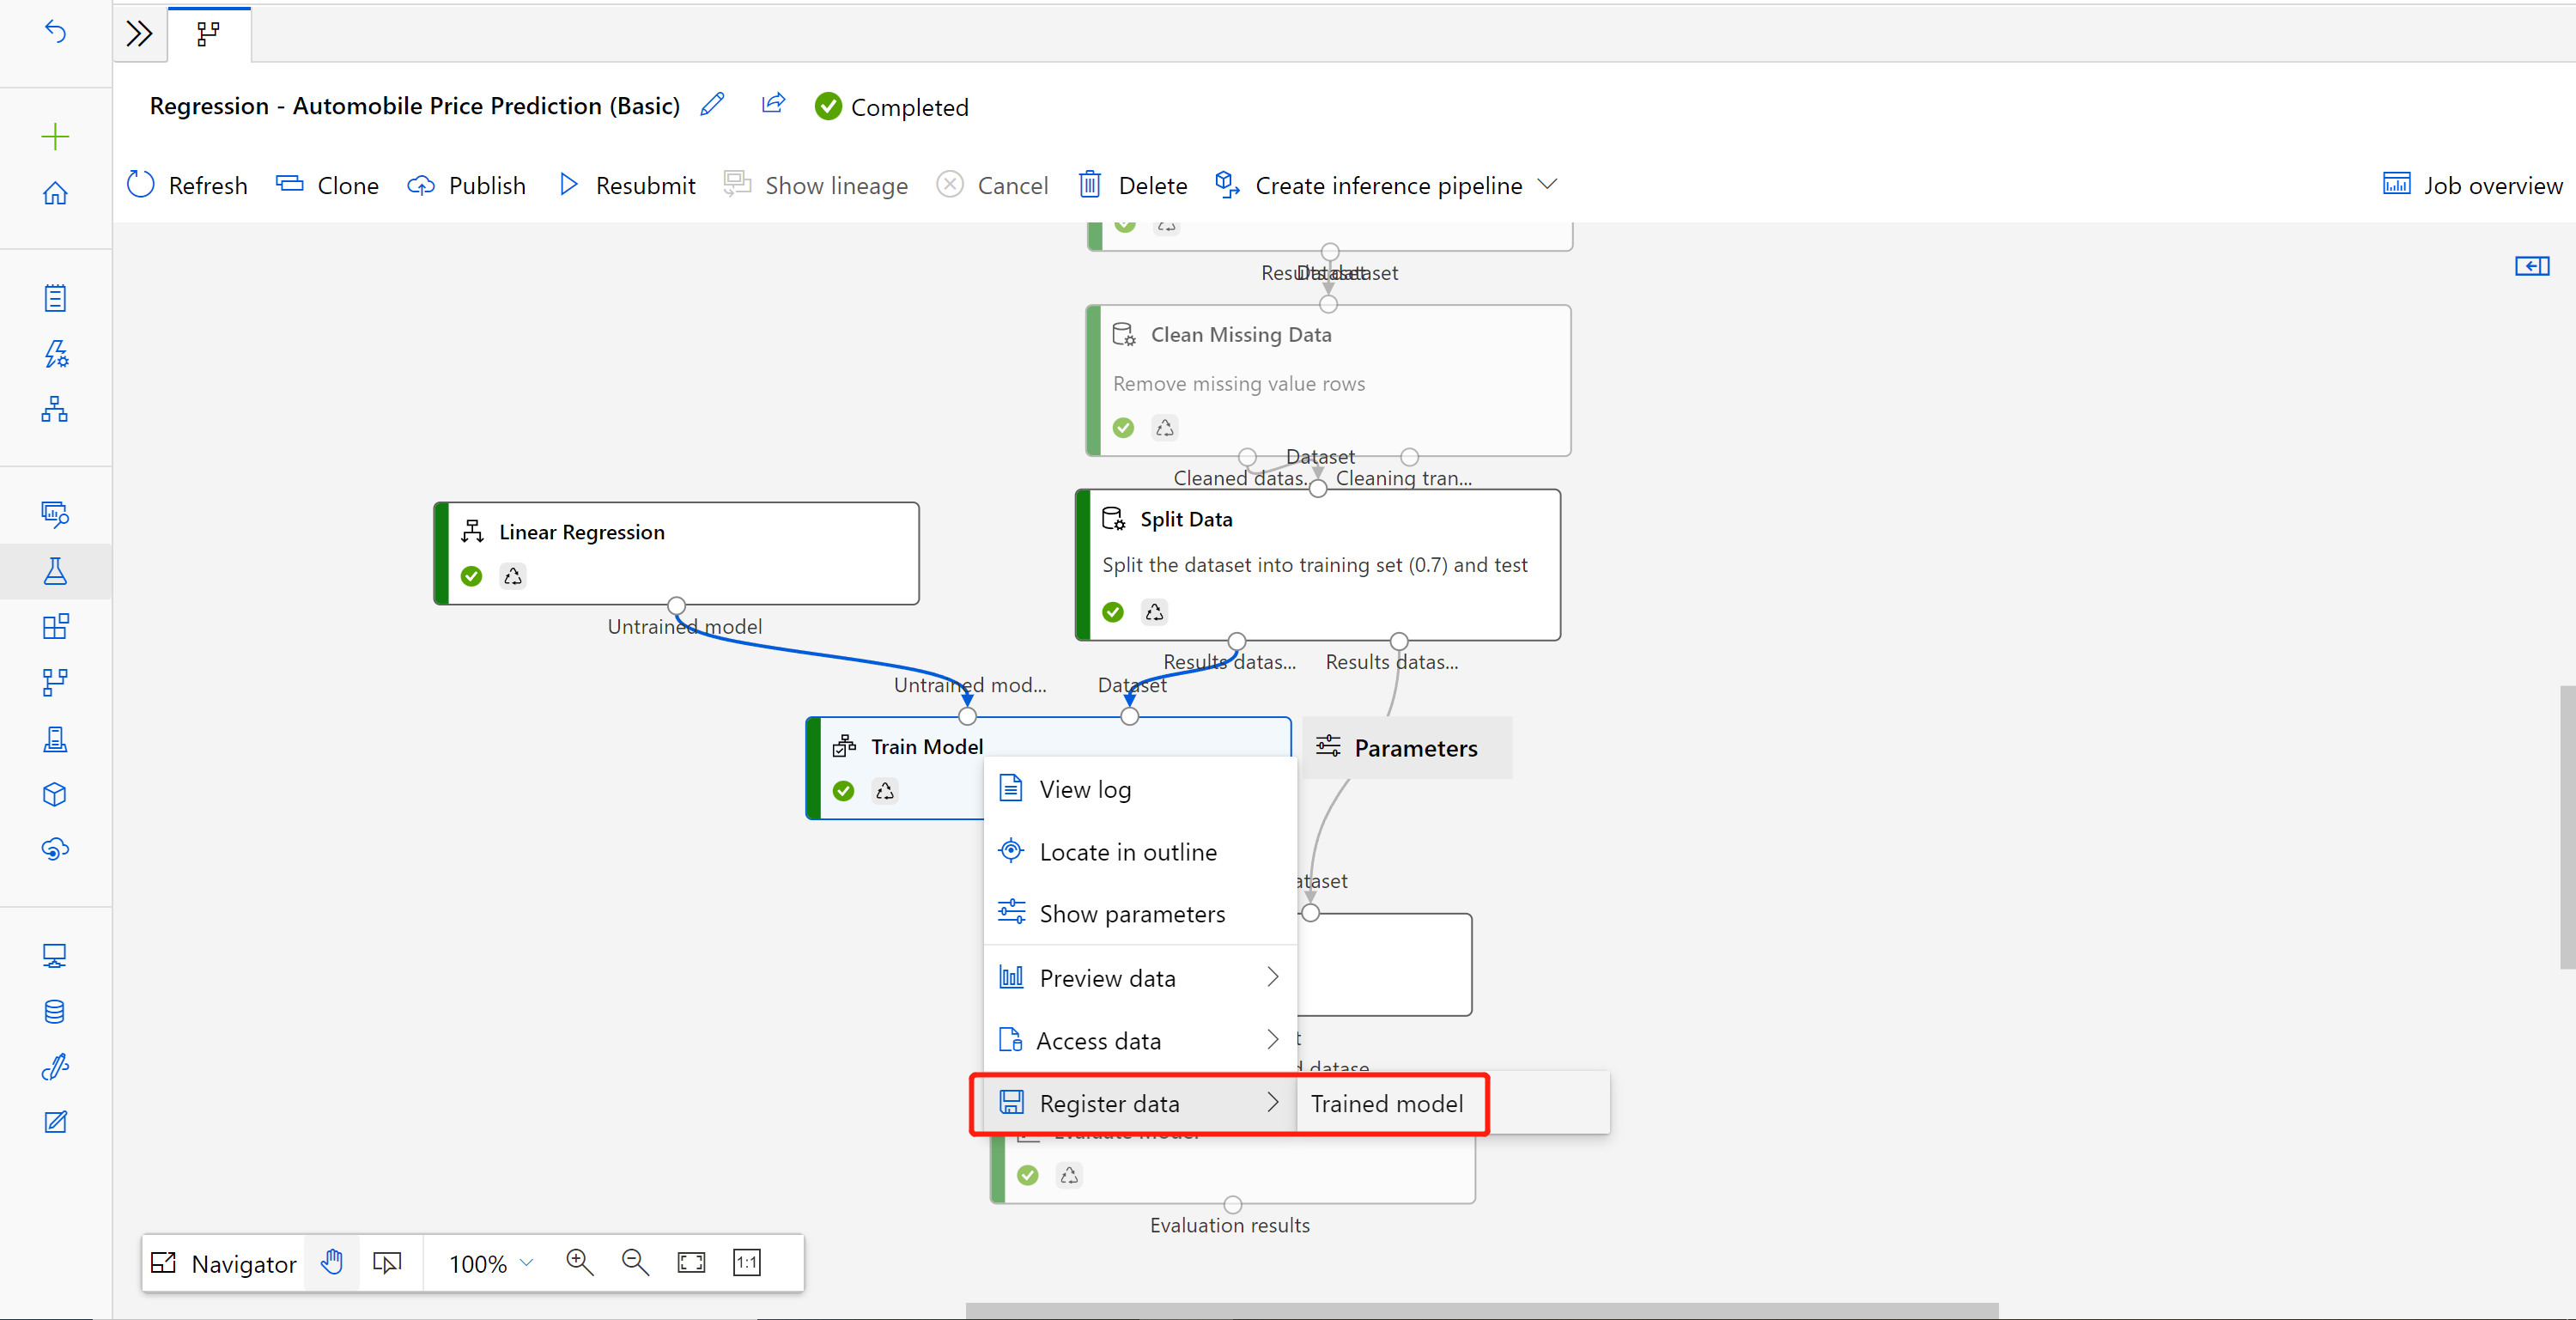
After your modified training pipeline completes successfully, go to the job detail page.
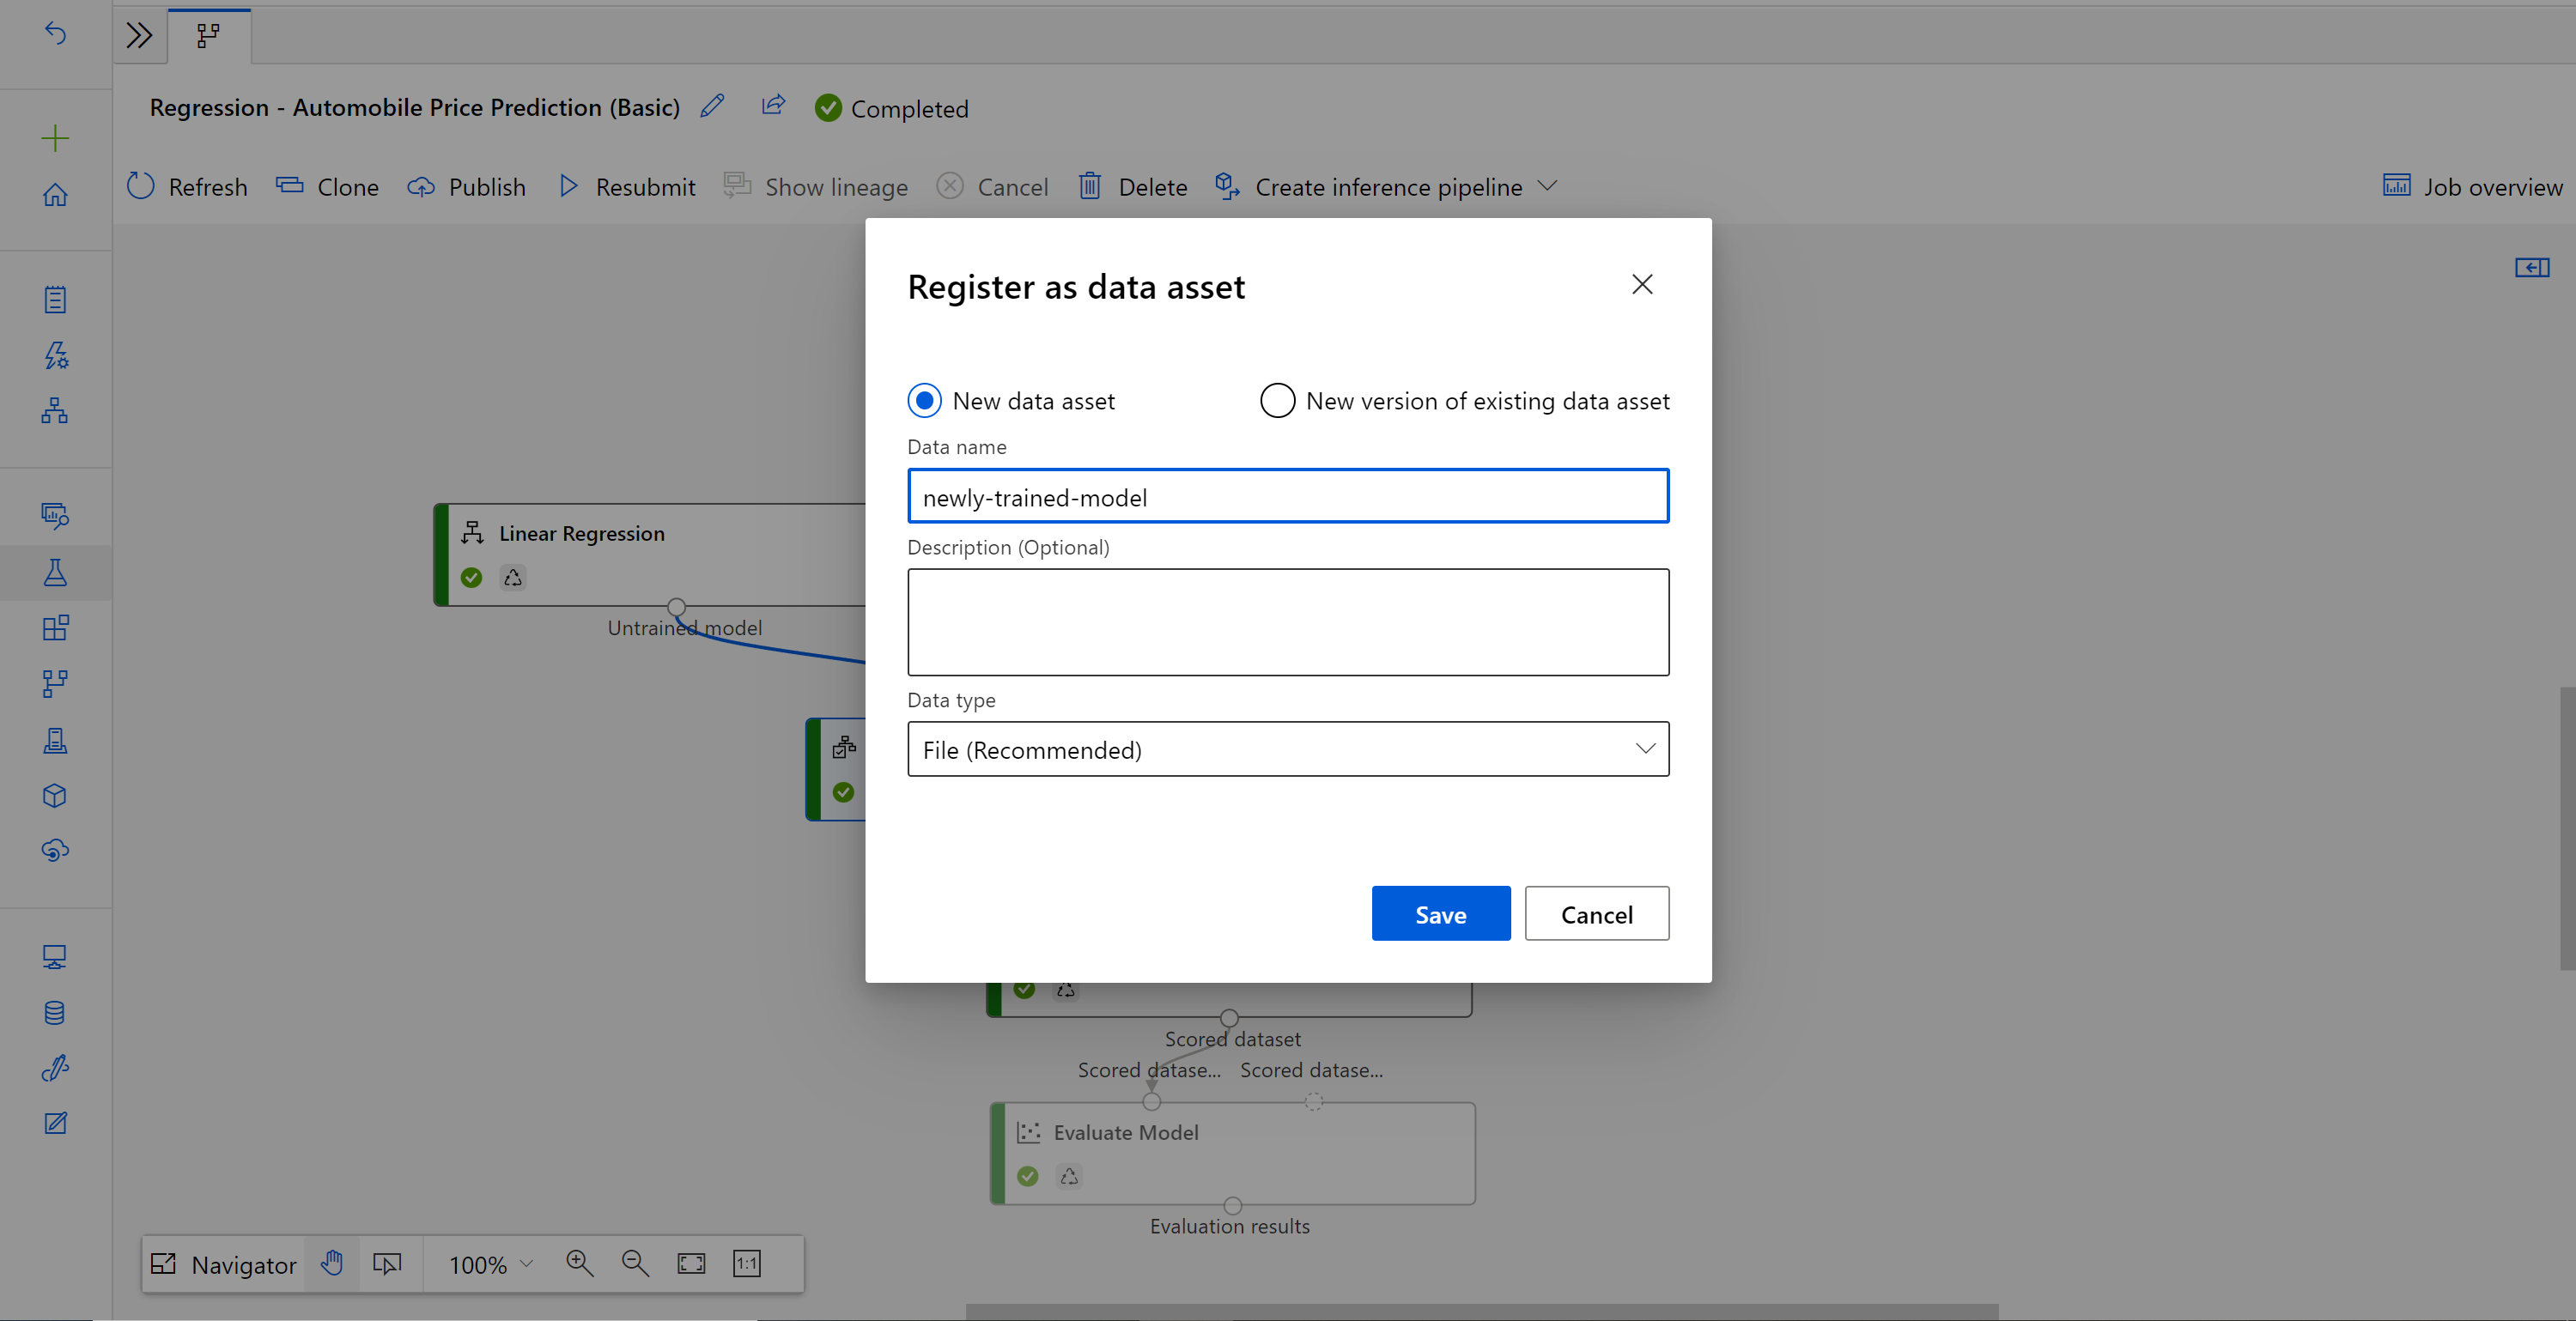
Right-click the Train Model component and select Register data.
Input a name and select a File type.
Find the previous batch inference pipeline draft, or Clone the published pipeline into a new draft.
Replace the MD- node in the inference pipeline draft with the registered data in the preceding step.
Updating data transformation node TD- is the same as the trained model.
Submit the inference pipeline with the updated model and transformation, and publish again.

