Note
Access to this page requires authorization. You can try signing in or changing directories.
Access to this page requires authorization. You can try changing directories.
APPLIES TO:
 Azure CLI ml extension v2 (current)
Python SDK azure-ai-ml v2 (current)
Azure CLI ml extension v2 (current)
Python SDK azure-ai-ml v2 (current)
By using Azure Machine Learning, you can integrate with GitHub Actions to automate the machine learning lifecycle. Some of the operations you can automate are:
- Deployment of Azure Machine Learning infrastructure
- Data preparation (extract, transform, and load operations)
- Training machine learning models with on-demand scale-out and scale-up
- Deployment of machine learning models as public or private web services
- Monitoring deployed machine learning models (such as for performance analysis)
In this article, you learn how to use Azure Machine Learning to set up an end-to-end MLOps pipeline that runs a linear regression to predict taxi fares in NYC. The pipeline is made up of components, each serving different functions, which you can register with the workspace, version, and reuse with various inputs and outputs. You use the recommended Azure architecture for MLOps and Azure MLOps (v2) solution accelerator to quickly set up an MLOps project in Azure Machine Learning.
Tip
Before implementing any solution, review the recommended Azure architectures for MLOps and choose the best architecture for your machine learning project. Before implementing any solution, review the recommended Azure architectures for MLOps and choose the best architecture for your machine learning project.
Prerequisites
- An Azure subscription. If you don't have an Azure subscription, create a free account before you begin. Try the free or paid version of Machine Learning.
- A Machine Learning workspace.
- Git running on your local machine.
- GitHub as the source control repository.
Note
Git version 2.27 or newer is required. For more information about installing the Git command, see Git downloads and select your operating system.
Important
The CLI commands in this article were tested using Bash. If you use a different shell, you might encounter errors.
Set up authentication with Azure and GitHub Actions
Before you can set up an MLOps project with Machine Learning, you need to set up authentication for GitHub Actions.
Important
The recommended, more secure approach is to use OpenID Connect (OIDC) with federated credentials for GitHub Actions authentication. OIDC eliminates the need to store long-lived secrets in your repository. The service principal approach shown in this article still works but is less secure. For OIDC setup with Azure Machine Learning, see Use GitHub Actions with Azure Machine Learning.
Create service principal
Create one prod service principal for this demo. You can add more depending on how many environments you want to work on (dev or prod or both). Service principals can be created using one of the following methods:
Launch the Azure Cloud Shell.
Tip
The first time you launch Cloud Shell, you're prompted to select between a persistent storage account or an ephemeral session (no storage required). Either option works for these steps. The first time you launch Cloud Shell, you're prompted to select between a persistent storage account or an ephemeral session (no storage required). Either option works for these steps.
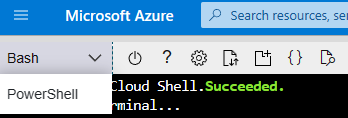
If prompted, choose Bash as the environment used in the Cloud Shell. You can also change environments in the drop-down on the top navigation bar.
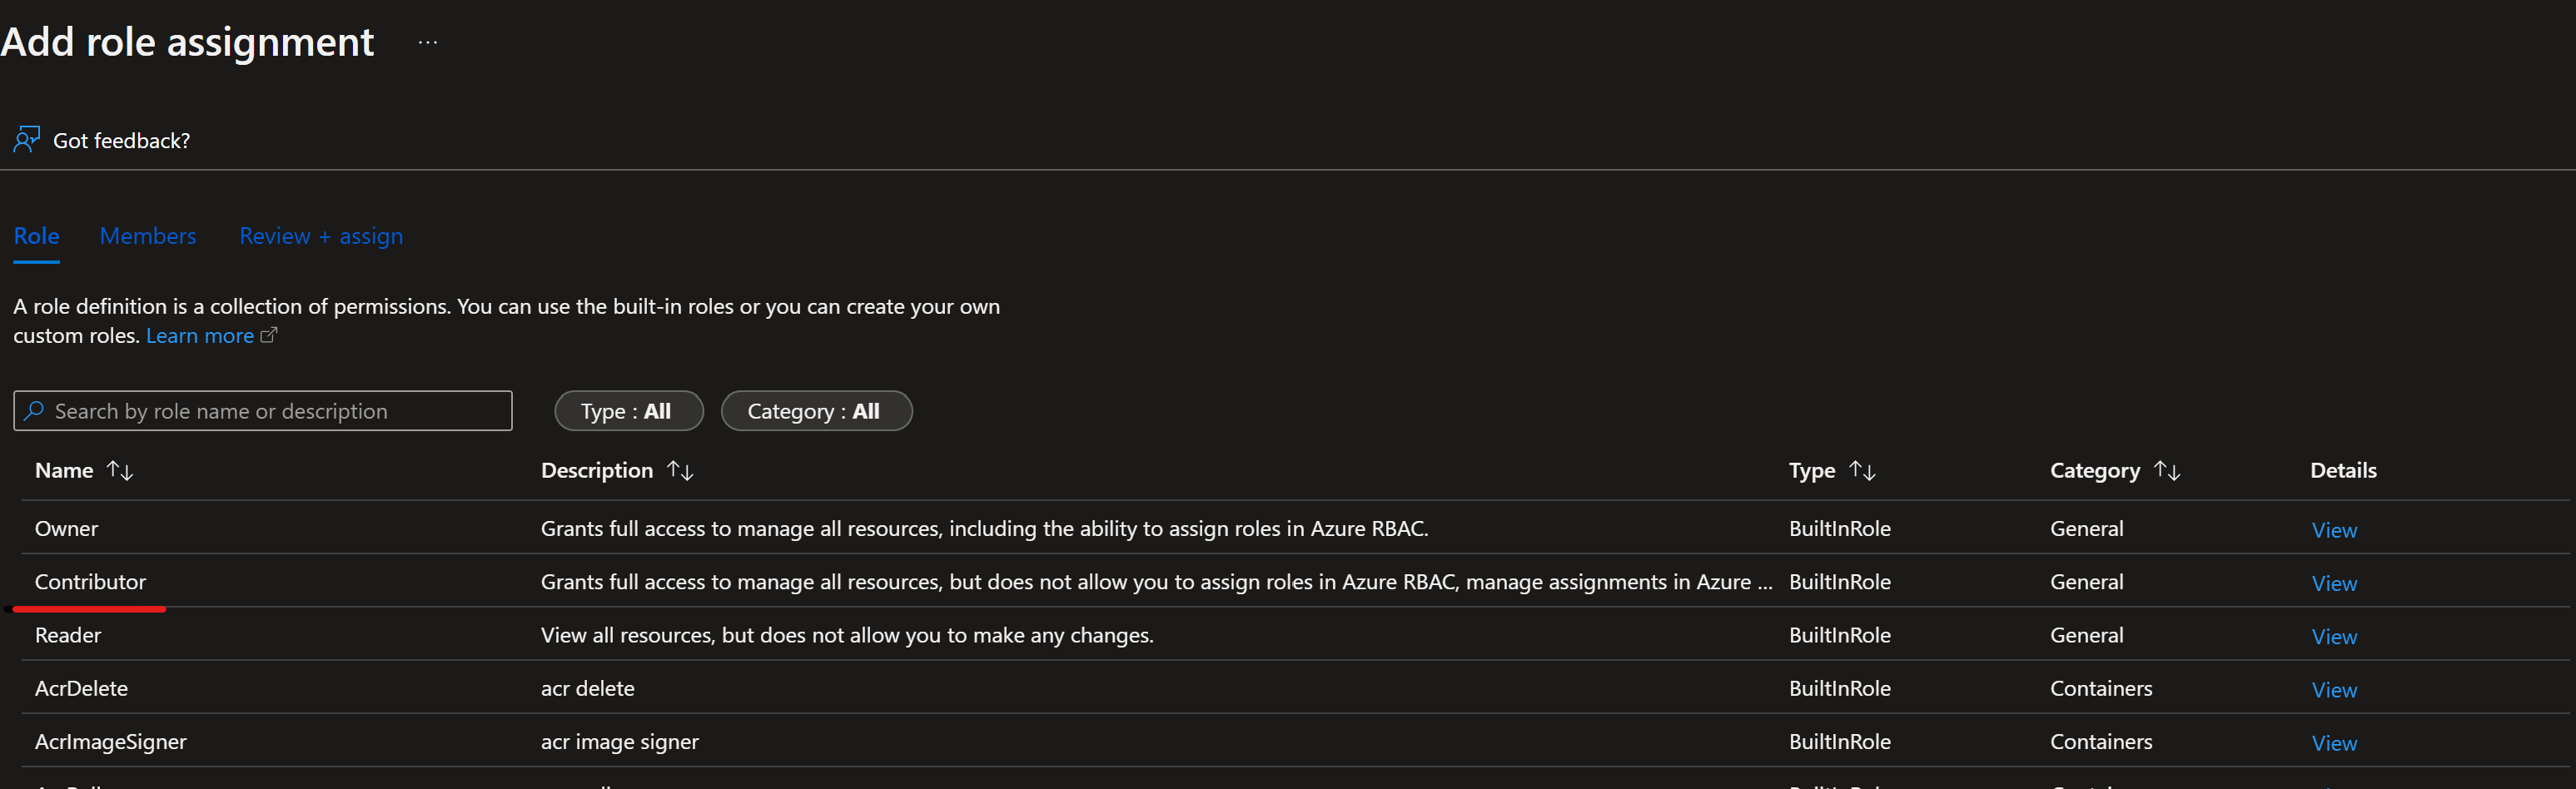
Copy the following bash commands to your computer and update the projectName, subscriptionId, and environment variables with the values for your project. This command also grants the Contributor role to the service principal in the subscription you provide. GitHub Actions needs this information to properly use resources in that subscription.
projectName="<your project name>"
roleName="Contributor"
subscriptionId="<subscription Id>"
environment="<Prod>" #First letter should be capitalized
servicePrincipalName="Azure-ARM-${environment}-${projectName}"
# Verify the ID of the active subscription
echo "Using subscription ID $subscriptionId"
echo "Creating SP for RBAC with name $servicePrincipalName, with role $roleName and in scopes     /subscriptions/$subscriptionId"
az ad sp create-for-rbac --name $servicePrincipalName --role $roleName --scopes /subscriptions/$subscriptionId --json-auth
echo "Please ensure that the information created here is properly save for future use."
Warning
The
--json-authparameter (and its predecessor--sdk-auth) is deprecated. For new projects, consider using OpenID Connect (OIDC) with federated credentials instead of storing service principal secrets. If you need--json-authoutput for existing workflows, it still functions in current Azure CLI versions but might be removed in a future release.Warning
The
--json-authparameter (and its predecessor--sdk-auth) is deprecated. For new projects, consider using OpenID Connect (OIDC) with federated credentials instead of storing service principal secrets. If you need--json-authoutput for existing workflows, it still functions in current Azure CLI versions but might be removed in a future release.Copy your edited commands into the Azure Shell and run them (Ctrl + Shift + v).
After running these commands, you see information related to the service principal. Save this information to a safe location for use later in these steps.
  {
  "clientId": "<service principal client id>",
  "clientSecret": "<service principal client secret>",
  "subscriptionId": "<Azure subscription id>",
  "tenantId": "<Azure tenant id>",
  "activeDirectoryEndpointUrl": "https://login.microsoftonline.com",
  "resourceManagerEndpointUrl": "https://management.azure.com/",
  "activeDirectoryGraphResourceId": "https://graph.windows.net/",
  "sqlManagementEndpointUrl": "https://management.core.windows.net:8443/",
  "galleryEndpointUrl": "https://gallery.azure.com/",
  "managementEndpointUrl": "https://management.core.windows.net/"
  }
Copy all of this output, braces included. Save this information to a safe location for use later in these steps.
Close the Cloud Shell once the service principals are created.
Set up GitHub repo
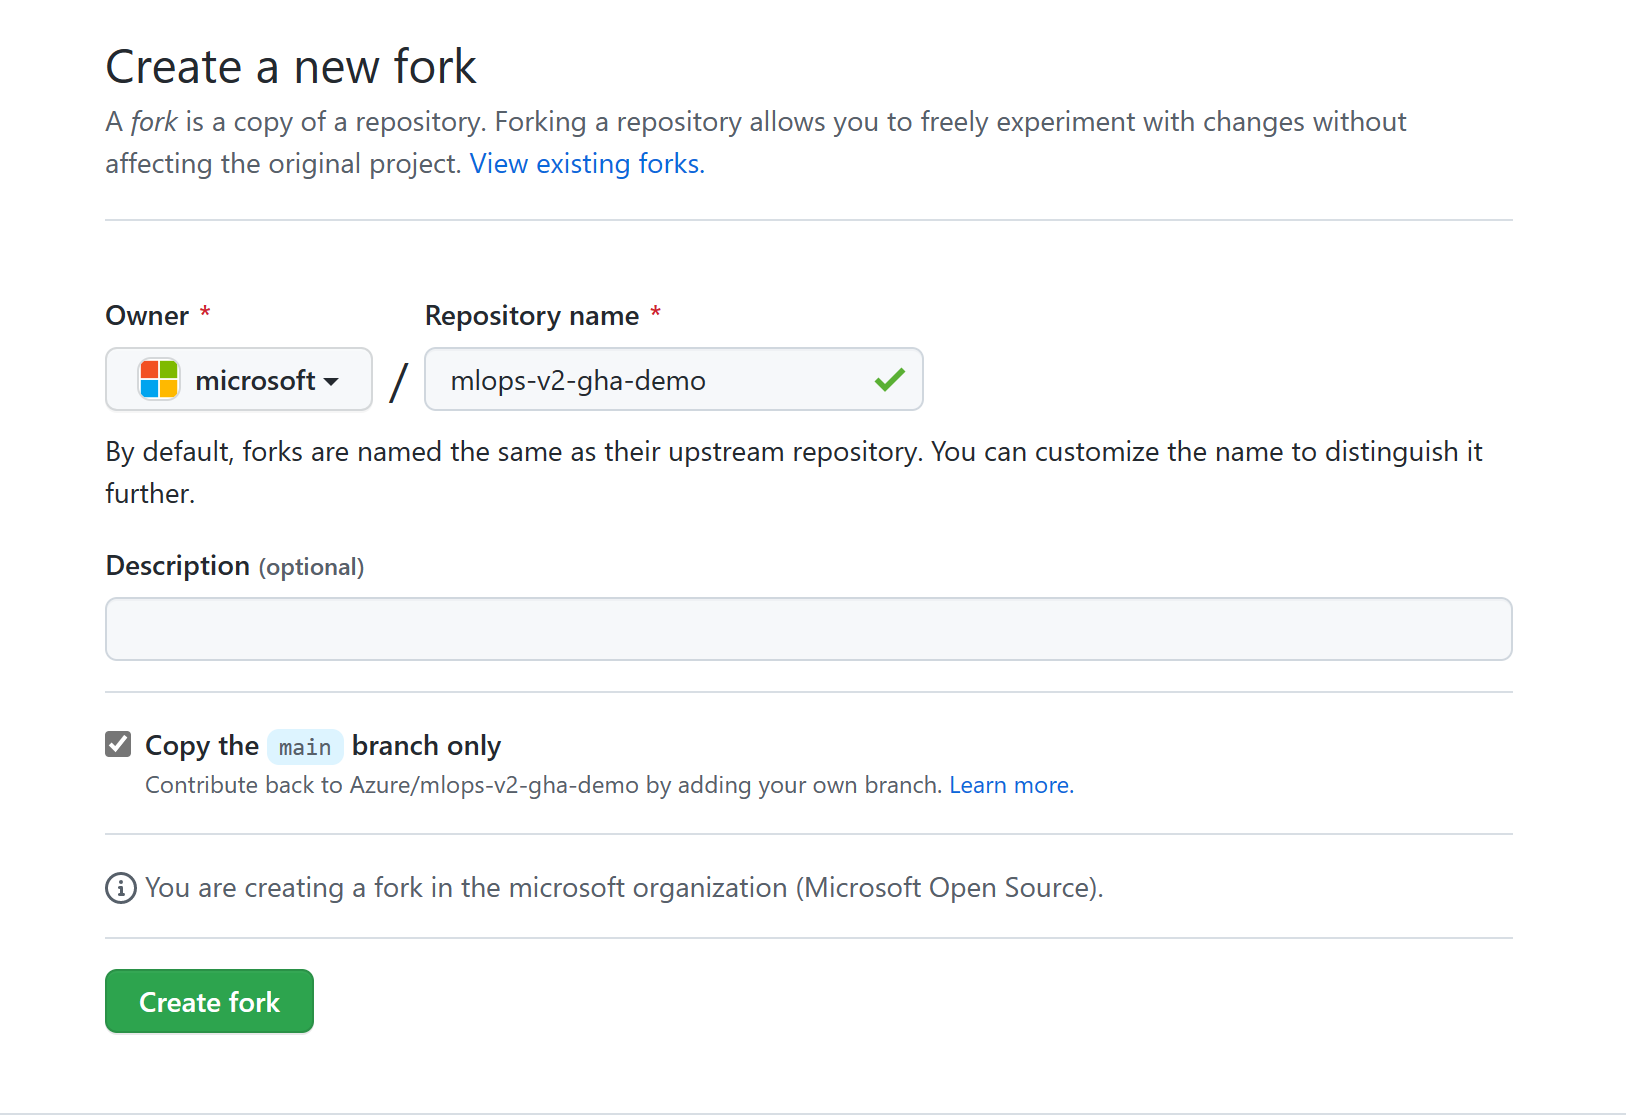
Fork the MLOps v2 Demo Template Repo in your GitHub organization.
Go to https://github.com/Azure/mlops-v2-gha-demo/fork to fork the MLOps v2 demo repo into your GitHub org. This repo has reusable MLOps code that you can use across multiple projects.
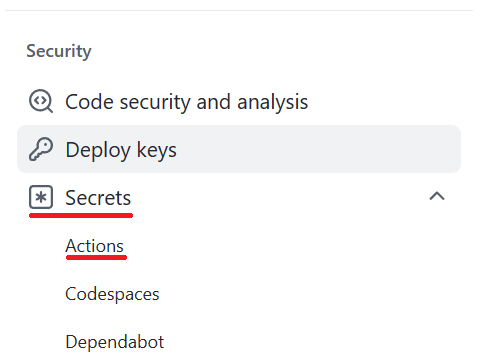
From your GitHub project, select Settings:

Under Security, select Secrets and variables, and then select Actions:
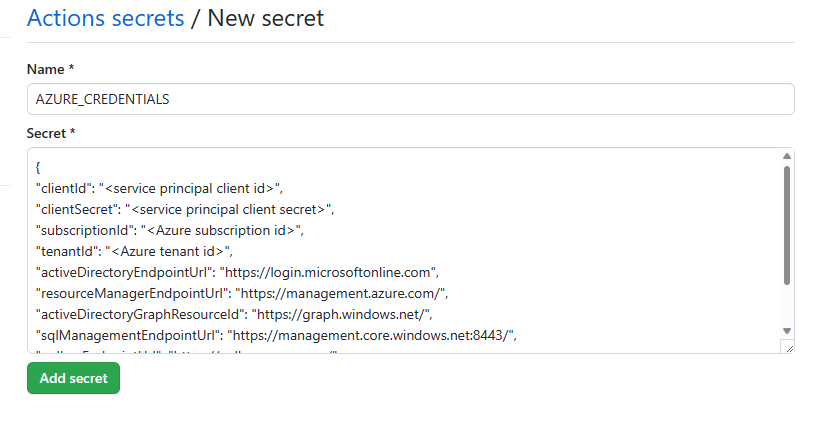
Select New repository secret. Name this secret AZURE_CREDENTIALS and paste the service principal output as the content of the secret. Select Add secret.
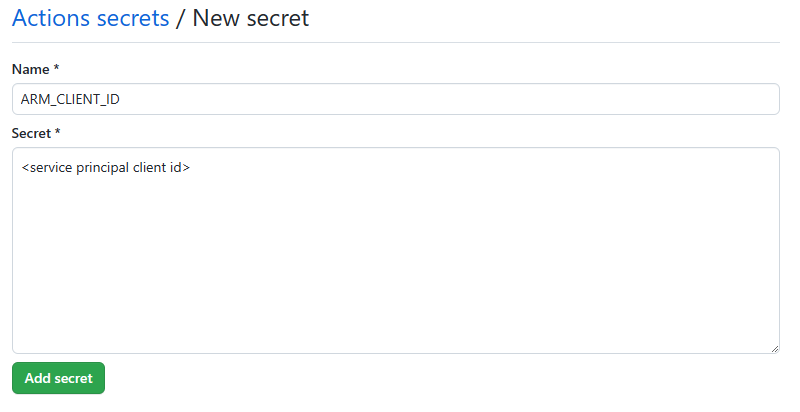
Add each of the following GitHub secrets using the corresponding values from the service principal output as the content of the secret:
- ARM_CLIENT_ID
- ARM_CLIENT_SECRET
- ARM_SUBSCRIPTION_ID
- ARM_TENANT_ID
Note
This step finishes the prerequisite section. You can now deploy the solution accelerator.
Deploy machine learning project infrastructure with GitHub Actions
This step deploys the training pipeline to the Machine Learning workspace created in the previous steps.
Tip
Before you check out the MLOps v2 repo and deploy the infrastructure, make sure you understand the Architectural Patterns of the solution accelerator. In these examples, you use the classical ML project type.
Configure Machine Learning environment parameters
Go to your repository and select the config-infra-prod.yml file in the root. Change the following parameters to your liking, and then commit the changes.
This config file uses the namespace and postfix values to name the artifacts and ensure uniqueness. Update the following section in the config to your liking. The following text shows the default values and settings in the files:
   namespace: mlopslite #Note: A namespace with many characters will cause storage account creation to fail due to storage account names having a limit of 24 characters.
   postfix: ao04
   location: westus

   environment: prod
   enable_aml_computecluster: true
   enable_aml_secure_workspace: true
   enable_monitoring: false
Note
If you're running a deep learning workload such as CV or NLP, ensure your GPU compute is available in your deployment zone.
The enable_monitoring flag in these files defaults to False. Enabling this flag adds more elements to the deployment to support Azure Machine Learning monitoring based on https://github.com/microsoft/AzureML-Observability. This flag enables an ADX cluster and increases the deployment time and cost of the MLOps solution.
Deploy Machine Learning infrastructure
In your GitHub project repository (for example,
taxi-fare-regression), select Actions.
The predefined GitHub workflows associated with your project are displayed. For a classical machine learning project, the available workflows look similar to the following screenshot:
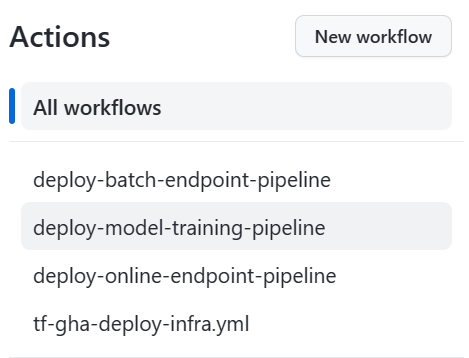
Select tf-gha-deploy-infra.yml to deploy the Machine Learning infrastructure by using GitHub Actions and Terraform.
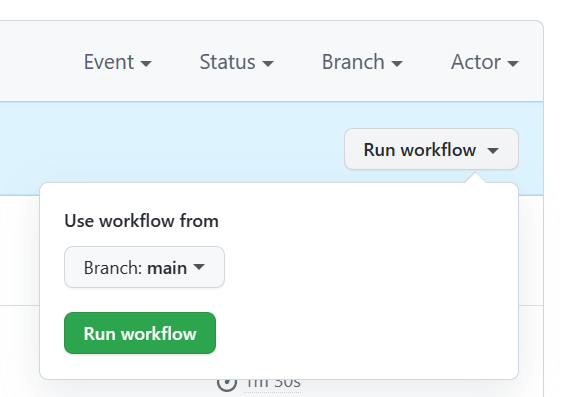
On the right side of the page, select Run workflow and select the branch to run the workflow on. This action might deploy dev infrastructure if you created a dev branch or prod infrastructure if deploying from main. Monitor the workflow for successful completion.
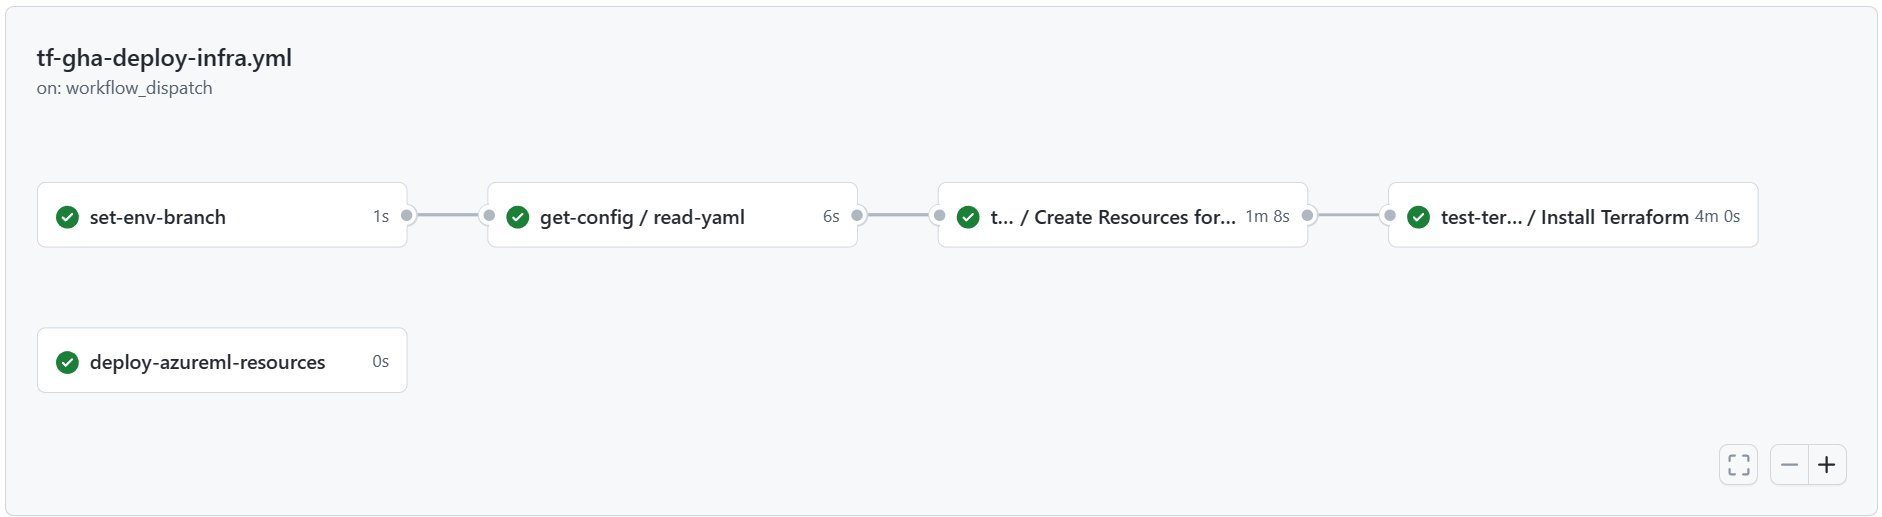
When the pipeline completes successfully, you can find your Azure Machine Learning workspace and associated resources by signing in to the Azure portal. Next, you deploy model training and scoring pipelines into the new Machine Learning environment.
Sample training and deployment scenario
The solution accelerator includes code and data for a sample end-to-end machine learning pipeline that runs a linear regression to predict taxi fares in NYC. The pipeline is made up of components, each serving different functions. You can register these components with the workspace, version them, and reuse them with various inputs and outputs. Sample pipelines and workflows for the Computer Vision and NLP scenarios have different steps and deployment steps.
This training pipeline contains the following steps:
Prepare Data
- This component takes multiple taxi datasets (yellow and green) and merges and filters the data. It prepares the train, validation, and evaluation datasets.
- Input: Local data under
./data/(multiple .csv files) - Output: Single prepared dataset (.csv) and train, validation, and test datasets.
Train Model
- This component trains a Linear Regressor with the training set.
- Input: Training dataset
- Output: Trained model (pickle format)
Evaluate Model
- This component uses the trained model to predict taxi fares on the test set.
- Input: ML model and Test dataset
- Output: Performance of model and a deploy flag whether to deploy or not.
- This component compares the performance of the model with all previously deployed models on the new test dataset. It decides whether to promote the model into production. The component promotes the model into production by registering the model in Azure Machine Learning workspace.
Register Model
- This component scores the model based on how accurate the predictions are in the test set.
- Input: Trained model and the deploy flag.
- Output: Registered model in Machine Learning.
Deploy the model training pipeline
Next, deploy the model training pipeline to your new Machine Learning workspace. This pipeline creates a compute cluster instance, registers a training environment that defines the necessary Docker image and Python packages, registers a training dataset, and then starts the training pipeline described in the previous section. When the job finishes, the trained model is registered in the Azure Machine Learning workspace and is available for deployment.
In your GitHub project repository (for example,
taxi-fare-regression), select Actions.
Select the deploy-model-training-pipeline workflow from the listed workflows, and then select Run Workflow to execute the model training workflow. This process takes several minutes to run, depending on the compute size.
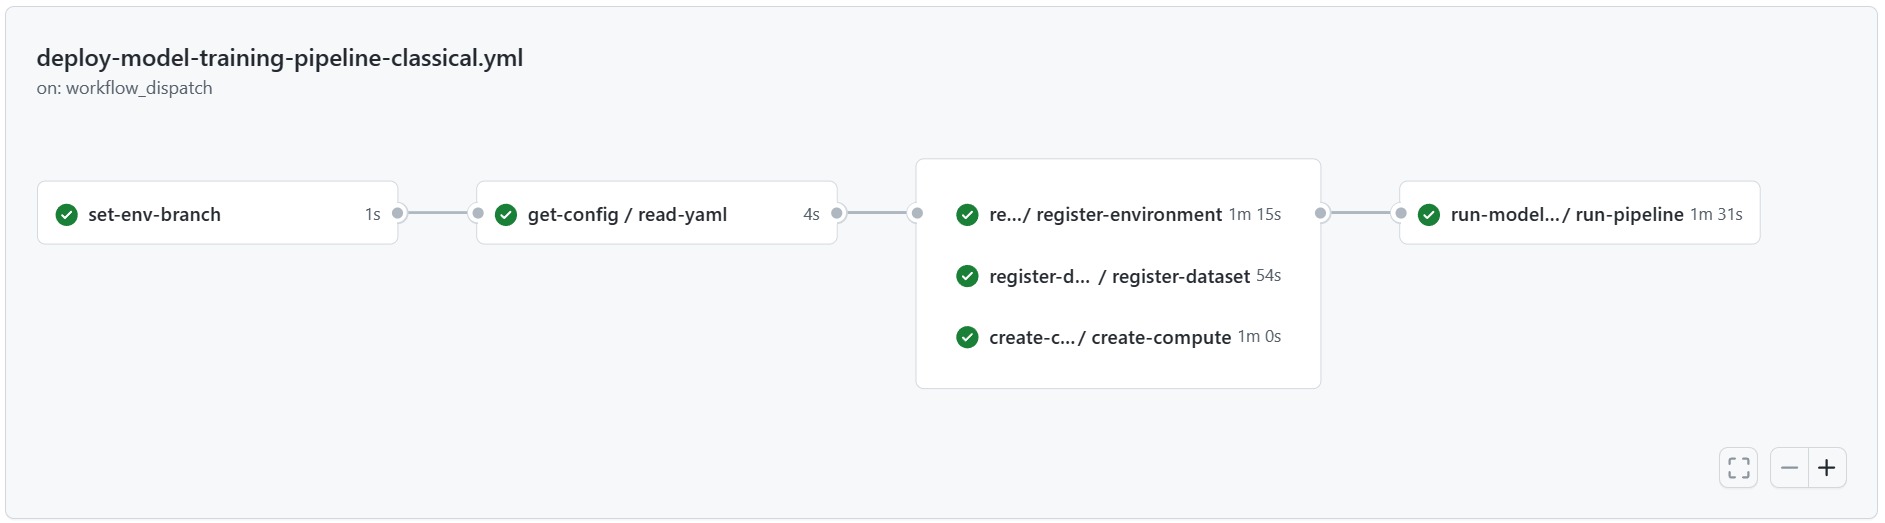
When the run finishes, a successful run registers the model in the Machine Learning workspace.
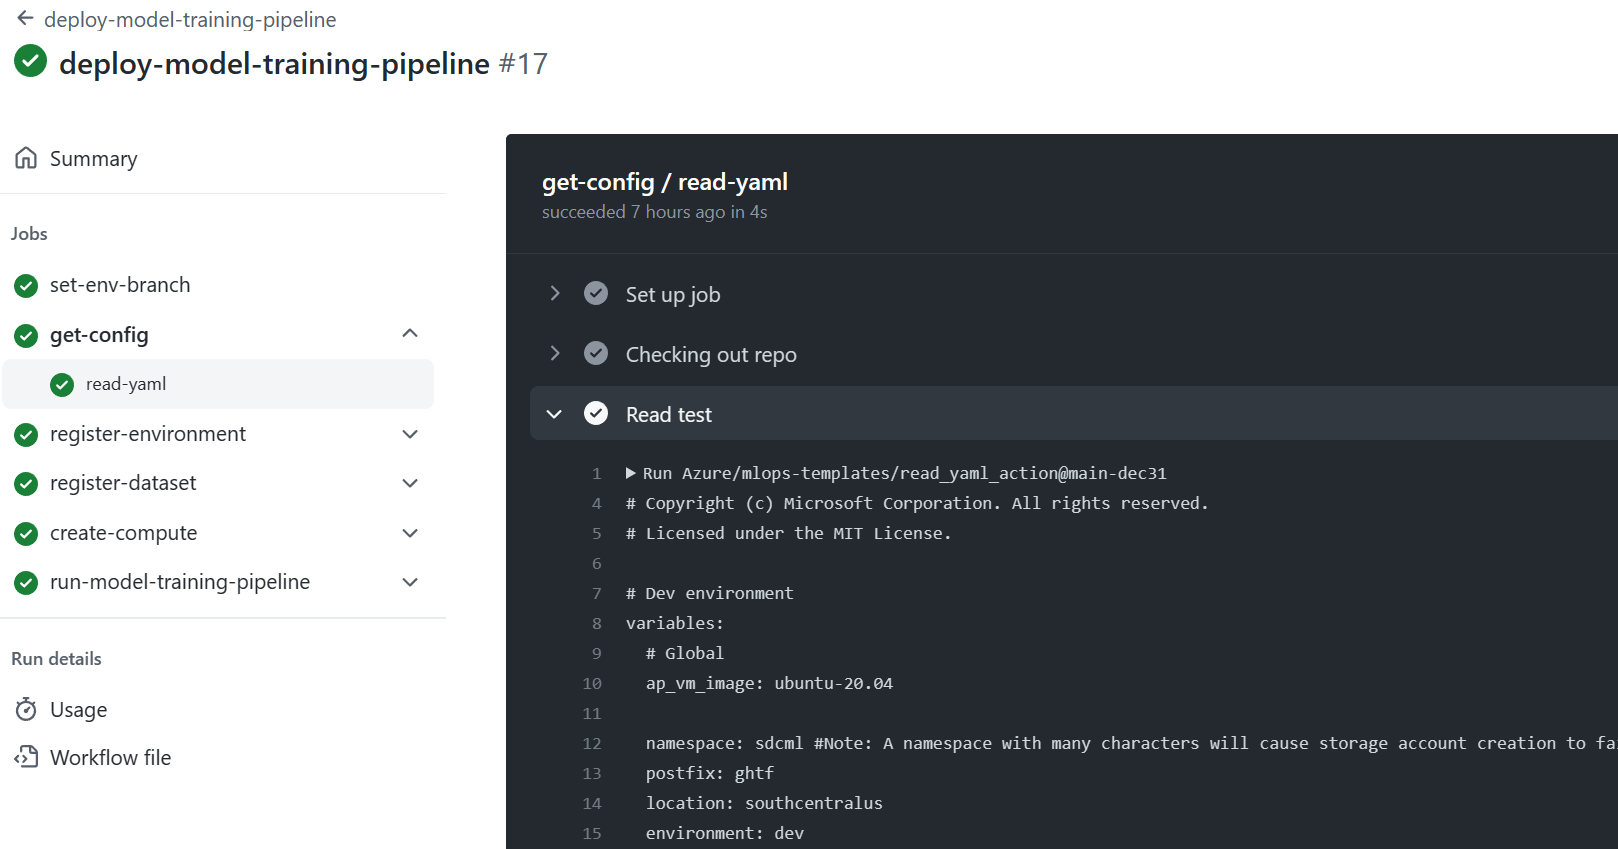
Note
To check the output of each individual step, for example to view output of a failed run, select a job output, and then select each step in the job to view any output of that step.
When you register the trained model in the Machine Learning workspace, you're ready to deploy the model for scoring.
Deploy the trained model
This scenario includes prebuilt workflows for two approaches to deploying a trained model: batch scoring or deploying a model to an endpoint for real-time scoring. You might run either or both of these workflows to test the performance of the model in your Azure Machine Learning workspace.
Online endpoint
In your GitHub project repository (for example,
taxi-fare-regression), select Actions.
Select the deploy-online-endpoint-pipeline from the workflows listed on the left and select Run workflow to execute the online endpoint deployment pipeline workflow. The steps in this pipeline create an online endpoint in your Machine Learning workspace, create a deployment of your model to this endpoint, then allocate traffic to the endpoint.

When the workflow finishes, the online endpoint is deployed in the Azure Machine Learning workspace and available for testing.

To test this deployment, go to the Endpoints tab in your Machine Learning workspace, select the endpoint, and select the Test tab. You can use the sample input data located in the cloned repo at
/data/taxi-request.jsonto test the endpoint.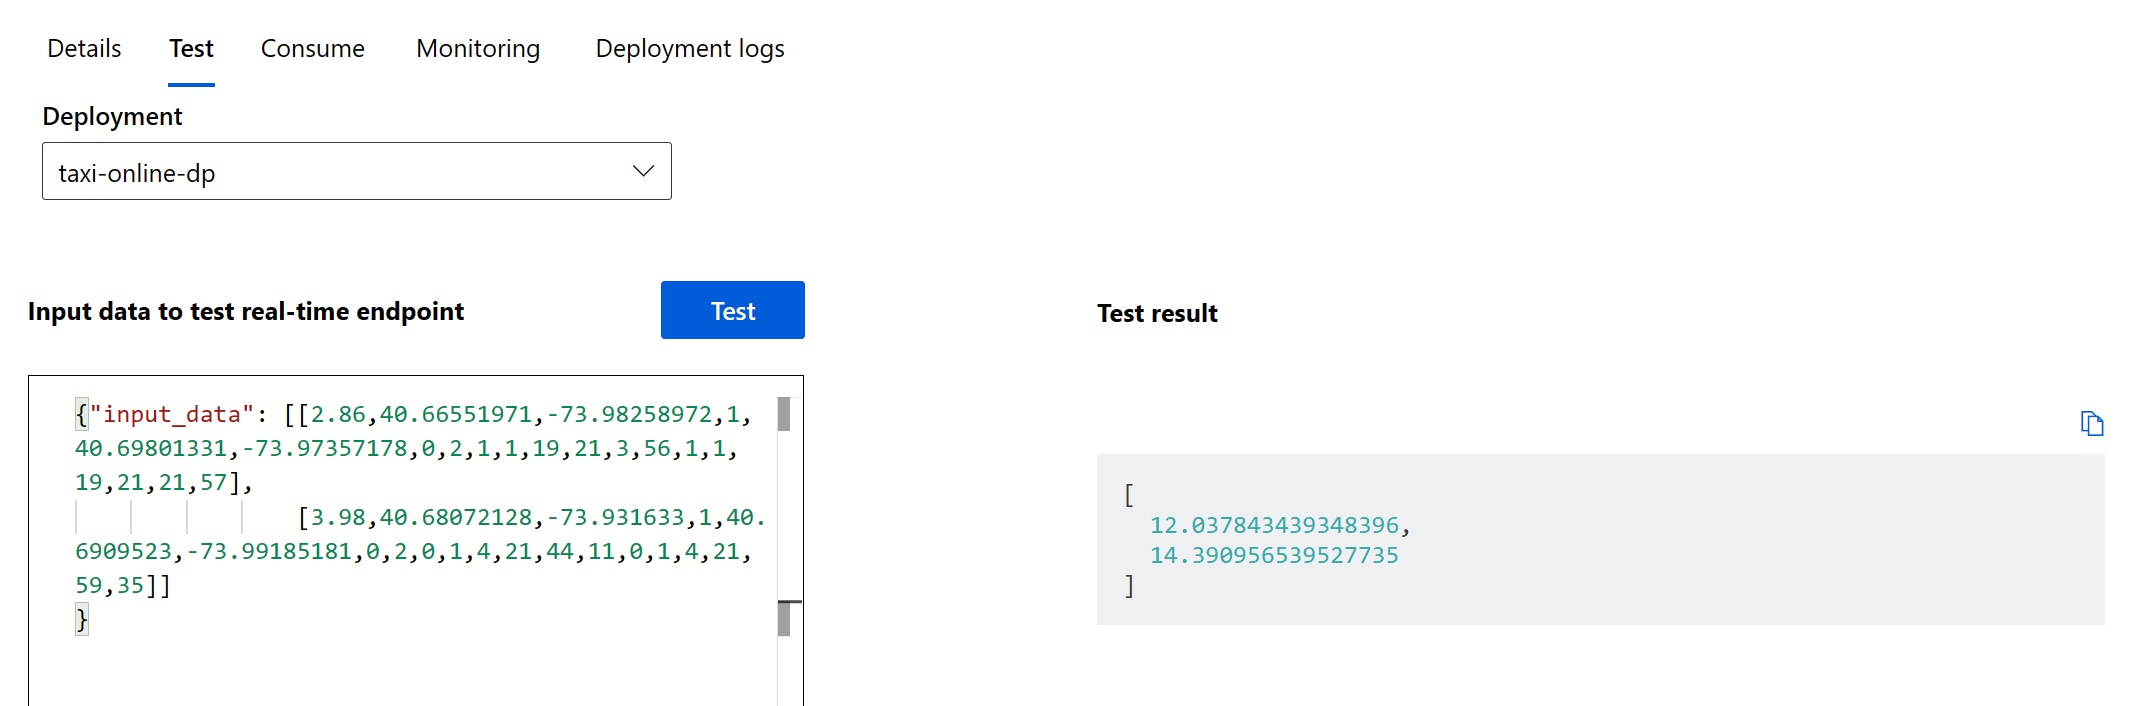
Batch endpoint
In your GitHub project repository (for example,
taxi-fare-regression), select Actions.
Select the deploy-batch-endpoint-pipeline from the workflows and select Run workflow to execute the batch endpoint deployment pipeline workflow. The steps in this pipeline create a new AmlCompute cluster on which to execute batch scoring, create the batch endpoint in your Machine Learning workspace, and then create a deployment of your model to this endpoint.

When the workflow finishes, the batch endpoint is deployed in the Azure Machine Learning workspace and available for testing.

Moving to production
You can train and deploy example scenarios for both dev and prod branches and environments. When you're satisfied with the performance of the model training pipeline, model, and deployment in testing, replicate dev pipelines and models and deploy them in the production environment.
Use the sample training and deployment Machine Learning pipelines and GitHub workflows as a starting point to adapt your own modeling code and data.
Clean up resources
- If you don't plan to continue using your pipeline, delete your GitHub repository fork.
- In the Azure portal, delete your resource group and Machine Learning instance.
Next steps
- Install and set up Python SDK v2
- Install and set up Python CLI v2
- Azure MLOps (v2) solution accelerator on GitHub
- Training course on MLOps with Machine Learning
- Learn more about Azure Pipelines with Machine Learning
- Learn more about GitHub Actions with Machine Learning
- Deploy MLOps on Azure in Less Than an Hour - Community MLOps V2 Accelerator video