There are many ways to create a training job with Azure Machine Learning. You can use the CLI (see Train models (create jobs)), the REST API (see Train models with REST (preview)), or you can use the UI to directly create a training job. In this article, you learn how to use your own data and code to train a machine learning model with a guided experience for submitting training jobs in Azure Machine Learning studio.
Important
This feature is currently in public preview. This preview version is provided without a service-level agreement, and we don't recommend it for production workloads. Certain features might not be supported or might have constrained capabilities.
You may enter the job creation UI from the homepage. Select Create new and select Job.
In this step, you can select your method of training, complete the rest of the submission form based on your selection, and submit the training job. Below we walk through the form with the steps for running a custom script (command job).
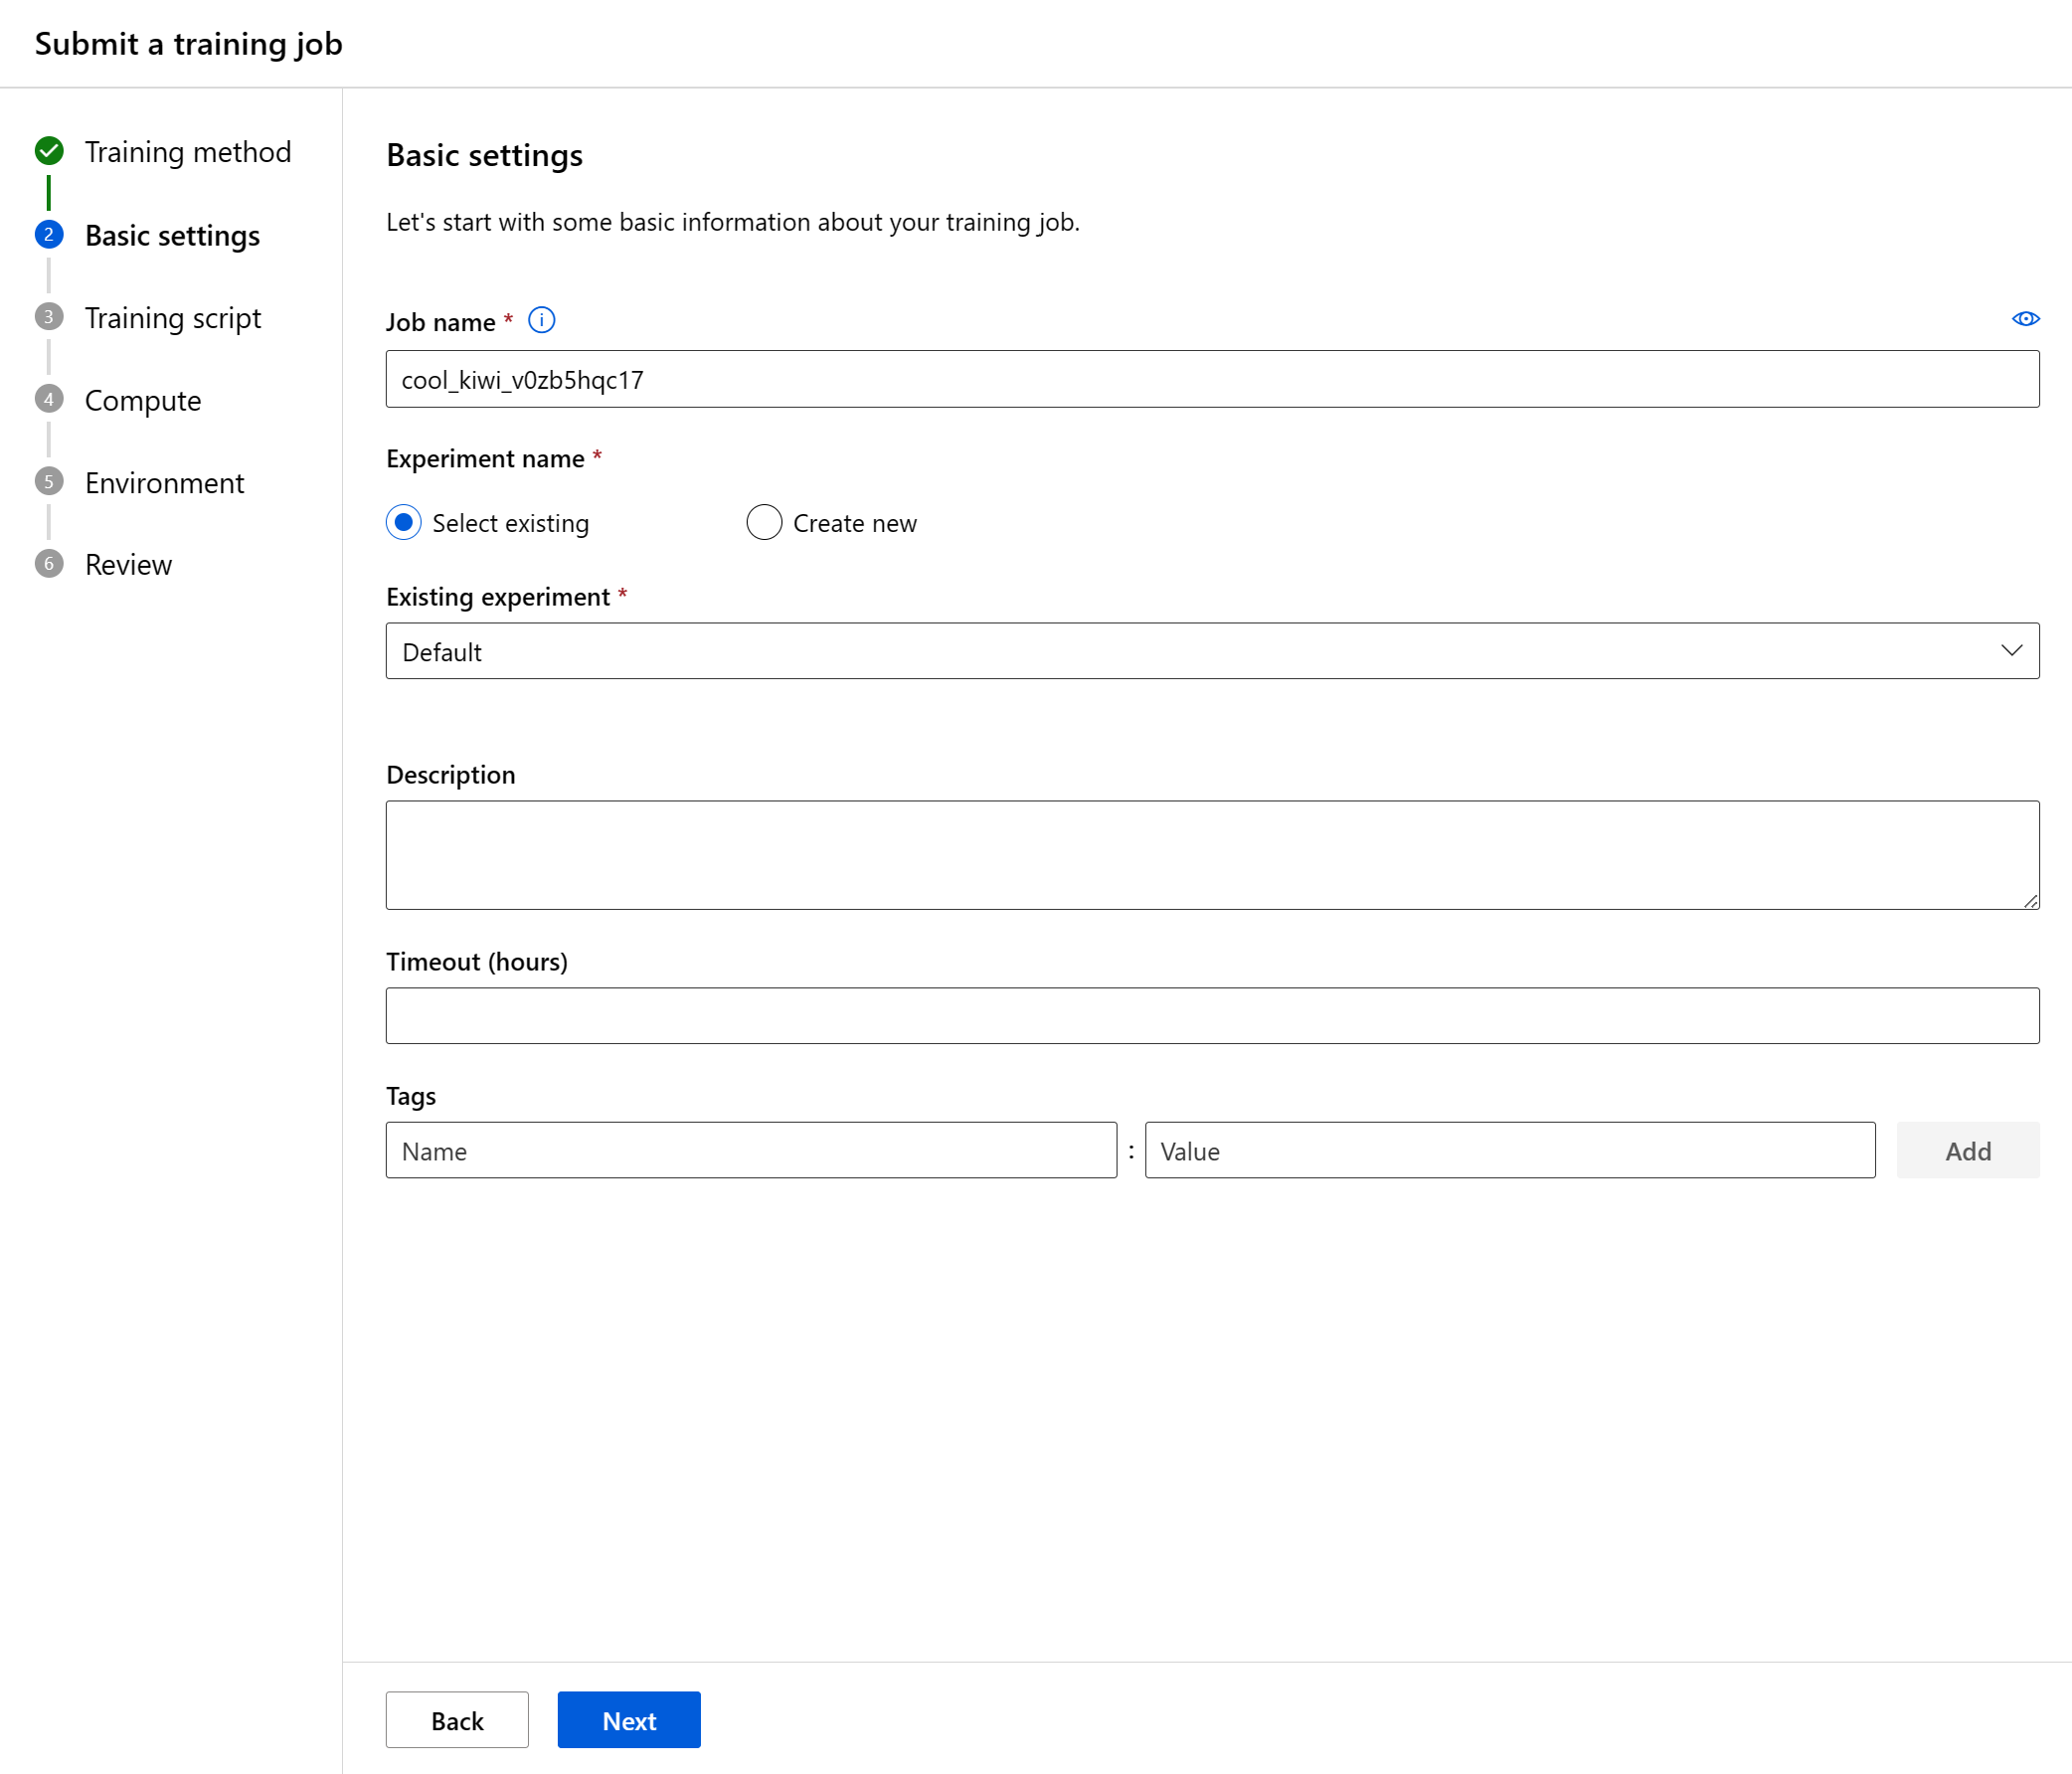
Configure basic settings
The first step is configuring basic information about your training job. You can proceed next if you're satisfied with the defaults we chose for you, or make changes to your desired preference.
These are the fields available:
Field
Description
Job name
The job name field is used to uniquely identify your job. It's also used as the display name for your job.
Experiment name
This helps organize the job in Azure Machine Learning studio. Each job's run record is organized under the corresponding experiment in the studio's "Experiment" tab. By default, Azure puts the job in the Default experiment.
Description
Add some text describing your job, if desired.
Timeout
Specify number of hours the entire training job is allowed to run. Once this limit is reached the system cancels the job including any child jobs.
Tags
Add tags to your job to help with organization.
Training script
Next step is to upload your source code, configure any inputs or outputs required to execute the training job, and specify the command to execute your training script.
This can be a code file or a folder from your local machine or workspace's default blob storage. Azure will show the files to be uploaded after you make the selection.
Field
Description
Code
This can be a file or a folder from your local machine or workspace's default blob storage as your training script. Studio will show the files to be uploaded after you make the selection.
Inputs
Specify as many inputs as needed of the following types data, integer, number, boolean, string).
Command
The command to execute. Command-line arguments can be explicitly written into the command or inferred from other sections, specifically inputs using curly braces notation, as discussed in the next section.
Code
The command is run from the root directory of the uploaded code folder. After you select your code file or folder, you can see the files to be uploaded. Copy the relative path to the code containing your entry point and paste it into the box labeled Enter the command to start the job.
If the code is in the root directory, you can directly refer to it in the command. For instance, python main.py.
If the code isn't in the root directory, you should use the relative path. For example, the structure of the word language model is:
tree
.
├── job.yml
├── data
└── src
    └── main.py
Here, the source code is in the src subdirectory. The command would be python ./src/main.py (plus other command-line arguments).
Inputs
When you use an input in the command, you need to specify the input name. To indicate an input variable, use the form ${{inputs.input_name}}. For instance, ${{inputs.wiki}}. You can then refer to it in the command, for instance, --data ${{inputs.wiki}}.
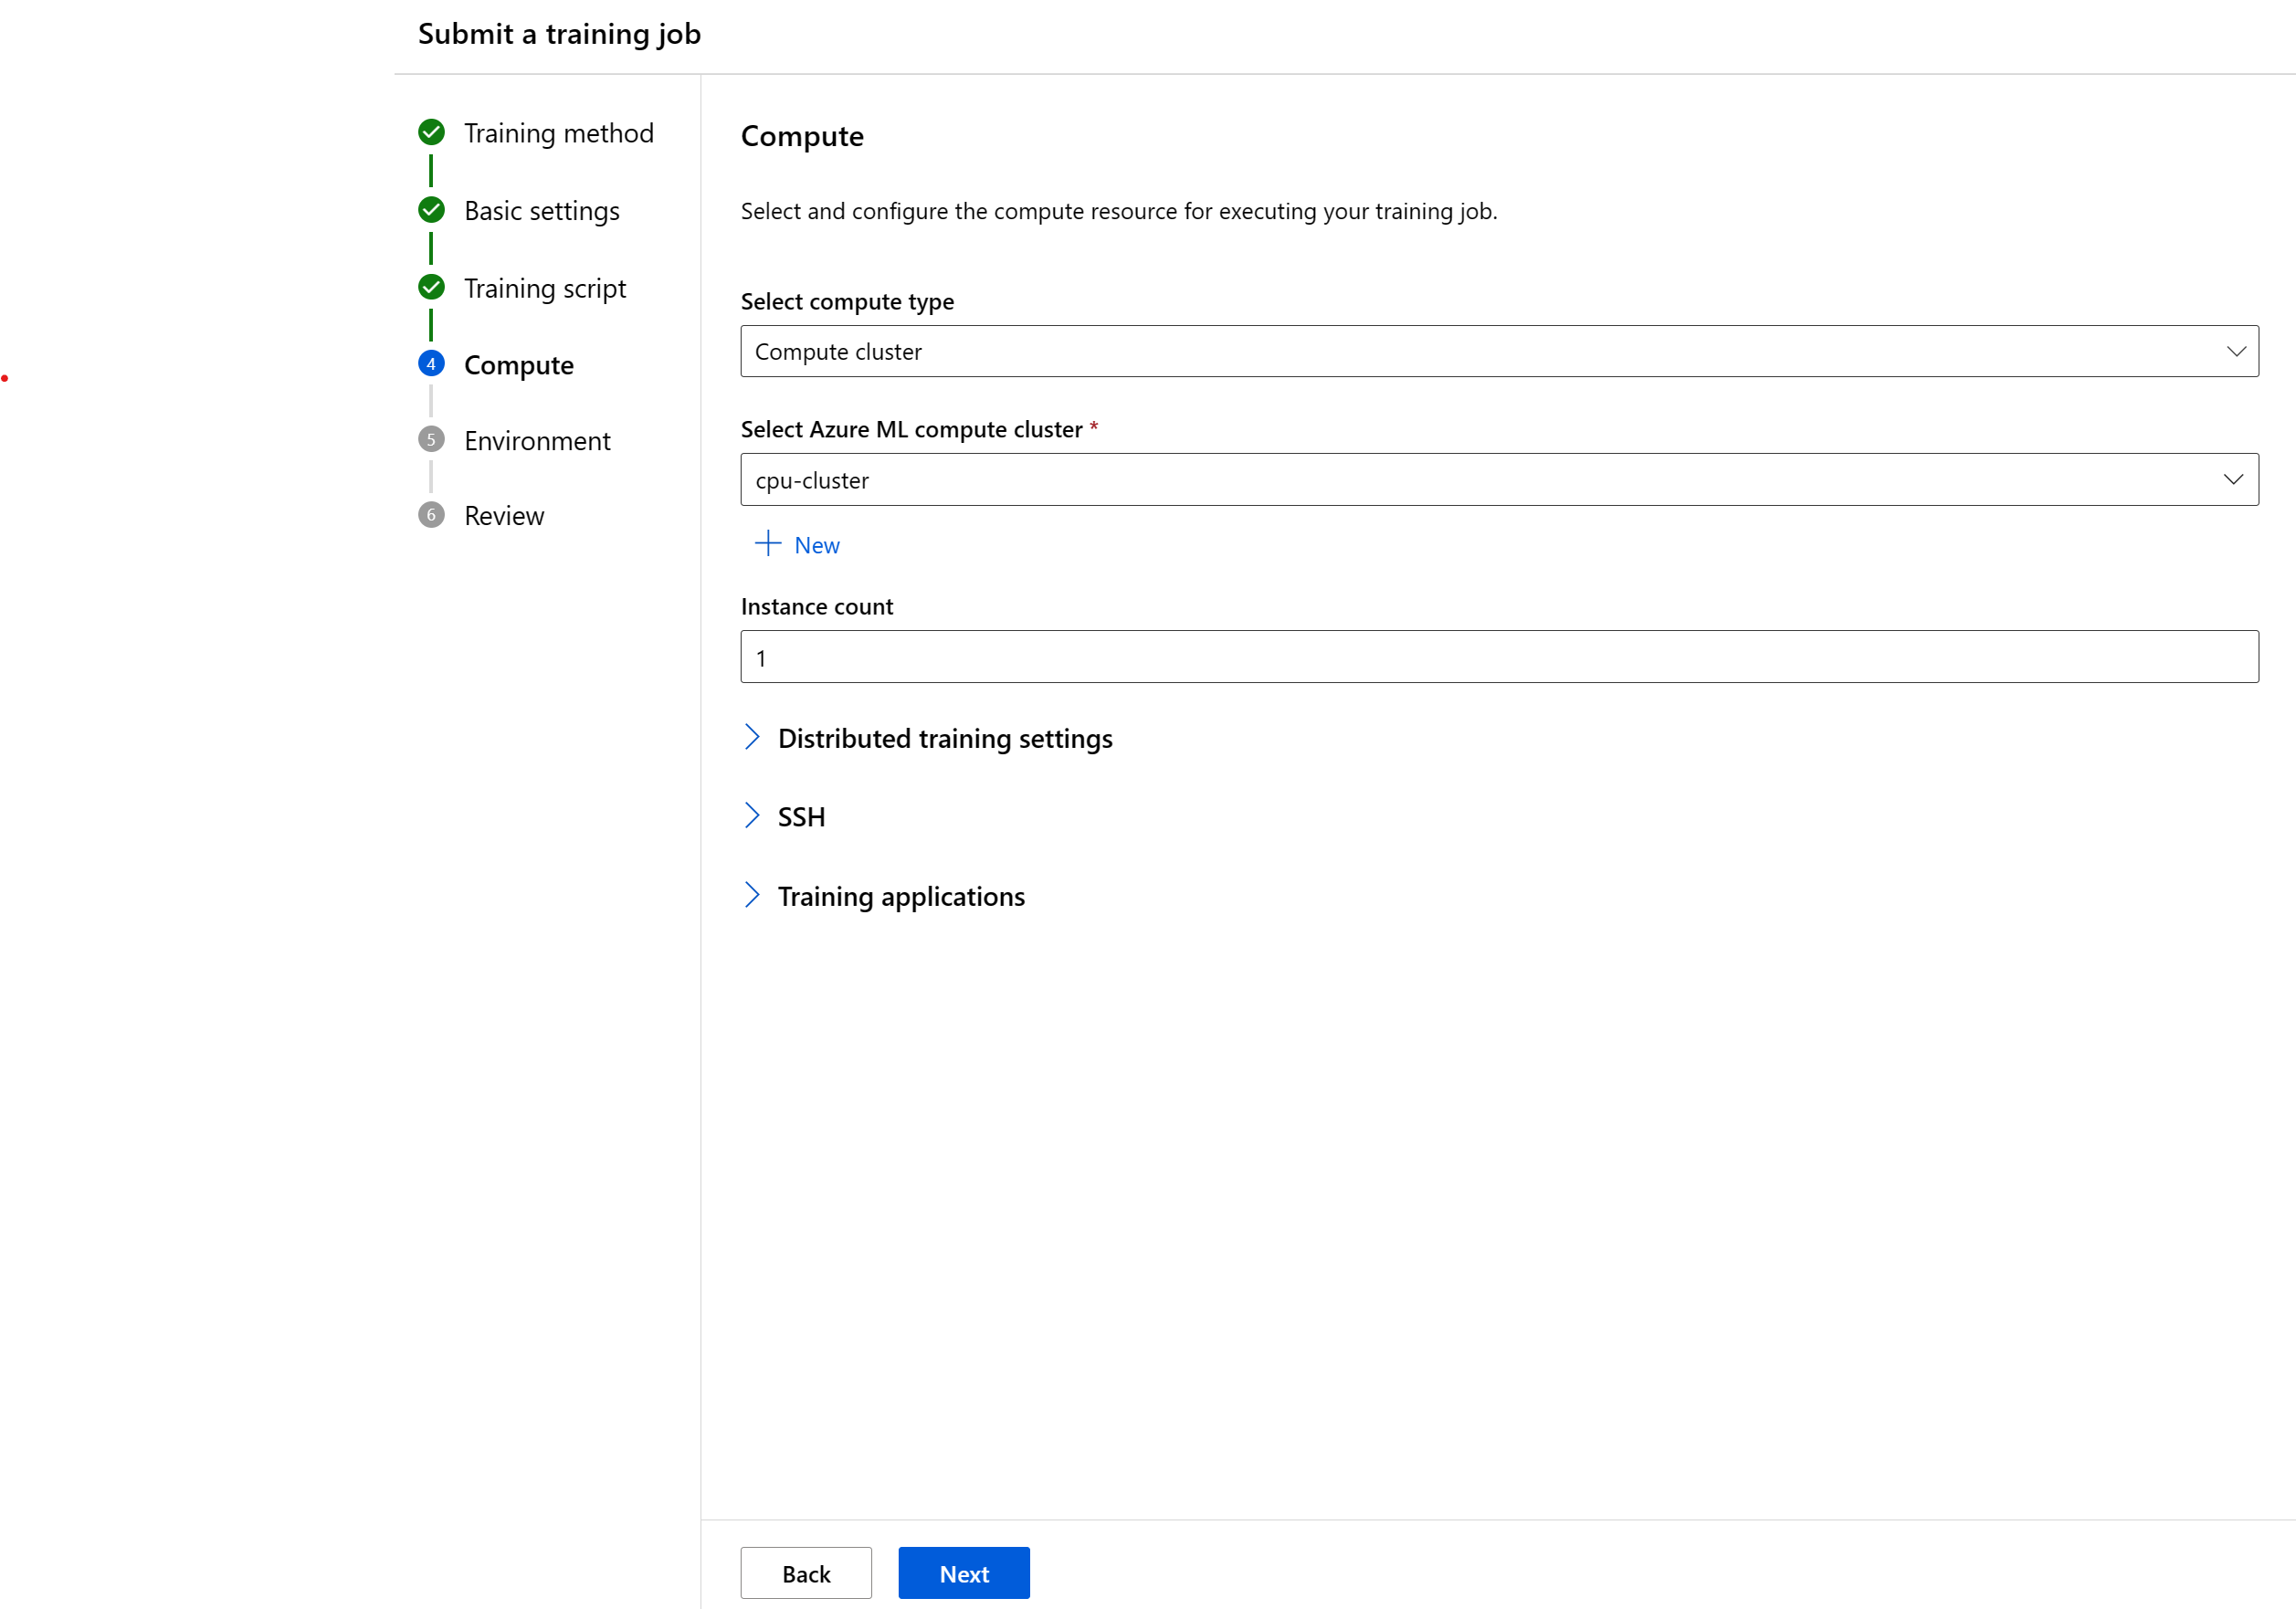
Select compute resources
Next step is to select the compute target on which you'd like your job to run. The job creation UI supports several compute types:
Select an existing compute resource. The dropdown shows the node information and SKU type to help your choice.
For a compute cluster or a Kubernetes cluster, you may also specify how many nodes you want for the job in Instance count. The default number of instances is 1.
When you're satisfied with your choices, choose Next.
If you're using Azure Machine Learning for the first time, you see an empty list and a link to create a new compute. For more information on creating the various types, see:
After selecting a compute target, you need to specify the runtime environment for your job. The job creation UI supports three types of environment:
Curated environments
Custom environments
Container registry image
Curated environments
Curated environments are Azure-defined collections of Python packages used in common ML workloads. Curated environments are available in your workspace by default. These environments are backed by cached Docker images, which reduce the job preparation overhead. The cards displayed in the "Curated environments" page show details of each environment. To learn more, see curated environments in Azure Machine Learning.
If you don't want to use the Azure Machine Learning curated environments or specify your own custom environment, you can use a docker image from a public container registry such as Docker Hub.
Review and Create
Once you configured the job, choose Next to go to the Review page. To modify a setting, choose the pencil icon and make the change.
To launch the job, choose Submit training job. Once the job is created, Azure shows you the job details page, where you can monitor and manage your training job.
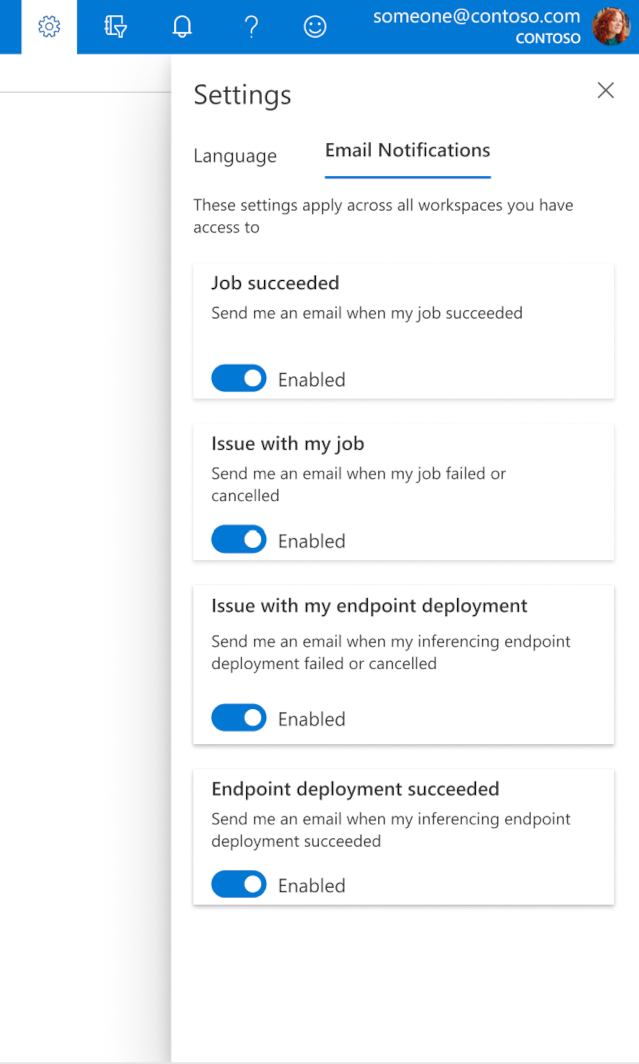
How to configure emails in the studio
To start receiving emails when your job, online endpoint, or batch endpoint is complete or if there's an issue (failed, canceled), use the following steps:
In Azure ML studio, go to settings by selecting the gear icon.
Select the Email notifications tab.
Toggle to enable or disable email notifications for a specific event.
Manage data ingestion and preparation, model training and deployment, and machine learning solution monitoring with Python, Azure Machine Learning and MLflow.