Note
Access to this page requires authorization. You can try signing in or changing directories.
Access to this page requires authorization. You can try changing directories.
Azure Managed CCF (Managed CCF) is a new and highly secure service for deploying confidential applications. For more information on Managed CCF, see About Azure Managed Confidential Consortium Framework.
If you don't have an Azure account, create a free account before you begin.
In this quickstart, you create a Managed CCF resource with the Azure portal.
Prerequisites
- OpenSSL on a computer running Windows or Linux.
Sign in to Azure
Sign in to the Azure portal.
Register the provider
Register the Managed CCF feature in the Microsoft.ConfidentialLedger namespace following instructions at Set up preview features in Azure subscription.
Then, re-register the Microsoft.ConfidentialLedger resource provider as described in Register resource provider.
Create a resource group
A resource group is a logical container into which Azure resources are deployed and managed. Use the Azure PowerShell New-AzResourceGroup cmdlet to create a resource group named myResourceGroup in the southcentralus location.
New-AzResourceGroup -Name "myResourceGroup" -Location "SouthCentralUS"
Create members
Generate a key pair for the member. After the following commands complete, the member's public key is saved in member0_cert.pem and the private key is saved in member0_privk.pem.
openssl ecparam -out "member0_privk.pem" -name "secp384r1" -genkey
openssl req -new -key "member0_privk.pem" -x509 -nodes -days 365 -out "member0_cert.pem" -"sha384" -subj=/CN="member0"
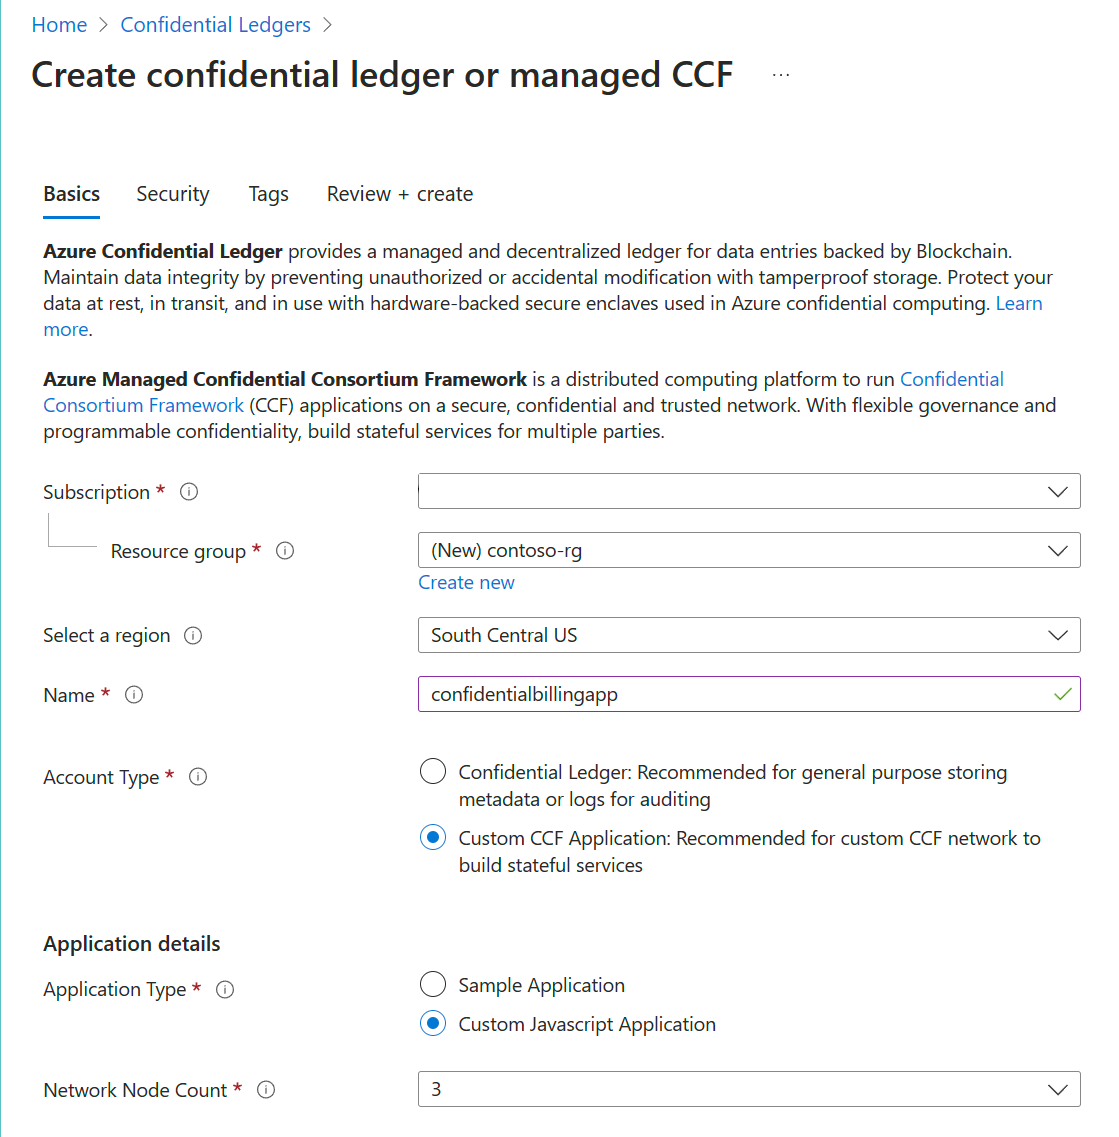
Create a Managed CCF resource
From the Azure portal menu, or from the Home page, select Create a resource.
In the Search box, enter "Confidential Ledger", select said application, and then choose Create.
On the Create confidential ledger section, provide the following information:
- Subscription: Choose the desired subscription.
- Resource Group: Choose the resource group created in the previous step.
- Region: In the pull-down menu, choose a region.
- Name: Provide a unique name.
- Account Type: Choose Custom CCF Application.
- Application Type: Choose Custom JavaScript Application.
- Network Node Count: Choose the desired node count.
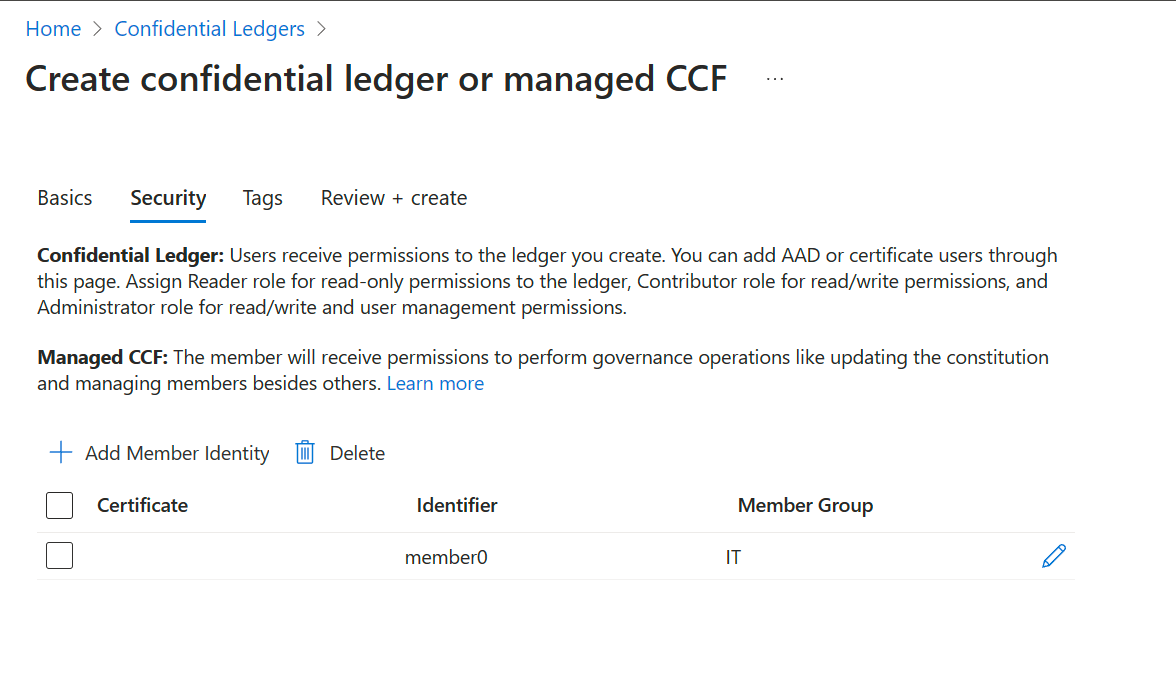
Select the Security tab.
You must add one or more members to the Managed CCF resource. Select + Add Member Identity.
- Member Identifier: A unique member name.
- Member Group: An optional group name.
- Certificate: Paste the contents of the member0_cert.pem file.
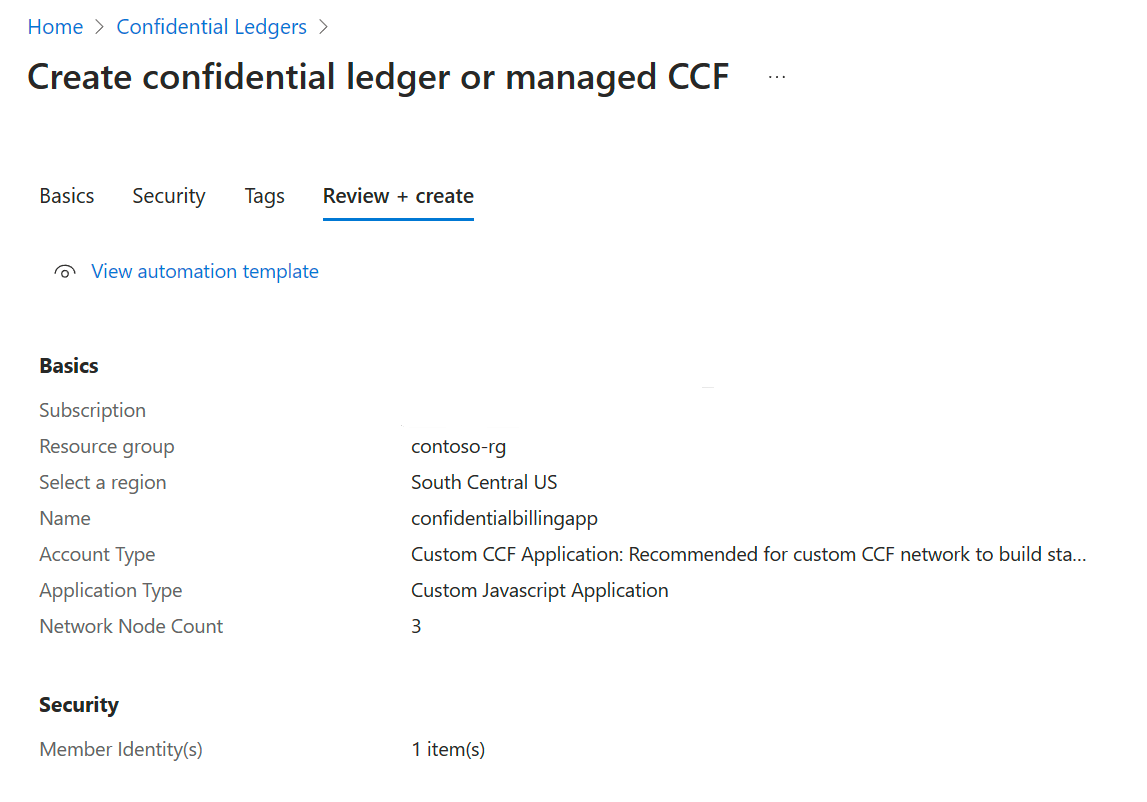
Select Review + Create. After validation has passed, select Create.1.
When the deployment is complete, select Go to resource.
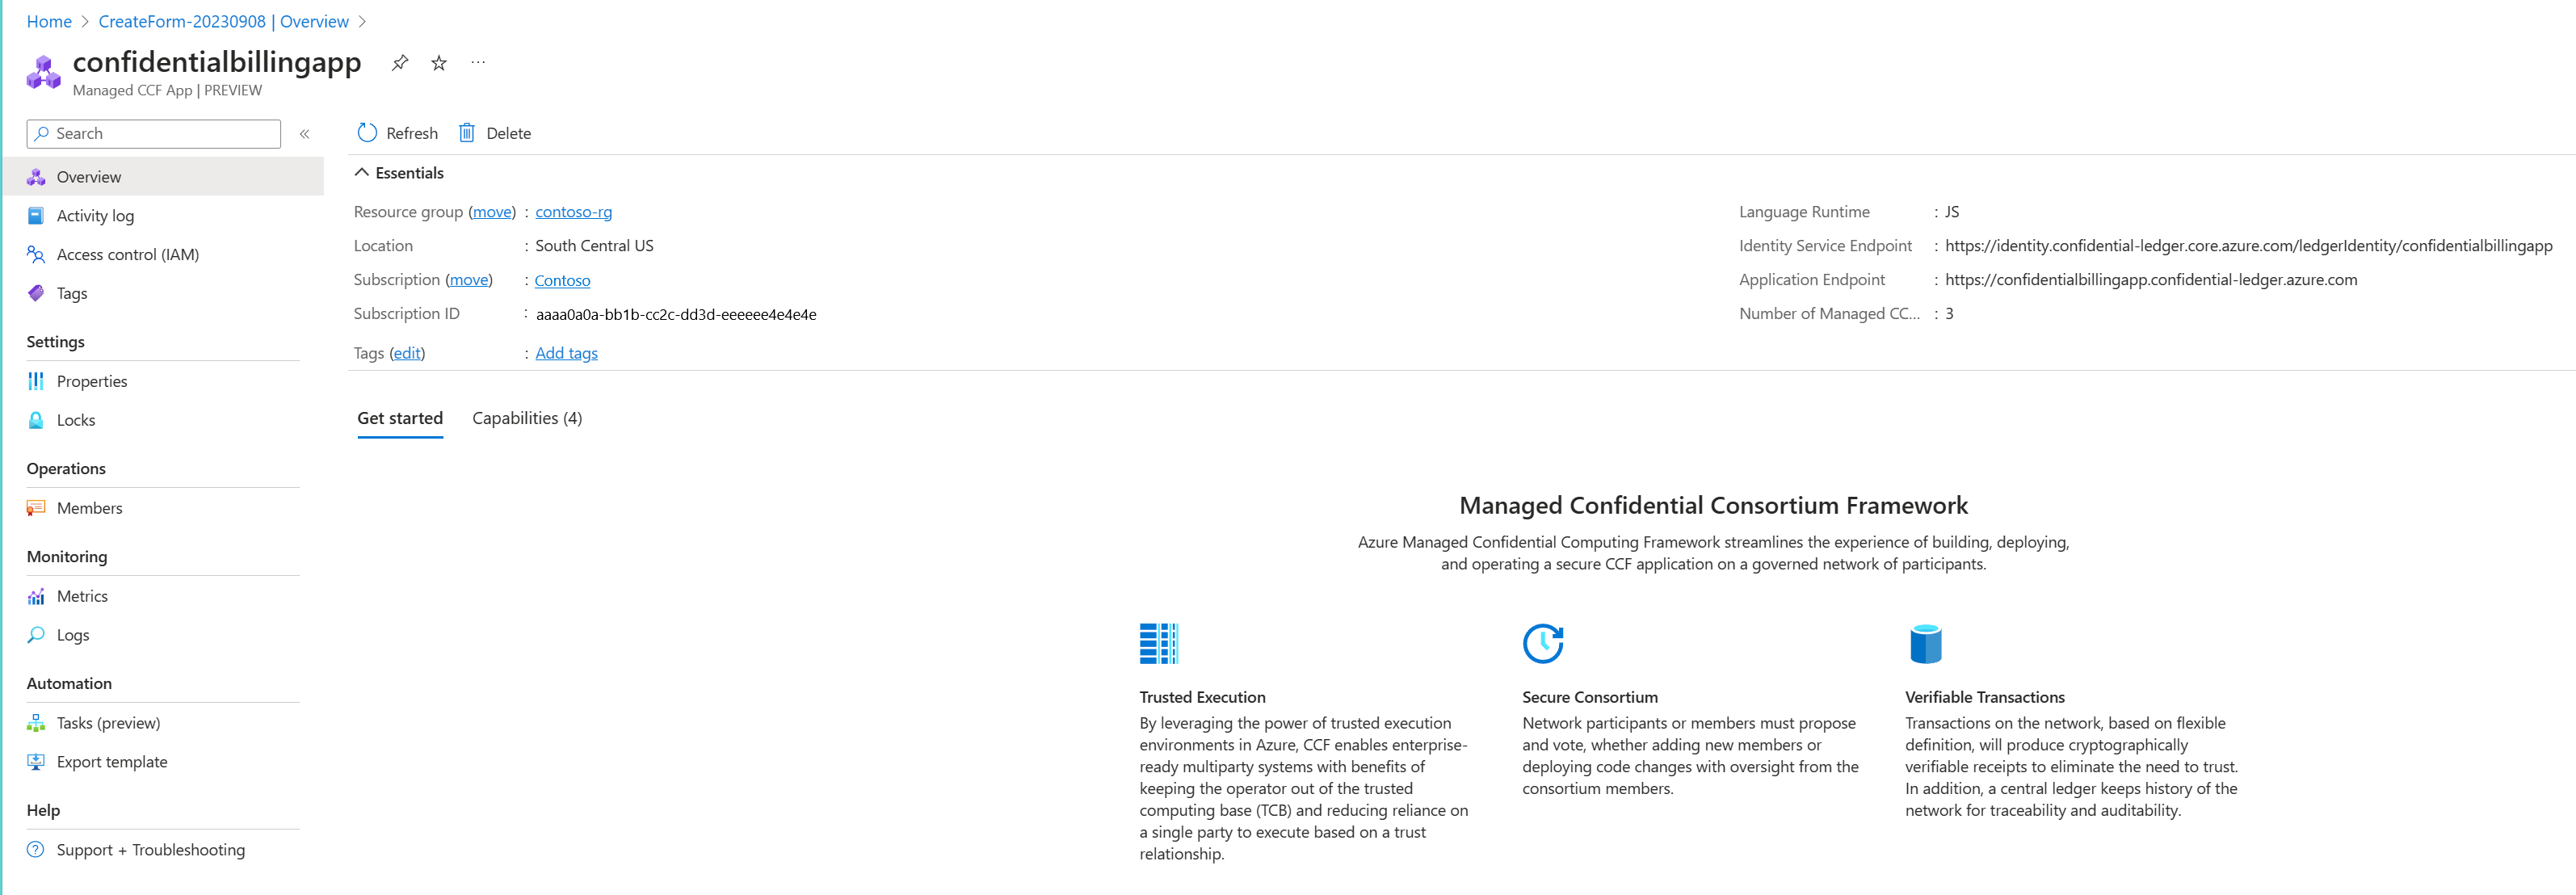
Make a note of the following properties as it is required to activate the member(s).
- Application endpoint: In the example, this endpoint is
https://confidentialbillingapp.confidential-ledger.azure.com. - Identity Service endpoint: In the example, this endpoint is
https://identity.confidential-ledger.core.azure.com/ledgerIdentity/confidentialbillingapp.
You will need these values to transact with the confidential ledger from the data plane.
Clean up resources
Other Azure Managed CCF articles build upon this quickstart. If you plan to continue on to work with subsequent articles, you might wish to leave these resources in place.
When no longer needed, delete the resource group, which deletes the Managed CCF and related resources. To delete the resource group through the portal:
Enter the name of your resource group in the Search box at the top of the portal. When you see the resource group used in this quickstart in the search results, select it.
Select Delete resource group.
In the TYPE THE RESOURCE GROUP NAME: box, enter the name of the resource group, and select Delete.
Next steps
In this quickstart, you created a Managed CCF resource by using the Azure portal. To learn more about Azure Managed CCF and how to integrate it with your applications, continue on to these articles: