Note
Access to this page requires authorization. You can try signing in or changing directories.
Access to this page requires authorization. You can try changing directories.
Applies to: Microsoft Discovery (Public Preview)
This article describes how to create a Supercomputer and NodePools using the Azure portal. It follows Learn.microsoft.com conventions and is safe for public preview documentation.
Overview
A Supercomputer is a managed compute cluster in Microsoft Discovery. NodePools provide the underlying virtual machines (VMs) that run workloads on the Supercomputer. You can attach multiple Node Pools, each with different VM types and scaling limits, to a single Supercomputer.
This article is scoped only to Supercomputer and NodePool creation. Prerequisites such as networking, identities, and storage must already be in place.
Important
This article doesn't cover workspace creation, storage provisioning, or network setup. Complete those steps before continuing.
Prerequisites
Before you begin, make sure the following requirements are met:
- An Azure subscription with the Microsoft.Discovery resource provider registered.
- A virtual network with the following subnets:
aksSubnet– used by the Supercomputer control planesupercomputerNodepoolSubnet– used by Node Pools
- A user-assigned managed identity (UAMI) with the required role assignments.
- Sufficient quota for the VM type you plan to use in the target region.
Create a Supercomputer
A Supercomputer represents the managed compute cluster that hosts one or more Nodepools.
Create the Supercomputer resource
- Sign in to the Azure portal
- In the search bar, enter Microsoft Discovery Supercomputers.
- Select Create.
- On the Basics tab, specify:
- Subscription
- Resource group
- Region
- Supercomputer name
- Select Next.

Configure networking
- On the Networking tab:
- Select the virtual network created during prerequisites.
- Select the
aksSubnetsubnet.
- Select Next.

Assign managed identities
- On the Identity tab, add the user-assigned managed identity (UAMI).
- Assign the same UAMI for:
- Cluster identity
- Kubelet identity
- Workload identity
This identity allows the Supercomputer to securely access Azure resources such as storage accounts.

Create the Supercomputer
- Review your selections.
- Select Create.
- Wait for deployment to complete. The provisioning state must show Succeeded.

Create a Nodepool
Nodepools define the compute capacity (VMs) attached to a Supercomputer. You can create multiple Nodepools with different VM types and scaling limits.
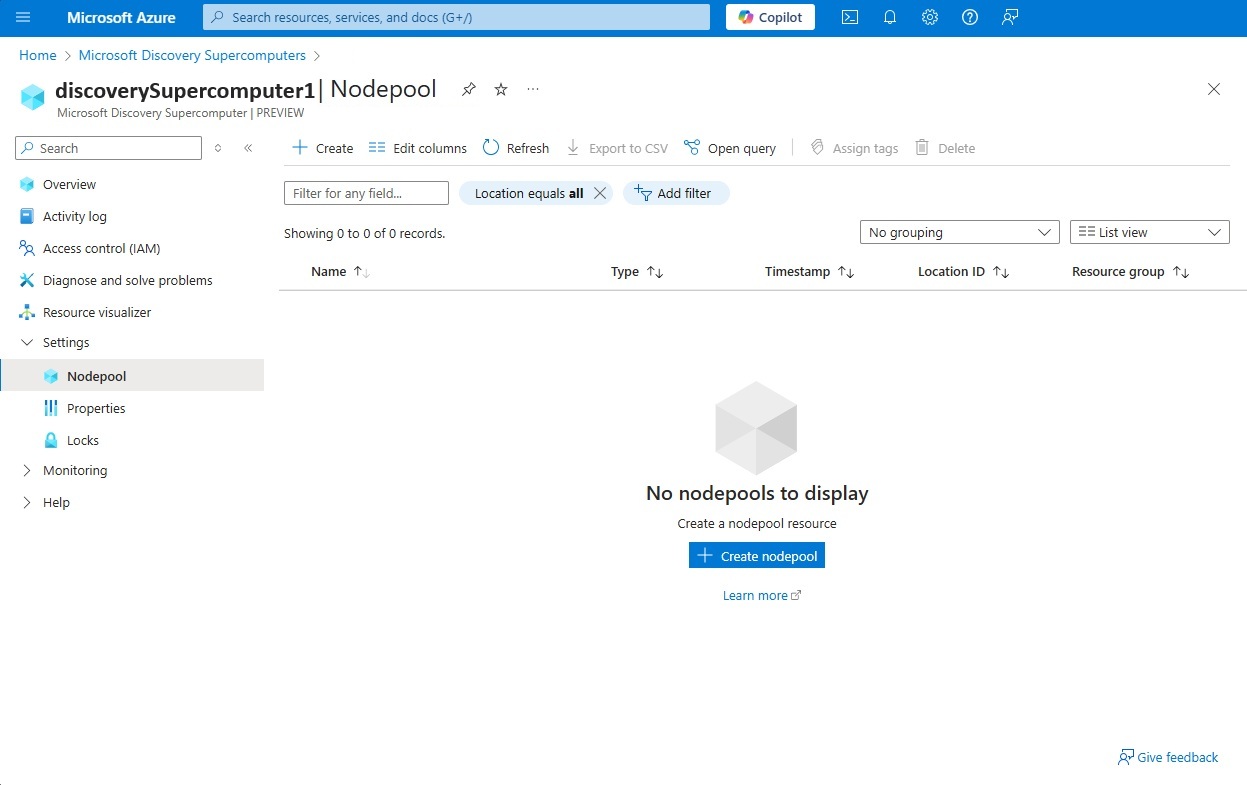
Open the Supercomputer
In the Azure portal, open the Supercomputer resource.
Under Settings, select Nodepools.
Select Create.

Configure basic settings
- Enter a Nodepool name that meets the following requirements:
- Lowercase letters only
- Maximum of 12 characters
- Starts with a letter
- Letters and numbers only
- Select the Region.
- Select Next.
Configure networking
- Select the same virtual network used by:
- The Supercomputer
- Microsoft Discovery shared storage
- Select the
supercomputerNodepoolSubnetsubnet. - Select Next.
Select VM configuration
Choose a Virtual Machine type for the Node Pool.
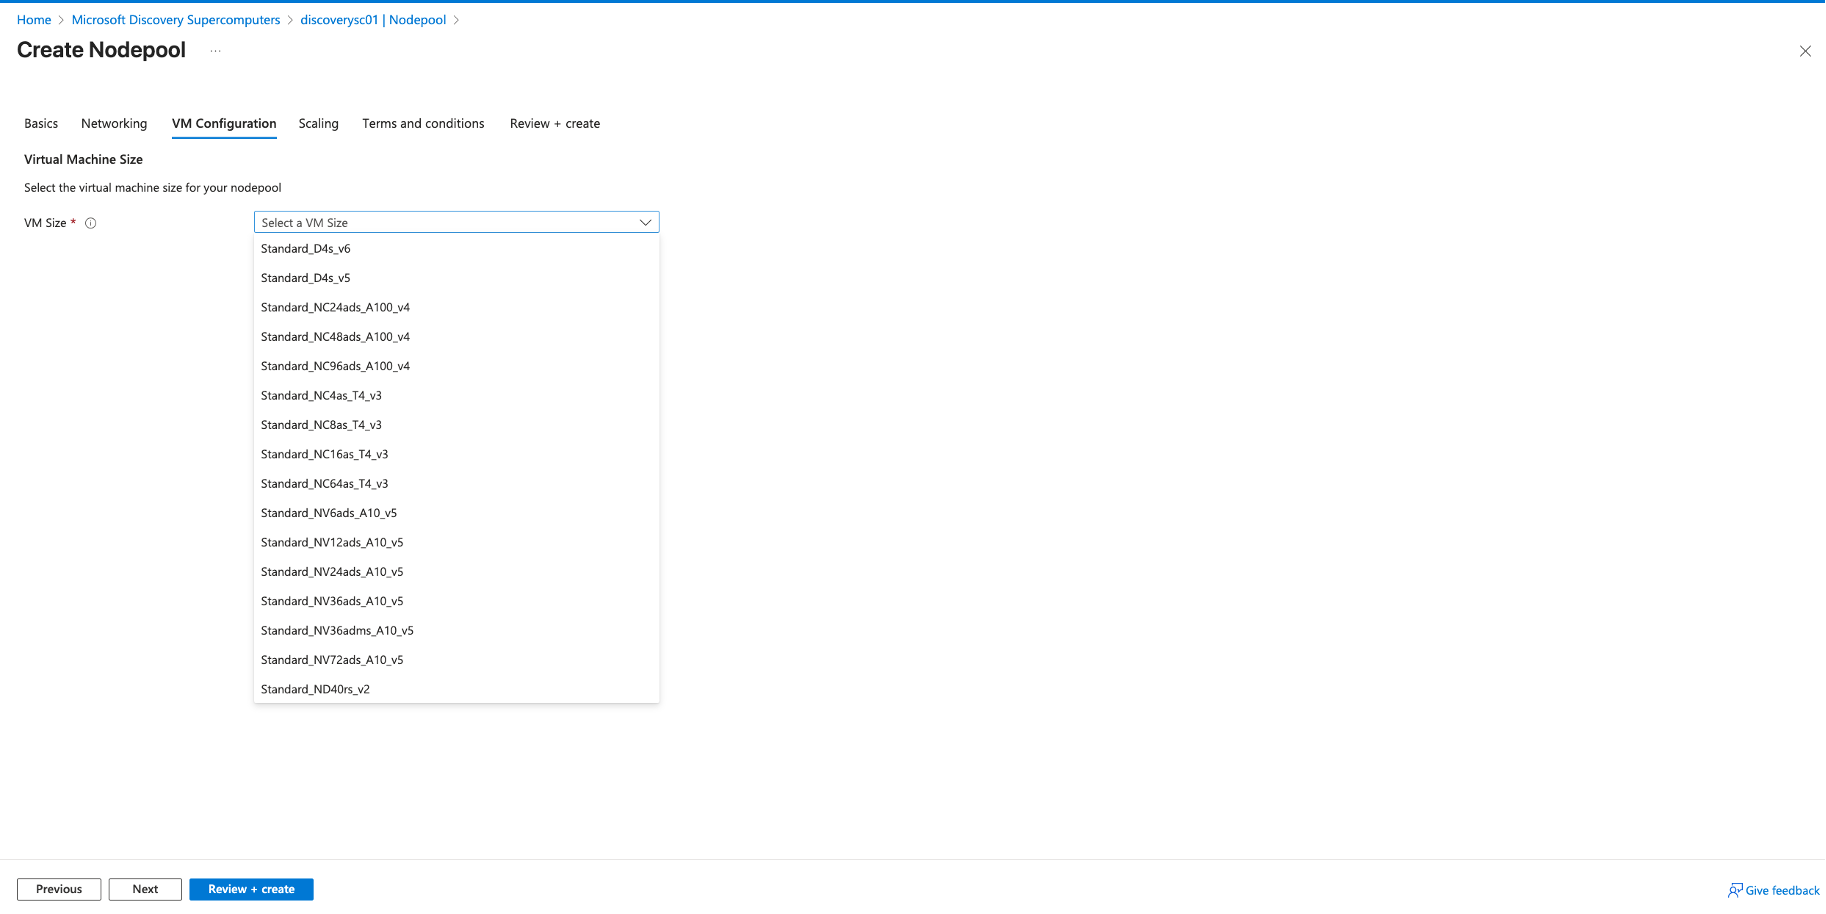

Note
The selected Virtual Machine type must be available and quota-approved in the selected region.
- Select Next.
Configure scaling
Specify the maximum node count, which defines the upper bound for automatically scaling.

Create the Nodepool
- Review your selections.
- Select Create.
- Wait for provisioning to complete. The Nodepool provisioning state must show Succeeded.
Delete a Supercomputer
You must delete all associated nodepools before you can delete a supercomputer.
To delete the nodepools, follow these steps:
Sign in to the Azure portal
Navigate to the Supercomputer
- In the top search bar, type "Microsoft Discovery Supercomputers."
- Select Microsoft Discovery Supercomputers.
- Select the Supercomputer that owns the nodepool.
Select the Nodepool under Settings in the left pane.
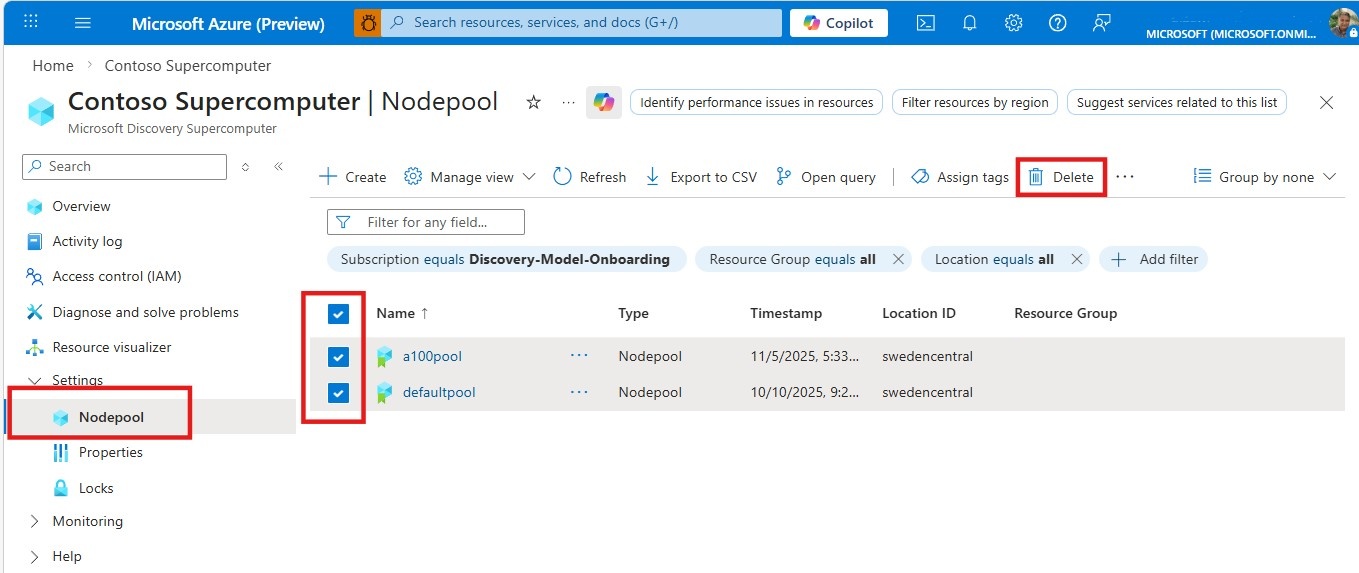
Select the nodepool or nodepools that you want to delete and select Delete
Wait for all the nodepools to get deleted, then navigate to the supercomputer and select the Overview section in the left pane
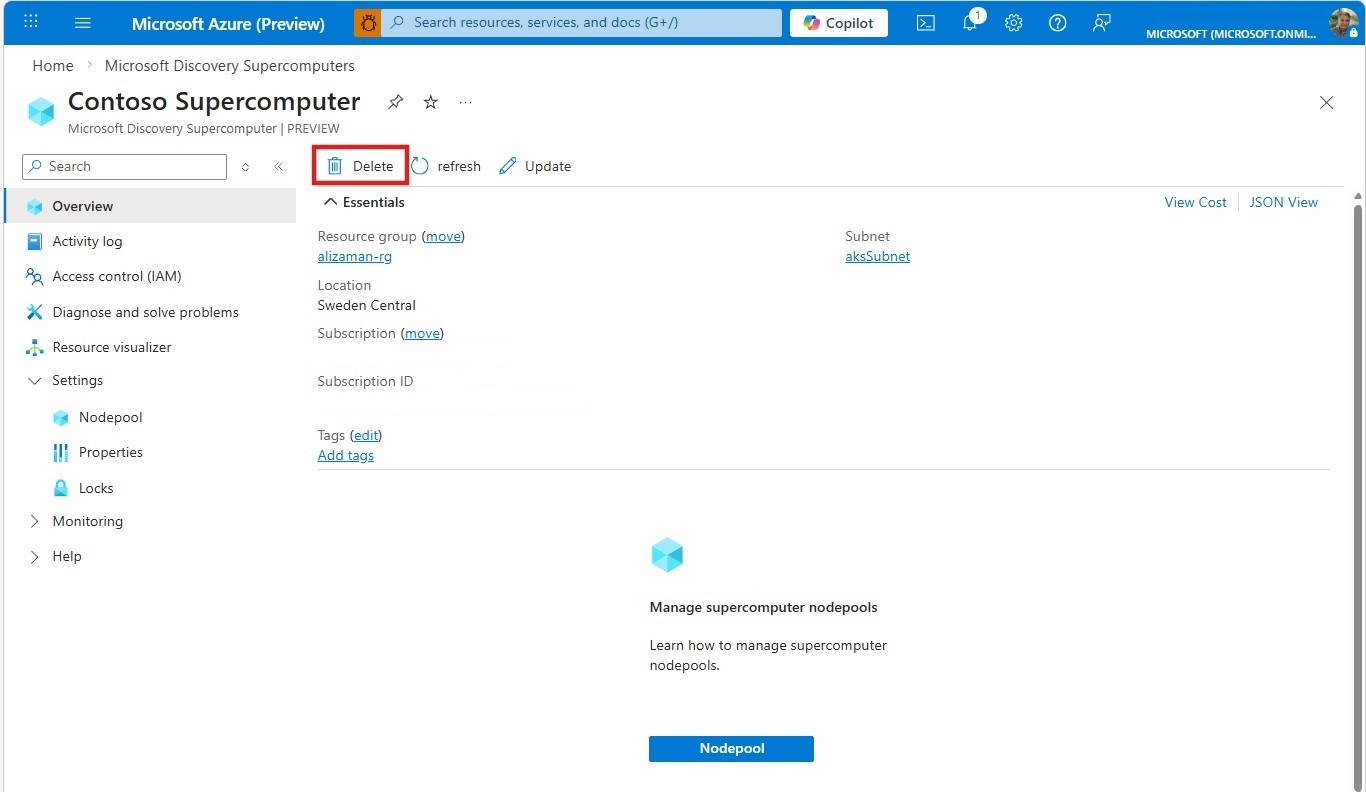
Select Delete


Troubleshooting Common Issues
Deployment Failures
- Insufficient Quota: Ensure you have sufficient VM quota in the selected region
- Network Configuration: Verify virtual network and subnet configurations are correct
- Identity Permissions: Confirm the UAMI has the required permissions
Performance Considerations
- Nodepool Sizing: Choose VM type that match your computational requirements
- Scaling Limits: Set appropriate maximum node counts based on your workload patterns
- Regional Availability: Select regions with good availability for your chosen VM type
Security Considerations
- Network Isolation: Supercomputers operate within your virtual network boundaries
- Identity Management: Use managed identities for secure access to Azure resources
- Access Control: Implement least-privilege access principles for supercomputer resources
- Monitoring: Enable Azure Monitor and logging for operational insights
Next steps
After creating a Supercomputer and Node Pools, you can:
- Attach the Supercomputer to a Microsoft Discovery workspace.
- Run tools, workflows, and investigations using Node Pools.
- Add more Nodepools with different VM types as your workload requirements evolve