Note
Access to this page requires authorization. You can try signing in or changing directories.
Access to this page requires authorization. You can try changing directories.
This article describes how to generate a Platform Landing Zone (PLZ) by using Azure Migrate. It also explains how to iterate on the generated configuration before deploying it with Visual Studio Code, GitHub Copilot Chat, and the Azure Model Context Protocol (MCP) server.
A Platform Landing Zone provides foundational Azure capabilities such as resource organization, governance, identity, networking, and management. Teams use it as a standardized baseline for deploying workloads in Azure.
Workflow overview
This workflow outlines how to generate a Platform Landing Zone from Azure Migrate and then iterate over it and deploy it using Visual Studio Code. The workflow consists of two phases:
- Generate the Platform Landing Zone: Generate the design document and Terraform-based infrastructure as code from Azure Migrate.
- Iterate and deploy the Platform Landing Zone: Iterate on and deploy the generated landing zone from Visual Studio Code by using the Azure Model Context Protocol (MCP) server.
Generation is initiated from Azure Migrate. Iteration and deployment are performed from Visual Studio Code.
Prerequisites
Before you begin, ensure that you have the following:
- An Azure Migrate project.
- Visual Studio Code installed.
- GitHub Copilot Chat enabled in Visual Studio Code.
- An Azure subscription with permissions to create and deploy resources required for the platform landing zone.
Permissions
The required permissions depend on the deployment scenario and the scope at which resources are deployed.
Initial tenant or subscription setup
If you are bootstrapping new subscriptions or performing initial tenant setup, Owner permission may be temporarily required at one of the following scopes:
- Tenant root management group
- Management group
Platform Landing Zone deployment
For standard Platform Landing Zone deployment, the deployment identity must have the following permissions:
- Contributor and User Access Administrator at the target management group scope.
- Contributor at the target subscription scope.
These permissions are required to create resources, assign policies, and configure role-based access control (RBAC) during deployment.
End-to-end Platform Landing Zone workflow
The following steps show how to generate a Platform Landing Zone using Azure Migrate and then iterate and deploy it using Visual Studio Code with GitHub Copilot Chat and the Azure MCP Server.
Generate the Platform Landing Zone in Azure Migrate
This section describes how to generate a Platform Landing Zone in Azure Migrate and review the generated artifacts in Visual Studio Code.
In the Azure portal, open Azure Migrate and then go to your Azure Migrate project.
Start the Azure Migrate Agent experience.
Ask the agent to create a Platform Landing Zone by entering: I want to create a Platform Landing Zone (or PLZ).
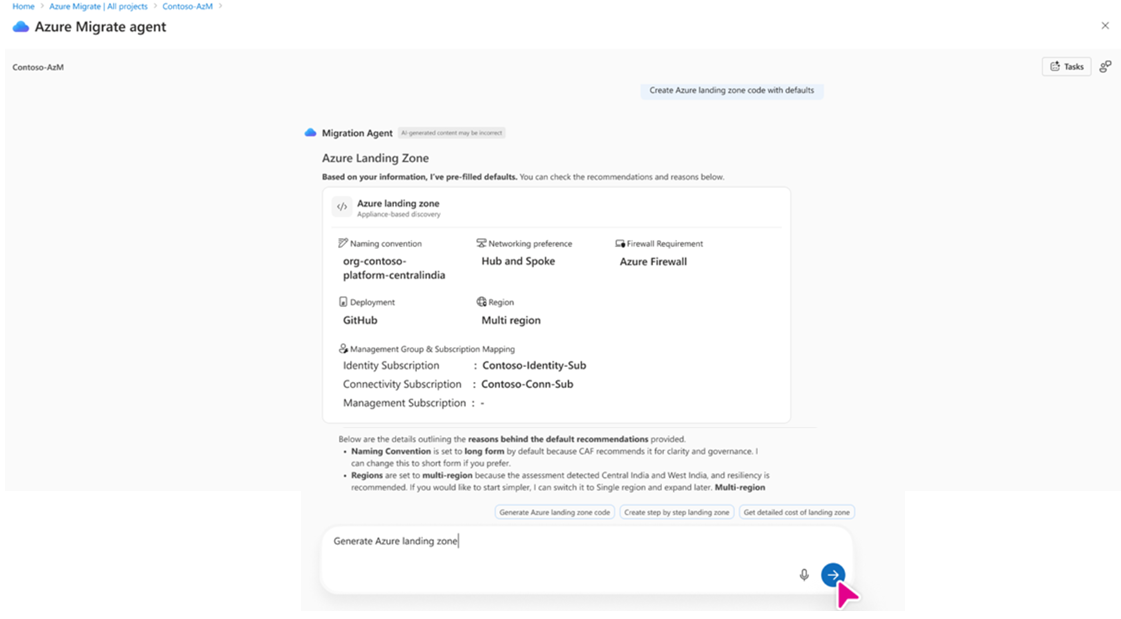
Complete the guided conversation based on your requirements.
When the process completes, download the generated output as a ZIP file.
Extract the ZIP file to a local folder.
Open the extracted folder in Visual Studio Code.

The downloaded ZIP file typically includes the following artifacts:
- Terraform templates for the Platform Landing Zone
- A generated design document
- Configuration files
- Scripts for configuration and deployment
- CI/CD workflow definitions (if applicable)
Enable iteration in Visual Studio Code by installing the Azure MCP Server
To iterate on the platform landing zone using natural language prompts in Copilot Chat, for example, to denial Distributed Denial of Service (DDoS) or switch to Azure Virtual WAN (vWAN), you must enable the Azure Model Context Protocol (MCP) Server in Visual Studio Code.
Install and configure the Azure MCP Server
- Open the Visual Studio Code.
- Go to Extensions and install the Azure MCP Server extension.
- If prompted, select Switch to Pre-Release Version.
- Reload Visual Studio Code or restart extensions.
- Open the Copilot Chat and select Tools.
- Enable Azure MCP, and then select Update tools.
- Verify that the
azuremigratetool appears in the tools list.
Iterate on the Platform Landing Zone - Visual Studio Code and MCP
After you enable the Azure Model Context Protocol (MCP) server, use GitHub Copilot Chat in Visual Studio Code to apply changes across the platform landing zone artifacts.
Use Copilot Chat to make updates such as:
- Disable DDoS protection.
- Change Azure regions.
- Switch the network architecture, for example, hub-and-spoke or Virtual WAN.
- Update firewall configurations.
- Modify policy overrides.
Copilot applies changes across the relevant files, including Terraform variables, configuration files, and policy overrides, and summarizes the updates that were made.
Deploy the Platform Landing Zone
Deploy the platform landing zone by following the deployment instructions included in the generated package, including the README file and deployment scripts.
A typical deployment workflow includes:
Update the configuration files, for example,
config/inputs.yamlwith values specific to your environment.Run the configuration update script:
.\scripts\powershell\update-config.ps1./scripts/bash/update-config.ps1Deploy bootstrap prerequisites:
.\scripts\powershell\invoke-terraform.ps1 -ModuleFolderPath "D:\azure-landing-zone-platform\output\bootstrap\v7.0.0\alz\github" -TfvarsFileName "terraform.tfvars.json" -TenantId "tenantId" -AutoApprove./scripts/bash/invoke-terraform.sh -m "azure-landing-zone-platform/output/bootstrap/v7.0.0/alz/github" -f "terraform.tfvars.json" -t "tenantId" -aDeploy the platform landing zone by using the provided CI/CD pipeline (GitHub Actions or Azure DevOps) or run Terraform by using the included scripts.
Design document generation
The design document included in the platform landing zone package uses a template-based approach. Azure Migrate generates the document based on the selected platform landing zone configuration you select, such as region type, network architecture, firewall type, and region selection. The output is a customized Markdown document that matches your chosen configuration.
Next steps
After deploying the Platform Landing Zone, you can start creating assessments or proceeding with migration.