Note
Access to this page requires authorization. You can try signing in or changing directories.
Access to this page requires authorization. You can try changing directories.
Notification Hubs is offered in three tiers: free, basic, and standard. This article shows you how to change the pricing tier for an Azure Notification Hubs namespace.
Overview
In Azure Notification Hubs, a notification hub is the smallest resource/entity. It generally maps to one application and can hold one certificate for each Platform Notification System (PNS) we support for the app. The application can be a hybrid, or a native and a cross-platform application.
A namespace is a collection of notification hubs. Each namespace usually consists of hubs that are related and used for a specific purpose. For example, you can have three different namespaces for development, test, and production purposes, respectively.
You can associate a namespace with the free, basic, or standard pricing tiers. For any namespace, you can use the tier that suits your requirements. The following sections show you how to change the pricing tier of a Notification Hubs namespace.
Use Azure portal
When using the Azure portal, you can change the pricing tier for a namespace on the namespace page, or on a hub page. When you change it on a hub page, you actually change it at the namespace level. It changes the pricing tier for the namespace and all hubs in the namespace.
Change tier on the namespace page
The following procedure shows how to change the pricing tier for a namespace on the namespace page. When you change the tier for a namespace, it applies to all hubs in that namespace.
Sign in to the Azure portal.
Select All services on the left menu.
Select Notification Hub Namespaces in the Internet of Things section. If you select the asterisk (
*) next to the text, it's added to the left navigation bar under FAVORITES. This helps you access the namespaces page faster next time. After you add it to FAVORITES, select Notification Hub Namespaces.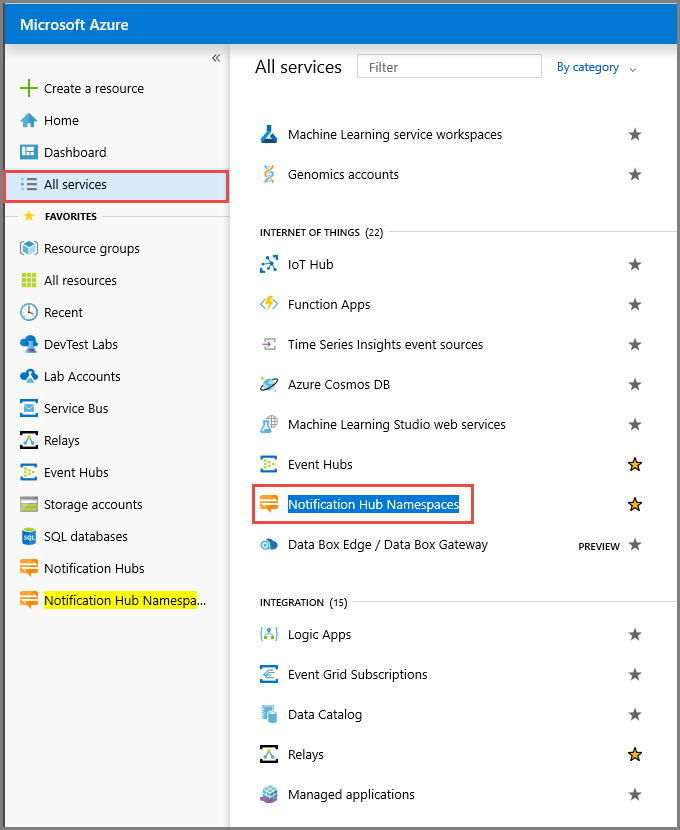
On the Notification Hub Namespaces page, select the namespace for which you want to change the pricing tier.
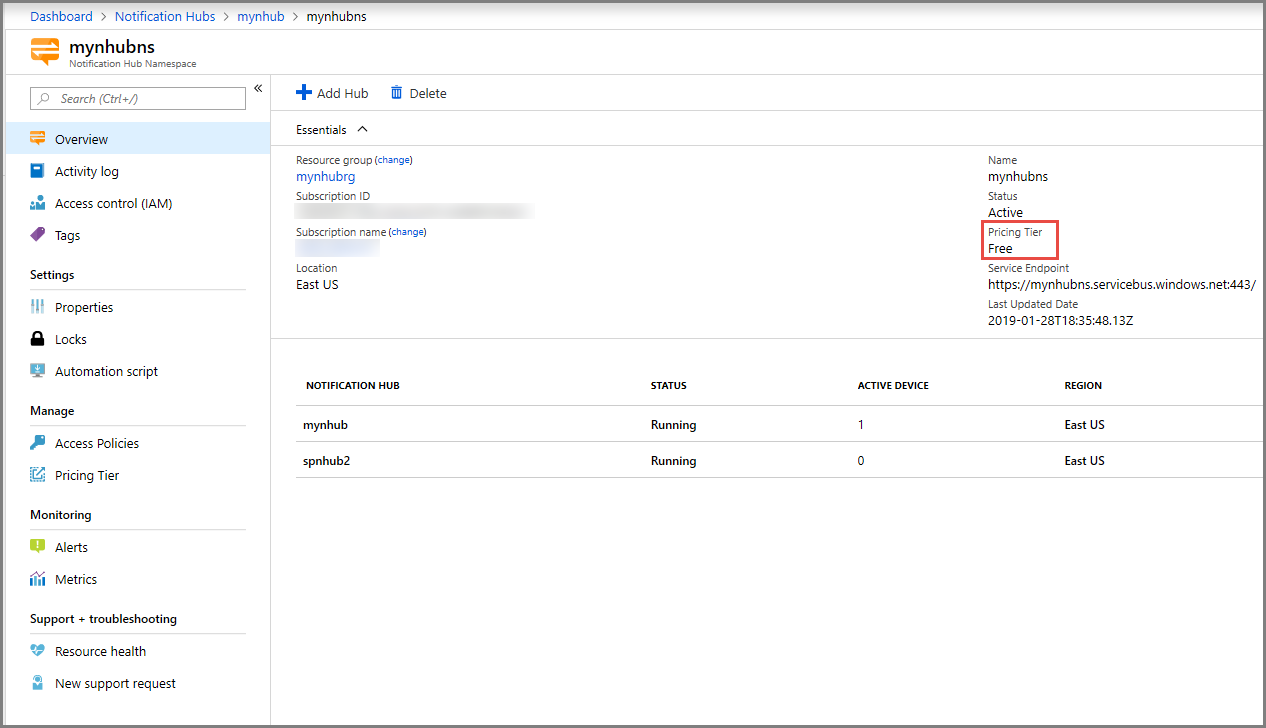
On the Notification Hub Namespace page for your namespace, you can see the current pricing tier for the namespace in the Essentials section. In the following image, you can see that the pricing tier of the namespace is Free.
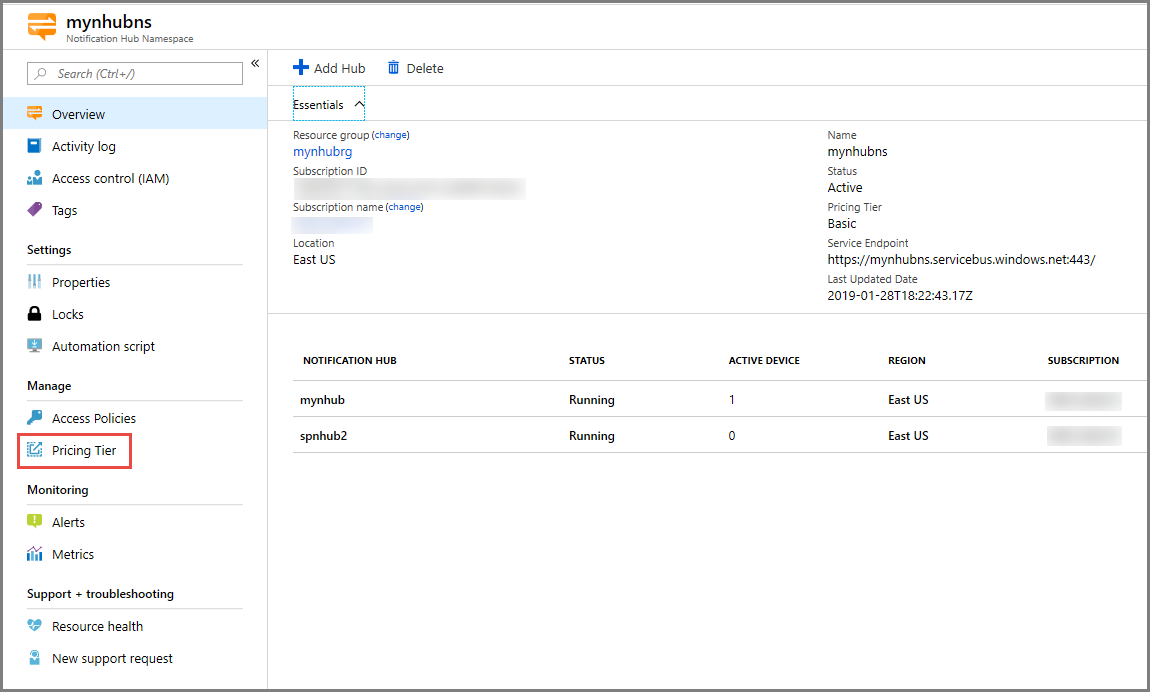
On the Notification Hub Namespace page for your namespace, select Pricing Tier in the Manage section.
Change the pricing tier, and then click the Select button.
You can see the status of the tier change action in the alerts.
Switch to the Overview page. Confirm that the new tier is shown for the Pricing Tier field in the Essentials section.
This step is optional. Select any hub in the namespace. Confirm that you see the same pricing tier in the Essentials section. You should see the same pricing tier for all hubs in the namespace.
Change tier on the hub page
Follow these steps to change the pricing tier of a namespace on the hub page. Even though you do these steps starting from the hub page, you actually change the pricing tier for the namespace and all hubs in the namespace:
- Sign in to the Azure portal.
- Select All services on the left menu.
- Select Notification Hubs in the Internet of Things section.
- Select your notification hub.
- Select Pricing Tier on the left menu.
- Change the pricing tier, and click the Select button. This action changes the pricing tier setting for the namespace that contains the hub. So, you see the new pricing tier on the namespace page and all hub pages.
Note
All pricing tier changes are effective immediately.
Use REST API
You can use the following Resource Provider REST APIs to get the current pricing tier and update it.
Get current pricing tier for a namespace
To get the current namespace tier, send a GET command, as shown in the following example:
GET: https://management.core.windows.net/{subscription ID}/services/ServiceBus/Namespaces/{namespace name}/notificationhubplan
Update pricing tier for a namespace
To update the namespace tier, send a PUT command, as shown in the following example:
PUT: https://management.core.windows.net/{subscription ID}/services/ServiceBus/Namespaces/{namespace name}/notificationhubplan
Body: <NotificationHubPlan xmlns:i="https://www.w3.org/2001/XMLSchema-instance" xmlns="http://schemas.microsoft.com/netservices/2010/10/servicebus/connect"><SKU>Standard</SKU></NotificationHubPlan>
Next steps
For more information about these tiers and pricing, see Notification Hubs pricing.