Note
Access to this page requires authorization. You can try signing in or changing directories.
Access to this page requires authorization. You can try changing directories.
The Break-Glass mechanism provides temporary and emergency access to Azure Operator Nexus devices or services, primarily for disaster recovery, incident response, or essential maintenance. Access is granted under controlled Identity Access Management (IAM) policies, maintaining security even during emergencies.
For Network Fabric environments, the current break-glass model, known as Method D v1.5, relies on password authentication. This model, however, is limited to 15 shared accounts and poses significant security risks. Method D v2.0 introduces a modernized approach, implementing FIDO-2 devices and SSH keys to secure break-glass access. Key improvements include:
Strict access control: Customer administrators control access through individual assignments instead of shared accounts.
Strong authentication: Break-glass access is managed via Microsoft Entra with multifactor authentication (MFA) eliminating local account dependencies.
Enhanced security: All access attempts are logged for audit and investigation purposes.
FIDO2 token
In the Method D v2.0 model, break-glass users uses a FIDO2 token to create and upload a public key linked to their Entra identity. This configuration provides secure SSH access to Fabric devices. Entra Role-Based Access Control (RBAC) manages authorization, allowing administrators to assign appropriate access levels to users.
For offline accessibility, usernames, public keys, and permissions are pre-provisioned on all the Network Fabric devices, allowing break-glass SSH login without requiring an active Azure connection.
Each FIDO2 token serves usually as a physical USB device, offering unphishable, multifactor authentication through user presence and PIN verification.
Method D v2.0 setup and operations
This guide is divided into two sections
Method D v2.0 infrastructure setup - Mandatory for both existing and new Network Fabric (NF) deployments running Runtime Fabric version 4.0.0.
Method D v2.0 infrastructure setup
This guide provides an overview of the infrastructure setup that is mandatory for both existing and new deployments using NF Runtime version 4.0.0.
Step 1: Register NexusIdentity Resource Provider
Register the Microsoft.NexusIdentity resource provider.
Register the resource provider:
az provider register --namespace Microsoft.NexusIdentity --waitVerify the registration status:
az provider show --namespace Microsoft.NexusIdentity -o tableThe registration status should display as "Registered".
Step 2: Assign necessary permissions for Network Fabric access
As part of the Secure Future Initiative (SFI), On-Behalf-Of (OBO) tokens are now required to grant access to customer resources. This token grants NexusIdentity permissions scoped at the subscription, resource group, or network fabric level to enable read access to Network Fabric role assignments. The following role permissions should be assigned to end users responsible for NF create, NF upgrade, and NF delete operations. These permissions can be granted temporarily, limited to the duration required to perform these operations.
Required permissions
- Microsoft.NexusIdentity/identitySets/read
- Microsoft.NexusIdentity/identitySets/write
- Microsoft.NexusIdentity/identitySets/delete
Configure Azure RBAC for Network Fabric Runtime version 4.0.0
Under Privileged Administrator Roles, select Azure RBAC Administrator as the built-in role and click Next.

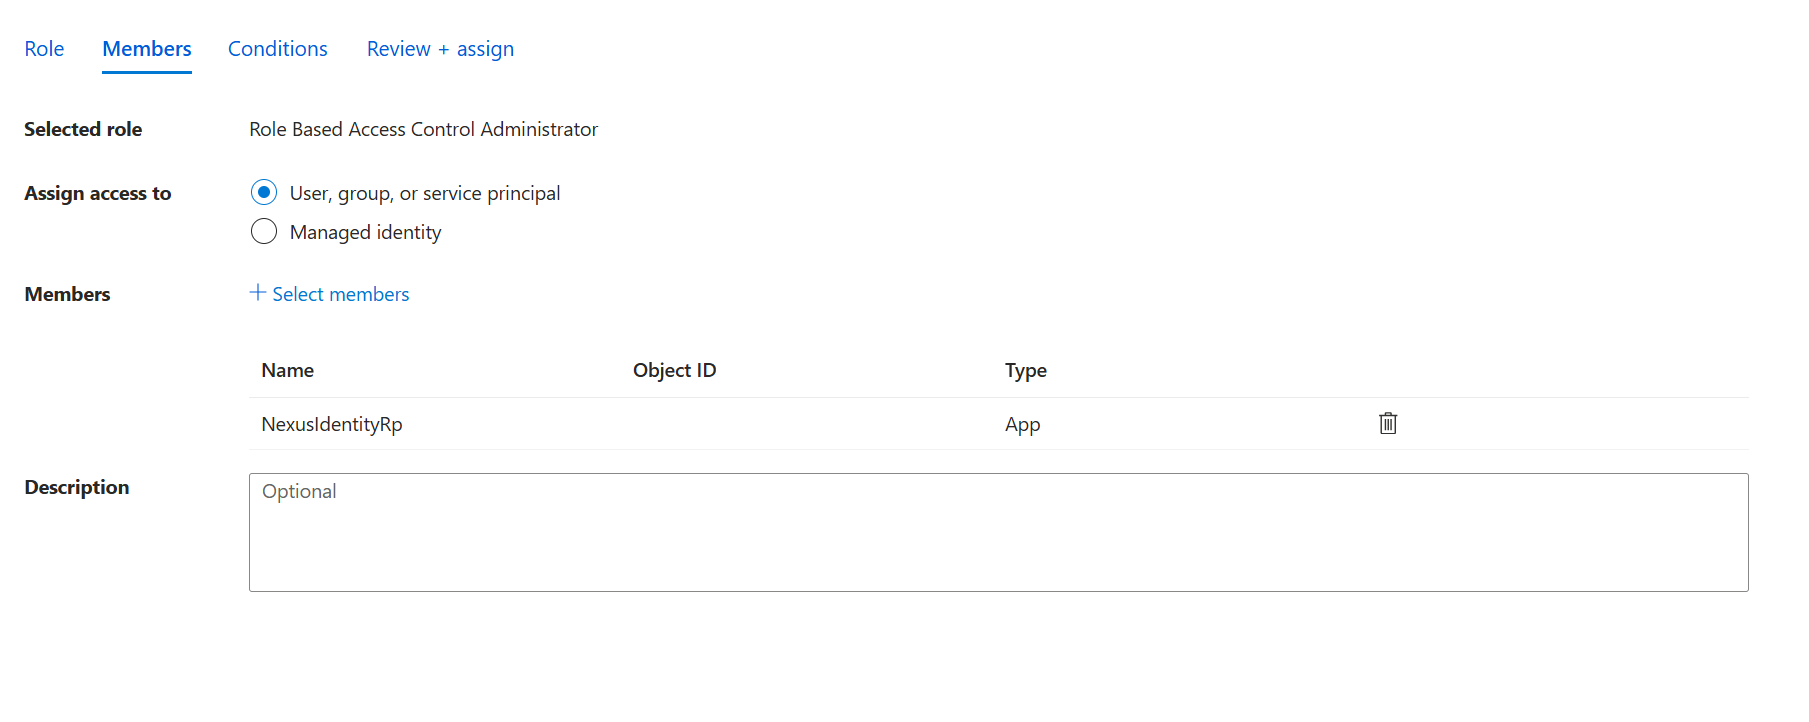
In the Members tab, add the identity of the user responsible for performing NF create, update, and delete operations.

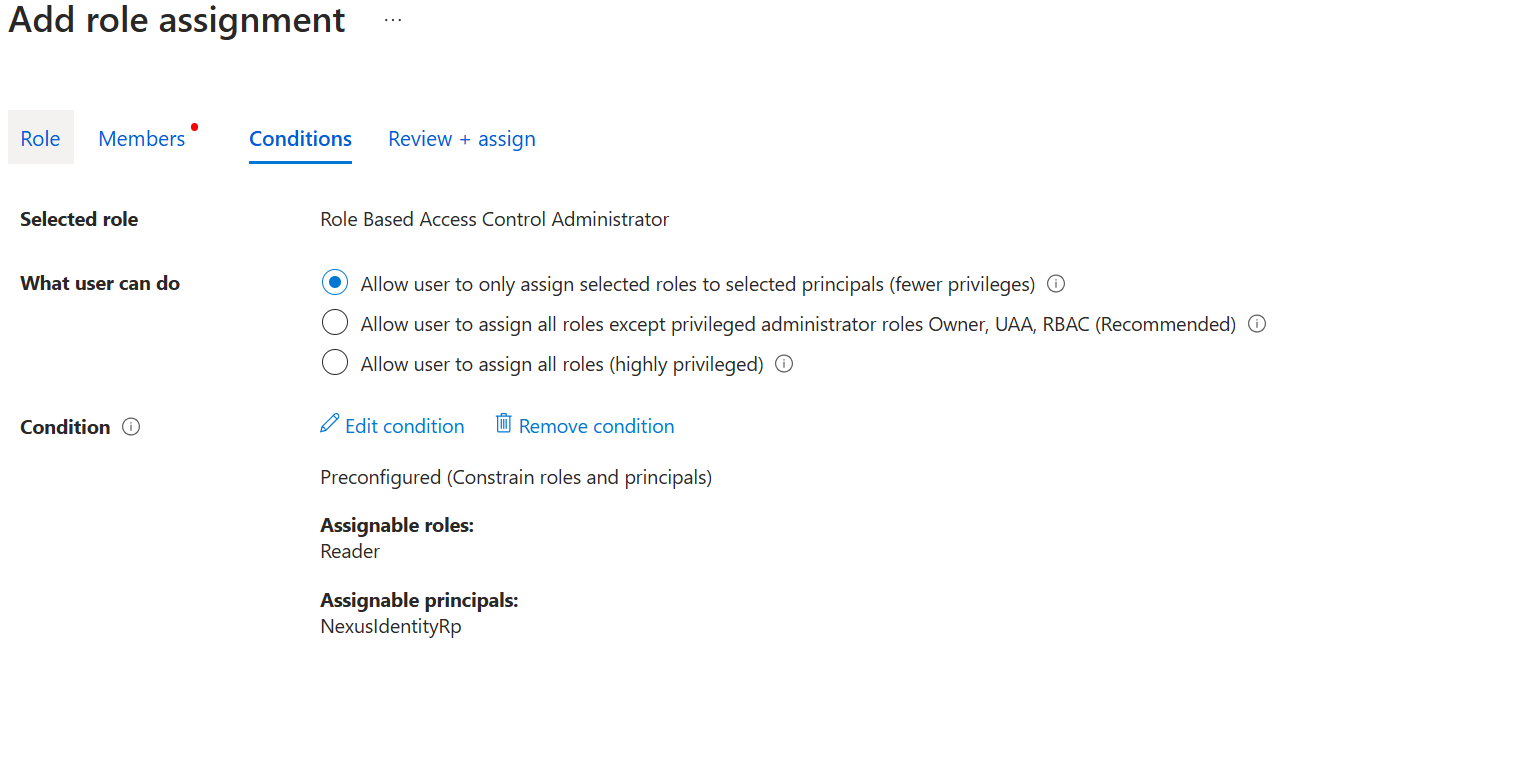
In the Conditions tab, select "Allow users to only assign selected roles to selected principals (fewer privileges).

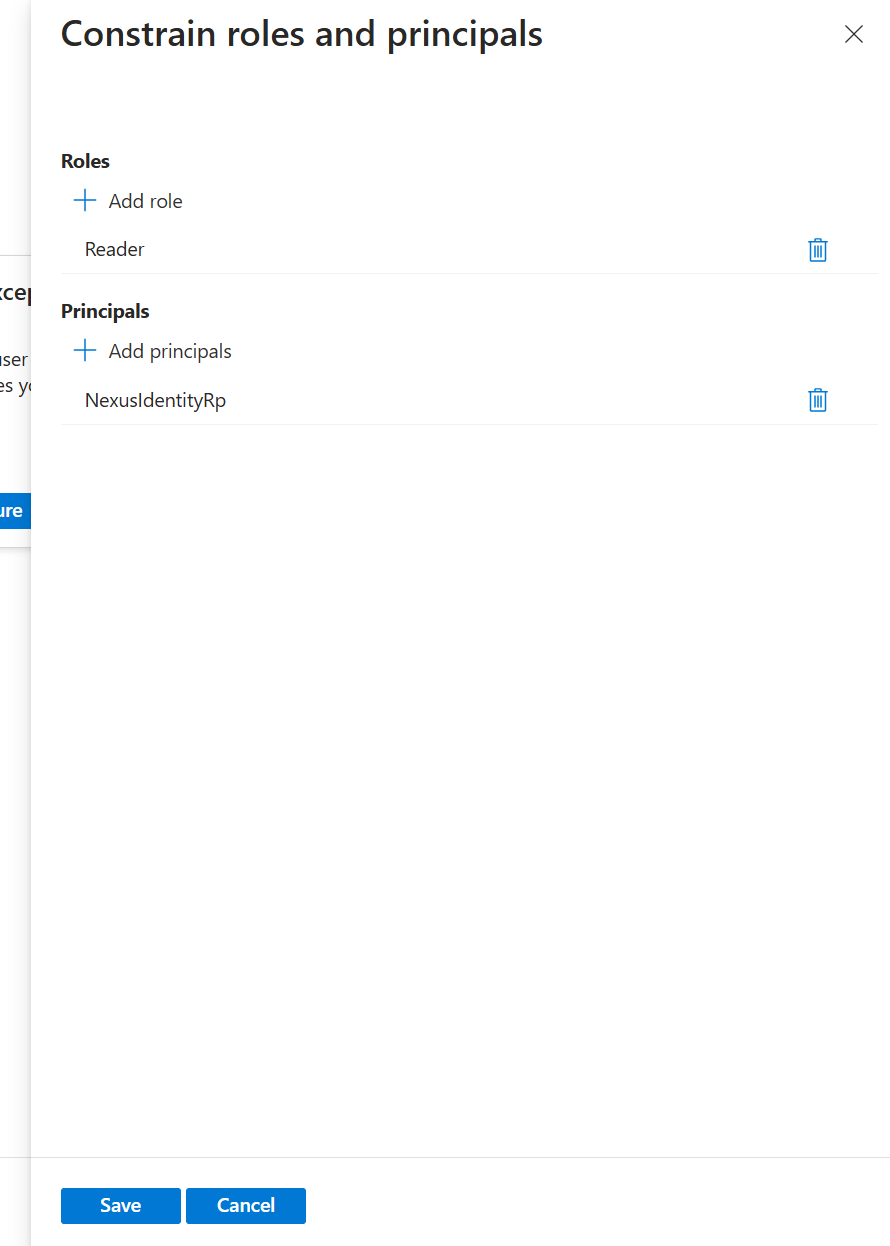
Select Constrain roles and principals and click Configure,
Select the following parameters:
Role: Reader
Principal: NexusIdentityRP

Click Review + Assign to finalize the configuration.
Activate role
- To activate the role, select Role Based Access Control Administrator from Eligible assignments tab.
Note
Ensure that Role Based Access Control Administrator is successfully activated.