Note
Access to this page requires authorization. You can try signing in or changing directories.
Access to this page requires authorization. You can try changing directories.
In this how-to guide you learn how to create a Site Network Service (SNS) using the Azure portal. A Site Network Service (SNS) is a collection of network functions along with Azure infrastructure that come together to offer a service. The set of Network Functions (NFs) and infrastructure that make up that service defined by the Network Service Design Version (NSDV).
Prerequisites
- Ensure you can sign in to the Azure portal using an account with access to the active subscription.
- A Resource Group over which you have the Contributor role.
- You have completed Create a site in Azure Operator Service Manager.
- The Network Service Design (NSD) you plan to use is published within the same tenant where you intend to deploy the Site Network Service (SNS).
- Collaboration has taken place with the Network Services Design Version (NSDV) designed to identify the required details that must be included in the Configuration Group Value (CGVs) for this specific Site Network Service (SNS).
- Verify that any prerequisites specific to the Network Service Design (NSD) are correctly deployed. The documentation from the Network Service Design (NSD) designer contains the essential details of these prerequisites.
Create the Site Network Service
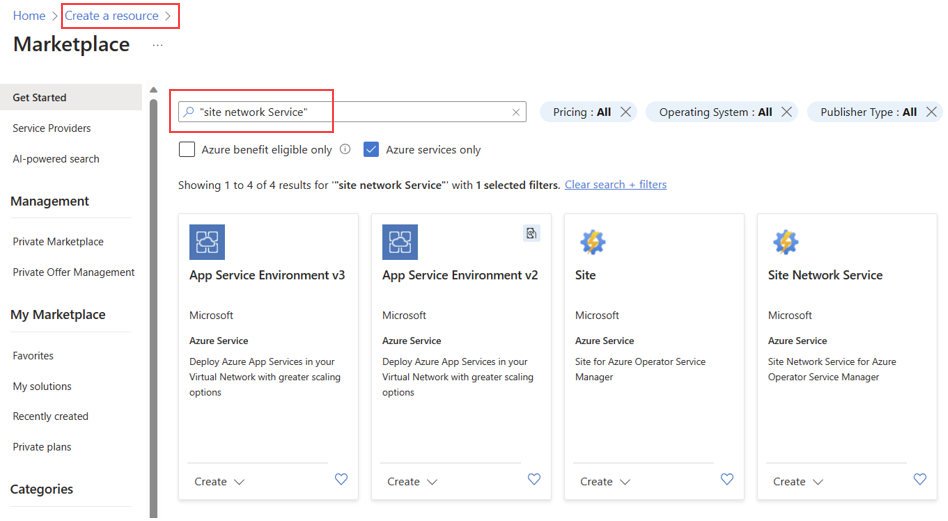
In the Azure portal, select Create resource.
In the search bar, search for Site Network Service and then select Create.
On the Basics tab, enter or select the information shown in the table. Accept the default values for the remaining settings.
Setting Value Subscription Select your subscription. Resource group Select your resource group. Name Enter the name for Site Network Service. Region Select the location. Site Select the name of the Site. Managed Identity Type This setting relies on the Network Service Design Version (NSDV). Consult your Network Service Design (NSD) designer for guidance. 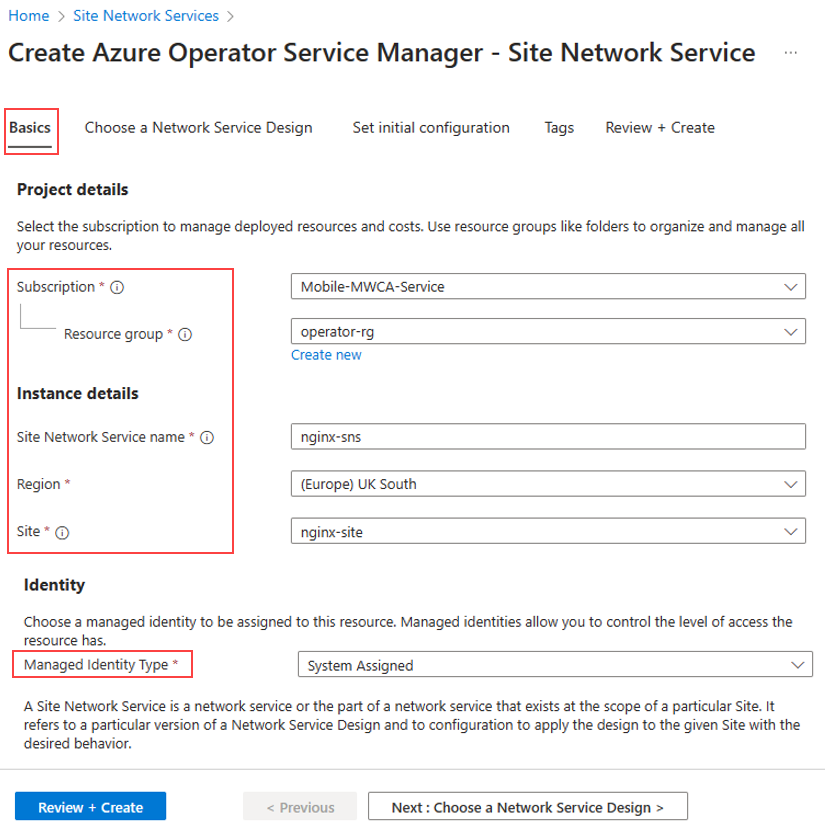


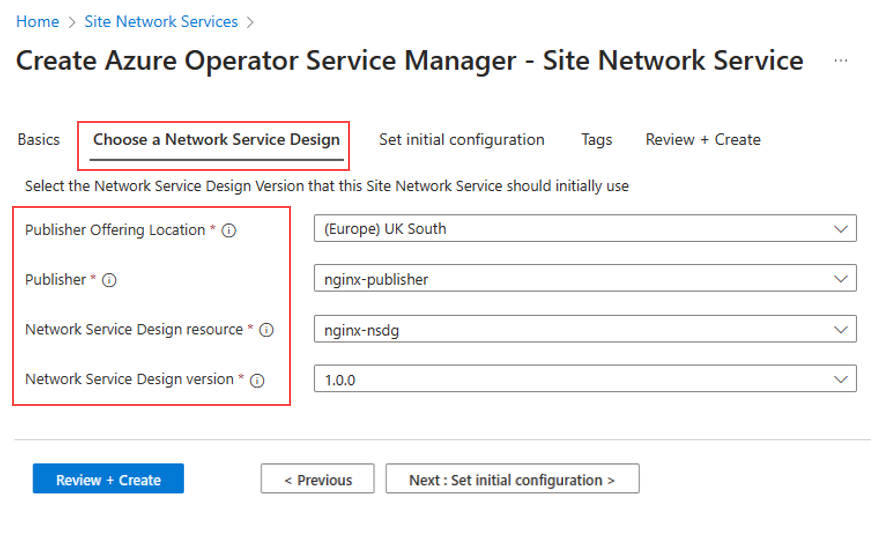
Choose a Network Service Design
On the Choose a Network Service Design tab, select the Publisher, Network Service Design Resource, Network Service Design Version that you published earlier.
Note
Consult the documentation from your Network Service Design (NSD) Publisher or directly contact them to obtain the Publisher Offering Location, Publisher, Network Service Design Resource and Network Service Design version.
On the Set initial configuration tab, select a Configuration Group Value resource for each schema listed in the selected Network Service Design.
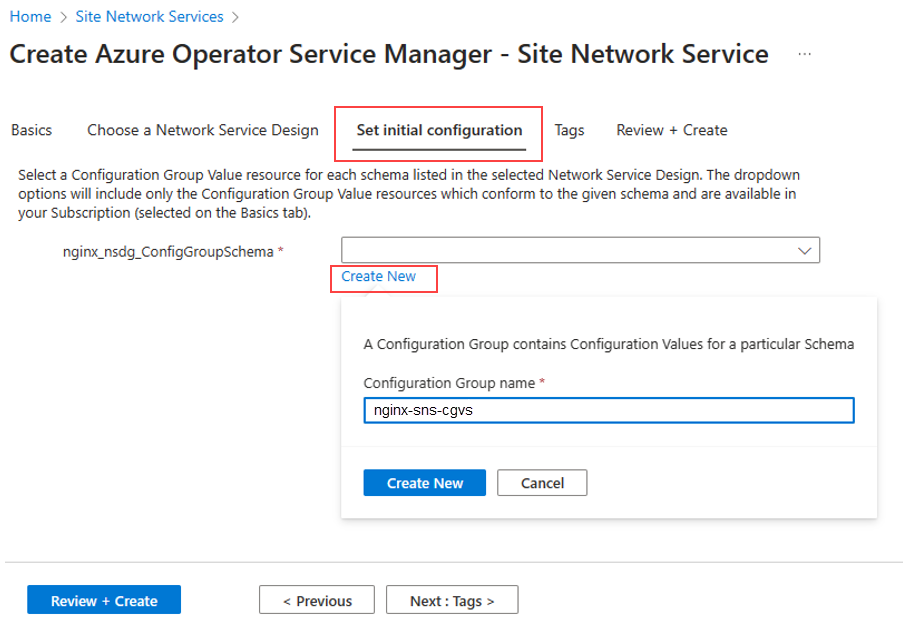
Select Create New on the Set initial configuration page.
Enter the name for the Configuration Group into the Configuration Group name field.
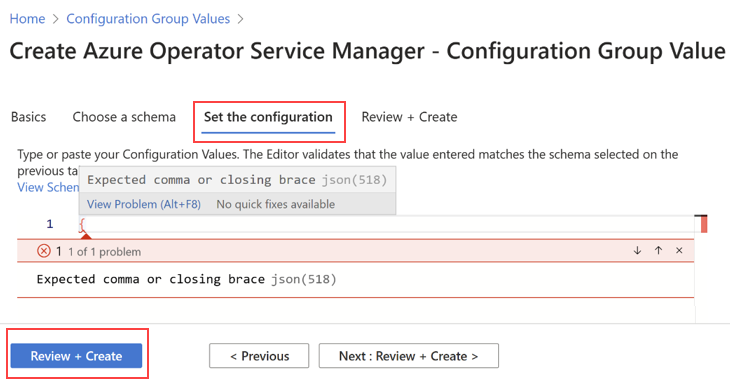
Enter the configuration into the Editor panel.


Editor panel
To configure settings in the editor panel, your input must be in JSON format:
Begin by entering a pair of curly brackets '{}'.
You notice a red squiggle appearing underneath them.
Hover your mouse cursor over the red squiggle to reveal the fields that require input.
More red squiggles might appear for any remaining errors. Follow the same process to address these issues.
Once all errors have been resolved, select Create Configuration.

Note
Consult the documentation from your Network Service Design (NSD) Publisher or directly contact them to obtain the Configuration Group Value.
Review and create
- Select Review + create and then Create.
- Select the link under Current State -> Resources. The link takes you to the Managed Resource Group created by the Azure Operator Service Manager (AOSM).