Note
Access to this page requires authorization. You can try signing in or changing directories.
Access to this page requires authorization. You can try changing directories.
This quickstart contains the prerequisite tasks for Operator and Containerized Network Function (CNF). While it's possible to automate these tasks within your NSD (Network Service Definition), in this quickstart, the actions are performed manually.
Note
The tasks presented in this article may require some time to complete.
Permissions
You need an Azure subscription with an existing Resource Group over which you have the Contributor role and the User Access Administrator role.
Alternatively the AOSM CLI extension can create the Resource Group for you, in which case you need the Contributor role over this subscription. If you use this feature, you will need to add to your user the User Access Administrator role with scope of this newly created Resource Group.
You also need the User Access Administrator role over the Network Function Definition Publisher Resource Group. The Network Function Definition Publisher Resource Group was used in Quickstart: Publish Nginx container as Containerized Network Function (CNF). Check the input-cnf-nfd.jsonc file for the Resource Group name.
Set environment variables
Adapt the environment variable settings and references as needed for your particular environment. For example, in Windows PowerShell, you would set the environment variables as follows:
$env:ARC_RG="<my rg>"
To use an environment variable, you would reference it as $env:ARC_RG.
export resourceGroup=operator-rg
export location=<region>
export clusterName=<replace with clustername>
export customlocationId=${clusterName}-custom-location
export extensionId=${clusterName}-extension
Create Resource Group
Create a Resource Group to host your Azure Kubernetes Service (AKS) cluster. This will also be where your Operator resources are created in later guides.
az account set --subscription <subscription>
az group create -n ${resourceGroup} -l ${location}
Provision Azure Kubernetes Service (AKS) cluster
az aks create -g ${resourceGroup} -n ${clusterName} --node-count 3 --generate-ssh-keys
Enable Azure Arc
Enable Azure Arc for the Azure Kubernetes Service (AKS) cluster. Running the commands below should be sufficient. If you would like to find out more, see Create and manage custom locations on Azure Arc-enabled Kubernetes.
Retrieve the config file for AKS cluster
az aks get-credentials --resource-group ${resourceGroup} --name ${clusterName}
Create a connected cluster
Create the cluster:
az connectedk8s connect --name ${clusterName} --resource-group ${resourceGroup}
Register your subscription
Register your subscription to the Microsoft.ExtendedLocation resource provider:
az provider register --namespace Microsoft.ExtendedLocation
Enable custom locations
Enable custom locations on the cluster:
az connectedk8s enable-features -n ${clusterName} -g ${resourceGroup} --features cluster-connect custom-locations
Connect cluster
Connect the cluster:
az connectedk8s connect --name ${clusterName} -g ${resourceGroup} --location $location
Create extension
Create an extension:
az k8s-extension create -g ${resourceGroup} --cluster-name ${clusterName} --cluster-type connectedClusters --name ${extensionId} --extension-type microsoft.azure.hybridnetwork --release-train preview --scope cluster
Create custom location
Create a custom location:
export ConnectedClusterResourceId=$(az connectedk8s show --resource-group ${resourceGroup} --name ${clusterName} --query id -o tsv)
export ClusterExtensionResourceId=$(az k8s-extension show -c $clusterName -n $extensionId -t connectedClusters -g ${resourceGroup} --query id -o tsv)
az customlocation create -g ${resourceGroup} -n ${customlocationId} --namespace "azurehybridnetwork" --host-resource-id $ConnectedClusterResourceId --cluster-extension-ids $ClusterExtensionResourceId
Retrieve custom location value
Retrieve the Custom location value. You need this information to fill in the Configuration Group values for your Site Network Service (SNS).
Search for the name of the Custom location (customLocationId) in the Azure portal, then select Properties. Locate the full Resource ID under the Essentials information area and look for field name ID. The following image provides an example of where the Resource ID information is located.

Tip
The full Resource ID has a format of: /subscriptions/{subscriptionId}/resourcegroups/{resourceGroupName}/providers/microsoft.extendedlocation/customlocations/{customLocationName}
Create User Assigned Managed Identity for the Site Network Service
Save the following Bicep script locally as prerequisites.bicep.
param location string = resourceGroup().location
param identityName string = 'identity-for-nginx-sns'


resource managedIdentity 'Microsoft.ManagedIdentity/userAssignedIdentities@2018-11-30' = {
  name: identityName
  location: location
}
output managedIdentityId string = managedIdentity.id
Start the deployment of the User Assigned Managed Identity by issuing the following command.
az deployment group create --name prerequisites --resource-group ${resourceGroup} --template-file prerequisites.bicepThe script creates a managed identity.
Retrieve Resource ID for managed identity
Run the following command to find the resource ID of the created managed identity.
az deployment group list -g ${resourceGroup} | jq -r --arg Deployment prerequisites '.[] | select(.name == $Deployment).properties.outputs.managedIdentityId.value'Copy and save the output, which is the resource identity. You need this output when you create the Site Network Service.
Update Site Network Service (SNS) permissions
To perform these tasks, you need either the 'Owner' or 'User Access Administrator' role in both the operator and the Network Function Definition Publisher Resource Groups. You created the operator Resource Group in prior tasks. The Network Function Definition Publisher Resource Group was created in Quickstart: Publish Nginx container as Containerized Network Function (CNF) and named nginx-publisher-rg in the input.json file.
In prior steps, you created a Managed Identity labeled identity-for-nginx-sns inside your reference resource group. This identity plays a crucial role in deploying the Site Network Service (SNS). Follow the steps in the next sections to grant the identity the 'Contributor' role over the Publisher Resource Group and the Managed Identity Operator role over itself. Through this identity, the Site Network Service (SNS) attains the required permissions.
Grant Contributor role over publisher Resource Group to Managed Identity
Access the Azure portal and open the Publisher Resource Group created when publishing the Network Function Definition.
In the side menu of the Resource Group, select Access Control (IAM).
Choose Add Role Assignment.
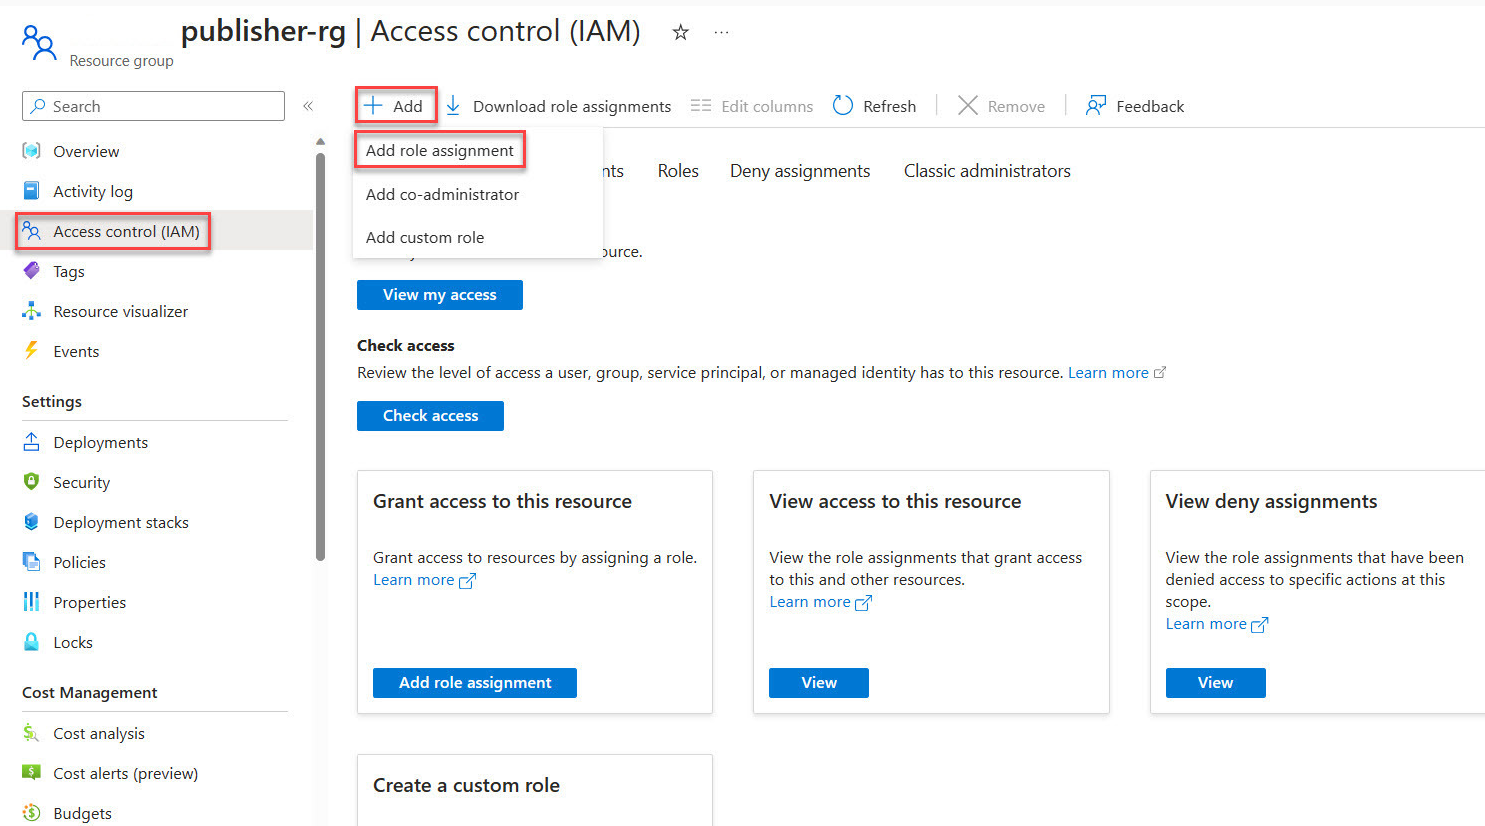
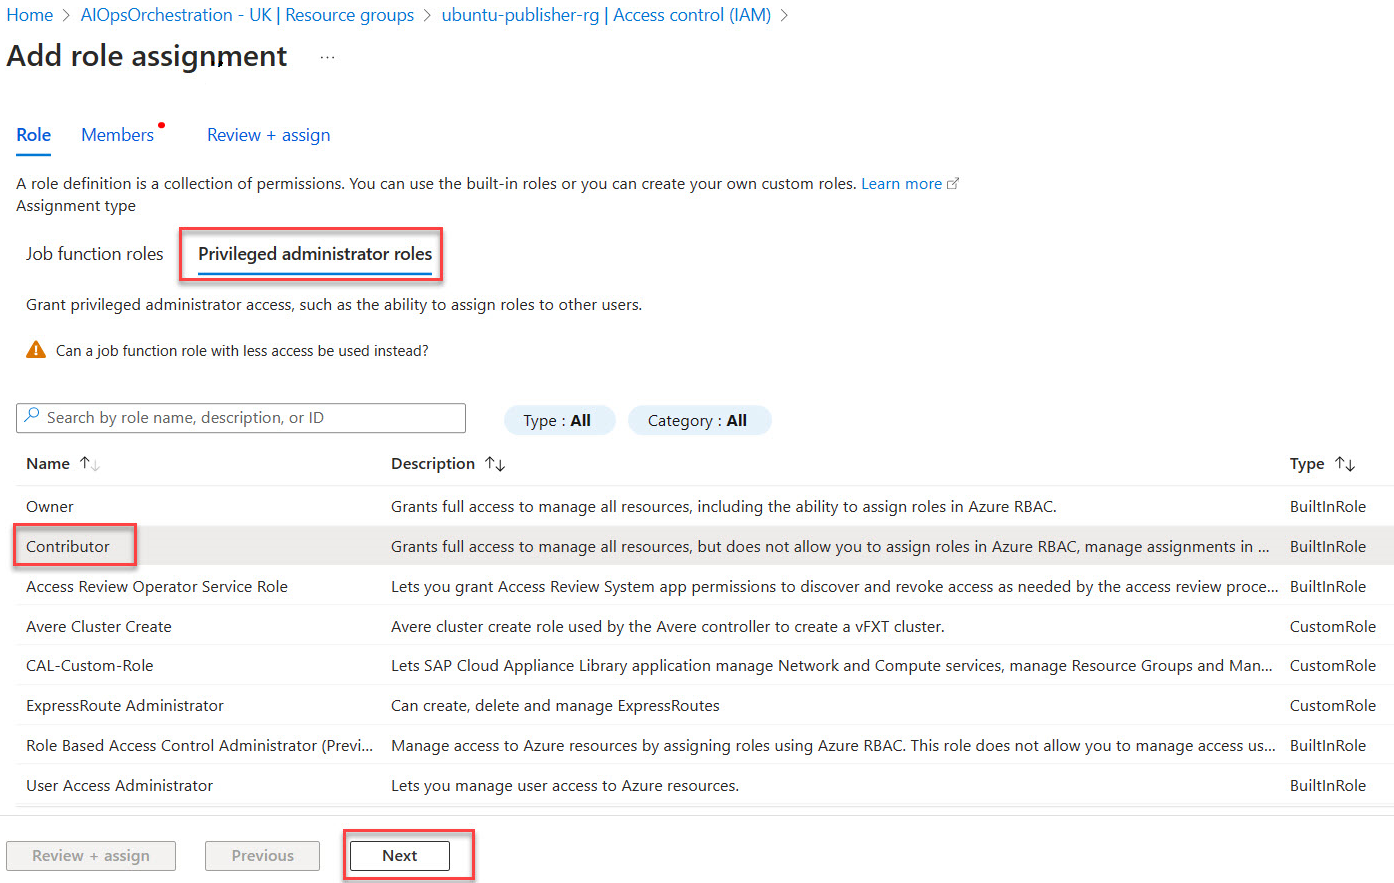
Under the Privileged administrator roles, category pick Contributor then proceed with Next.
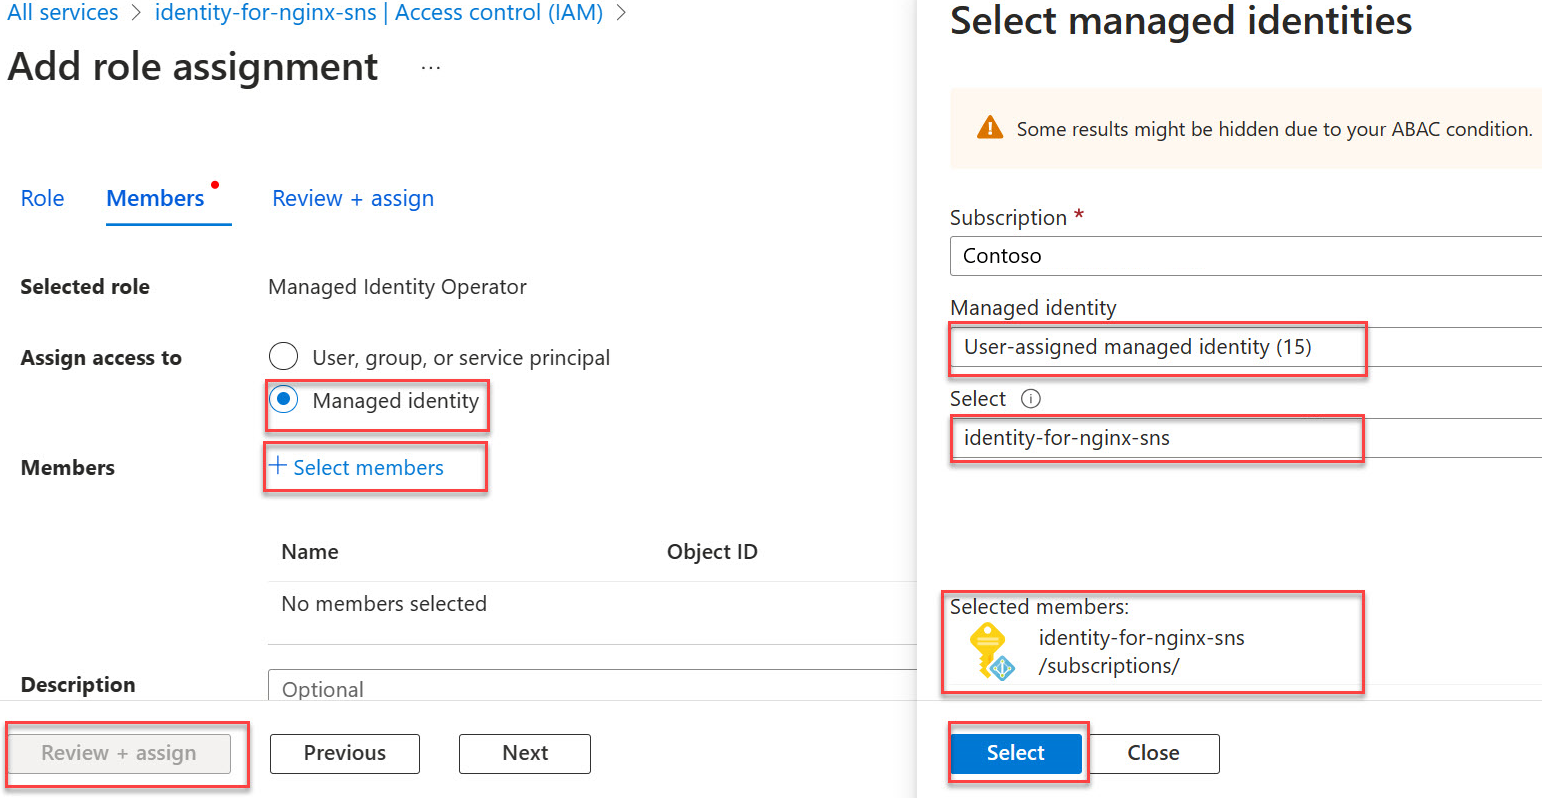
Select Managed identity.
Choose + Select members then find and choose the user-assigned managed identity identity-for-nginx-sns.


Grant Contributor role over Custom Location to Managed Identity
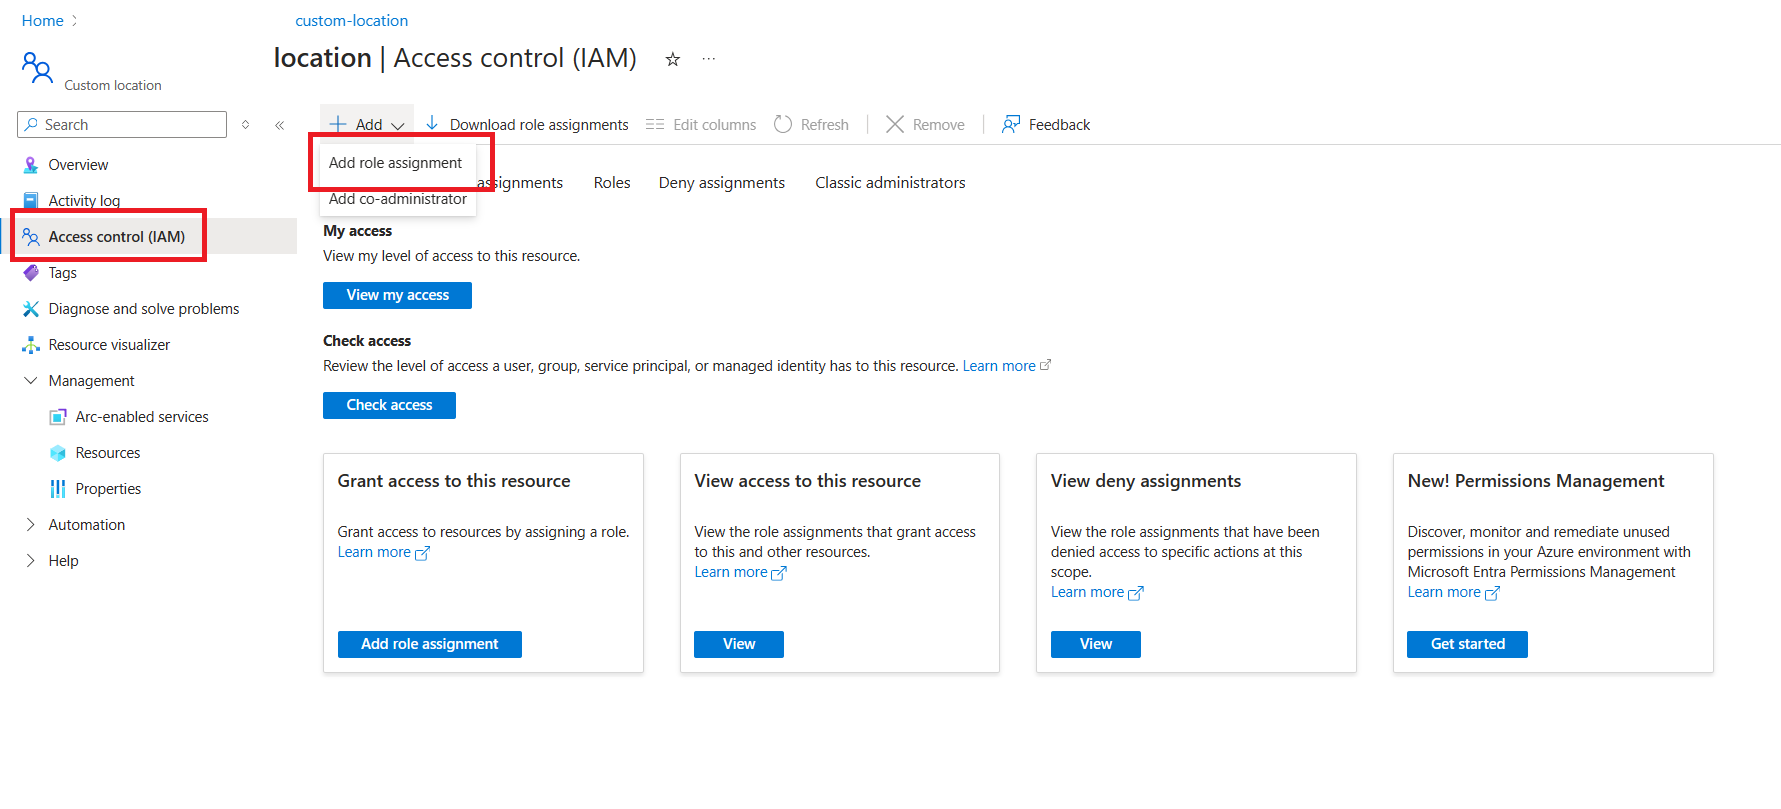
Access the Azure portal and open the Operator Resource Group, operator-rg.
In the side menu of the Resource Group, select Access Control (IAM).
Choose Add Role Assignment.
Under the Privileged administrator roles, category pick Contributor then proceed with Next.
Select Managed identity.
Choose + Select members then find and choose the user-assigned managed identity identity-for-nginx-sns.

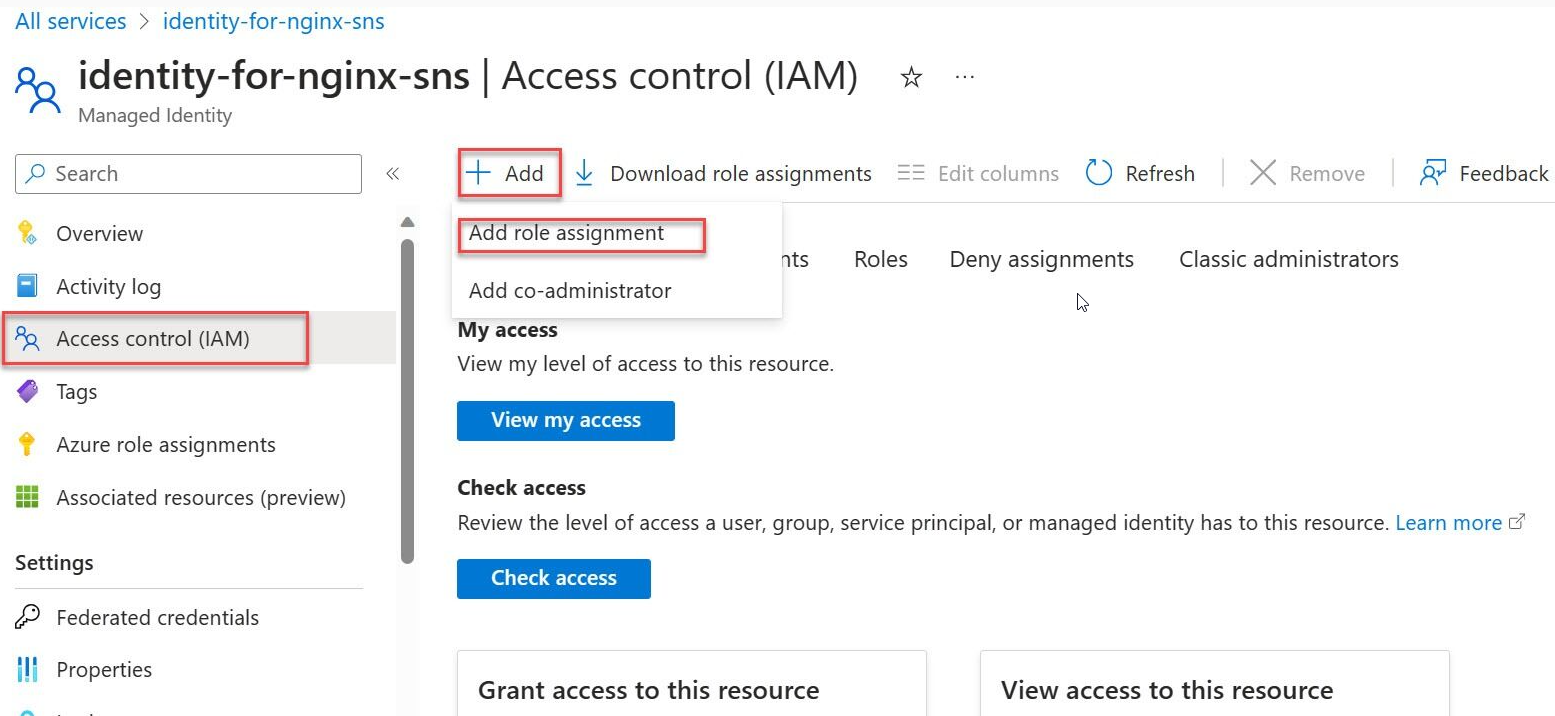
Grant Managed Identity Operator role to itself
Go to the Azure portal and search for Managed Identities.
Select identity-for-nginx-sns from the list of Managed Identities.
On the side menu, select Access Control (IAM).
Choose Add Role Assignment.
Select the Managed Identity Operator role then proceed with Next.
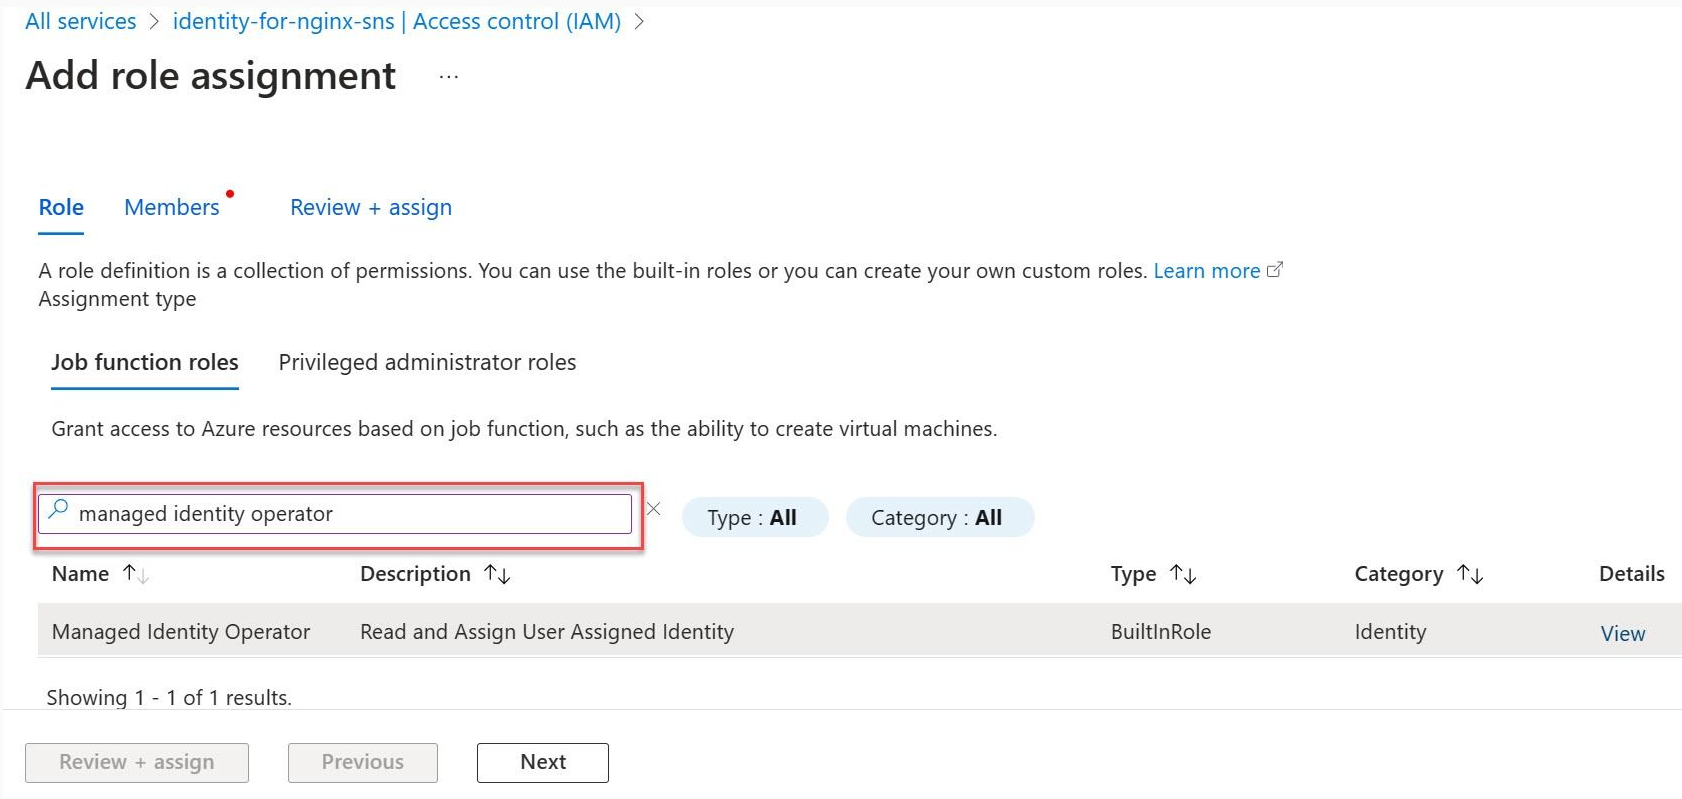
Select Managed identity.
Select + Select members and navigate to the user-assigned managed identity called identity-for-nginx-sns and proceed with the assignment.
Select Review and assign.


Completion of all the tasks outlined in these articles ensure that the Site Network Service (SNS) has the necessary permissions to function effectively within the specified Azure environment.