Tutorial: Understand virtual RF (vRF) through demodulation of Aqua using GNU Radio
In Tutorial: Downlink data from a public satellite, data from NASA's Aqua satellite is downlinked using a managed modem, meaning the raw RF signal received from the Aqua satellite by the ground station is passed through a modem managed by Azure Orbital. The output of this modem, which is in the form of bytes, is then streamed to the user's VM. As part of the step Configure a contact profile for a public satellite downlink mission the Demodulation Configuration was set to Aqua Direct Broadcast, which is what enabled and configured the managed modem to demodulate/decode the RF signal received from Aqua. Using the vRF concept, no managed modem is used, and instead the raw RF signal is sent to the user's VM for processing. This concept can apply to both the downlink and uplink, but in this tutorial we examine the downlink process. We create a vRF, based on GNU Radio, which processes the raw RF signal and act as the modem.
In this guide, you learn how to:
- Understand the limitations and tradeoffs of using vRF.
- Configure a contact profile through vRF instead of a managed modem.
- Process downlinked data from Aqua (in the form of raw RF) using GNU Radio as the modem, using both an offline/development setup and a realtime setup.
Prerequisites
- Complete Tutorial: Downlink data from NASA's Aqua public satellite, as this tutorial assumes you already configured the spacecraft and VM.
Understand the limitations and tradeoffs of using vRF
Before we dive into the tutorial, it's important to understand how vRF works and how it compares to using a managed modem. With a managed modem, the entire physical (PHY) layer occurs within Azure Orbital, meaning the RF signal is immediately processed within Azure Orbital's resources and the user only receives the information bytes produced by the modem. By choosing vRF, there's no managed modem, and the raw RF signal is streamed to the user from the ground station digitizer. This approach allows the user to run their own modem, or capture the RF signal for later processing.
Advantages of vRF include the ability to use modems that Azure Orbital doesn't support or have access to. vRF also allows running the same RF signal through a modem while trying different parameters to optimize performance. This approach can be used to reduce the number of satellite passes needed during testing and speed up development. Due to the nature of raw RF signals, the packet/file size is typically greater than the bytes contained within that RF signal; usually between 2-10x larger. More data means the network throughput between the VM and Azure Orbital can potentially be a limiting factor for vRF.
Throughout this tutorial, you learn first hand how vRF works. At the end of this tutorial, we include several RF and digitizer-specific details that are of interest to a vRF user.
Role of DIFI within vRF
Azure Orbital's ground stations consist of digitizers that utilize DIFI to send and receive digitized RF signals. The DIFI Packet Protocol, technically referred to as "IEEE-ISTO Std 4900-2021: Digital IF Interoperability Standard", defines a data plane interface meant for transmitting and receive digitized IF data (such as IQ samples) and corresponding metadata over standard IP networks. Even though DIFI is an "IF" standard, IQ samples at baseband can also be streamed with DIFI, as is with Azure Orbital. The primary use-case of DIFI packets is to create an interface between satellite ground station digitizers (transceivers) and software modems, enabling interoperability and combatting vendor lock-in that plagues the satellite industry.
The DIFI Packet Protocol contains two primary message types: data packets and context packets. Due to legacy hardware reasons, there are two different versions of context packets. Azure Orbital's ground stations use the up-to-date (DIFI v1.1) context packets for X-Band signals, and the legacy format for S-Band signals. If you're using the gr-difi GNU Radio package, you want to make sure to select the 108-byte format for X-Band and the 72-byte format for S-band. For non-GNU Radio vRFs you need to ensure the correct version of DIFI is used for context packets, v1.1 can be found here and the legacy version can be inferred from this section of code. More considerations are included in the vRF within AOGS Reference at the end of this tutorial.
Step 1: Use AOGS to schedule a contact and collect Aqua data
First we remove the managed modem, and capture the raw RF data into a pcap file. Execute the steps listed in Tutorial: Downlink data from NASA's Aqua public satellite but during step Configure a contact profile for an Aqua downlink mission leave the Demodulation Configuration blank and choose UDP for Protocol. Lastly, towards the end, instead of the socat command (which captures TCP packets), run sudo tcpdump -i eth0 port 56001 -vvv -p -w /tmp/aqua.pcap to capture the UDP packets to a pcap file.
Note
The following three modifications are needed to Tutorial: Downlink data from NASA's Aqua public satellite:
- Demodulation Configuration: leave blank
- Protocol: choose UDP
- Step 8 and 9: instead use the command
sudo tcpdump -i eth0 port 56001 -vvv -p -w /tmp/aqua.pcap
After a satellite pass, you should have a file /tmp/aqua.pcap of size 10-20 GB (depending on the max elevation). This file contains DIFI packets containing the raw RF signal received by the ground station, in the form of IQ samples.
Step 2: Extract the IQ samples from the DIFI packets
Next we extract the IQ samples and save them in a more traditional form; a binary IQ file. The following steps can be performed on any VM/computer that has a copy of the aqua.pcap file you created. These steps involve using a short Python script maintained by the DIFI Consortium to extract the IQ samples from the UDP DIFI packets into an IQ file.
- Download or copy the following code into a new python script.
- Edit
filenameto match wherever you saved your pcap (/tmp/aqua.pcap). - Run the Python script using
python3 difi_to_binary_iq.py, and it should create a new file in the same directory as your pcap, with a.cs8extension. This file is the binary IQ file, which contains the digitized RF samples as 8-bit integers and nothing else. The script takes some time to run, and as it runs the file gets larger. When the script is complete, the file is roughly the same size as the pcap file. You can stop the script before completion (with control-C) and continue the tutorial; the entire duration of the contact isn't necessary for the remainder of the tutorial. - (Optional) If you want to visualize the signal, install Inspectrum using https://github.com/miek/inspectrum/wiki/Build#building-on-debian-based-distros then run Inspectrum using
inspectrum /tmp/aqua.pcap.cs8(using the path to your new.cs8file). Once in the Inspectrum GUI, you can adjustPower MaxandPower Minto see the full dynamic range of the signal.
If you would also like the IQ samples in float32 format instead of int8 (some software only lets you load float32 format), you can use the following Python snippet:
import numpy as np
samples = np.fromfile('/tmp/aqua.pcap.cs8', np.int8) / 127.0
samples = samples.astype(np.float32)
samples.tofile('/tmp/aqua.pcap.cf32')
We'll use the float32 version for the next step, as it simplifies the GNU Radio flowgraph.
Step 3: Demodulate the Aqua signal in GNU Radio
Next we create the actual vRF modem, based on GNU Radio, used to demodulate the Aqua signal.
GNU Radio is a free and open-source software development toolkit that provides signal processing blocks and many example digital signal processing (DSP) applications. It can be used with readily available low-cost RF hardware to create software-defined radios, or without hardware in a simulation-like environment. GNU Radio is widely used in research, industry, academia, government, and hobbyist environments to support both wireless communications research and real-world radio systems. In this tutorial, we use GNU Radio to demodulate Aqua (that is, GNU Radio acts as the modem).
Although GNU Radio can be used in headless mode, in this tutorial we1 use GNU Radio's GUI (that is, desktop interface), so you must copy /tmp/aqua.pcap.cf32 to a VM with X11 forwarding or computer with Ubuntu 20/22 desktop. The command scp can be used to copy the file from a VM on Azure to a local development machine.
Install GNU Radio
If you're using Ubuntu 22, run sudo apt-get install gnuradio. If instead you are on Ubuntu 20, then use the following commands to install GNU Radio:
sudo add-apt-repository ppa:gnuradio/gnuradio-releases
sudo apt-get update
sudo apt-get install gnuradio python3-packaging
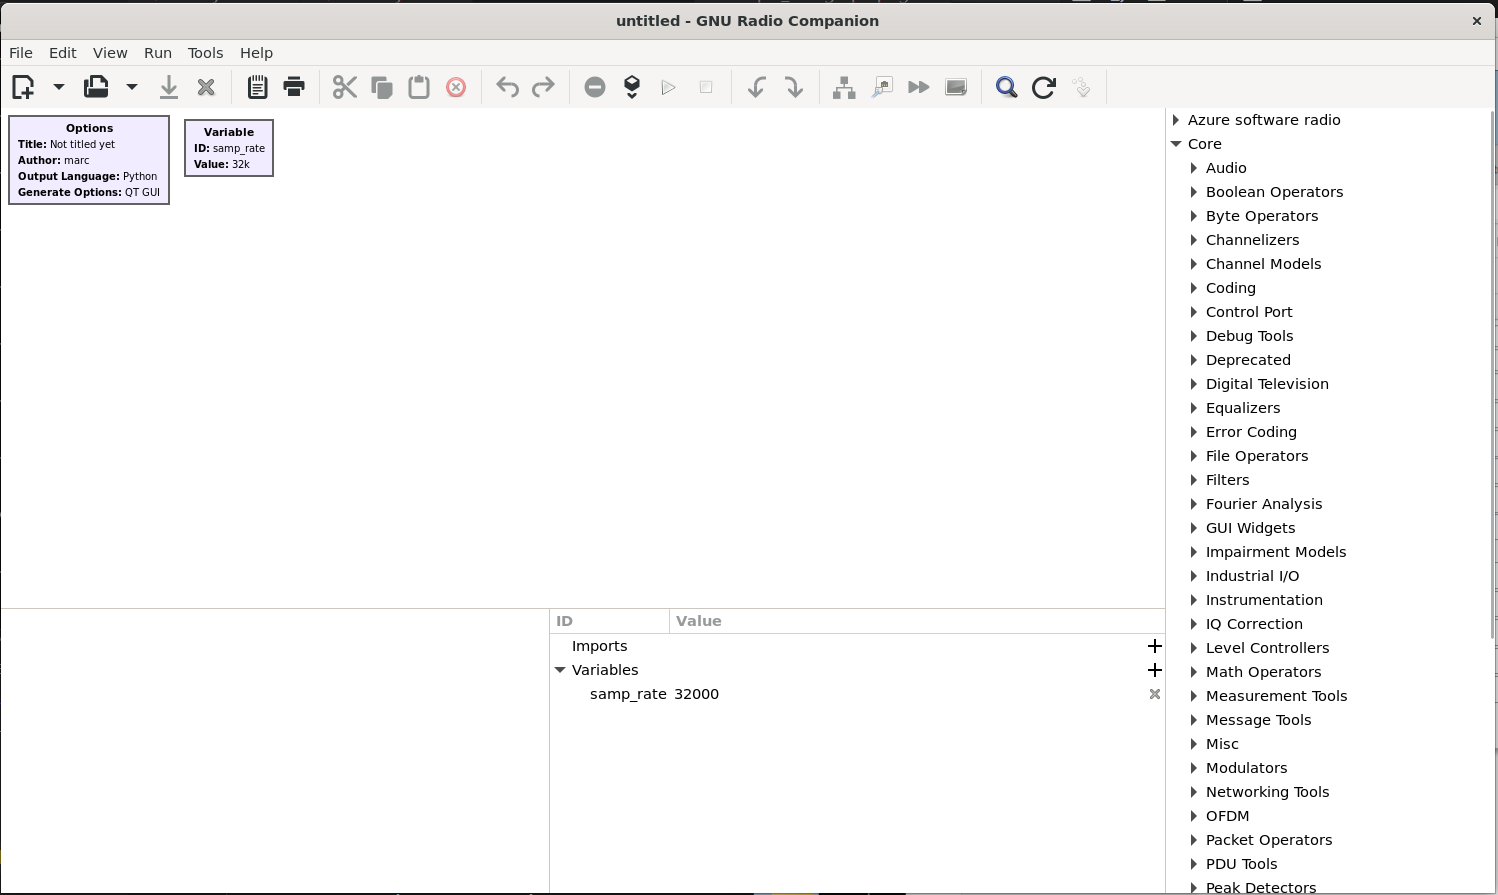
Verify that GNU Radio installed properly and that graphics are working using gnuradio-companion; a window should pop up that looks like this:
If the block tree on the right isn't displayed, you can show it using the magnifying glass icon at the top-right.
Run the Aqua flowgraph
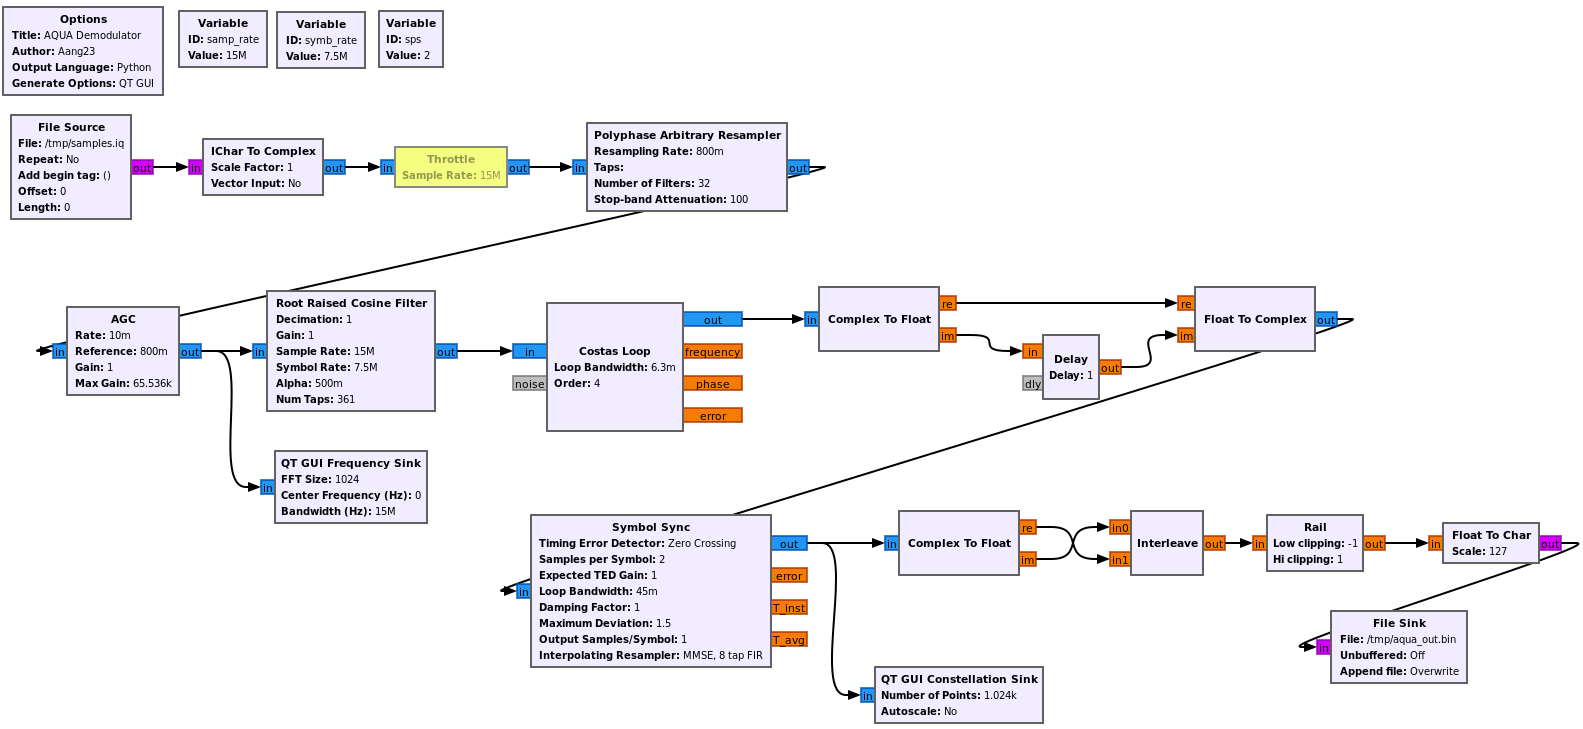
A GNU Radio application is called a "flowgraph," and it typically either processes or generates an RF signal. The starter flowgraph to use can be downloaded here. Open this .grc file within GNU Radio and you should see the following flowgraph:
Note
For those not interested in the details of how the flowgraph/modem works, you can skip the following paragraph
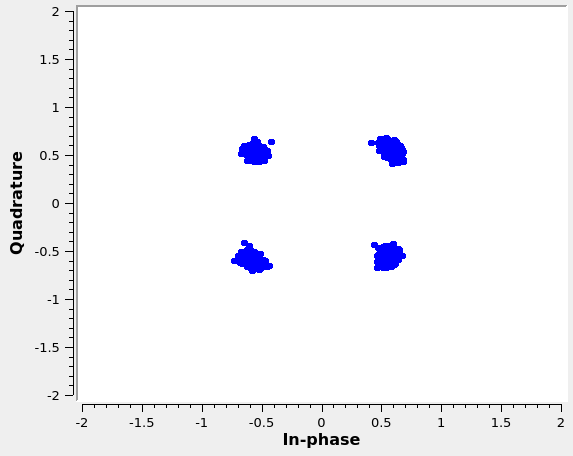
The flowgraph starts by reading in the IQ file, converting it from interleaved 8-bit integers to GNU Radio's complex data type, then it resamples the signal to go from the original 18.75 MHz to 15 MHz, which is an integer number of samples per symbol. This resample might be a little confusing because in the Contact Profile we specified a bandwidth of 15 MHz. As discussed more at the end of this tutorial, for X-Band signals the digitizer uses a sample rate that is 1.25 times the specified bandwidth. It turns out that in this flowgraph we want a 15 MHz sample rate, so that we have exactly two samples per symbol; therefore we must resample from 18.75 MHz to 15 MHz. Next we have an automatic gain control (AGC) block, to normalize the signal power level. The root raised cosine (RRC) filter acts as the matched filter. The Costas loop performs frequency synchronization to remove any small frequency offsets caused by oscillator error or imperfect Doppler correction. The next three blocks are used because Aqua uses offset QPSK (OQPSK) instead of regular QPSK. Symbol synchronization is then performed so that the OQPSK symbols are sampled at their peaks. We can visualize this sampling of QPSK using the Constellation Sink block (an example output is shown). The remainder of the flowgraph interleaves the real and imaginary portions, and saves them as int8's (chars/bytes) which represent the soft symbols. While it could convert these soft symbols to 1's and 0's, later processing benefits from having the full symbol values.
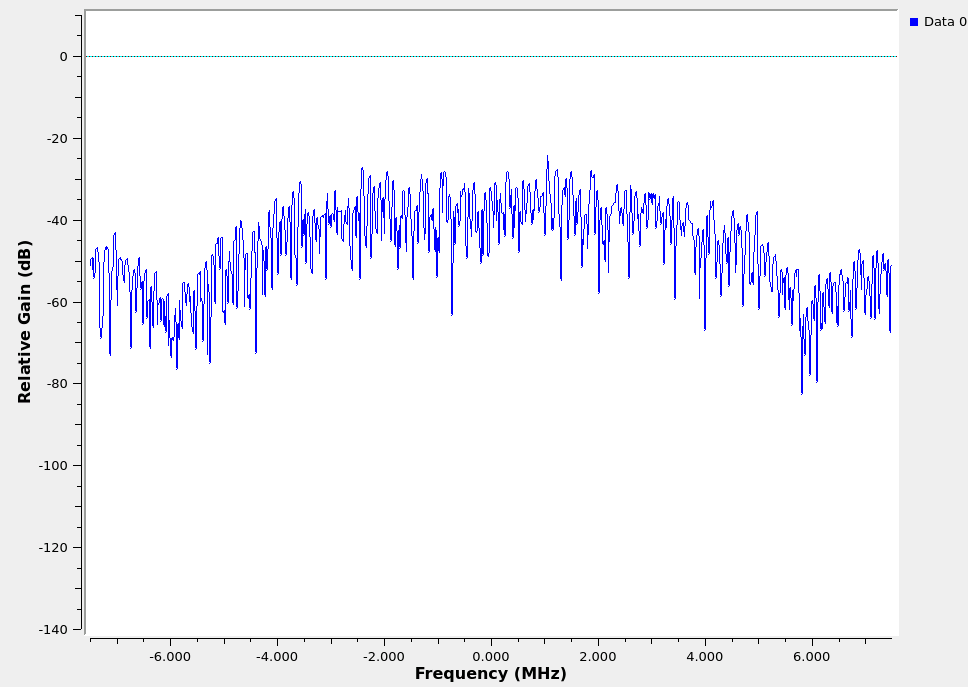
Before running the flowgraph, double click the File Source block and update the path to match wherever you saved /tmp/aqua.pcap.cf32. Click the play button at the top to run the flowgraph. If the previous steps were successful, and your Aqua contact was a success, you should see the following power spectral density (PSD) and IQ plot displayed:
Yours could vary, based on the strength the signal was received. If no GUI showed up, then check GNU Radio's output in the bottom left for errors. If the GUI shows up but resembles a horizontal noisy line (with no hump), it means the contact didn't actually receive the Aqua signal. In this case, double check that autotrack is enabled in your Contact Profile and that the center frequency was entered correctly.
The time it takes GNU Radio to finish is based on how long you let the pcap_to_iq script run, combined with your computer/VM CPU power. As the flowgraph runs, it's demodulating the RF signal stored in /tmp/aqua.pcap.cf32 and creating the file /tmp/aqua_out.bin, which contains the output of the modem. Feel free to copy this .bin file off the VM.
We end this tutorial here. If you're interested in decoding the bytes into imagery, you can either use NASA's tools or open source tools such as altillimity/X-Band-Decoders.
(Optional) Step 4: Run the GNU Radio flowgraph live
This tutorial up to this point represents the design/testing portion of creating a vRF. We transform this GNU Radio flowgraph so that it can be run live on the VM, resembling a true vRF modem.
Handle the input
Previously, we manually converted the DIFI packet pcap to a binary IQ file, then loaded that binary IQ file into GNU Radio with the Fink Source block. We can simplify our flowgraph using a block within gr-difi (maintained by Microsoft) designed to receive DIFI packets into GNU Radio! This added block does require us to install a GNU Radio out-of-tree (OOT) module, which is like a plugin for GNU Radio:
sudo apt-get install python3-pip cmake liborc-dev doxygen
sudo pip install pytest pybind11
cd ~
git clone https://github.com/DIFI-Consortium/gr-difi
cd gr-difi
mkdir build
cd build
cmake -DCMAKE_FIND_ROOT_PATH=/usr ..
make -j4
sudo make install
sudo ldconfig
After these steps, you should be able to reopen GNU Radio and see the new blocks (DIFI Source and DIFI Sink) listed in the block tree. In the flowgraph you used during the previous section, perform these steps:
- Replace the File Source block with a DIFI Source block
- Double click the DIFI Source block to edit its parameters
- The Source IP Address should be the IP of the eth0 interface of your VM
- Port should be 56001, just like we used in the tcpdump step
- Set DIFI Stream Number to 0. All other parameters can be left default
If you want to test this flowgraph on your development machine, you need a tool such as udpreplay to play back the pcap we recorded. Otherwise you can wait to test this part until the flowgraph is used live on the VM connected to Azure Orbital. This limitation is one reason it helps to make a recording of the signal during the vRF development and testing phase.
Handle the output
You can choose to leave the File Sink at the end, and retrieve the recorded file each pass, but many applications require streaming the bytes out of the modem. One option is to use the TCP Sink Block in place of the File Sink. The TCP Sink block can be configured in either a server or client mode, depending on which side should make the initial connection. Set the Input Type to Byte, and the TCP Sink streams the bytes over a raw TCP payload.
ZMQ PUB Sink is another option, which is a messaging library that sits on top of TCP or inter-process communication (IPC), for more complex behavior like PUB/SUB.
If you leave it as a File Sink, we recommend adding a few lines of Python at the end of the flowgraph (after it finishes) that copies the created file to a new location.
Run the flowgraph in headless mode
There's a good chance that the VM receiving the Azure Orbital stream doesn't support a desktop environment, which causes GNU Radio to crash. We must configure this flowgraph to avoid using GUIs.
- Edit the Options block in the top-left
- Under Generate Options choose No GUI
- Under Run Options choose Run to Completion
- Hit OK
These steps let us run the flowgraph as a Python script with no GUI, and when the incoming socket closes the flowgraph should automatically end.
Run the flowgraph live
Once the flowgraph is configured with the DIFI Source and in headless mode, we can run the flowgraph live on the VM. In GNU Radio Companion (GRC), every time you hit the play button, a .py file is created in the same directory. This Python script needs to be copied onto the VM. If GNU Radio and gr-difi were installed properly, you should be able to run the Python script using python yourflowgraph.py and it waits for the DIFI stream from Azure Orbital to start. You can feel free to add any Python code you want to this Python script, such as copying the resulting file to a new location each pass. Note: if you regenerate the Python script within GRC, this new Python code has to be manually added again.
If the above steps worked, you successfully created and deployed a downlink vRF, based on GNU Radio!
vRF within AOGS reference
In this section, we provide several RF/digitizer-specific details that are of interest to a vRF user or designer.
On the downlink side, a vRF receives a signal from Azure Orbital. A DIFI stream is sent to the user's VM by Azure Orbital during a satellite contact. The user is expected to capture the stream in real-time, either by recording it or processing it live. Examples include using tcpdump, socat, or directly ingested into a modem. Next are some specifications related to how Azure Orbital's ground station receives and processes the signal:
- The center frequency is specified in the Contact Profile
- The signal bandwidth (BW) is set in the Contact Profile, and the sample rate is
1.25*BWfor X-Band and1.125*BWfor S-Band contacts - The DIFI stream uses 8-bit depth (2 bytes per IQ sample)
- The digitizer's gain mode is set to use automatic gain control (AGC) with a power target of -10 dBFS
- No spectral inversion is used
- No frequency offset is used
- The user VM MTU size should be set to 3650 for X-Band and 1500 for S-Band, which is the max packet size coming from Azure Orbital
On the uplink side, the user must provide a DIFI stream to Azure Orbital throughout the pass, for Azure Orbital to transmit. The following notes might be of interest to an uplink vRF designer:
- The center frequency is specified in Contact Profile
- The signal sample rate is set through the DIFI stream (even though a bandwidth is provided as part of the Contact Profile, it's purely for network configuration under the hood)
- The bit depth is set through the DIFI stream but Azure Orbital expects 8 bits
- The DIFI stream ID should be set to 0
- Similar to the downlink, the MTU size should be 1500 for S-Band and up to 3650 for X-Band (your choice)
- No spectral inversion is used
- No frequency offset is used
Next steps
To easily deploy downstream components necessary to receive and process spaceborne earth observation data using Azure Orbital Ground Station, see:


