Note
Access to this page requires authorization. You can try signing in or changing directories.
Access to this page requires authorization. You can try changing directories.
Important
This document is no longer updated and will be removed. For up-to-date instructions on trying out OSConfig scenarios:
- First, follow the steps in Create an OSConfig (with Azure IoT) lab environment in 5 minutes
- Next, try any of the scenarios from: What can I provision and manage?
This guide is for Azure IoT solution builders and operators who have (or will have) a fleet of Linux devices to manage. You will use IoT Hub features (Configurations and Queries), along with the OSConfig micro agent. In Part 1 you will build a temporary fleet environment with VMs standing in for real devices. In Part 2 you will use the IoT Hub Configuration and Query features to set and audit device configuration at scale.
Prerequisites
- You will need an Azure account with an active subscription. If needed, you can create an account free here.
- Log in to the Azure portal.
Part 1: Set up your temporary environment
The lab environment involves a resource group with an IoT Hub and four Azure VMs running Linux with OSConfig. These VMs are lab stand-ins for real world devices like smart cameras, kiosks, mini-PCs, smart sensors, etc. For this guide 4 virtual devices are enough to demonstrate the scale usage patterns. These same patterns can be used with large fleets.
The lab setup involves several steps, so we will use Azure Cloud Shell and bash.
Tip
Cloud Shell is recommended for this activity, as it provides the prerequisites and authentication to Azure. If you choose to use your own bash environment rather than Cloud Shell, ensure you have Azure CLI installed with version 2.34 or greater, and are signed in to the account you want to use.
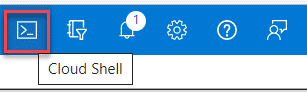
1.1. Open a Cloud Shell pane
You can open a Cloud Shell pane in your Azure portal view, by clicking the Cloud Shell button.
1.2. Ensure your Azure Cloud Shell session is in bash mode
1.3. Check your Azure account context
Run the following command and evaluate the output to ensure your are connected to the account and subscription you wish to use.
az account show --query [name,user.name]
1.4. Run the following command to install the IoT extension for Azure CLI
az extension add --name azure-iot
1.5. Create a resource group and IoT Hub
You can modify the following example commands as needed. You might, for example, wish to change the region from westus2 to your preferred Azure location.
Tip
- You can copy the entire code block using the Copy button, rather than working line by line
- The last command in this block (az iot hub create) may take a few minutes to complete. This is normal.
location="westus2"
startAtDeviceNumber=1
endAfterDeviceNumber=4
uniquifier=$(od --address-radix=n -N2 -i /dev/random | tr -d "[:space:]")
demoUniqueLabel="QuickStart-$uniquifier"
resourceGroupName="$demoUniqueLabel"
iotHubName="$demoUniqueLabel"
az group create --name "$resourceGroupName" --location "$location" --query id
az iot hub create --resource-group "$resourceGroupName" --name "$iotHubName" --query id --output tsv
1.6. Create a small fleet of virtual devices
The following commands must be run in the same bash/Cloud Shell session as the previous commands.
vmInitScriptTemplate='#!/bin/sh
## This sequence of commands runs inside each VM to set up AIS and osconfig, connecting to Azure IoT.

demo_connection_string=DEMO_CONNECTION_STRING_PLACEHOLDER

## simulate ADHS being installed by placing ADHS config file
mkdir /etc/azure-device-health-services/
echo "Permission = \"Optional\"" > /etc/azure-device-health-services/config.toml

## add prod channel from packages.microsoft.com to package manager
os=$(cat /etc/os-release | grep ^ID= | tr -d "ID=")
version=$(cat /etc/os-release | grep VERSION_ID | tr -d "VERSION_ID=" | tr -d \")
curl -sSL https://packages.microsoft.com/config/$os/$version/prod.list | sudo tee /etc/apt/sources.list.d/pkgs-msft_prod.list
curl -sSL https://packages.microsoft.com/keys/microsoft.asc | sudo tee /etc/apt/trusted.gpg.d/pkgs-msft_key.asc
sudo apt-get update

## Install and configure AIS
sudo apt install aziot-identity-service
sudo aziotctl config mp --connection-string "$demo_connection_string" --force
sudo aziotctl config apply

sudo apt-get -y install osconfig
sleep 5
sudo systemctl restart osconfig
'

for i in $(seq $startAtDeviceNumber $endAfterDeviceNumber)
do
    deviceName=$(printf "device%02d" "$i")
    pathToDeviceInitScript="/var/tmp/$deviceName.sh"
    az iot hub device-identity create --hub-name "$iotHubName" --device-id "$deviceName" --query status
    connectionString=$(az iot hub device-identity connection-string show --device-id "$deviceName" --hub-name "$iotHubName" --query connectionString)
    echo "$vmInitScriptTemplate" > "$pathToDeviceInitScript"
    sed -i "s|DEMO_CONNECTION_STRING_PLACEHOLDER|$connectionString|" "$pathToDeviceInitScript"
    az vm create --resource-group "$resourceGroupName" --name "$deviceName" --size Standard_B1s --image "canonical:0001-com-ubuntu-server-focal:20_04-lts-gen2:latest" --generate-ssh-keys --user-data "$pathToDeviceInitScript" --public-ip-sku Standard --admin-username "azureuser" --no-wait
    sleep 2
    rm "$pathToDeviceInitScript"
done
echo "## Your IoT Hub is named: $demoUniqueLabel"
Tip
When finished, the setup script shows a name like QuickStart-nnnn in the Cloud Shell pane, for example it might be QuickStart-5309. Make a note of this name, as you will need it a following step.

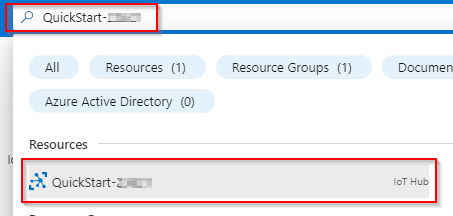
1.6 Navigate to the overview page of your new IoT Hub
To find your IoT Hub's overview page, paste that name (from previous step) into the Search bar of the Azure Portal and choose the corresponding IoT Hub.
Tip
The remaining steps in this guide are through the graphical portion of the Azure portal. You can now close the Cloud Shell pane.
Part 2: Use IoT Hub Configurations and Queries with OSConfig
Azure IoT Queries get the reported properties of the devices in your fleet. Azure IoT Configurations set the desired properties of the devices in your fleet. When used with the OSConfig micro agent on devices, Queries and Configurations can be used to configure (set) and audit (get) OS level settings and state, at scale.
For example, you can use a Configuration to set a certain firewall rule on devices at scale, and you can use a Query to check whether all devices have implemented that firewall rule. Queries can be used independently or can be integrated with Configurations to create compliance Metrics.
2.1. Observing reported properties manually or with Queries
We will manually view an OSConfig twin property for one device, and then we will use a Query to view the same property across multiple devices.
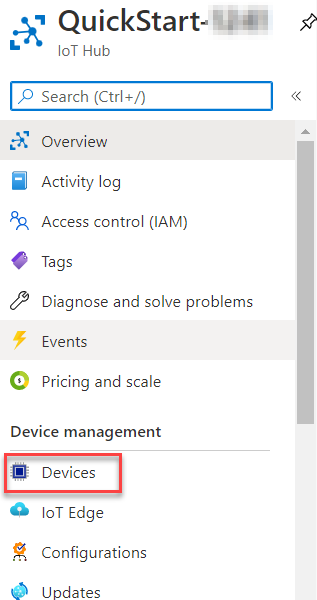
2.1.1. See your devices
To see that we have devices attached to this IoT Hub, click on Devices in the left side options.
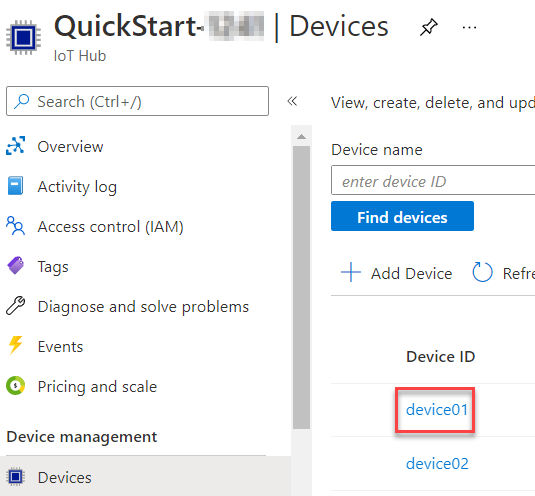
2.1.2. To see examples of OSConfig reported properties for one device, click on device01
2.1.3. Next, select osconfig under Module Identities
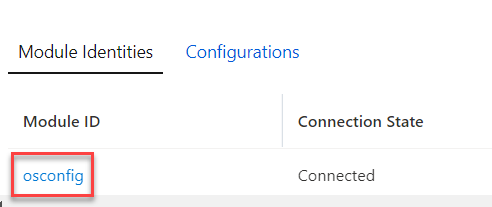
2.1.4. Then on Module Identity Twin
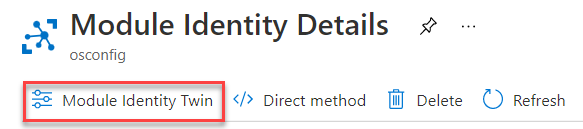
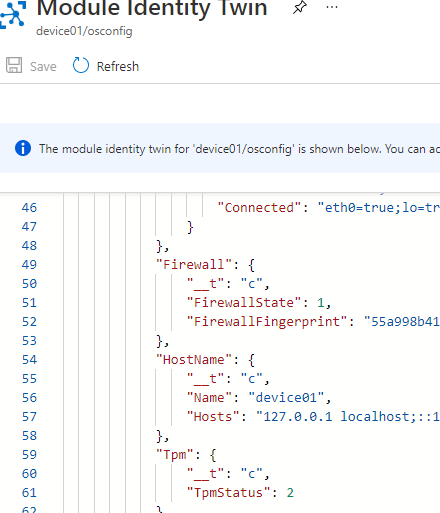
2.1.5. See some properties reported by the device
Scroll to the HostName section of the twin JSON. Notice that the device’s host name is reported here. You might also note that OSConfig reports many other device properties such as IP addresses, firewall state, and so on. These additional properties are not used in the QuickStart but give some idea of other properties you can audit.
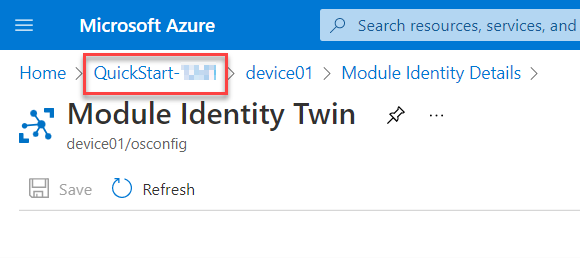
2.1.6. Navigate back to your IoT Hub's overview page, by selecting your IoT hub name
2.1.7. Try a Query
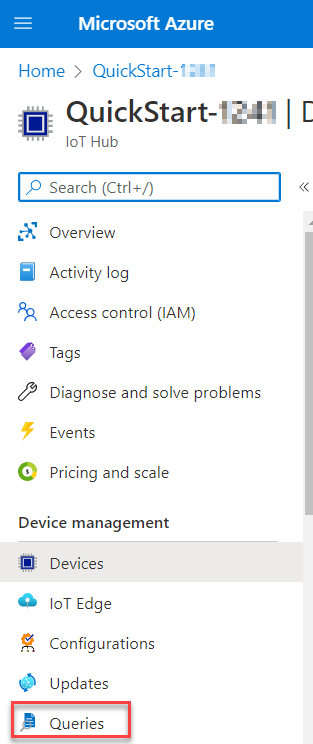
To see how you would retrieve device properties at-scale, navigate to the Queries section of your IoT Hub.
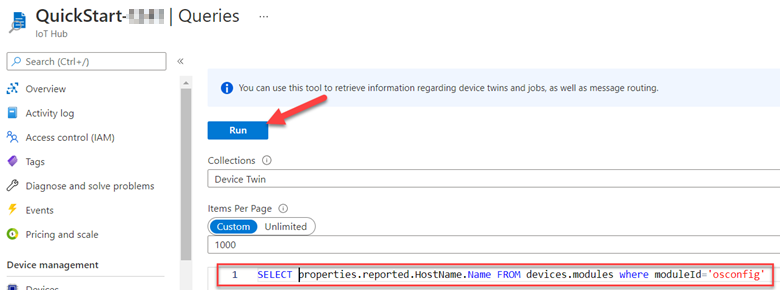
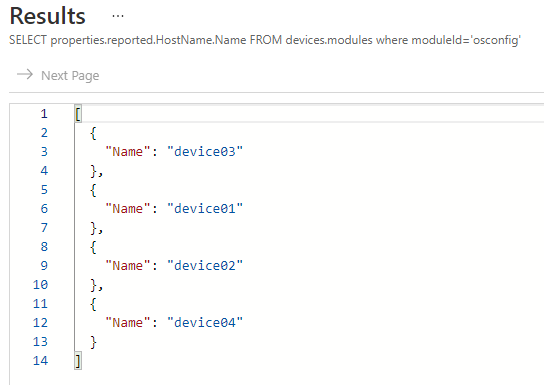
2.1.8. Run the following query: SELECT properties.reported.HostName.Name FROM devices.modules where moduleId='osconfig'
The output of the query demonstrates that you can get device properties across multiple devices.
2.2. Next, let's configure a setting at scale by creating a Configuration
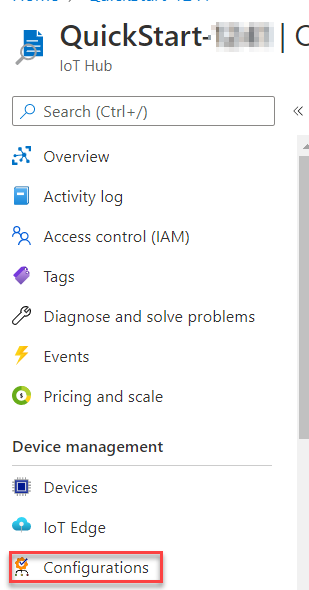
2.2.1. Navigate to the Configurations section of your IoT Hub
2.2.2. Click on + Add Module Configuration

2.2.3. For the Configuration name, enter my_first_config
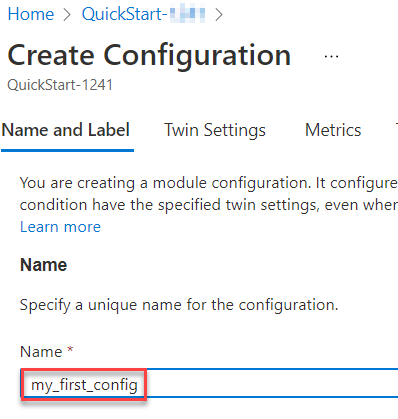
2.2.4. Click Next: Twin Settings

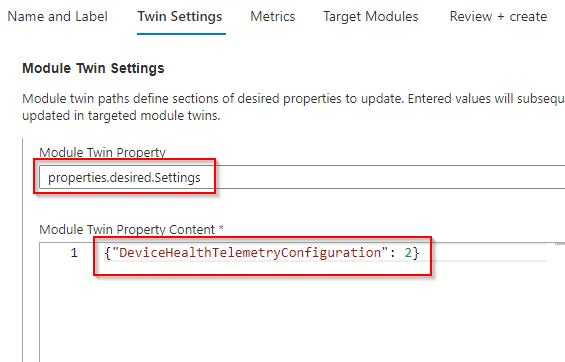
2.2.5. Module Twin Settings
For the Module Twin Property, enter properties.desired.Settings, For the Module Twin Property Content, enter {"DeviceHealthTelemetryConfiguration": 2}
2.2.6. Click Next: Metrics

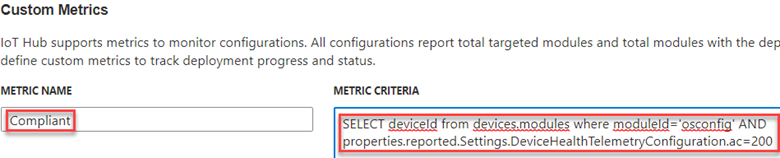
2.2.7. Adding compliance metrics
For Metric Name enter Compliant. For the Metric Criteria, enter SELECT deviceId from devices.modules where moduleId='osconfig' AND properties.reported.Settings.DeviceHealthTelemetryConfiguration.ac=200
The query powering this metric translates to "I only consider the devices to be compliant if they have acknowledged receiving and implementing the setting."
2.2.8. Click Next: Target Modules

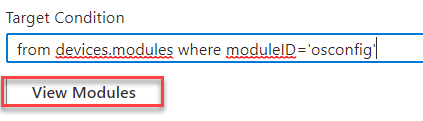
2.2.9. For Priority enter 10, for Target Condition, enter from devices.modules where moduleID='osconfig'
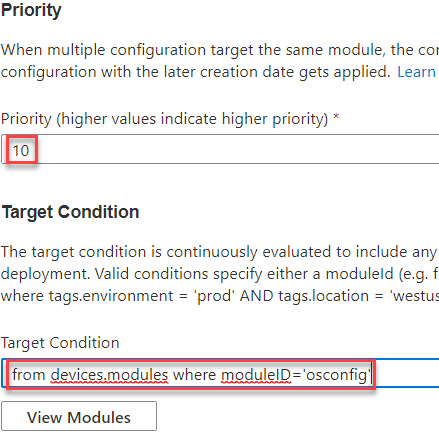
2.2.10. Click View Modules to check that this Configuration will apply to our devices
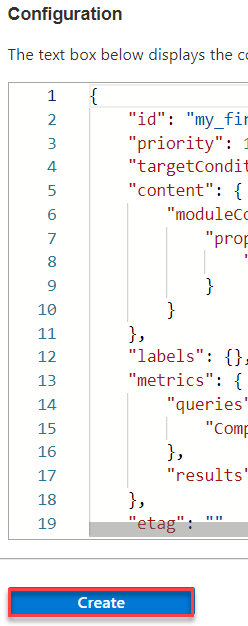
2.2.11. Click Next: Review and create

2.2.12. Click Create
2.3. Observing the Configuration
You should now be back at the main Configurations page, and see my_first_config listed.
Tip
It may take a few minutes before the new Configuration starts applying to our devices. Wait 5 minutes then click the Refresh button on the Configurations page.
Understanding the Metrics
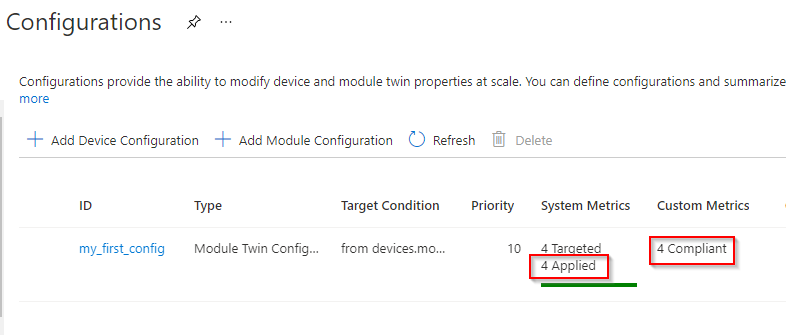
The built-in Targeted metric indicates how many twins (representing devices) meet the target condition. Our target condition was from devices.modules where moduleID='osconfig' which targets all devices with OSConfig.
The built-in Applied metric indicates how many of the Targeted twins (representing devices) have the Configuration’s desired properties applied to them. In simple scenarios the Applied number will match the Targeted number. In more complex deployments there may be multiple Configurations targeting the same devices, with priorities used to break ties.
Those built-in metrics reflect the cloud-side operation of the Configuration. We also want to know which devices in the real world have seen the desired configuration and have brought themselves into compliance. Therefore, we created the Compliant metric earlier. This metric uses responses from the actual devices. If everything is working normally, the Compliant number will equal the Applied number. If some devices haven’t seen the desired configuration yet (for example they are currently offline), the Compliant number will be lower. In this way you can track as your desired configuration reaches all devices in your fleet.
Clean up resources
If you do not wish to retain this lab environment, you can delete the resource group which you created earlier (via the setup script). From the Overview page of your IoT Hub, click the link to the resource group. Now, from the resource group’s Overview page you can click Delete resource group.
Next Steps
For more information on OSConfig for IoT, see https://aka.ms/OSConfigDocs.