Note
Access to this page requires authorization. You can try signing in or changing directories.
Access to this page requires authorization. You can try changing directories.
This article describes how to manage the settings for Dynatrace for Azure.
Resource overview
To see the details of your Dynatrace resource, select Overview in the left pane.
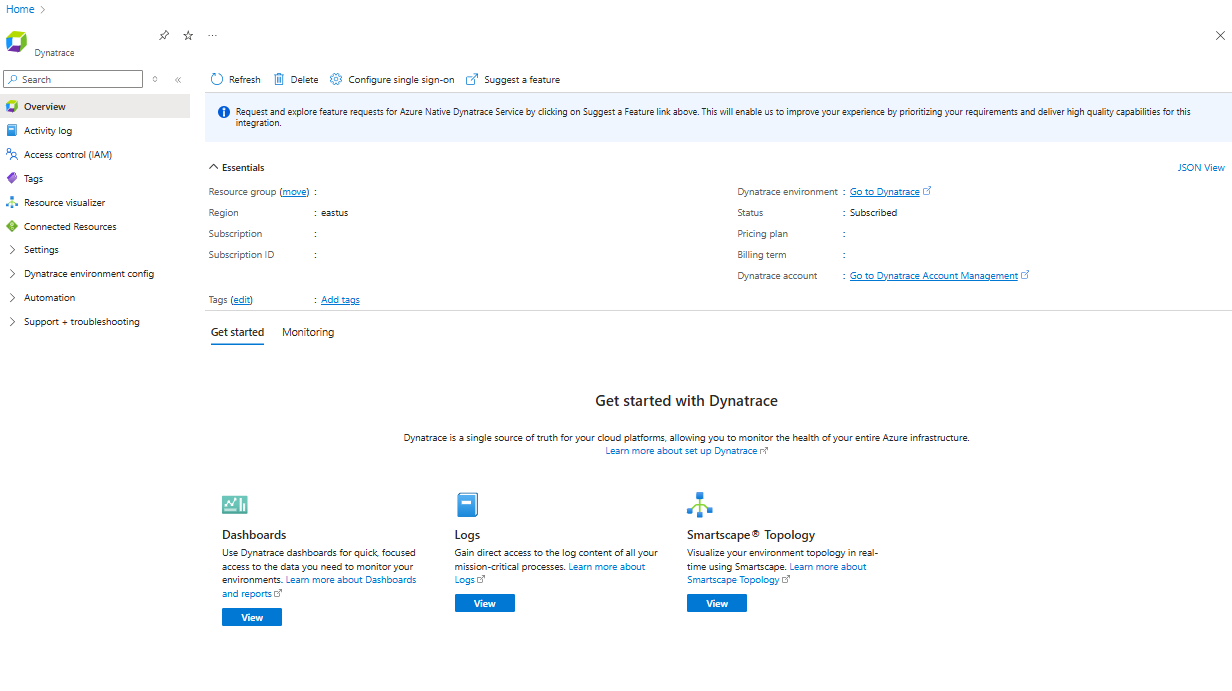
The details include:
- Resource group name
- Region
- Subscription
- Subscription ID
- Tags
- Dynatrace environment
- Status
- Pricing plan
- Billing term
- Dynatrace account
To manage your resource, select the links next to corresponding details.
Below the essentials, you can navigate to other details about your resource by selecting the links.
- Get started provides access to Dashboards, Logs, and Smartscape Topology.
- Monitoring provides a summary of resources sending logs to Dynatrace.
Reconfigure rules for metrics and logs
To change the configuration rules for logs, select Metrics and logs in the service menu on the left.
For more information, see Configure metrics and logs.
View monitored resources
To view the list of resources emitting logs to Dynatrace, select Dynatrace environment config > Monitored Resources in the service menu.
Tip
You can filter the list of resources by resource type, resource group name, region, and whether the resource is sending logs and/or metrics.
- The column Logs to Dynatrace indicates whether the resource is sending logs to Dynatrace.
- The column Metrics to Dynatrace indicates whether the resource is sending metrics to Dynatrace.
Monitor resources using Dynatrace OneAgent
You can install Dynatrace OneAgents on virtual machines, App Service extensions, and Azure Arc Machines.
To monitor resources for virtual machines, select Dynatrace environment config > Virtual Machines from the Resource pane.
Important
- If the virtual machine is stopped, installing the Dynatrace OneAgent is disabled. Dynatrace OneAgent can only be installed on virtual machines that are running.
- If a virtual machine shows that a OneAgent is installed and the option Uninstall extension is disabled, another resource configured the agent. To make changes, go to the other Dynatrace resource in the Azure subscription.
Install an agent
To install an agent:
Choose the resource you would like to monitor.
Select Install Extension.
Select OK.
After the agent is installed, the status changes to Installed. The service restarts once installation is complete.
Uninstall an agent
To uninstall an agent:
Choose a resource.
Select Uninstall Extension.
Reconfigure single sign-on
To enable single sign-on through Microsoft Entra ID:
Select Settings > Single sign-on from the Resource pane.
Select the check box.
Delete a resource
If you finished using your resource and you want to delete it, follow these steps:
On the command bar, select Delete.
The Delete Resource pane appears in the sidebar.
In the Confirm Delete field, enter the name of the resource.
Choose a reason for deleting the resource.
Select Delete.
After the resource is deleted, all billing through Azure Marketplace stops for that resource.
Get support
Contact Dynatrace for customer support.
You can also request support in the Azure portal from the resource overview.
Select Support + Troubleshooting from the service menu, then choose the link to log a support request in the Dynatrace portal.