Note
Access to this page requires authorization. You can try signing in or changing directories.
Access to this page requires authorization. You can try changing directories.
In this quickstart, you use the Azure portal to create an advanced serverless runtime in your Informatica Intelligent Data Management Cloud (IDMC) organization.
Prerequisites
An Informatica Organization. If you don't have an Informatica Organization, see Get started with Informatica.
After an Organization is created, make sure to sign in to the Informatica Portal from Overview tab of the Organization. Creating a serverless runtime environment fails if you don't first sign in to the Informatica portal at least once.
A subnet used in serverless runtime environment must be delegated to Informatica.DataManagement/organizations.


Create an advanced serverless deployment
In this section, you create an advanced serverless deployment of Informatica Intelligent Data Management Cloud using the Azure portal.
In the Informatica organization, select Serverless Runtime Environment from the service menu to navigate to the Advanced Serverless section. It shows the existing list of serverless runtime environments.

Create Serverless Runtime Environments
In Serverless Runtime Environments, select Create Serverless Runtime Environment to launch the workflow to create serverless runtime environment.

Basics
Set the following values in the Basics tab.

| Property | Description |
|---|---|
| Name | Name of the serverless runtime environment. |
| Description | Description of the serverless runtime environment. |
| Task Type | Type of tasks that run in the serverless runtime environment. Select Data Integration to run mappings outside of advanced mode. Select Advanced Data Integration to run mappings in advanced mode. |
| Maximum Compute Units per Task | Maximum number of serverless compute units corresponding to machine resources that a task can use. |
| Task Timeout (Minutes) | By default, the timeout is 2,880 minutes (48 hours). You can set the timeout to a value that's less than 2880 minutes. |
Platform Detail
Set the following values in the Platform Detail tab.

| Property | Description |
|---|---|
| Region | Select the region where the serverless runtime environment is hosted. |
| Virtual network | Select a virtual network to use. |
| Subnet | Select a subnet within the virtual network to use. |
| Supplementary file Location | Location of any supplementary files. Use the following format:abfs://<file_system>@<account_name>.dfs.core.windows.net/<path> For example, to use a JDBC connection, you place the JDBC JAR files in the supplementary file location. Then enter this location:abfs://discaleqa@serverlessadlsgen2acct.dfs.core.windows.net/serverless. |
| Custom Properties | Specific properties that might be required for the virtual network. Use custom properties only as directed by Informatica Global Customer Support. |
Runtime Configuration
The Runtime Configuration tab shows the customer properties retrieved from the IDMC environment. To add new parameters, select Add Property.

Tags
You can specify custom tags for the new Informatica organization by adding custom key-value pairs. Set any required tags in the Tags tab.

| Property | Description |
|---|---|
| Name | Name of the tag corresponding to the Azure Native Informatica resource. |
| Value | Value of the tag corresponding to the Azure Native Informatica resource. |
Review and create
Select Next: Review + Create to navigate to the final step for serverless creation. When you get to the Review + Create pane, validations are run. Review all the selections made in the Basics, and optionally the Tags panes. Review the Informatica and Azure Marketplace terms and conditions.
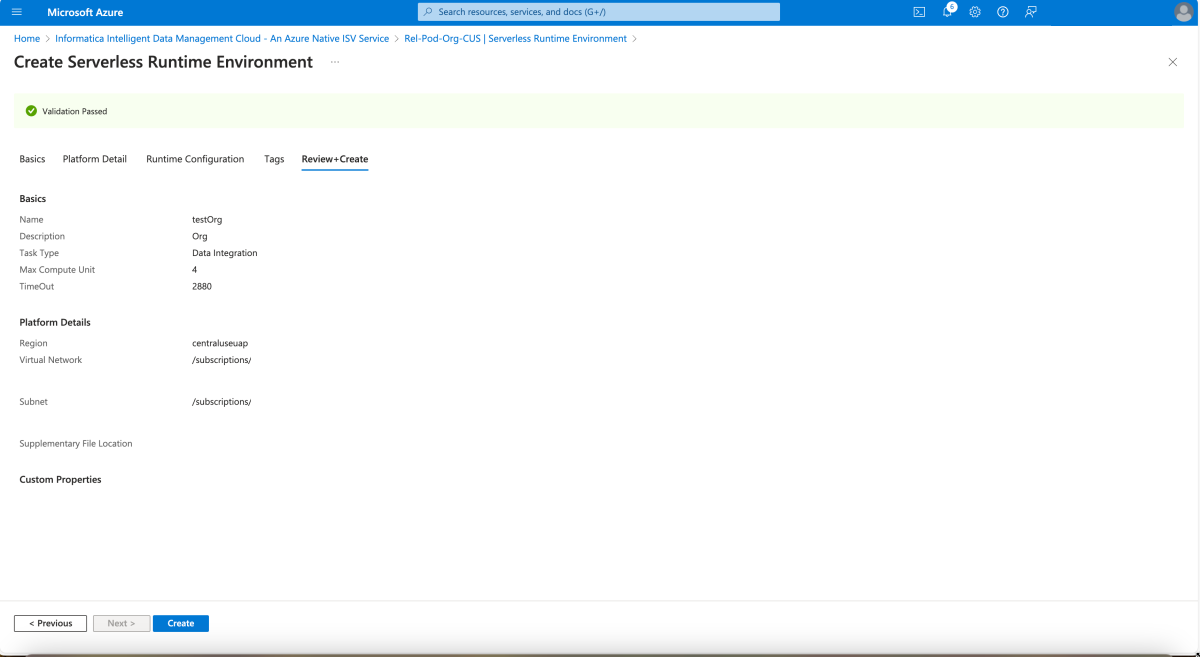
After you review the information, select Create. Azure now deploys the Informatica resource.


