Note
Access to this page requires authorization. You can try signing in or changing directories.
Access to this page requires authorization. You can try changing directories.
After you create your NGINXaaS resource in the Azure portal, you might need to get information about it or change it.
Begin by signing in to the Azure portal.
In the Azure portal search bar, enter All resources and select All resources from the results.
From the Resources list, select your resource.
The Azure portal shows the resource with the Overview page open, by default.

Here are some management tasks:
- Configure managed identity
- Change the configuration
- Add a certificate
- Send metrics to monitoring
- Delete an NGINXaaS deployment
- GitHub integration
Configure managed identity
Add a new User Assigned Managed Identity.
In your NGINXaaS deployment, in the left menu, select Settings > Identity.
Select User assigned, then select Add.
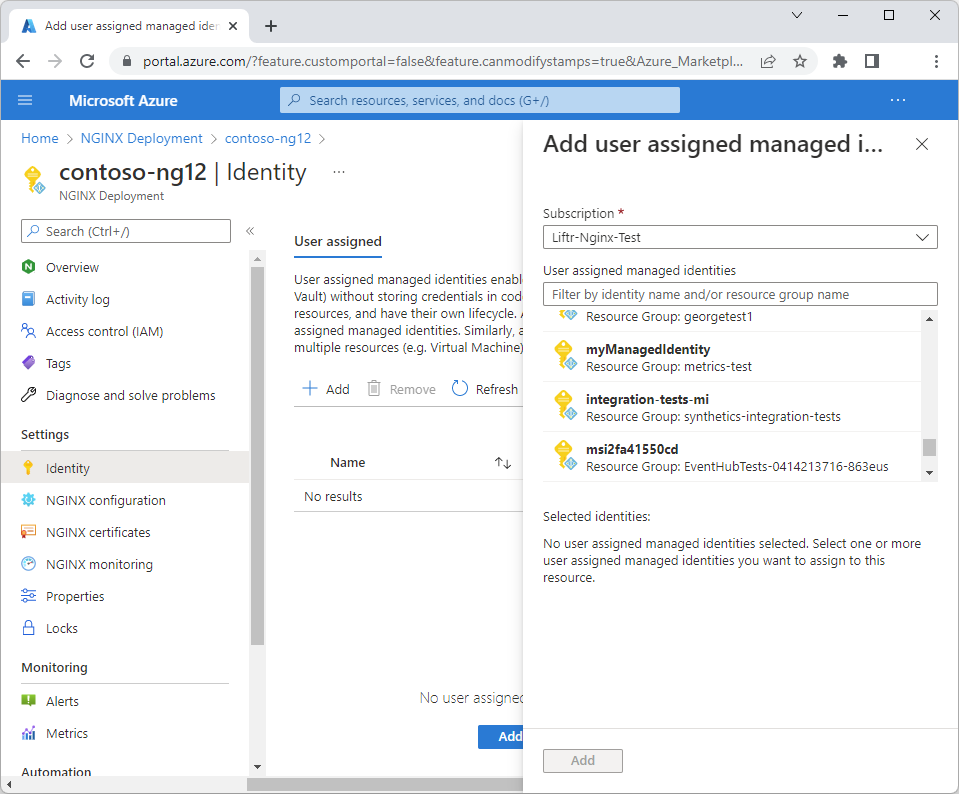
Under Add user assigned managed identity, select your subscription and then select an identity.
Select Add.

Change the configuration
Change your configuration file.
In your NGINXaaS deployment, in the left menu, select Settings > NGINXaaS configuration.
Select Upload config package.
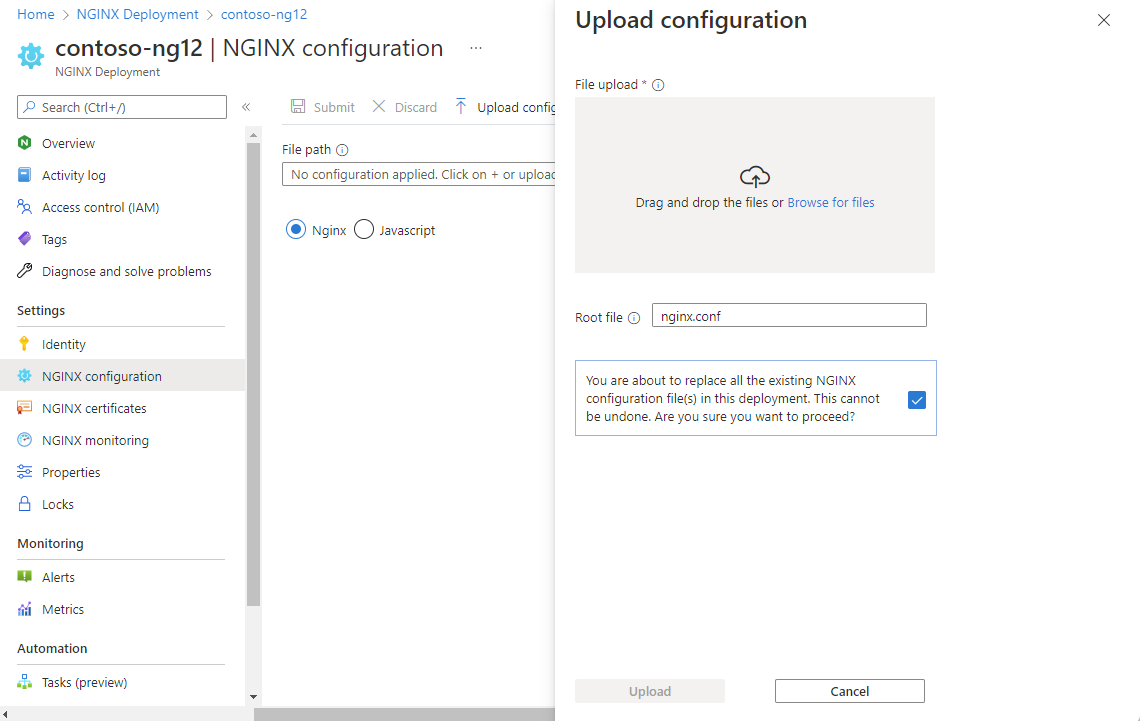
In Upload configuration, drag your file to the upload area or browse to upload it.
Specify a Root file.
This change replaces existing files. Select the option to proceed, then select Upload.

Besides replacing your configuration file, you can edit it in this page. Select the pencil icon. When you're done editing, select Submit.
Add a certificate
You can add a certificate. First, upload your certificate to Azure Key Vault. For more information, see Import a certificate in Azure Key Vault. Then follow these steps:
In your NGINXaaS deployment, in the left menu, select Settings > NGINXaaS certificates.
Select Add certificate.
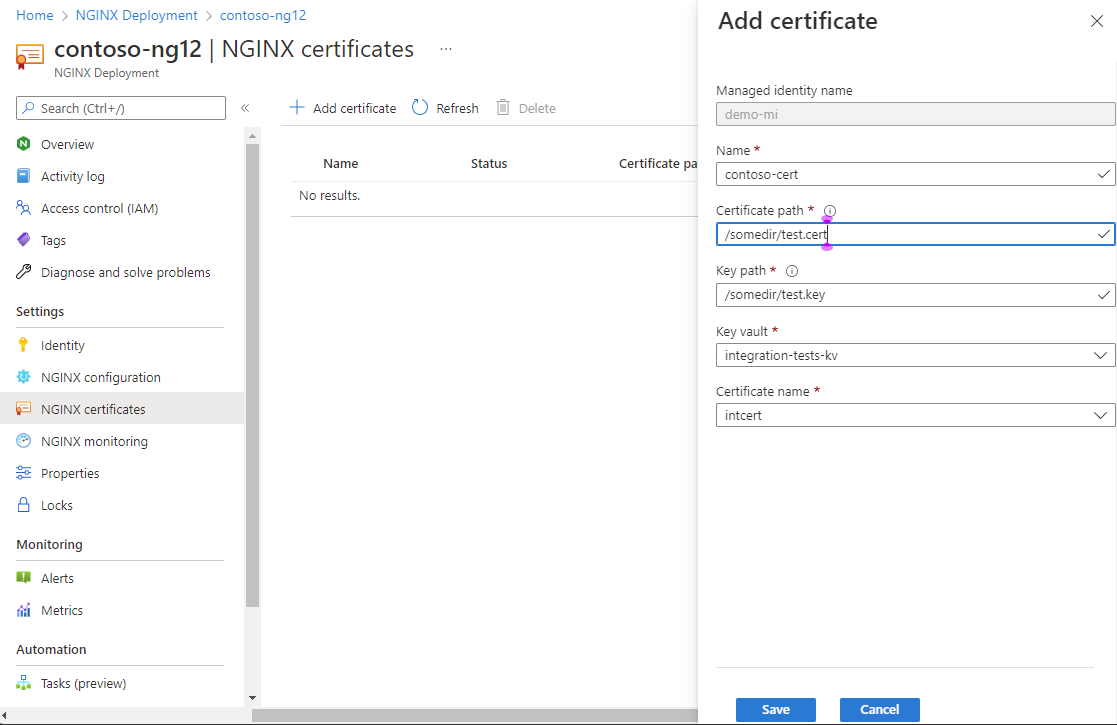
In the Add certificate pane, choose Select certificate and choose your certificate from the options.
Select Add certificate.

Send metrics to monitoring
You can send metrics to Azure Monitor to take advantage of its monitoring capabilities.
In your NGINXaaS deployment, in the left menu, select Settings > NGINXaaS Monitoring.
For Send metrics to Azure Monitor, select On, then select Save
Delete a resource
If you finished using your resource and you want to delete it, follow these steps:
On the command bar, select Delete.
The Delete Resource pane appears in the sidebar.
In the Confirm Delete field, enter the name of the resource.
Choose a reason for deleting the resource.
Select Delete.
After the resource is deleted, all billing through Azure Marketplace stops for that resource.
After the account is deleted, logs are no longer sent to NGINXaaS.
Note
The delete button on the main account is only activated if all the subaccounts mapped to the main account are already deleted.
GitHub integration
Enable CI/CD deployments by using GitHub Actions integrations.