Note
Access to this page requires authorization. You can try signing in or changing directories.
Access to this page requires authorization. You can try changing directories.
In this quickstart, you use Azure Marketplace to find and create an instance of Cloud NGFW by Palo Alto Networks - an Azure Native ISV Service resource.
Prerequisites
An Azure account with an active subscription is required. If you don't already have one, you can create an account for free.
Your Azure role must be set to Owner or Contributor for the subscription. Confirm that you have the appropriate access before you begin.
Create a Cloud NGFW resource
Begin by signing in to the Azure portal.
In the Azure portal, in the search bar, enter the name of the service.
In the Services search results, choose the service.
Select the + Create option.
The pane for creating a resource appears with the Basics tab open by default.
In this section, you'll create a Cloud NGFW by Palo Alto Networks resource.
Basics tab
Set the following values on the Basics tab.
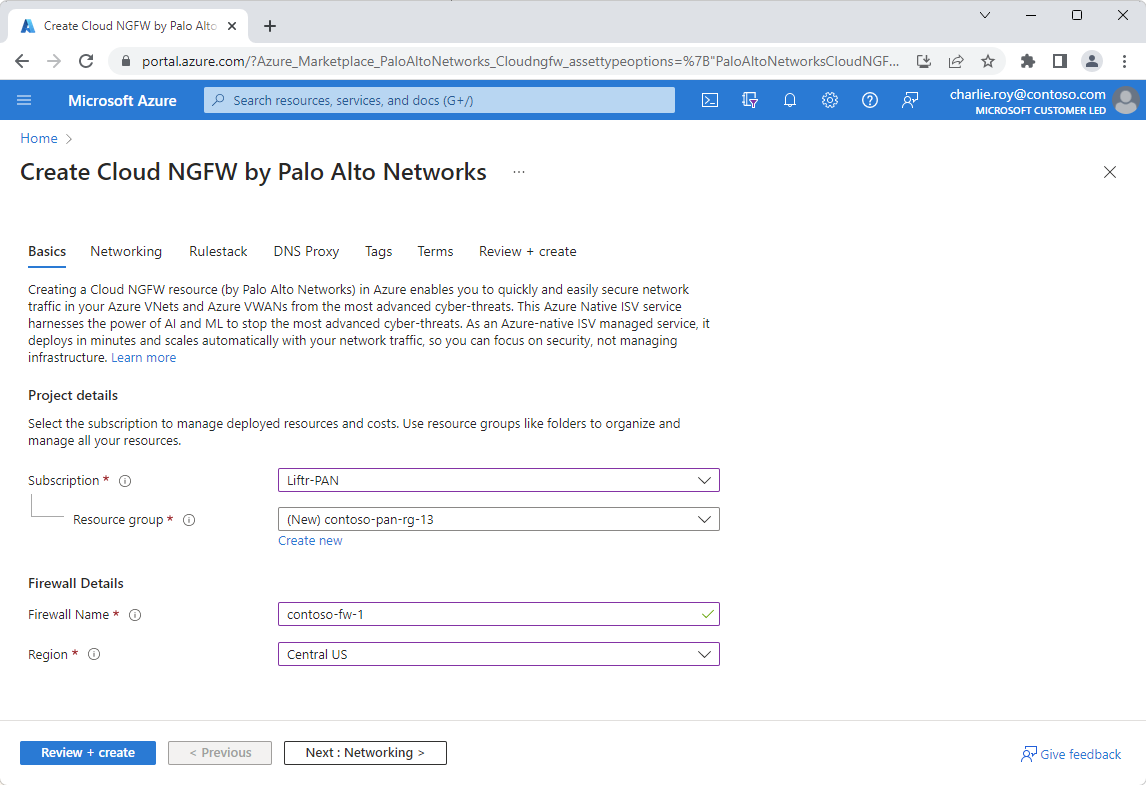
Setting Description Subscription Select an Azure subscription for which you have owner access. Resource group Specify whether you want to create a new resource group or use an existing one. A resource group is a container that holds related resources for an Azure solution. For more information, see What is a resource group?. Firewall name Enter a name for the firewall. Region Select an appropriate region. Marketplace Plan Select Cloud NGFW by Palo Alto Networks - an Azure Native ISV Service (PAYG).

Networking tab
After providing the required information on the Basics tab, select Next to go to the Networking tab.
Select either Virtual Network or Virtual Wan Hub.
Select the dropdown arrows to set the Virtual Network, Private Subnet, and Public Subnet that are associated with the Cloud NGFW deployment.
Under Public IP Address Configuration, select either Create new or Use existing.
If you select Create new, accept the supplied public IP address name or enter a name. If you select Use existing, select a public IP address name.
Under Source NAT Settings, indicate your preferred NAT settings.
Security Policies tab
After setting the networking values, select Next to go to the Security Policies tab. You can set the policies for the firewall on this tab.
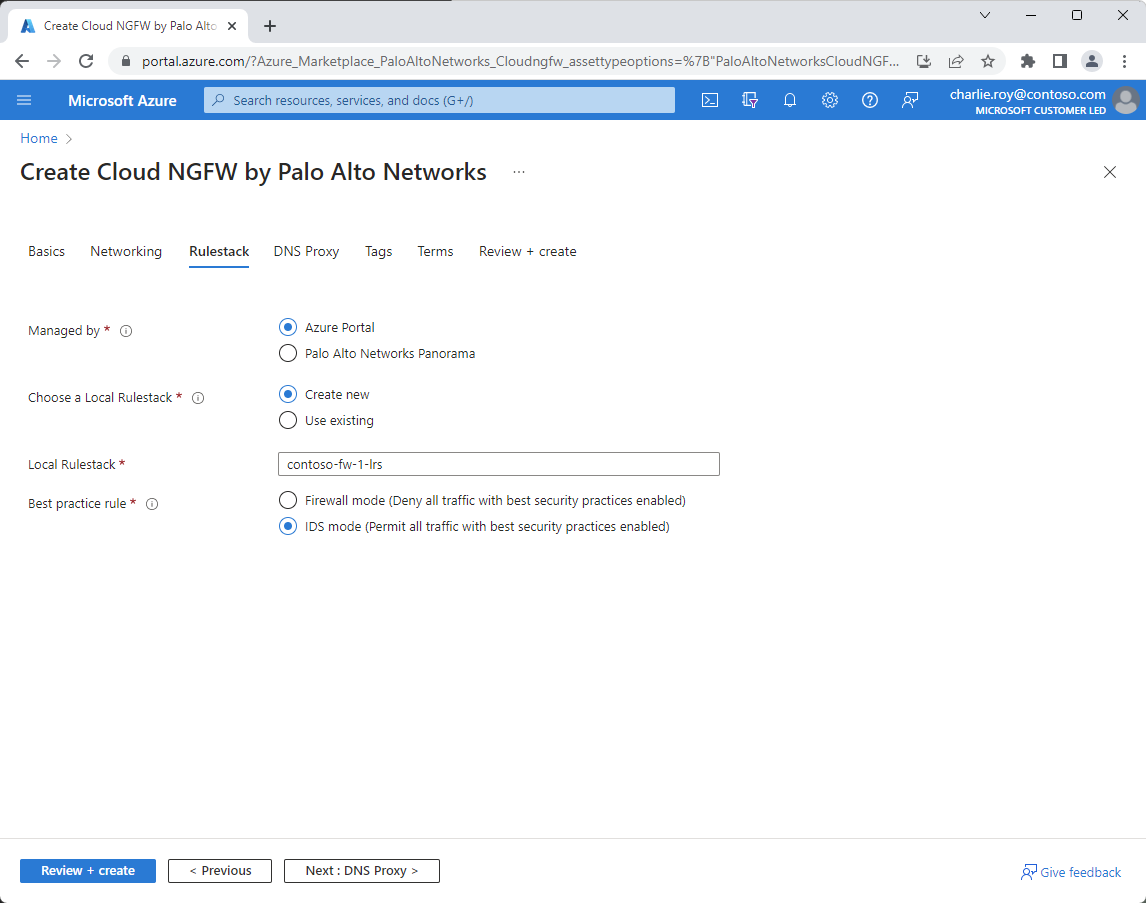
Under Managed by, select Azure Rulestack, Palo Alto Networks Panorama, or Palo Alto Networks Strata Cloud Manager.
Your options depend on the choice you made in the previous step. Indicate your choices for the required settings.

DNS Proxy
After you configure the Security Policies values, select Next to go to the DNS Proxy tab.
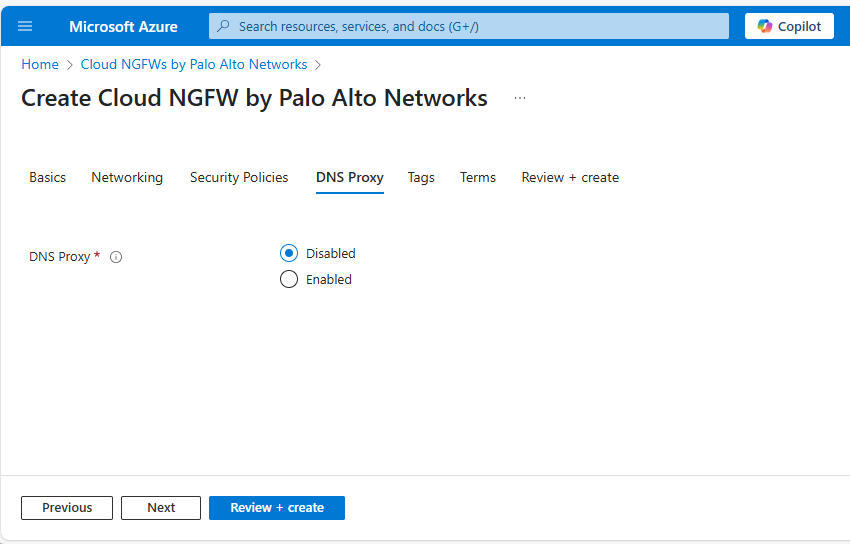
Under DNS Proxy, select either Disabled or Enabled.

Tags tab (optional)
You can optionally create tags for your resource.
Terms tab
Next, you must accept the terms of use for the new Cloud NGFW resource.
Select the Terms tab.
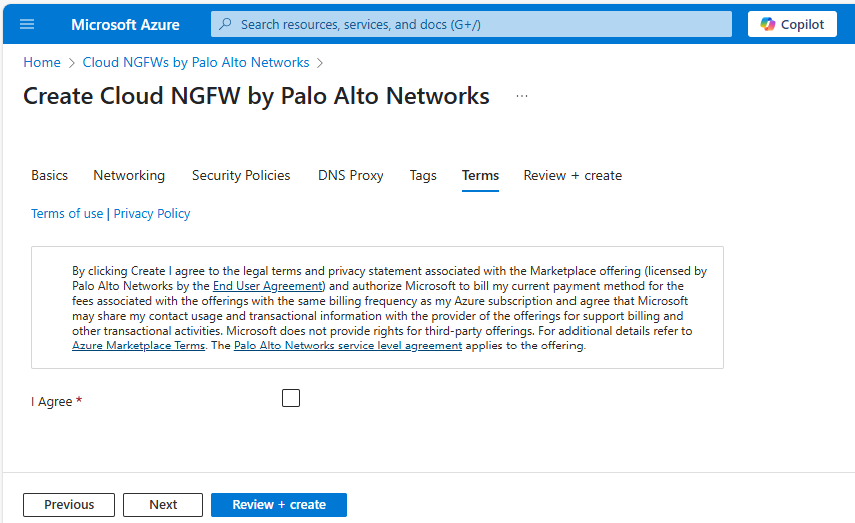
Select the I Agree box to indicate your acceptance.
Select Next to go to the final step of creating the resource.

Review + create tab
If the review finds no errors, the Create button is enabled. Select it.
If the review identifies errors, a red dot appears next to each section where errors exist. To fix errors:
Open each section that has errors and fix the errors.
Fields with errors are highlighted in red.
Select Review + create again.
Select Create.
The message "Deployment is in progress" appears. When the deployment is complete, the message "Your deployment is complete" appears.
After the resource is created, select Go to Resource to view your resource.
Next steps
Get started with Cloud NGFW on: