Note
Access to this page requires authorization. You can try signing in or changing directories.
Access to this page requires authorization. You can try changing directories.
In this quickstart, you learn how to use a Microsoft Planetary Computer Pro GeoCatalog resource in Azure Batch to process geospatial data at scale.
Azure Batch is a cloud-based job scheduling service that enables you to run large-scale parallel and high-performance computing (HPC) workloads. By combining Azure Batch with Microsoft Planetary Computer Pro, you can:
- Process large volumes of geospatial data in parallel across multiple compute nodes
- Authenticate securely to GeoCatalog APIs using managed identities
- Scale processing power up or down based on workload demands
- Automate geospatial data pipelines without managing infrastructure
This quickstart demonstrates how to set up a Batch pool with a user-assigned managed identity, configure permissions to access your GeoCatalog, and run jobs that query the STAC API.
Tip
For an overview of application development options with Microsoft Planetary Computer Pro, see Connect and build applications with your data.
Prerequisites
Before you begin, ensure you meet the following requirements to complete this quickstart:
- An Azure account with an active subscription. Use the link Create an account for free.
- A Microsoft Planetary Computer Pro GeoCatalog resource.
A Linux machine with the following tools installed:
- Azure CLI
perlpackage.
Create a Batch account
Create a resource group:
az group create \
    --name spatiobatchdemo \
    --location uksouth
Create a storage account:
az storage account create \
    --resource-group spatiobatchdemo \
    --name spatiobatchstorage \
    --location uksouth \
    --sku Standard_LRS
Assign the Storage Blob Data Contributor to the current user to the storage account:
az role assignment create \
    --role "Storage Blob Data Contributor" \
    --assignee $(az account show --query user.name -o tsv) \
    --scope $(az storage account show --name spatiobatchstorage --resource-group spatiobatchdemo --query id -o tsv)
Create a Batch account:
az batch account create \
    --name spatiobatch \
    --storage-account spatiobatchstorage \
    --resource-group spatiobatchdemo \
    --location uksouth
Important
Ensure you have enough quota to create a pool of computer nodes. If you don't have enough quota, you can request an increase by following the instructions in the Azure Batch quotas and limits documentation.
Sign in to the new Batch account by running the following command:
az batch account login \
    --name spatiobatch \
    --resource-group spatiobatchdemo \
    --shared-key-auth
Once you authenticate your account with Batch, subsequent az batch commands in this session use the Batch account you created.
Create a User Assigned Managed Identity:
az identity create \
    --name spatiobatchidentity \
    --resource-group spatiobatchdemo
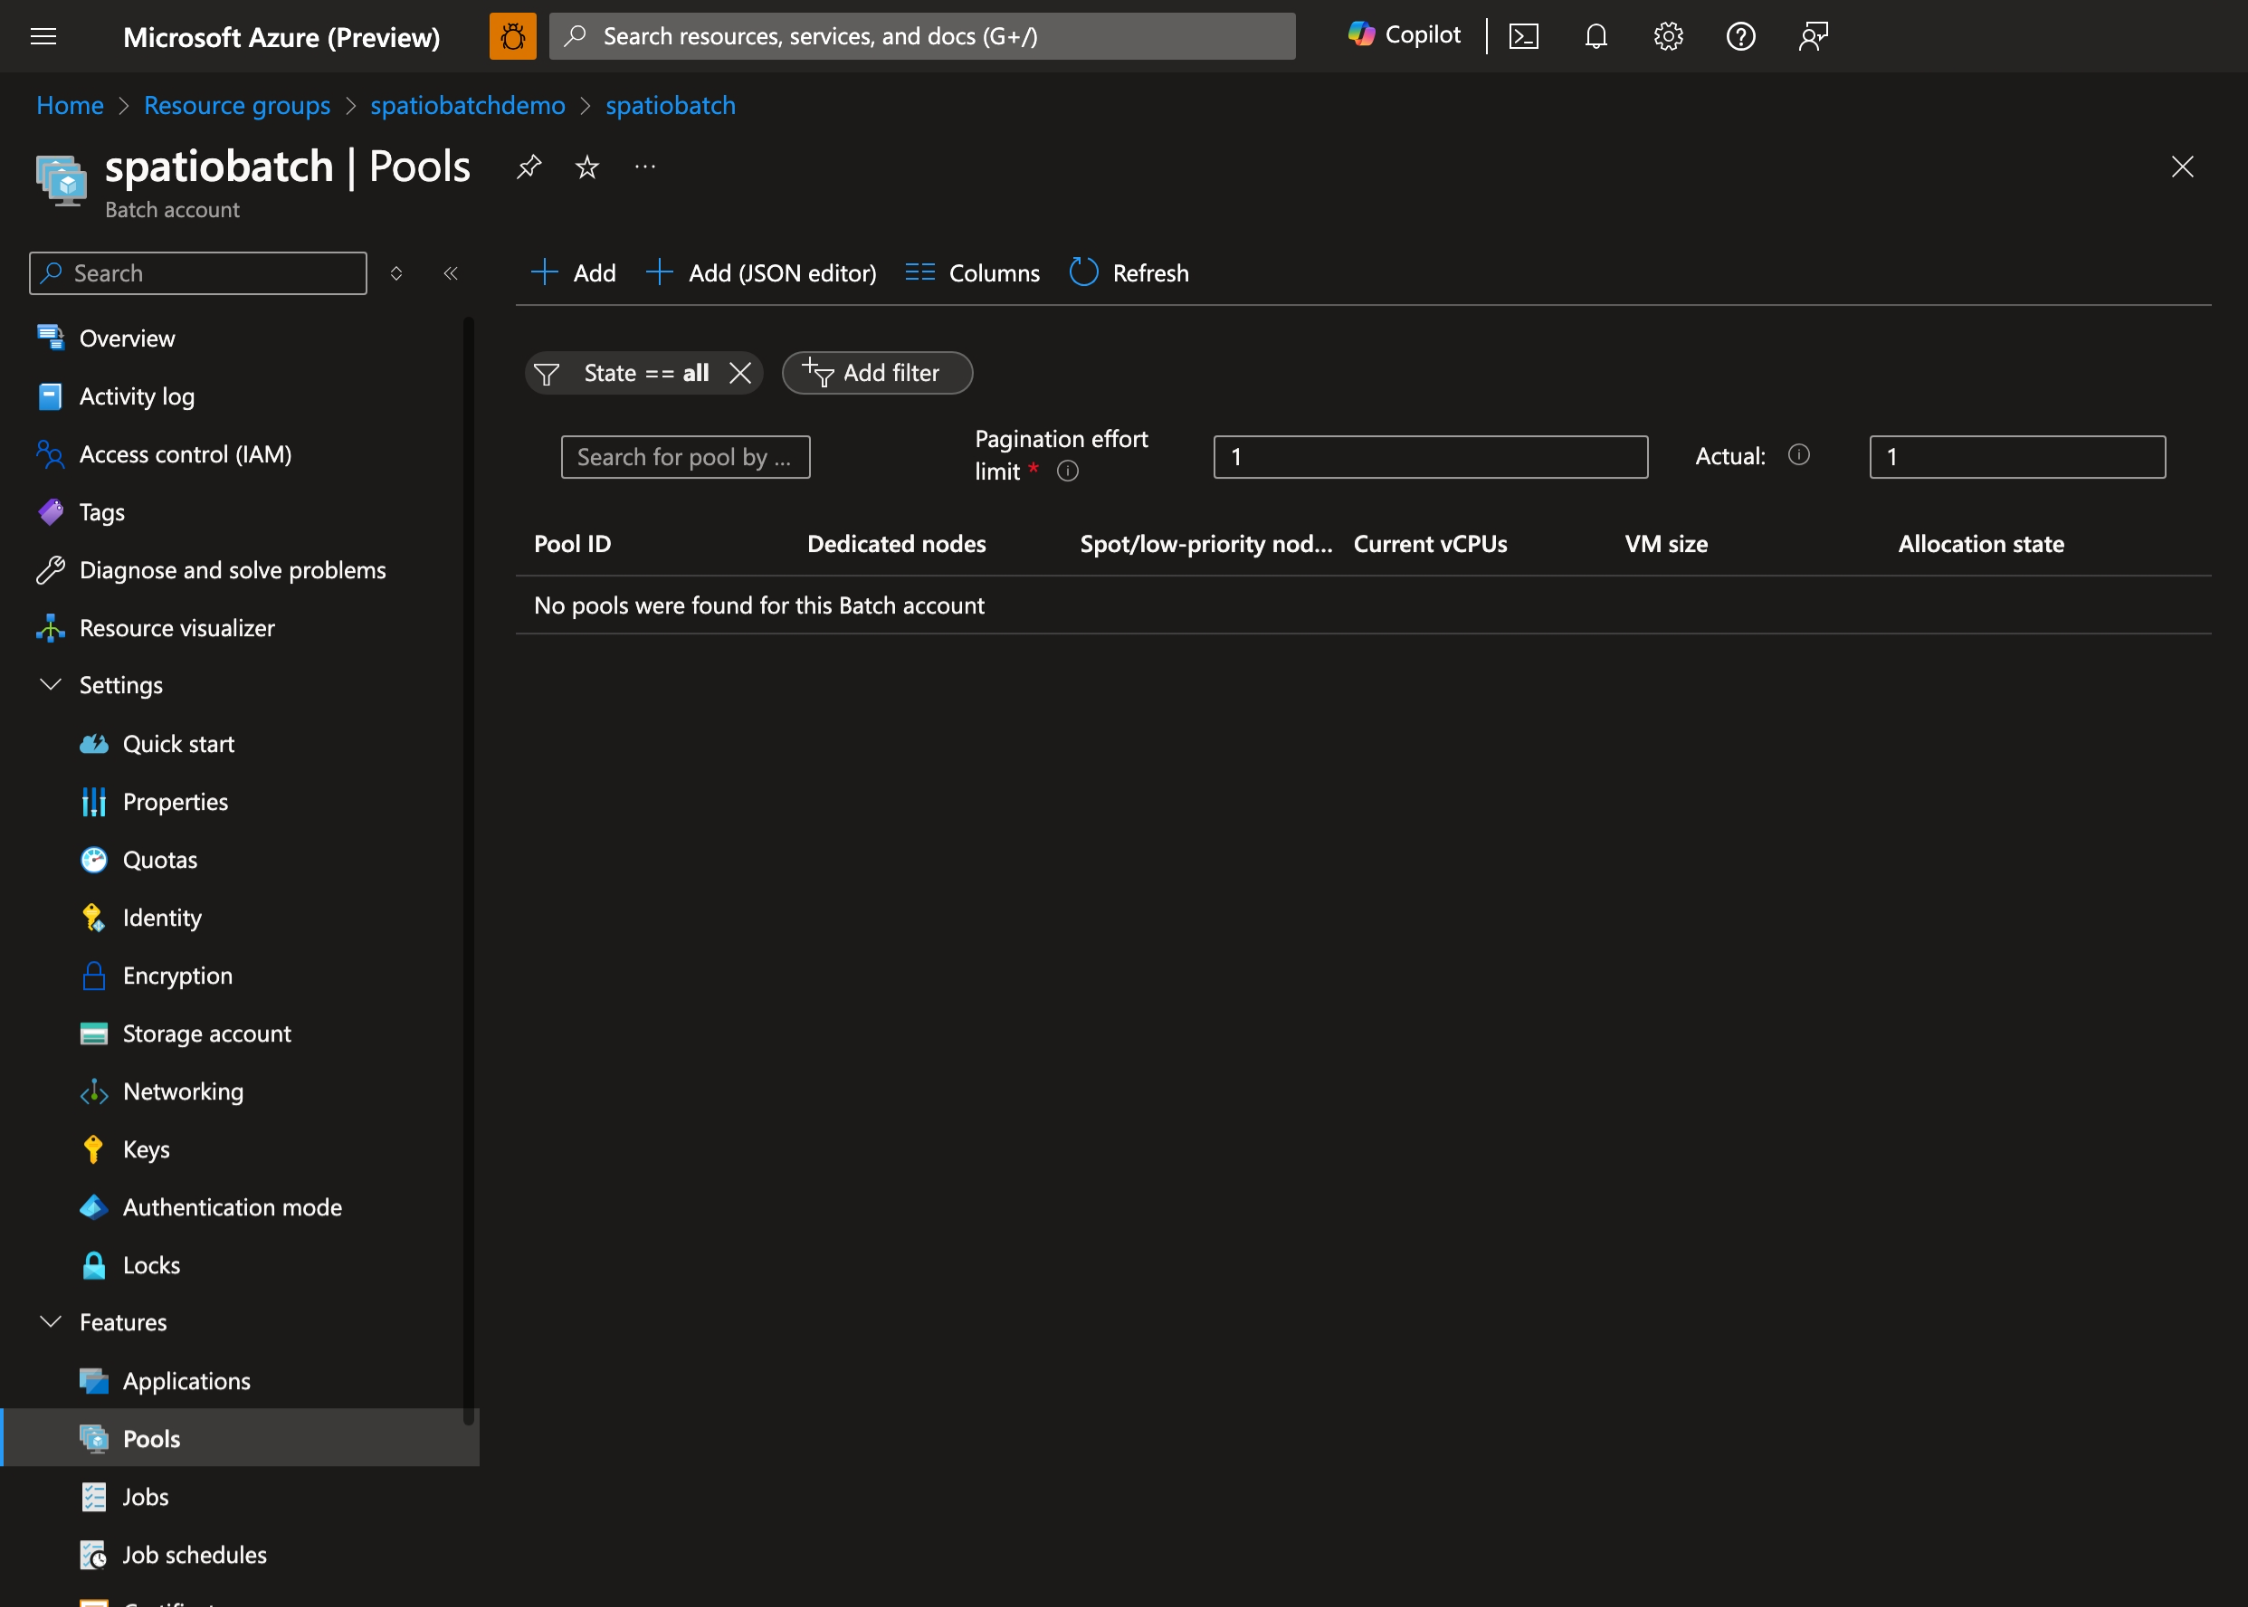
Create a pool of compute nodes using the Azure portal:
- In the Azure portal, navigate to your Batch account and select Pools:
- Select + Add to create a new pool and select User-assigned as the pool's identity:
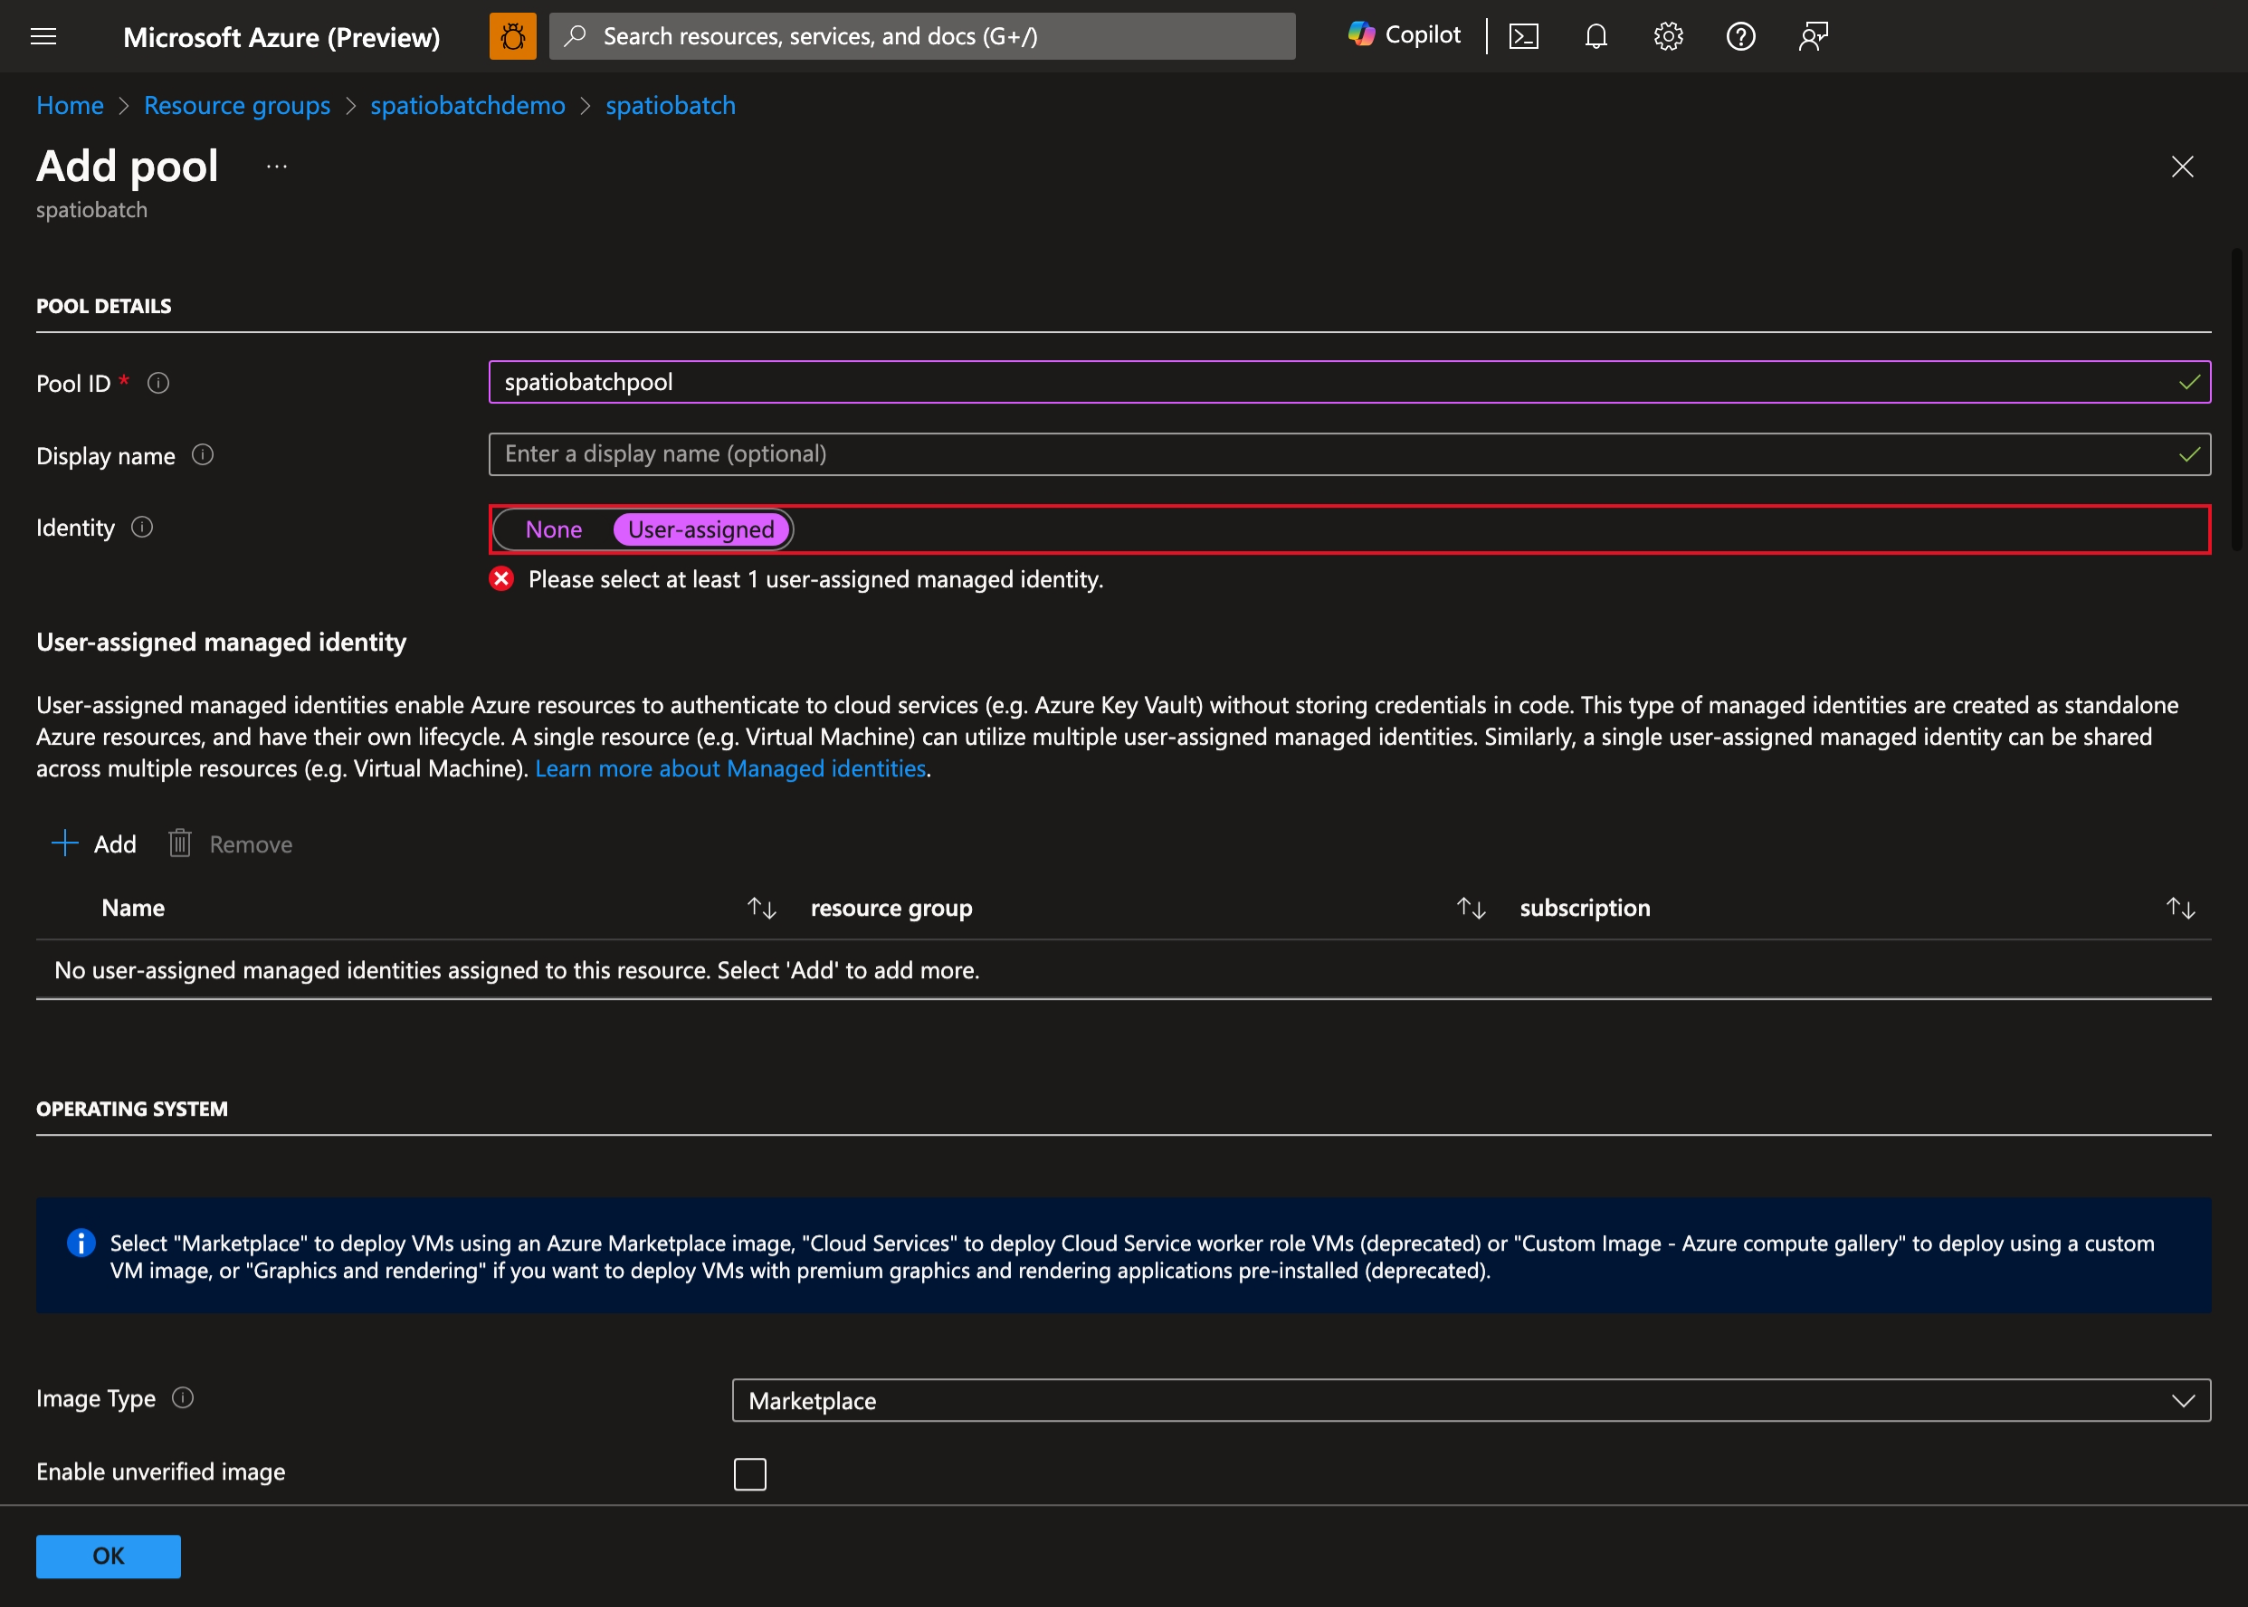
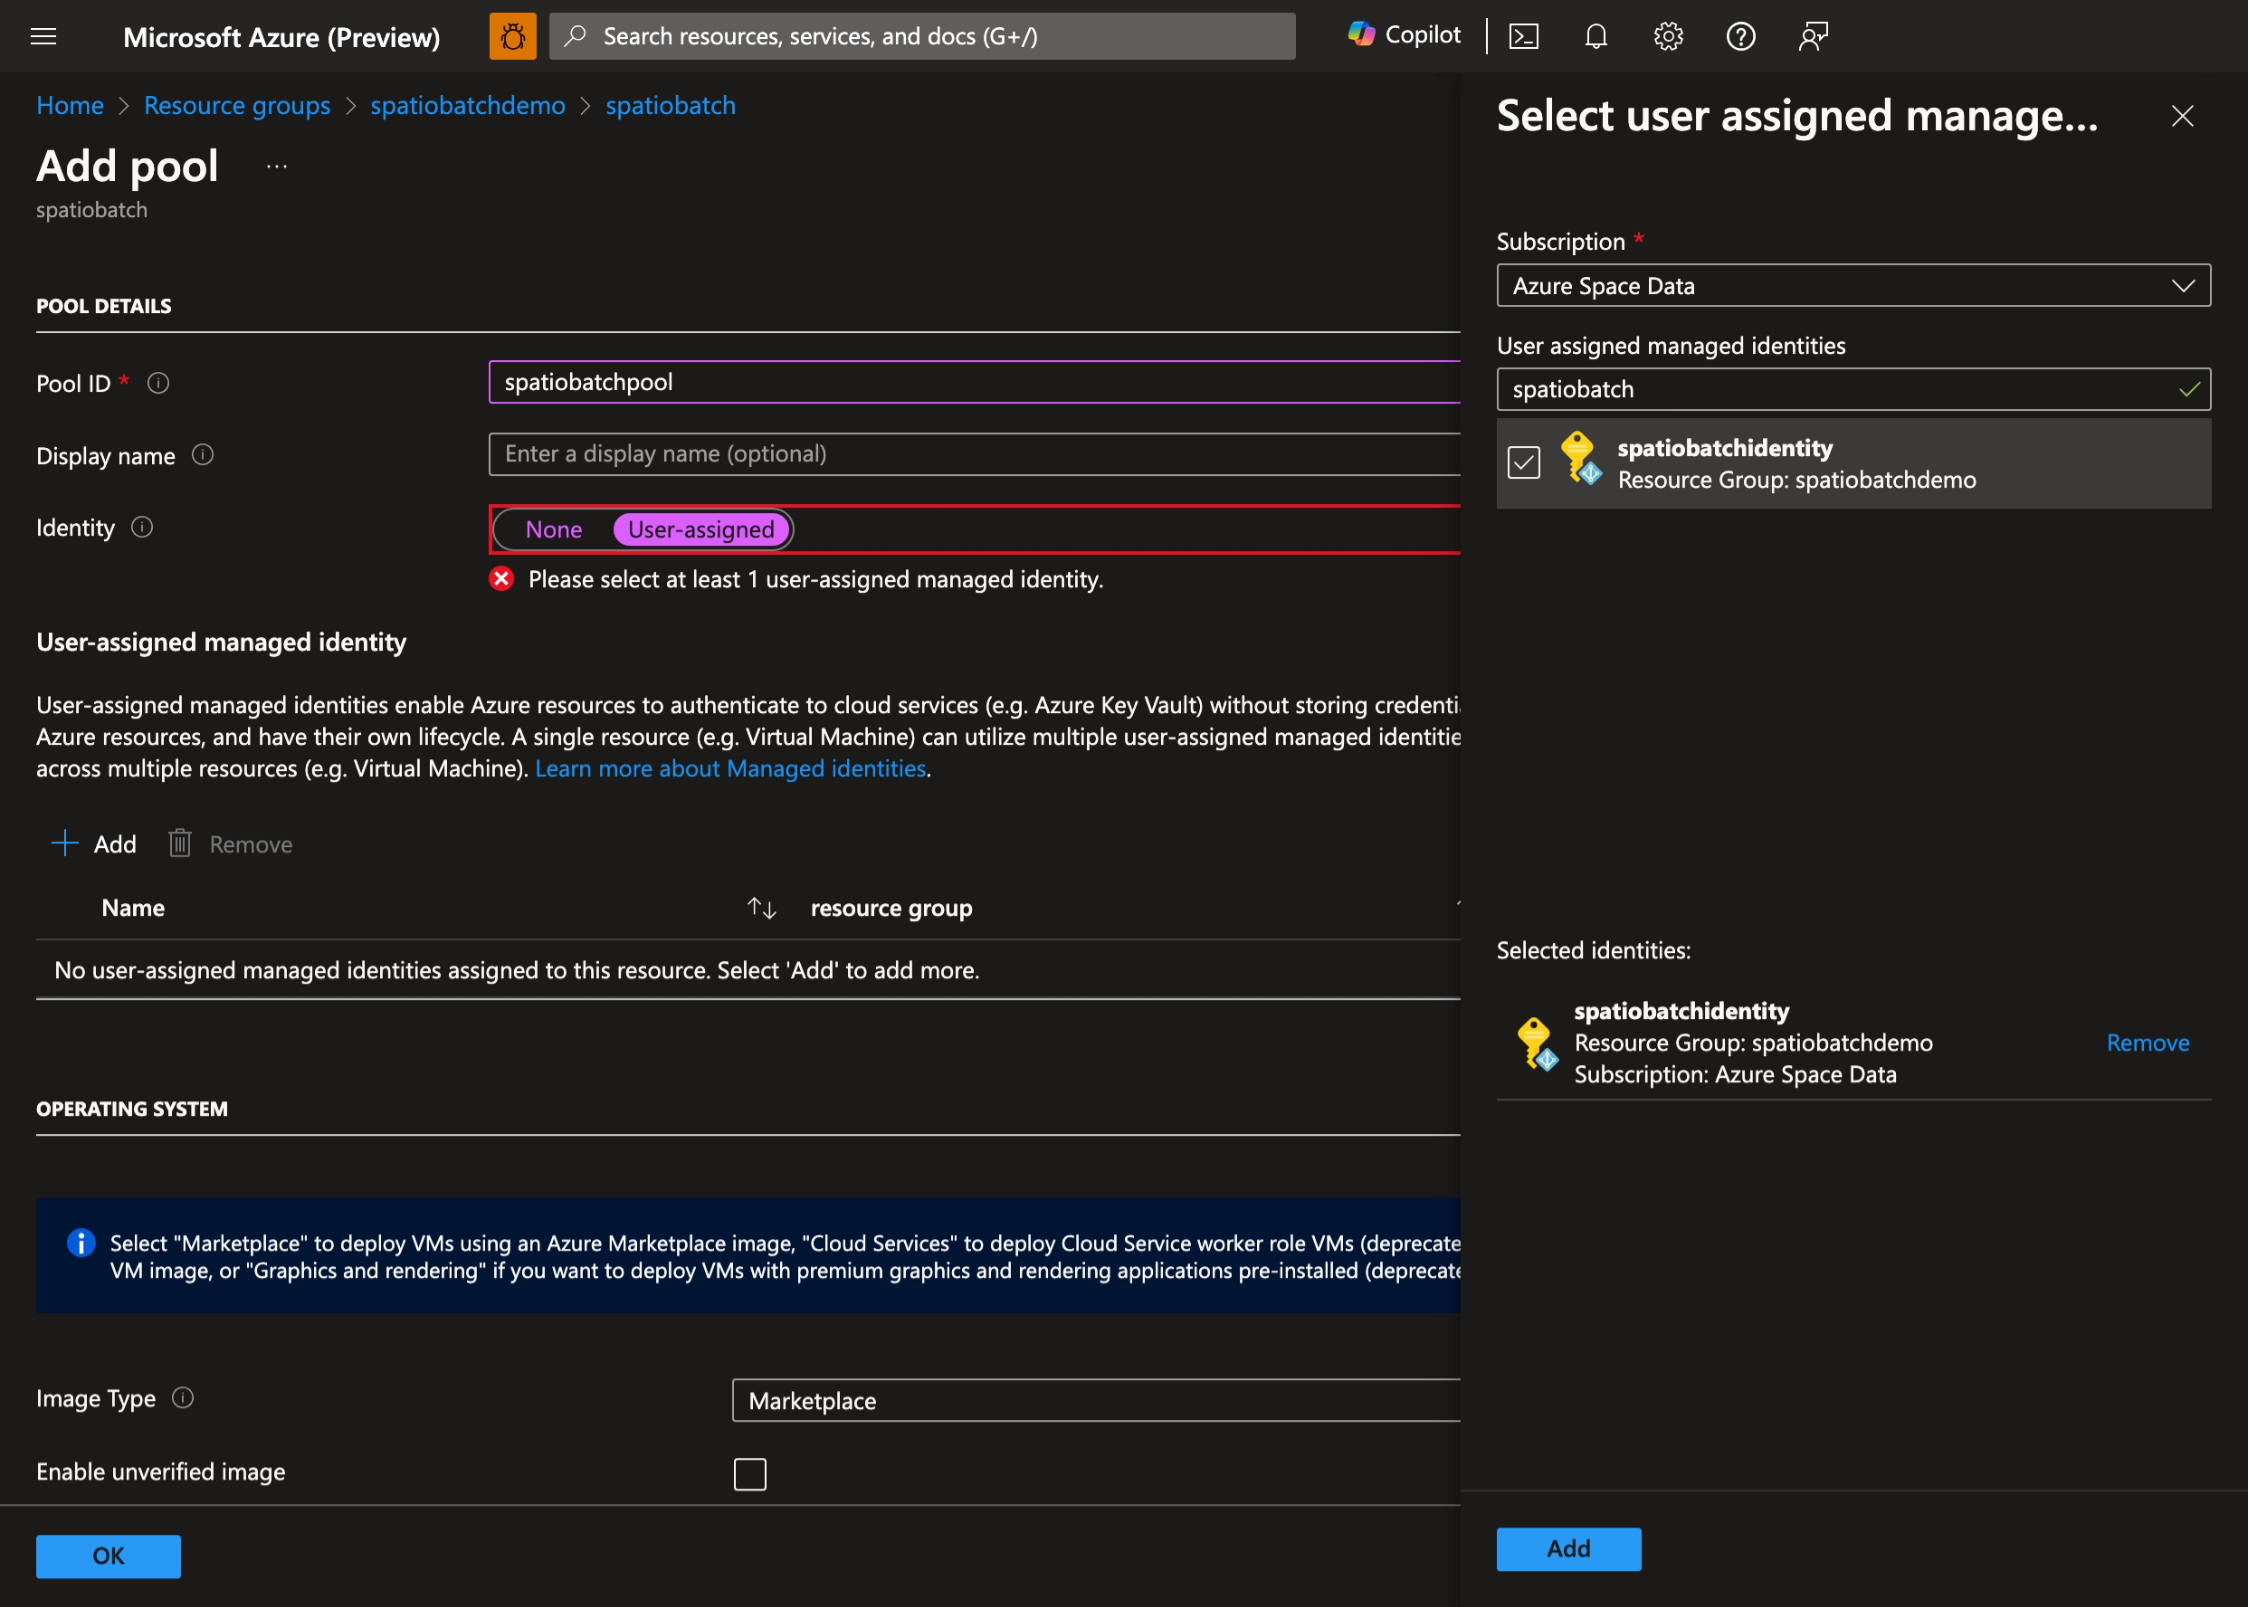
- Select the User Assigned Managed Identity you created earlier:
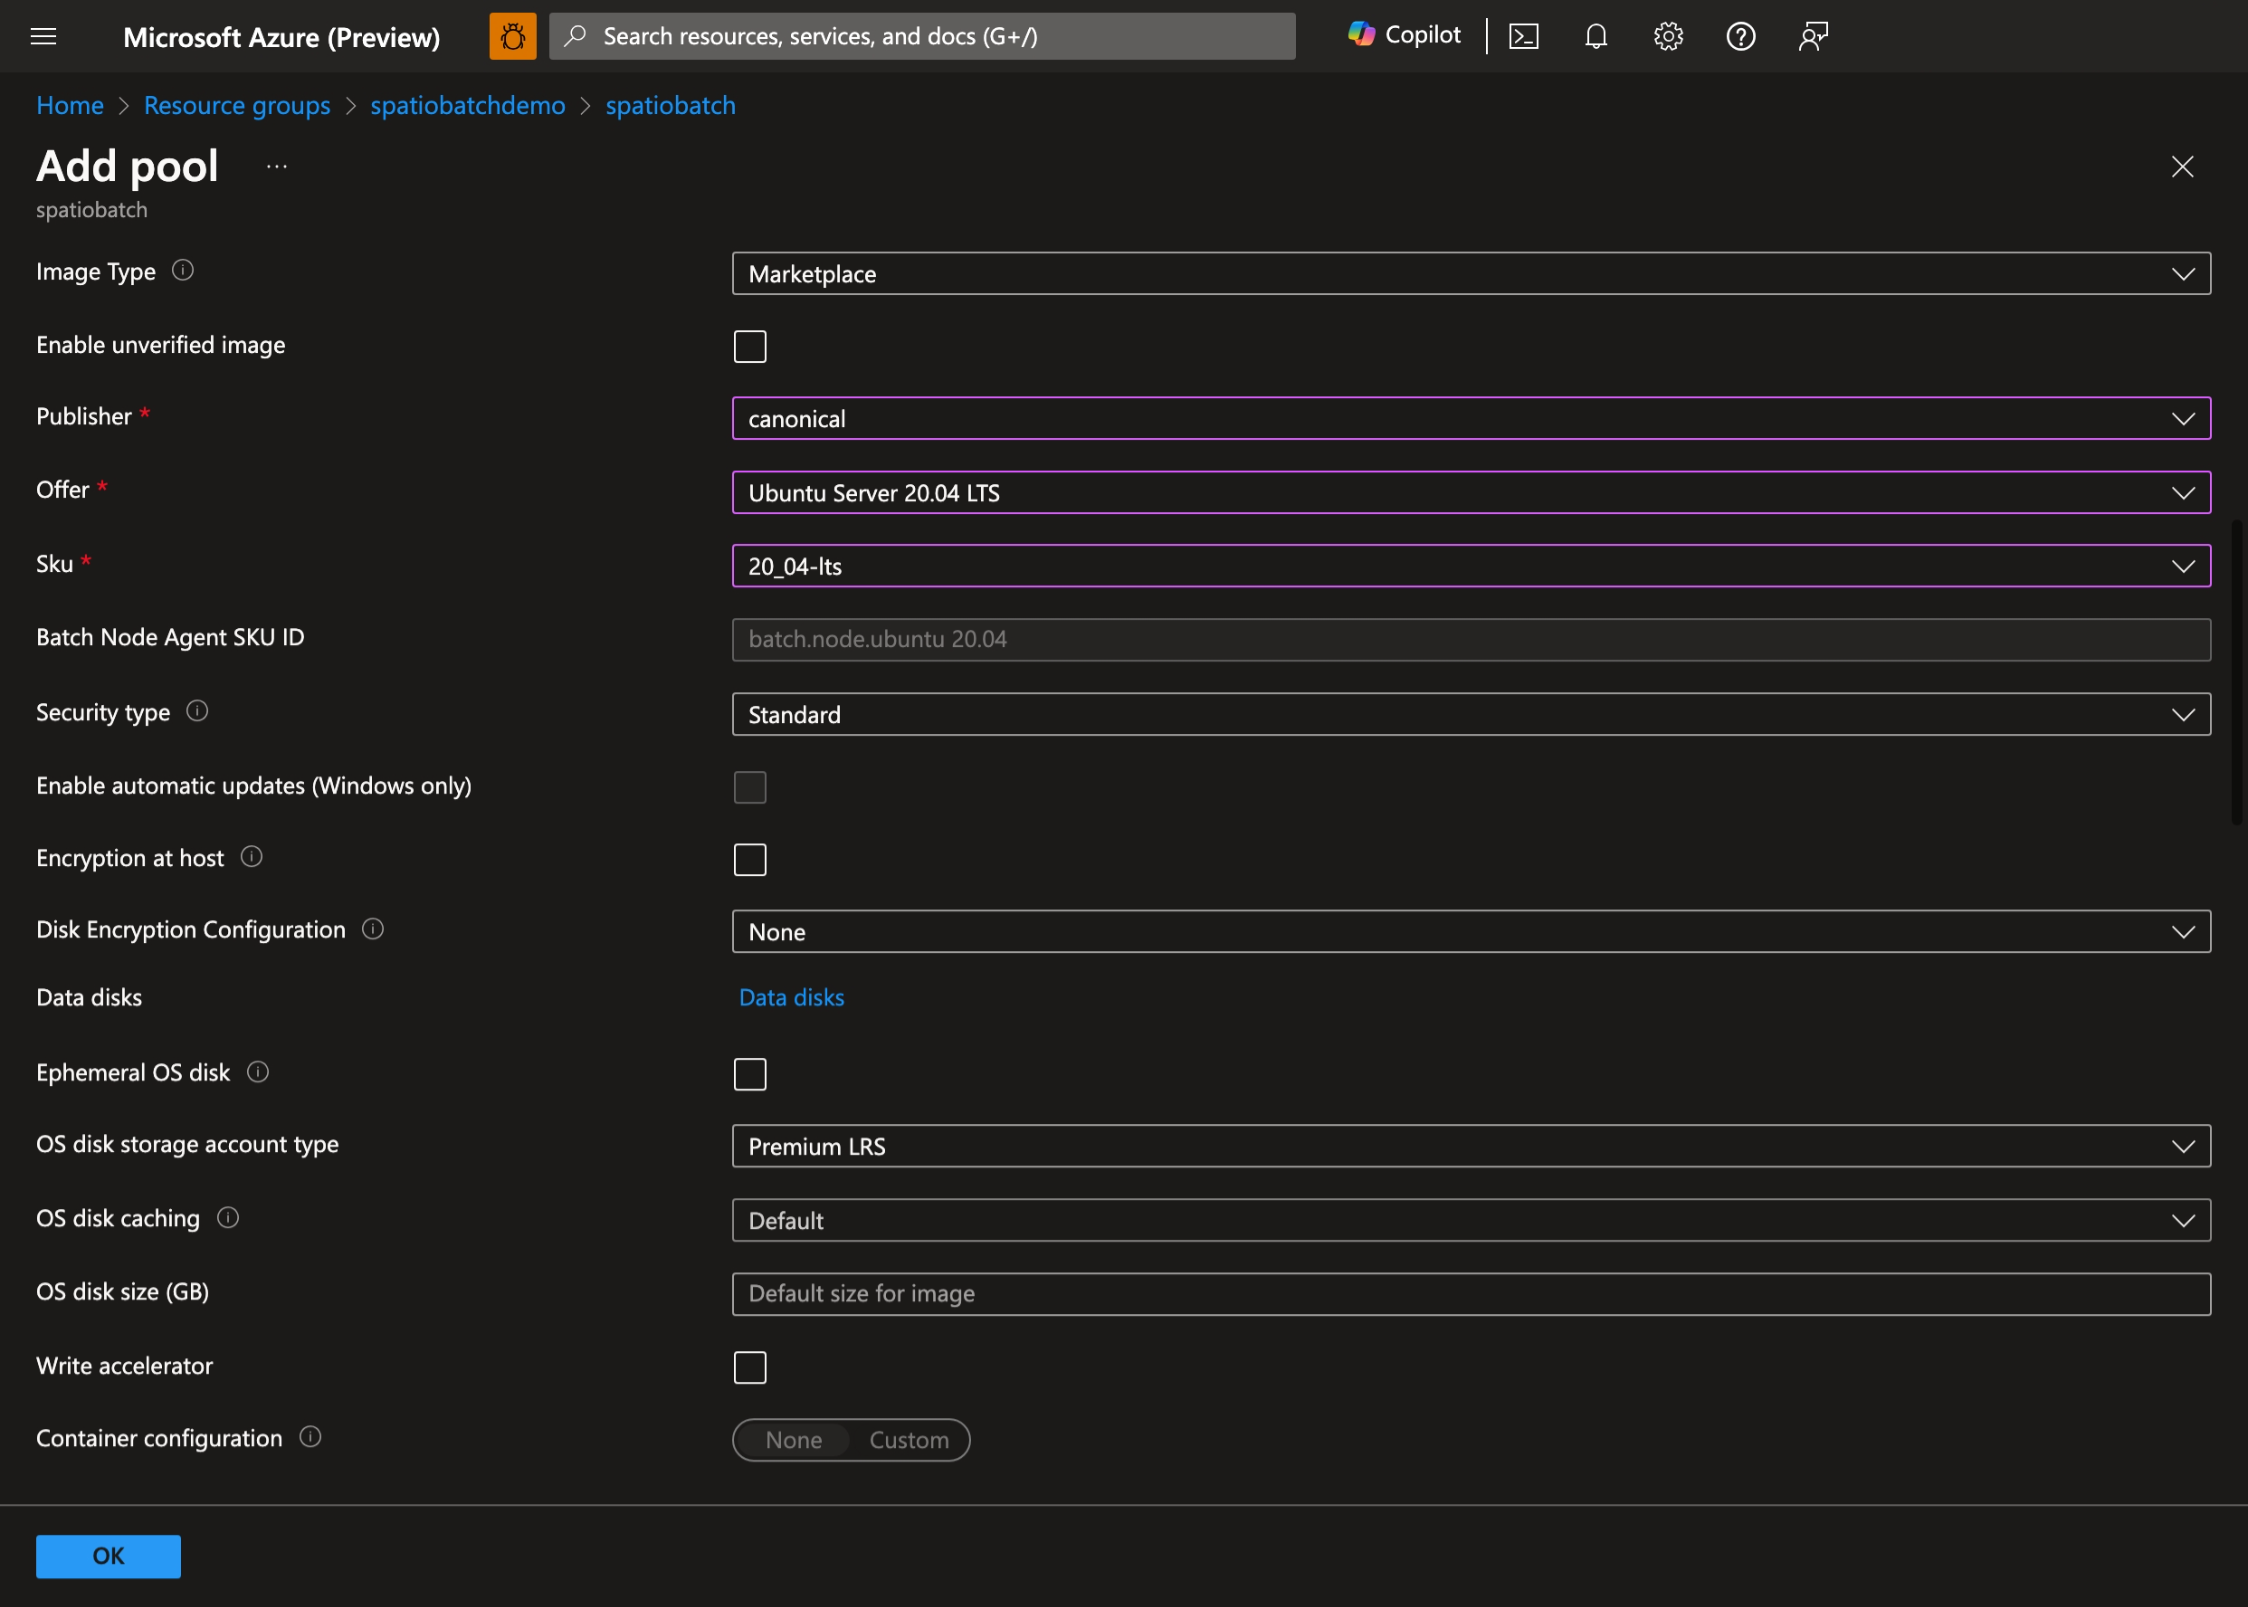
- Select your preferred operating system and VM size. In this demo, we use Ubuntu Server 20.04 LTS:
- Enable Start Task, set the following Command line:
bash -c "apt-get update && apt-get install jq python3-pip -y && curl -sL https://aka.ms/InstallAzureCLIDeb | bash"and set Elevation level to Pool autouser, Admin: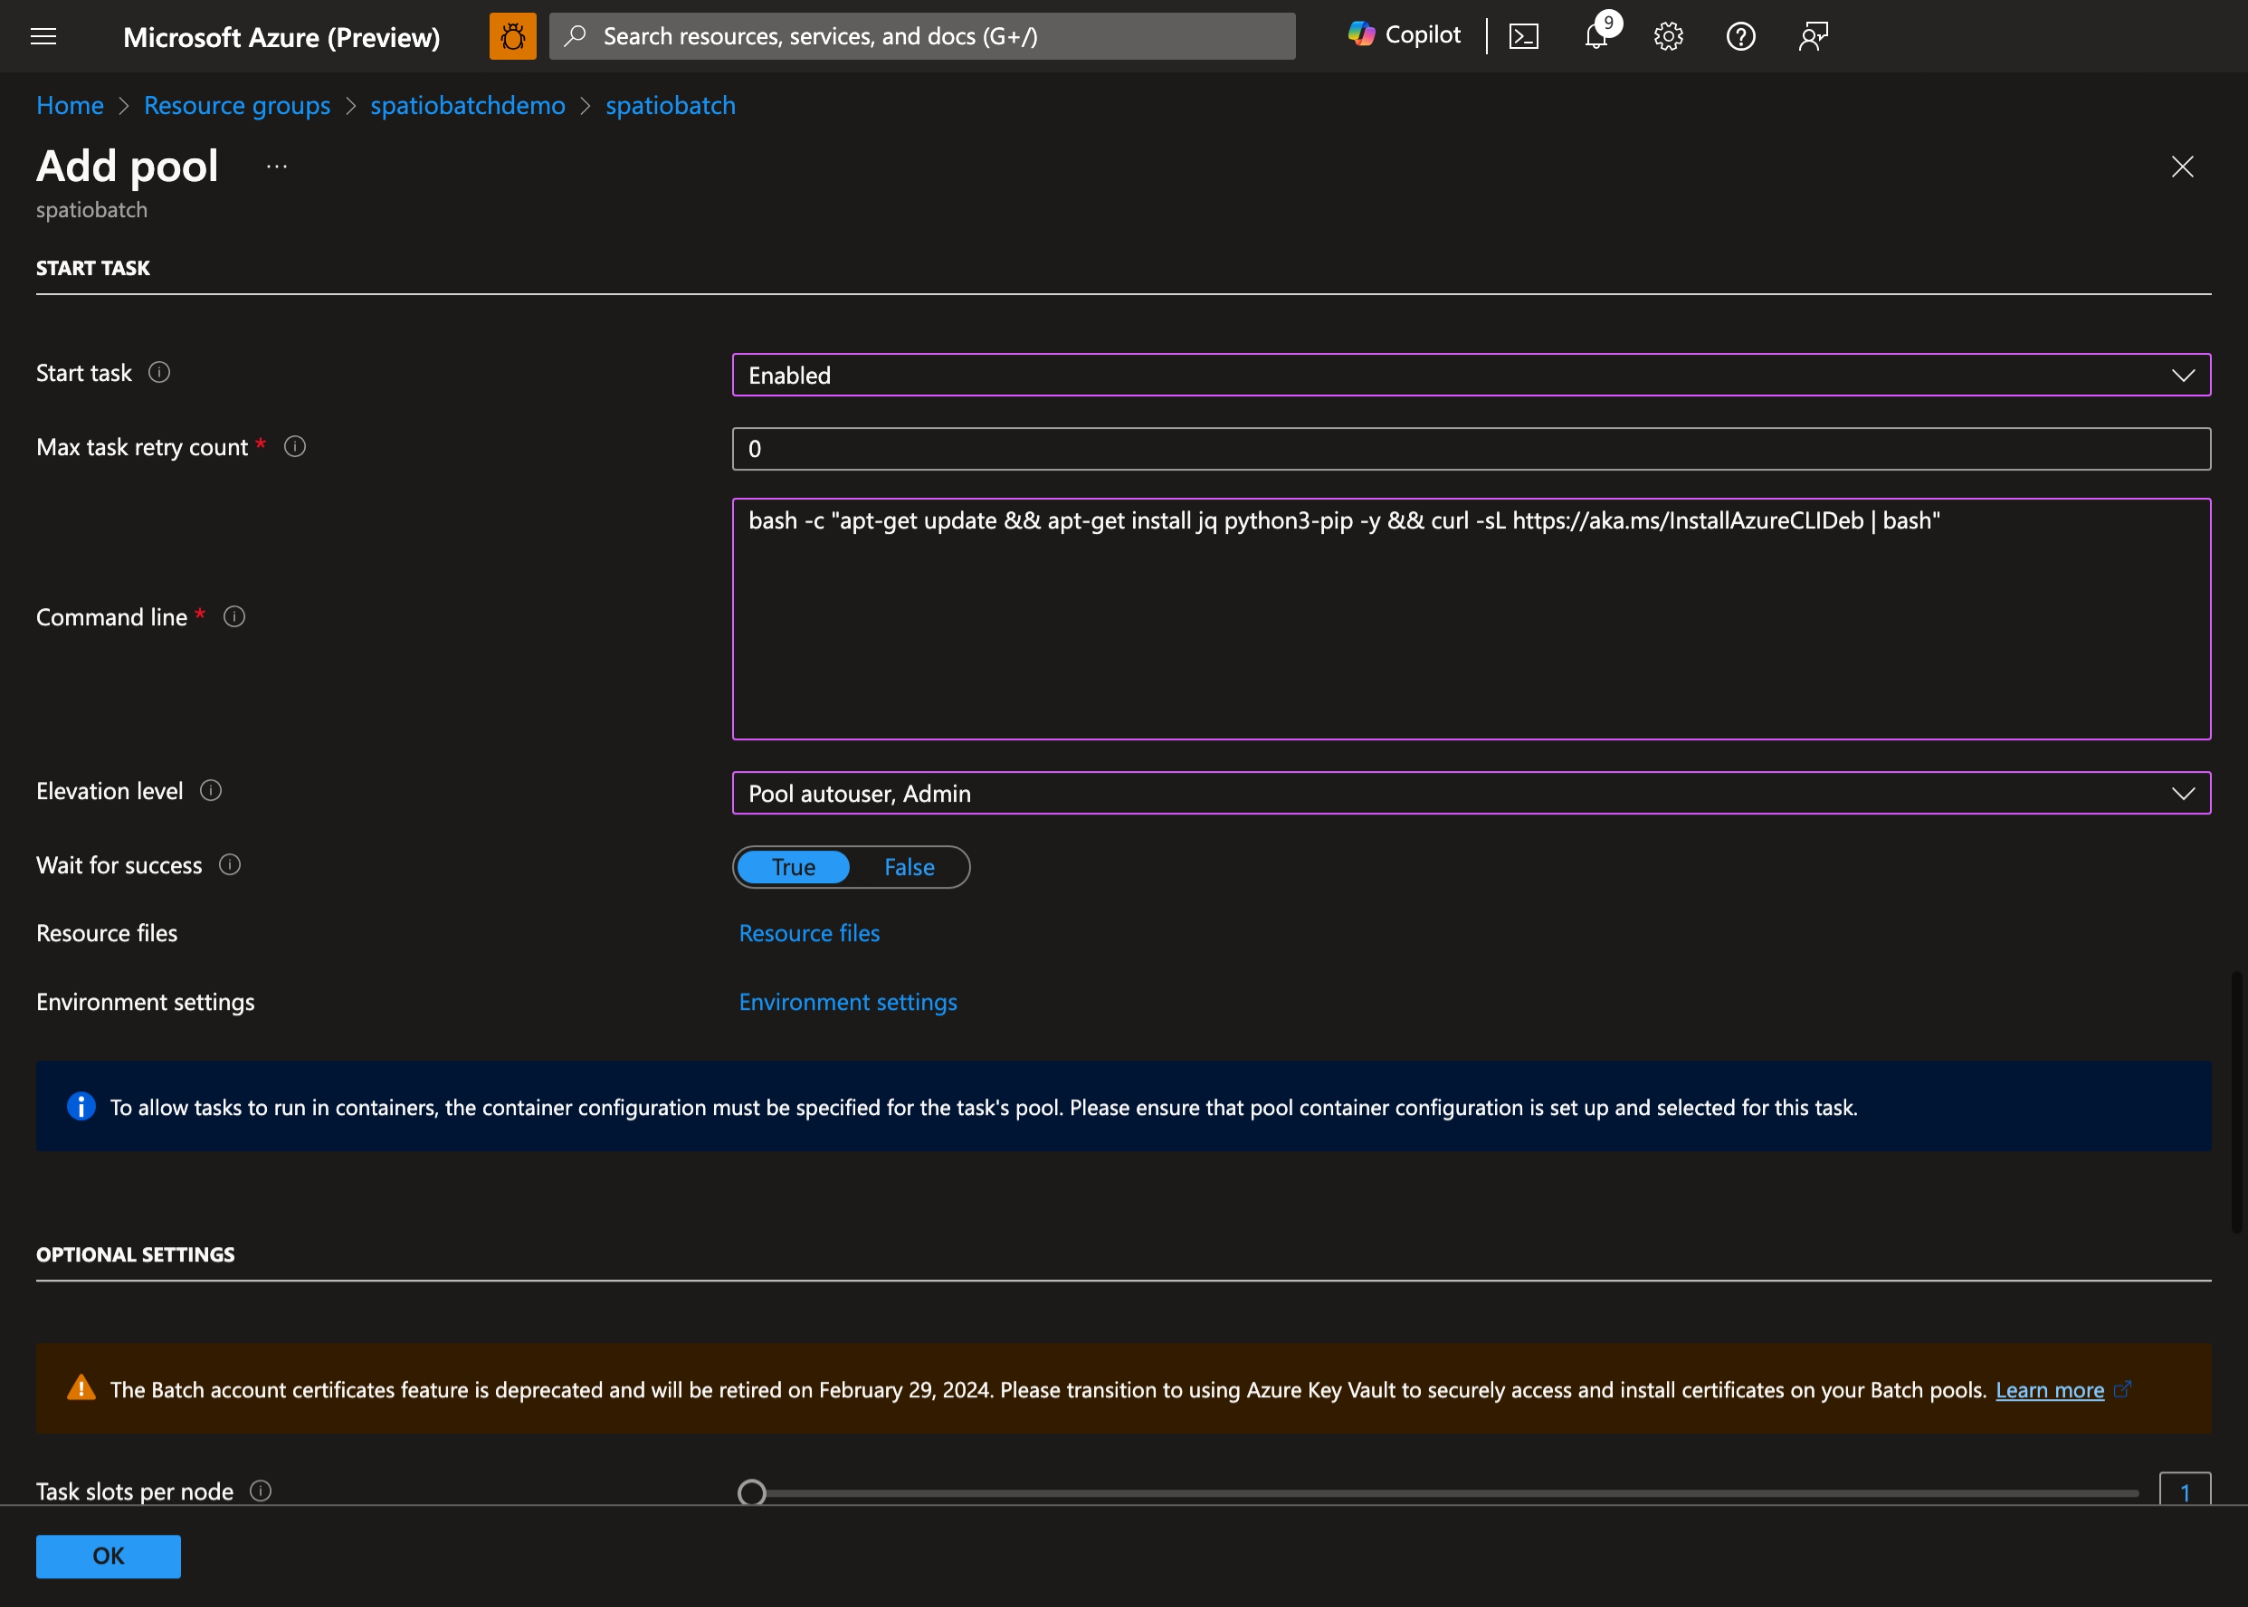
- Select OK to create the pool.


Assign permissions to the managed identity
You need to provide the managed identity access to the GeoCatalog. Go to your GeoCatalog, select on Access control (IAM) and select Add role assignment:

Select the appropriate role based on your needs, GeoCatalog Administrator or GeoCatalog Reader, and select Next:

Select the managed identity you created and then select Review + assign.

Prepare the Batch job
Create a container in the storage account:
az storage container create \
    --name scripts \
    --account-name spatiobatchstorage
Upload the script to the container:
az storage blob upload \
    --container-name scripts \
    --file src/task.py \
    --name task.py \
    --account-name spatiobatchstorage
Run the Batch jobs
There are two examples in this quickstart: a Python script, and a Bash script. You can use either of them to create a job.
Python script job
To execute the Python script job, execute the following commands:
geocatalog_url="<geocatalog url>"
token_expiration=$(date -u -d "30 minutes" "+%Y-%m-%dT%H:%M:%SZ")
python_task_url=$(az storage blob generate-sas --account-name spatiobatchstorage --container-name scripts --name task.py --permissions r --expiry $token_expiration --auth-mode login --as-user --full-uri -o tsv)

cat src/pythonjob.json | perl -pe "s,##PYTHON_TASK_URL##,$python_task_url,g" | perl -pe "s,##GEOCATALOG_URL##,$geocatalog_url,g" | az batch job create --json-file /dev/stdin
The Python job executes the following Python script:
import json
from os import environ
import requests
from azure.identity import DefaultAzureCredential

MPCPRO_APP_ID = "https://geocatalog.spatio.azure.com"
credential = DefaultAzureCredential()
access_token = credential.get_token(f"{MPCPRO_APP_ID}/.default")

geocatalog_url = environ["GEOCATALOG_URL"]

response = requests.get(
    f"{geocatalog_url}/stac/collections",
    headers={"Authorization": "Bearer " + access_token.token},
    params={"api-version": "2026-04-15"},
)
print(json.dumps(response.json(), indent=2))
Which uses DefaultAzureCredential to authenticate with the managed identity and retrieves the collections from the GeoCatalog. To get the results of the job, execute the following command:
az batch task file download \
    --job-id pythonjob1 \
    --task-id task1 \
    --file-path "stdout.txt" \
    --destination /dev/stdout
Bash job
To execute the Bash script job, run the following commands:
geocatalog_url="<geocatalog url>"

cat src/bashjob.json | perl -pe "s,##GEOCATALOG_URL##,$geocatalog_url,g" | az batch job create --json-file /dev/stdin
The Bash job executes the following Bash script:
az login --identity --allow-no-subscriptions > /dev/null
token=$(az account get-access-token --resource https://geocatalog.spatio.azure.com --query accessToken --output tsv)
curl --header \"Authorization: Bearer $token\" $GEOCATALOG_URL/stac/collections | jq
Which uses az login --identity to authenticate with the managed identity and retrieves the collections from the GeoCatalog. To get the results of the job, run the following command:
az batch task file download \
    --job-id bashjob1 \
    --task-id task1 \
    --file-path "stdout.txt" \
    --destination /dev/stdout
Related content
- Connect and build applications with your data
- Configure application authentication for Microsoft Planetary Computer Pro
- Build a web application with Microsoft Planetary Computer Pro
- Use the Microsoft Planetary Computer Pro Explorer
- Manage access to Microsoft Planetary Computer Pro
- Configure managed identities in Batch pools
- Copy applications and data to pool nodes
- Deploy applications to compute nodes with Batch application packages
- Creating and using resource files