Note
Access to this page requires authorization. You can try signing in or changing directories.
Access to this page requires authorization. You can try changing directories.
This quickstart explains how to ingest data into your collection using the Microsoft Planetary Computer Pro web interface.
This approach is ideal if you prefer a graphical user interface over APIs for managing your geospatial data.
Prerequisites
Before using this quickstart, you need:
An Azure account with an active subscription. Use the link Create an account for free.
An active GeoCatalog instance. Use the link to Create a GeoCatalog.
An Azure blob storage container with:
A geospatial dataset in a supported format.
For more information, see Supported data types.
Associated STAC metadata for the dataset.
For more information, see Create STAC Item.
A web browser to access the Planetary Computer Pro web interface.
A collection created using the Quickstart: Create a collection with the Microsoft Planetary Computer Pro web interface or the Quickstart: Create a STAC collection with Microsoft Planetary Computer Pro GeoCatalog.
Configure your ingestion source
Once you create a collection, you're ready to ingest data. The first step, however, is to configure your ingestion source. You set up your ingestion source by navigating to the Settings page. For more information on ingestion sources, see Ingestion sources.
Configure your ingestion source in the Settings page
You can configure your ingestion source using either managed identity or a shared access signature (SAS).
For detailed steps, see:
Create ingestion
Now that you configured an ingestion source, refer to the following steps to create an ingestion:
- Navigate to the collection in which you want to ingest data.
Note
If you have not already ingested data into your collection, a graphic showing the 3 steps to get started appears on the Overview tab, '1. Configure ingestion source, 2. Create ingestion, 3. Start run,' along with a Get started button.
Select the Get started button, and you're taken to the Ingestion tab of the collection.

Note
If you already ingested data into this collection, and want to create another ingestion, you can navigate to the Ingestion tab of the collection.
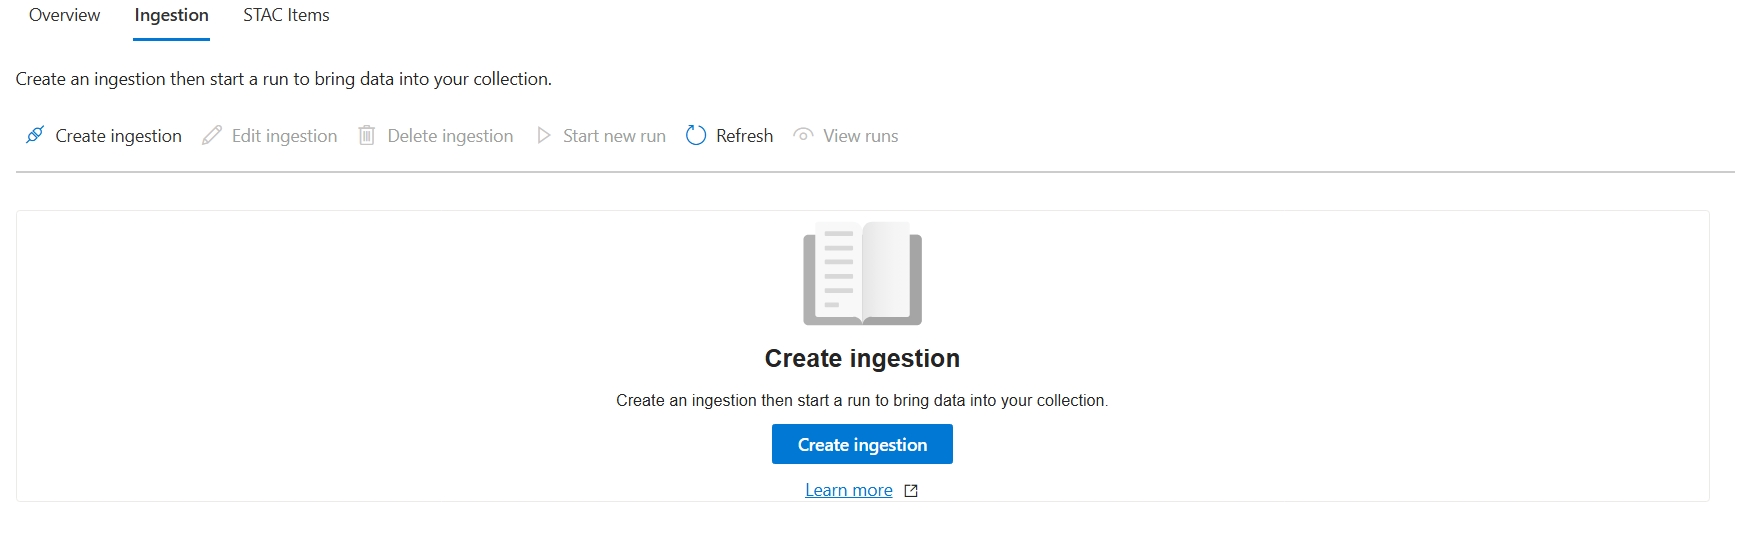
If you don't have a configured ingestion source, a graphic appears prompting you to do so. Select the Create ingestion source button to navigate to the Settings page where you can configure your ingestion source. If you already have a configured ingestion source, you see a graphic prompting you to Create ingestion. Select the Create ingestion button to open the Create ingestion panel.
To create your ingestion, input a Display Name and Ingestion URL (URL of the STAC catalog JSON organizing your STAC items). You can also configure the following options:
- Keep Original STAC items: Retains non-cloud-optimized assets in the GeoCatalog instead of deleting the original file. For example, if you select this option, the original non-COG file is kept along with the new cloud-optimized COG file.
- Skip items already in STAC catalog: Prevents overwrites if the item already exists in the GeoCatalog. This option speeds up ingestion runs.
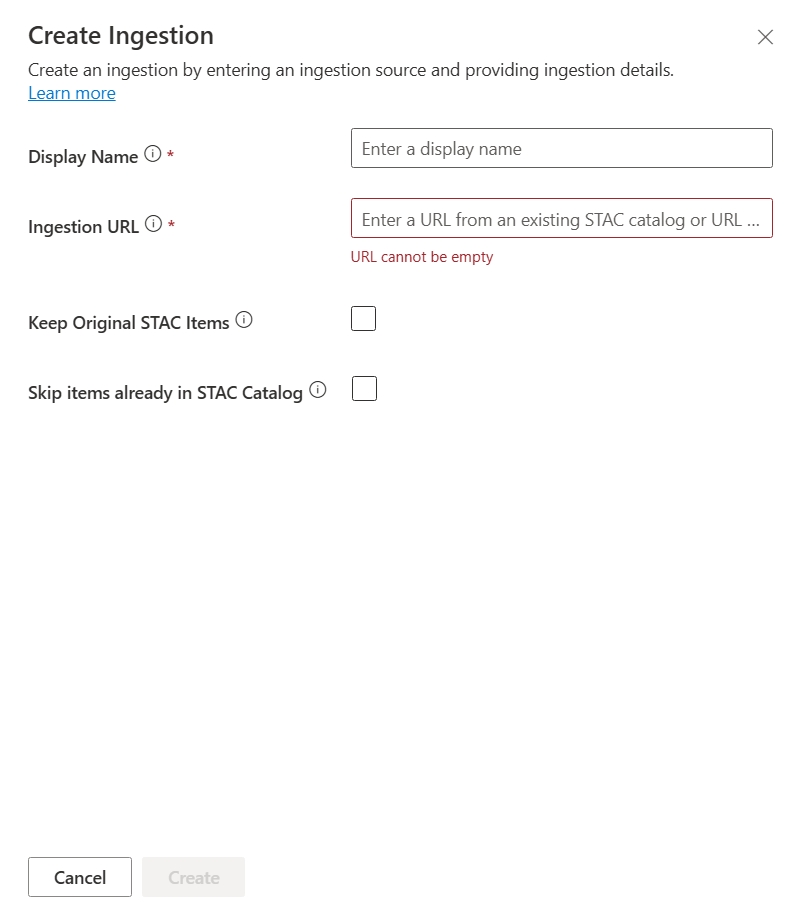
After you fill out all the fields, select Create to create your ingestion.
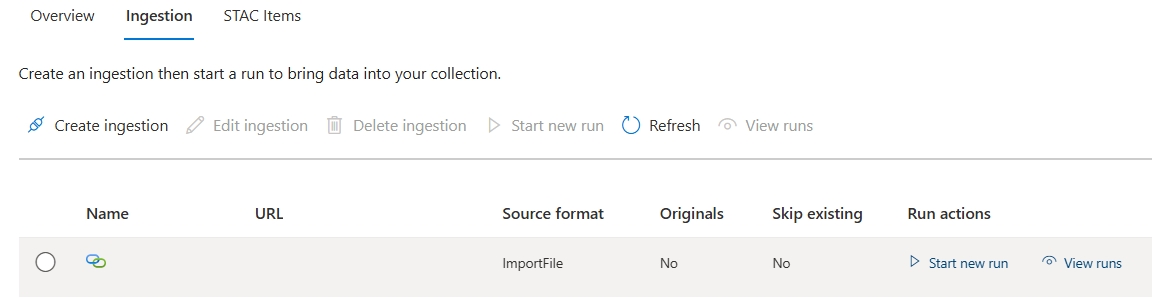
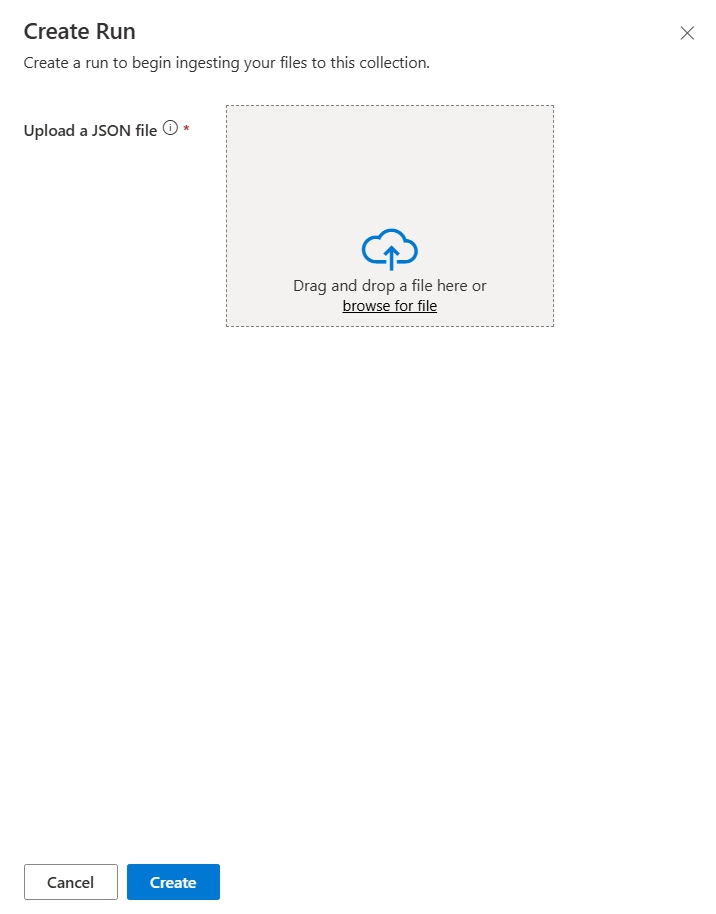
Your ingestion path now appears in the list of ingestions for your collection. To pull your data in, you need to start an ingestion run. Select the Start new run button from the Run actions column to open the Create run panel.
Select Create to start the run. This action returns you to the Ingestion tab, where you can select the View runs button to see the status of your ingestion.
When the ingestion run is complete, the STAC items tab in your collection displays your list of STAC items that have been ingested, with columns for the item ID and acquisition date.


Troubleshooting
If you encounter issues during the ingestion process, such as failures in creating an ingestion source, starting a run, or if items don't appear as expected, refer to the following resources:
- Troubleshooting data ingestion in Microsoft Planetary Computer Pro: Provides guidance on diagnosing common ingestion problems.
- Error codes: Microsoft Planetary Computer Pro ingestion: Lists common error codes and their meanings.
Next steps
Once you have ingested data, it's time to configure the STAC Collection so you can visualize your data in the Explorer.