Note
Access to this page requires authorization. You can try signing in or changing directories.
Access to this page requires authorization. You can try changing directories.
This article shows you how to manage identities in Microsoft Entra ID, and how to configure role-based access control (RBAC) for Microsoft Planetary Computer Pro. This process allows the user to assign specific GeoCatalog resource access permissions to Microsoft Entra identities.
Prerequisites
- Azure account with an active subscription - create an account for free
- An existing GeoCatalog resource
Create and Manage Users
Create and manage your users list by following the Microsoft Entra ID create, invite, and delete users how-to article. Once your users are created, you need to grant proper permissions to them to access a GeoCatalog resource with the assignment of one or more RBAC roles.
Planetary Computer Pro defines two GeoCatalog resource specific roles, in addition to Azure built in roles:
| Role | Description | Allows RBAC Management? |
|---|---|---|
| GeoCatalog Administrator | Allows the user to read, write, and delete data inside a GeoCatalog | No |
| GeoCatalog Reader | Allows the user to only read GeoCatalogs data. | No |
| Owner | Azure built-in role that grants full access to all resources, including the ability to manage RBAC. | Yes |
| User Access Administrator | Azure built-in role that allows management of user access to Azure resources. | Yes |
| Role Based Access Control Administrator | Azure built-in role that allows management of RBAC assignments and permissions. | Yes |
Note
Owner is also a GeoCatalog Administrator.
Assigning Role Based Access Control to a user
You can use the Azure portal to assign RBAC roles to Planetary Computer Pro users. This section demonstrates how to use the GeoCatalog Access Control (IAM) controls to assign the GeoCatalog Administrator role to one or more users.
Within Azure portal, go to your GeoCatalog resource Access control (IAM) tab in the left sidebar:
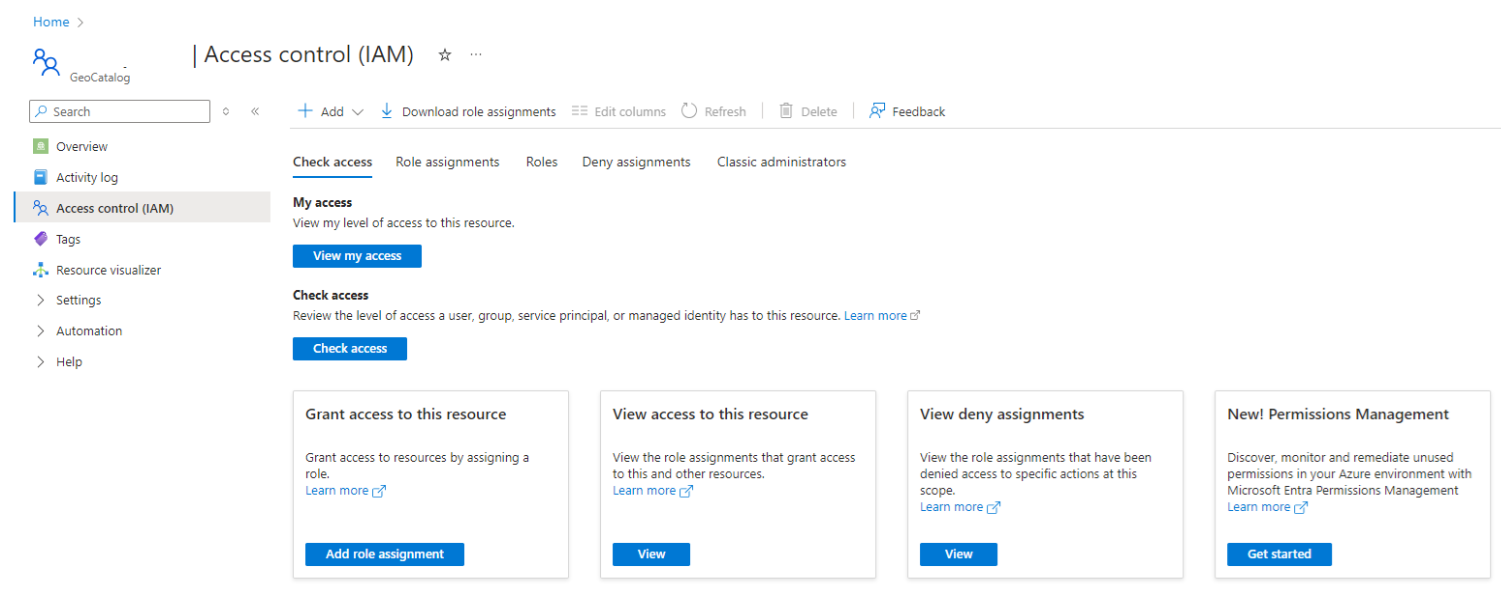
Select Add > Add role Assignment.
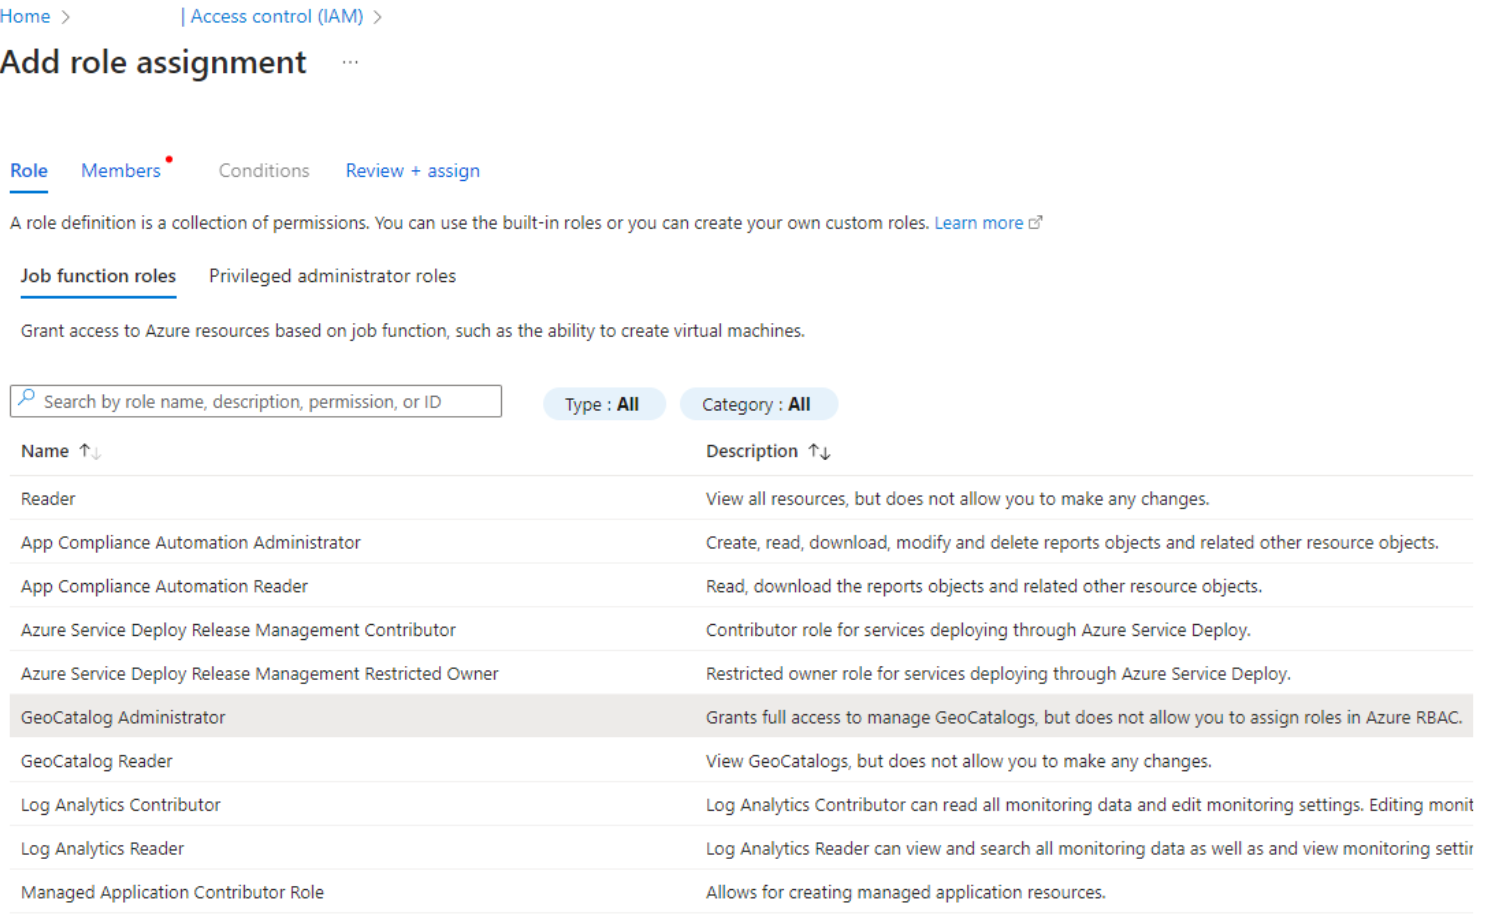
Select GeoCatalog Administrator from the list of Job function roles, and then select the Next button at the bottom of the page:
Select the radio button of User, group, or service principal:
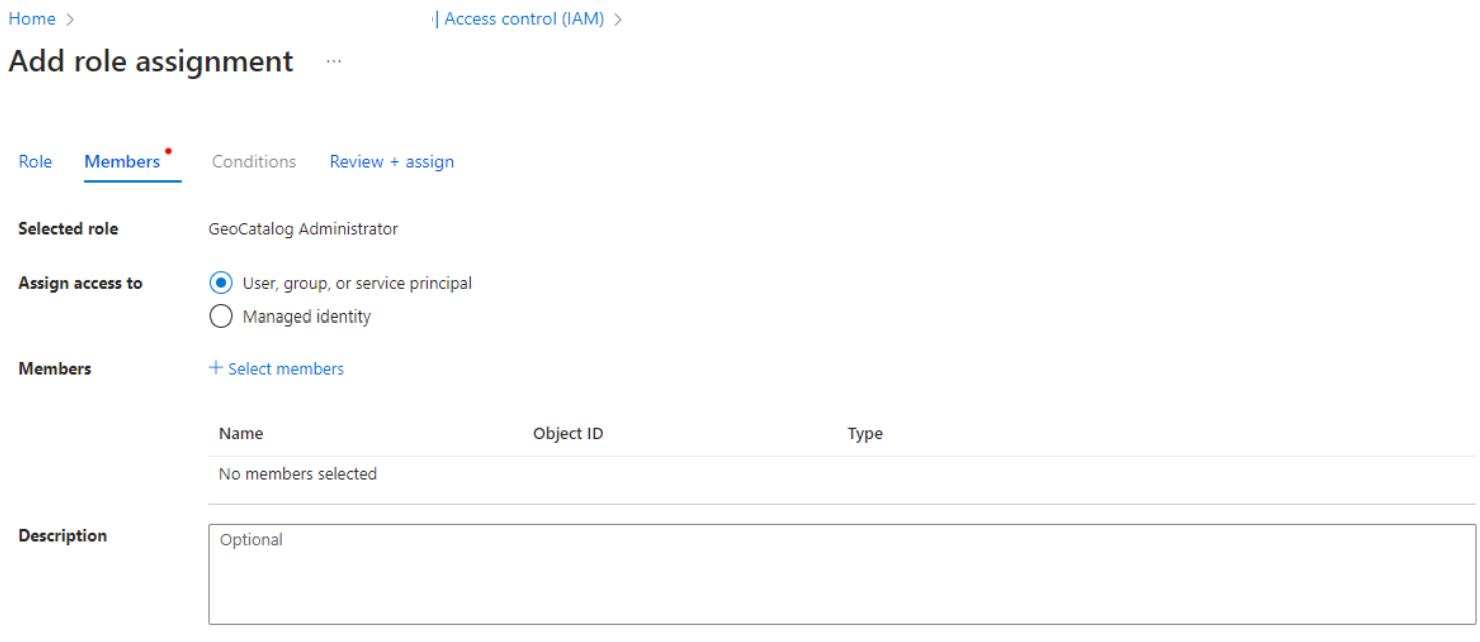
Select Select members
Search for the user on the Select members pane that appears on the right-hand side. Select a name or identity from the list to add it to the list of Selected Members. Repeat this step for each of the users that need to be assigned this role.
When all the users for whom you need to assign this role are selected, use the Select button at the bottom of the pane to close the pane.
Select Next at the bottom of the page.
Verify the information, then complete the assignment by selecting review + assign.


Now the selected users are able to access the GeoCatalog resource, either through Azure portal or APIs.