Note
Access to this page requires authorization. You can try signing in or changing directories.
Access to this page requires authorization. You can try changing directories.
In this Quickstart, you learn how to connect to an Azure Database for PostgreSQL flexible server instance with Power BI Desktop. With Power BI Desktop, you can visually explore your data through a free-form drag-and-drop canvas, a broad range of modern data visualizations, and an easy-to-use report authoring experience. You can import directly from the tables or import from a SELECT query. This article applies to Power BI Desktop only. Currently, Power Query online or Power BI Service is not supported.
Prerequisites
- Install Power BI desktop.
Connect with Power BI desktop from Azure portal
Get the connection information needed to connect to the Azure Database for PostgreSQL flexible server instance. You need the fully qualified server name and sign in credentials.
Sign in to the Azure portal.
From the left-hand menu in Azure portal, select All resources, and then search for the server you've created (such as mydemoserverpbi).
Select the server name.
From the server's Overview panel, Select Power BI setting from the left-hand menu.
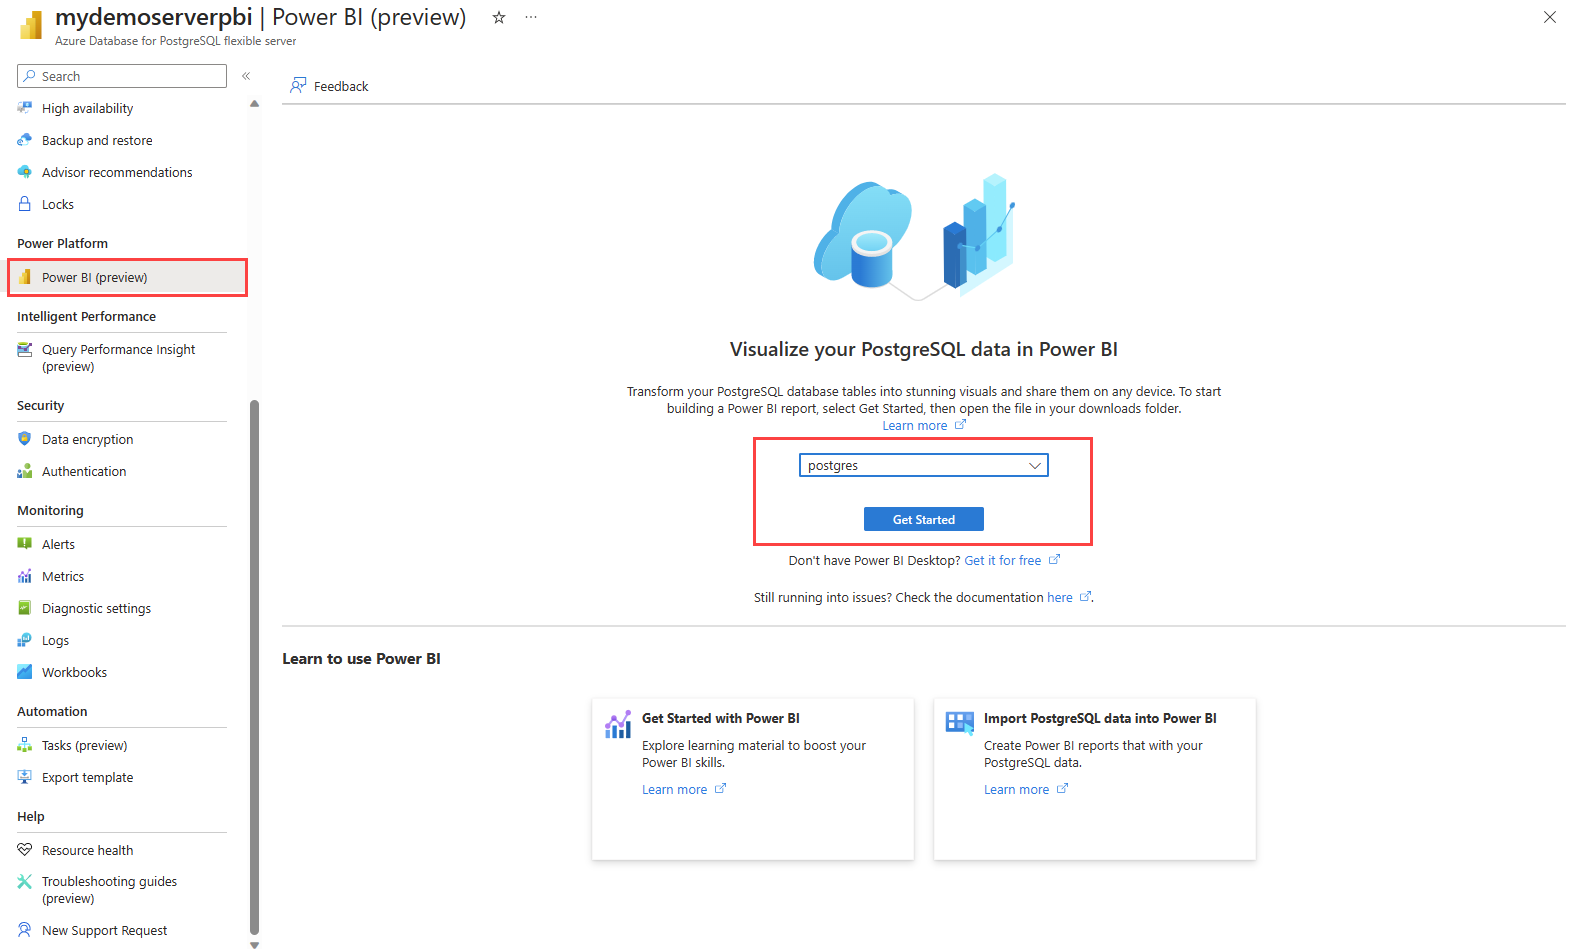
Select a database from the dropdown, for example postgres and then select Get started.
Download the Power BI desktop file mydemoserverpbi_postgres.pbids.

Open the file in Power BI desktop.
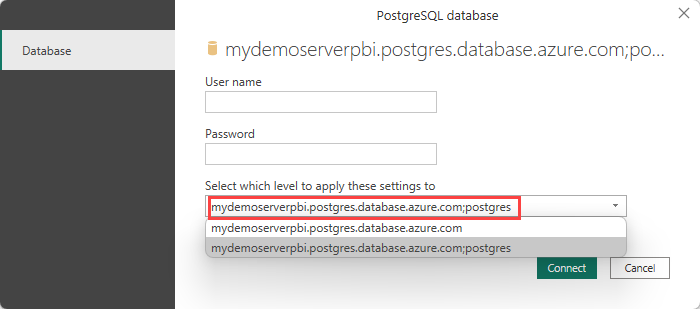
Switch to Database tab to provide the username and password for your database server.
Note
Windows authentication is not supported for Azure Database for PostgreSQL flexible server instances.
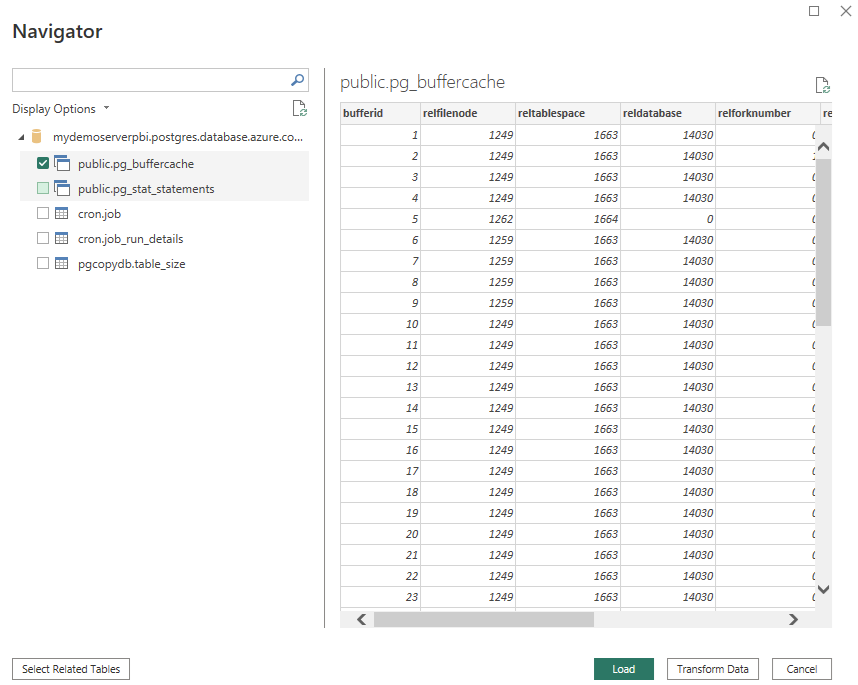
In Navigator, select the data you require, then either load or transform the data.
Connect to Azure Database for PostgreSQL database from Power BI Desktop
You can connect to an Azure Database for PostgreSQL flexible server instance with Power BI desktop directly without the use of Azure portal.
Get the Azure Database for PostgreSQL connection information
- Sign in to the Azure portal.
- From the left-hand menu in Azure portal, select All resources, and then search for the server you've created (such as mydemoserverpbi).
- Select the server name.
- From the server's Overview panel, make a note of the Server name and Server admin login name. If you forget your password, you can also reset the password from this panel.
- Go to Databases page to find the database you want to connect to. Power BI desktop supports adding a connection to a single database and hence providing a database name is required for importing data.
Add Azure Database for PostgreSQL connection in Power BI desktop
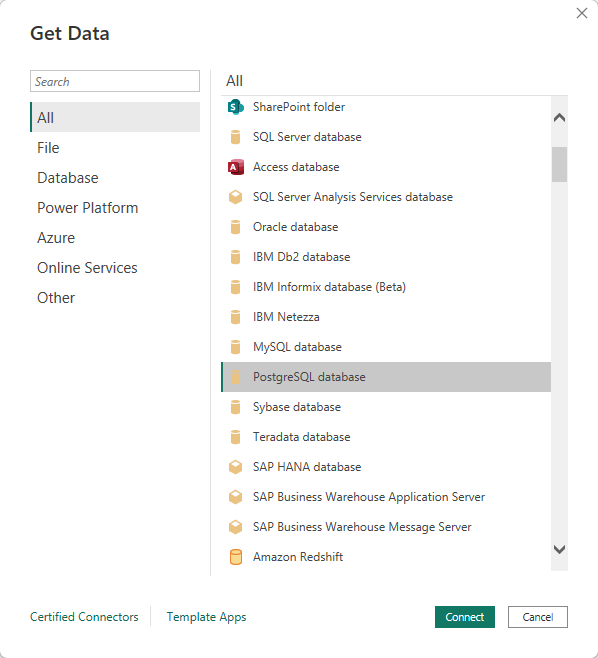
Select the PostgreSQL database option in the connector selection.
In the PostgreSQL database dialog, provide the name of the server and database.
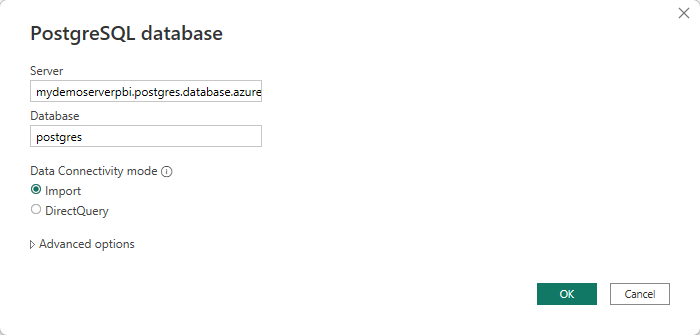
Select the Database authentication type and input your Azure Database for PostgreSQL flexible server instance credentials in the User name and Password boxes. Make sure to select the level to apply your credentials to.
Once you're done, select OK.
In Navigator, select the data you require, then either load or transform the data.
Connect to Azure Database for PostgreSQL database from Power Query Online
To make the connection, take the following steps:
Select the PostgreSQL database option in the connector selection.
In the PostgreSQL database dialog, provide the name of the server and database.
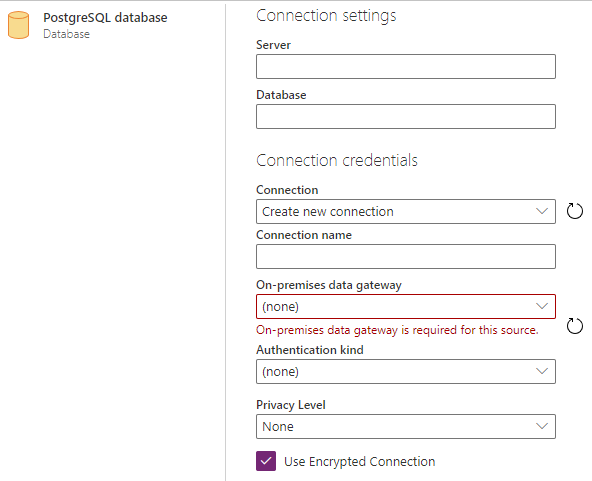
Note
Data gateway is not needed for Azure Database for PostgreSQL flexible server instances.
Select the Basic authentication kind and input your Azure Database for PostgreSQL flexible server instance credentials in the Username and Password boxes.
If your connection isn't encrypted, clear Use Encrypted Connection.
Select Next to connect to the database.
In Navigator, select the data you require, then select Transform data to transform the data in Power Query Editor.
Connect using advanced options
Power Query Desktop provides a set of advanced options that you can add to your query if needed.
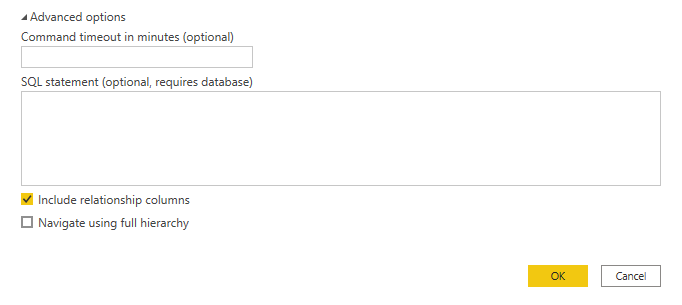
The following table lists all of the advanced options you can set in Power Query Desktop.
| Advanced option | Description |
|---|---|
| Command timeout in minutes | If your connection lasts longer than 10 minutes (the default timeout), you can enter another value in minutes to keep the connection open longer. This option is only available in Power Query Desktop. |
| SQL statement | For information, go to Import data from a database using native database query. |
| Include relationship columns | If checked, includes columns that might have relationships to other tables. If this box is cleared, you won't see those columns. |
| Navigate using full hierarchy | If checked, the navigator displays the complete hierarchy of tables in the database you're connecting to. If cleared, the navigator displays only the tables whose columns and rows contain data. |
Once you've selected the advanced options you require, select OK in Power Query Desktop to connect to your PostgreSQL database.
Related content
- Manage Azure Database for PostgreSQL using the Azure portal.
- Build visuals with Power BI Desktop.
- Quickstart: Use Python to connect and query data in Azure Database for PostgreSQL.
- Quickstart: Use Java and JDBC with Azure Database for PostgreSQL.
- Quickstart: Use .NET (C#) to connect and query data in Azure Database for PostgreSQL.
- Quickstart: Use Go language to connect and query data in Azure Database for PostgreSQL.
- Quickstart: Use PHP to connect and query data in Azure Database for PostgreSQL.
- Quickstart: Connect and query with Azure CLI with Azure Database for PostgreSQL.