Note
Access to this page requires authorization. You can try signing in or changing directories.
Access to this page requires authorization. You can try changing directories.
Azure Database for PostgreSQL is a managed service that you use to run, manage, and scale highly available PostgreSQL databases in the cloud. With an Azure free account, you can use an Azure Database for PostgreSQL flexible server instance for free for 12 months with monthly limits of up to:
- 750 hours of Burstable B1MS instance, enough hours to run a database instance continuously each month.
- 32 GB storage and 32 GB backup storage.
This article shows you how to create and use an Azure Database for PostgreSQL flexible server instance for free using an Azure free account.
Prerequisites
To complete this tutorial, you need:
- An Azure free account. If you don't have one, create a free account before you begin.
Create a flexible server instance
Sign in to the Azure portal with your Azure free account.
The default view is your service dashboard.
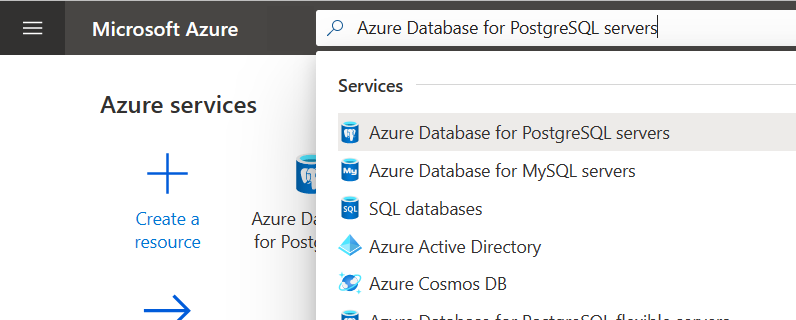
To create an Azure Database for PostgreSQL flexible server instance, search for and select Azure Database for PostgreSQL servers:
Alternatively, you can search for and navigate to Free Services, and then select Azure Database for PostgreSQL tile from the list:
Select Create.
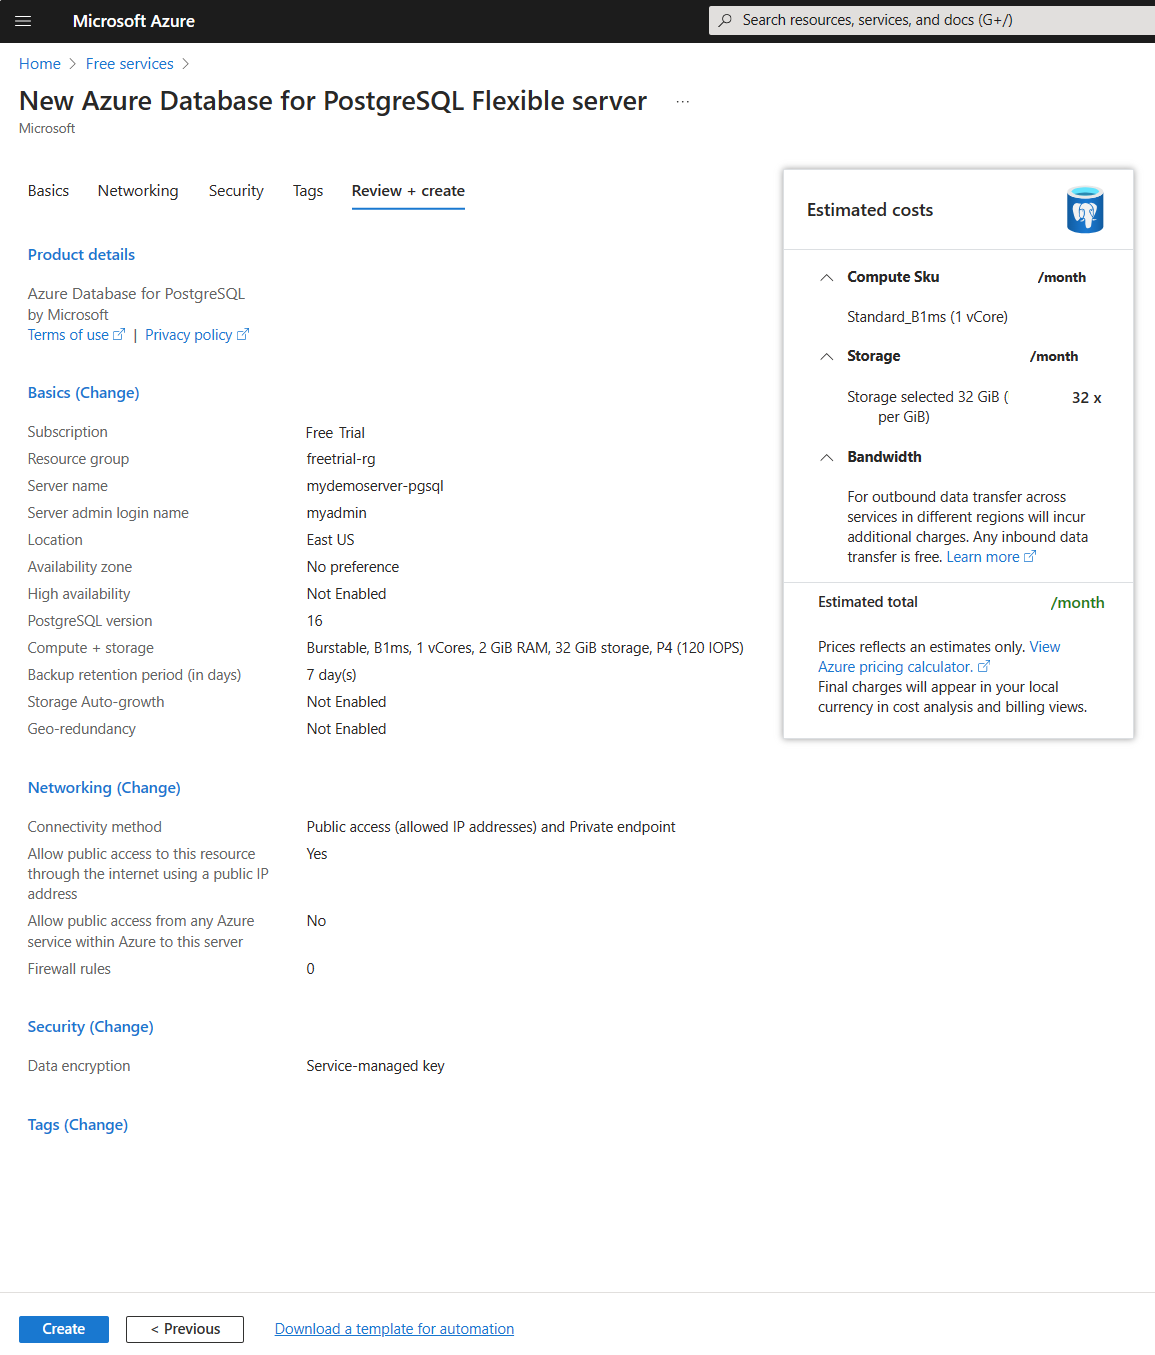
Enter the basic settings for a new Azure Database for PostgreSQL flexible server instance.

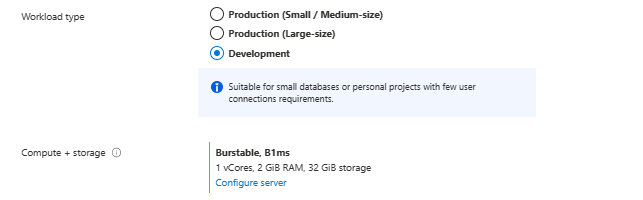
Setting Suggested Value Description Subscription Your subscription name Select the Free Trial Azure subscription. Resource group Your resource group Enter a new resource group or an existing one from your subscription. Server name mydemoserver-pgsql Specify a unique name to identify your flexible server instance. The domain name postgres.database.azure.com is appended to the server name you provide. The server name can contain only lowercase letters, numbers, and the hyphen (-) character. It must contain between 3 and 63 characters. Region The region closest to your users Select a location from the list, preferably the location that's closest to your users. PostgreSQL version The latest major version Use the latest PostgreSQL major version unless you have specific requirements otherwise. Workload type Development For a free trial, select Development workload. For a production workload, choose Small/Medium-size or Large-size depending on your requirements. Compute + storage Default Select the SKU of the compute and storage that better accommodates your performance and cost needs. Availability zone No preference If your application (hosted on Azure VMs, virtual machine scale sets or AKS instance) is provisioned in a specific availability zone, create your flexible server instance in the same availability zone. Collocating the application and database improves performance by reducing network latency across zones. If you choose No preference, a default AZ is selected for you. High availability Default Leave the High Availability option unchecked. Authentication method PostgreSQL authentication only Select the authentication method that suits your authentication needs for this instance of PostgreSQL. Admin username myadmin Create a sign-in account to use when you connect to the server. The admin username must contain between 1 and 63 characters, must only contain numbers and letters, can't start with pg_ and can't be azure_superuser, azure_pg_admin, admin, administrator, root, guest, or public. Password Your password Specify a password for the server admin account. The password must contain between 8 and 128 characters. It must also contain characters from three of the following four categories: English uppercase letters, English lowercase letters, numbers (0 through 9), and non-alphanumeric characters (!, $, #, %, and so on). Your password cannot contain all or part of the login name. Part of a login name is defined as three or more consecutive alphanumeric characters. For Compute + storage setting, keep the default values populated upon selecting Development workload type.
Select Configure Server to review and customize the Compute + storage setting.
Make sure to select Burstable B1MS Instance (1-2 vCores), specify to include storage of less than or equal to 32 GB, and keep the default settings for the remaining options.
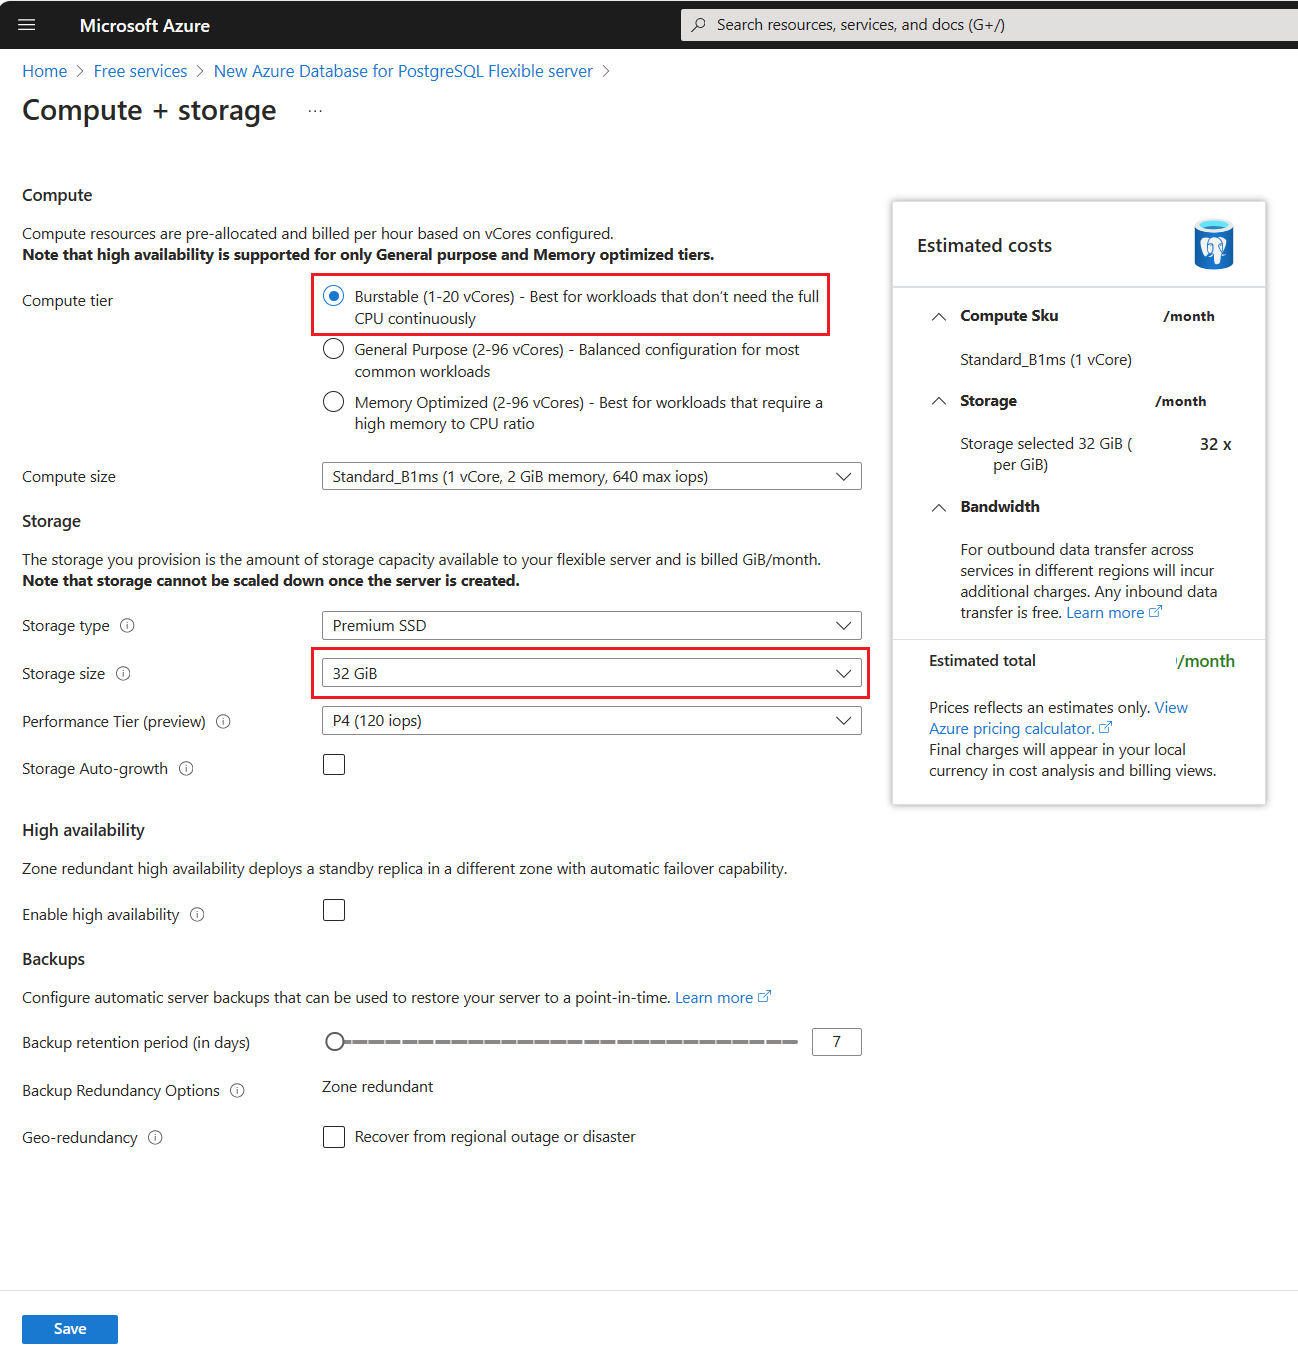
Select Save to continue with the configuration.
Select Networking tab to configure how to reach your server.
Azure Database for PostgreSQL provides two ways to connect:
- Public access (allowed IP addresses) and Private endpoint
- Private access (VNet Integration)
With public access, access to your server is limited to allowed IP addresses that you include in a firewall rule or to applications which can reach the instance of Azure Database for PostgreSQL flexible server via private endpoints. This method prevents external applications and tools from connecting to the server and any databases on the server, unless you create a rule to open the firewall for a specific IP address or range, or create a private endpoint.
With private access, access to your server is limited to your virtual network. For more information about connectivity methods, see Networking overview.
For the purposes of this tutorial, enable public access to connect to the server.
Note
Azure Database for PostgreSQL support for Private Endpoints in Preview requires enablement of Enable Private Endpoints for PostgreSQL preview feature in your subscription. Only after preview feature is enabled you can create servers which are PE capable, i.e. can be networked using Private Link.
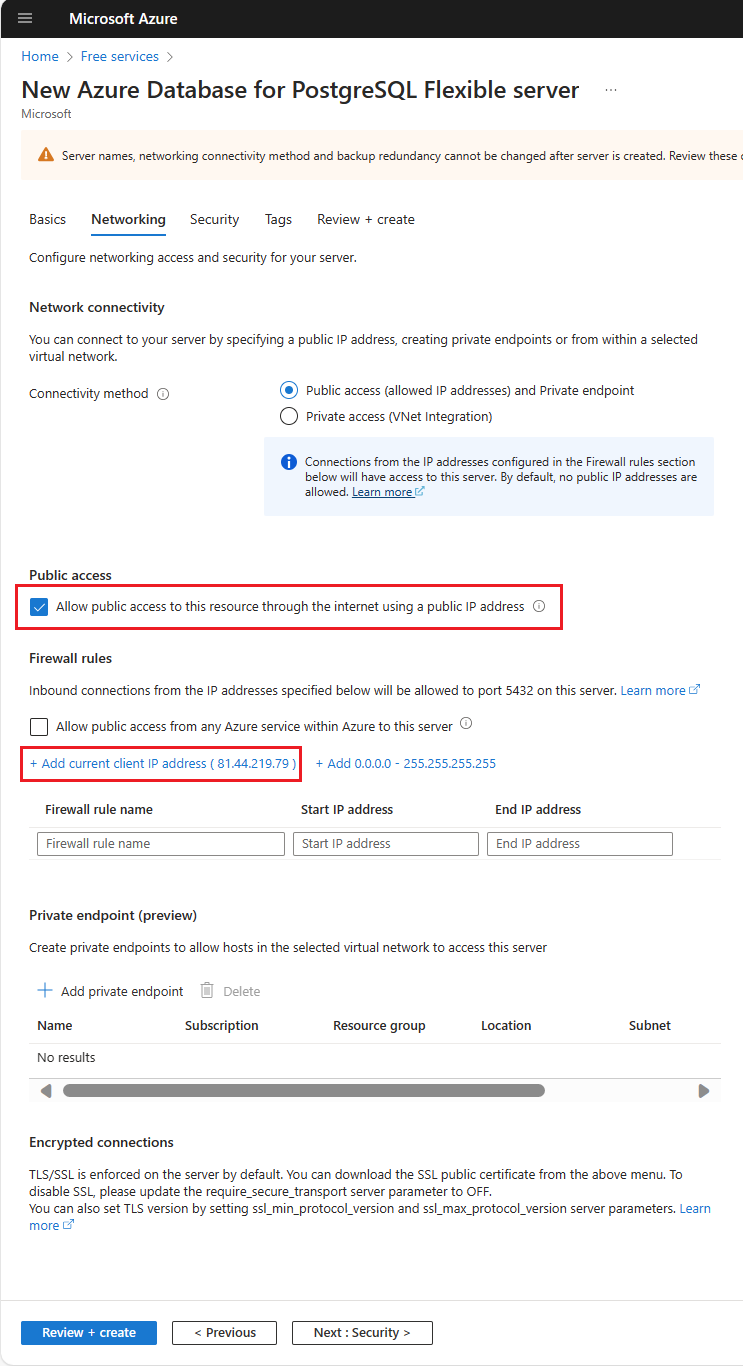
On the Networking tab, for Connectivity method select Public access (allowed IP addresses) and Private endpoint.
Leave Allow public access to this resource through the internet using a public IP address enabled in this case, since you want the instance to be accessible from the public IP address with which your workstation navigates on the Internet. By disabling this check box, the only incoming traffic which would be permitted would be the one coming through private endpoints.
For configuring Firewall rules, select Add current client IP address.
To review your Azure Database for PostgreSQL configuration, select Review + create.
Important
When creating the Azure Database for PostgreSQL flexible server instance using your Azure free account, you will see an Estimated cost per month in the Compute + Storage: Cost Summary blade and the Review + Create tab. However, as long as you stay within the monthly limits of your Azure free account (refer to the Monitor and track free services usage section below for usage information). There is no charge for the service. We are currently working to improve the Cost Summary experience for free services.
Select Create to provision the server.
Provisioning can take a few minutes.
On the toolbar, select Notifications (the bell icon) to monitor the deployment process.
After the deployment is complete, select Pin to dashboard, to create a tile for the Azure Database for PostgreSQL flexible server instance on your Azure portal dashboard. This tile is a shortcut to the server's Overview page. When you select Go to resource, the server's Overview page opens.
By default, a postgres database is created under your server. The postgres database is a default database that's meant for use by users, utilities, and third-party applications. (The other default database is azure_maintenance. Its function is to separate the managed service processes from user actions. You can't access this database.)


Connect and query
Now that you've created an Azure Database for PostgreSQL flexible server instance in a resource group, you can connect to server and query databases by using the following Connect and query quickstarts:
Monitor and track free services usage
You're not charged for Azure Database for PostgreSQL services that are included for free with your Azure free account unless you exceed the free service limits. To remain within the limits, use the Azure portal to track and monitor your free services usage.
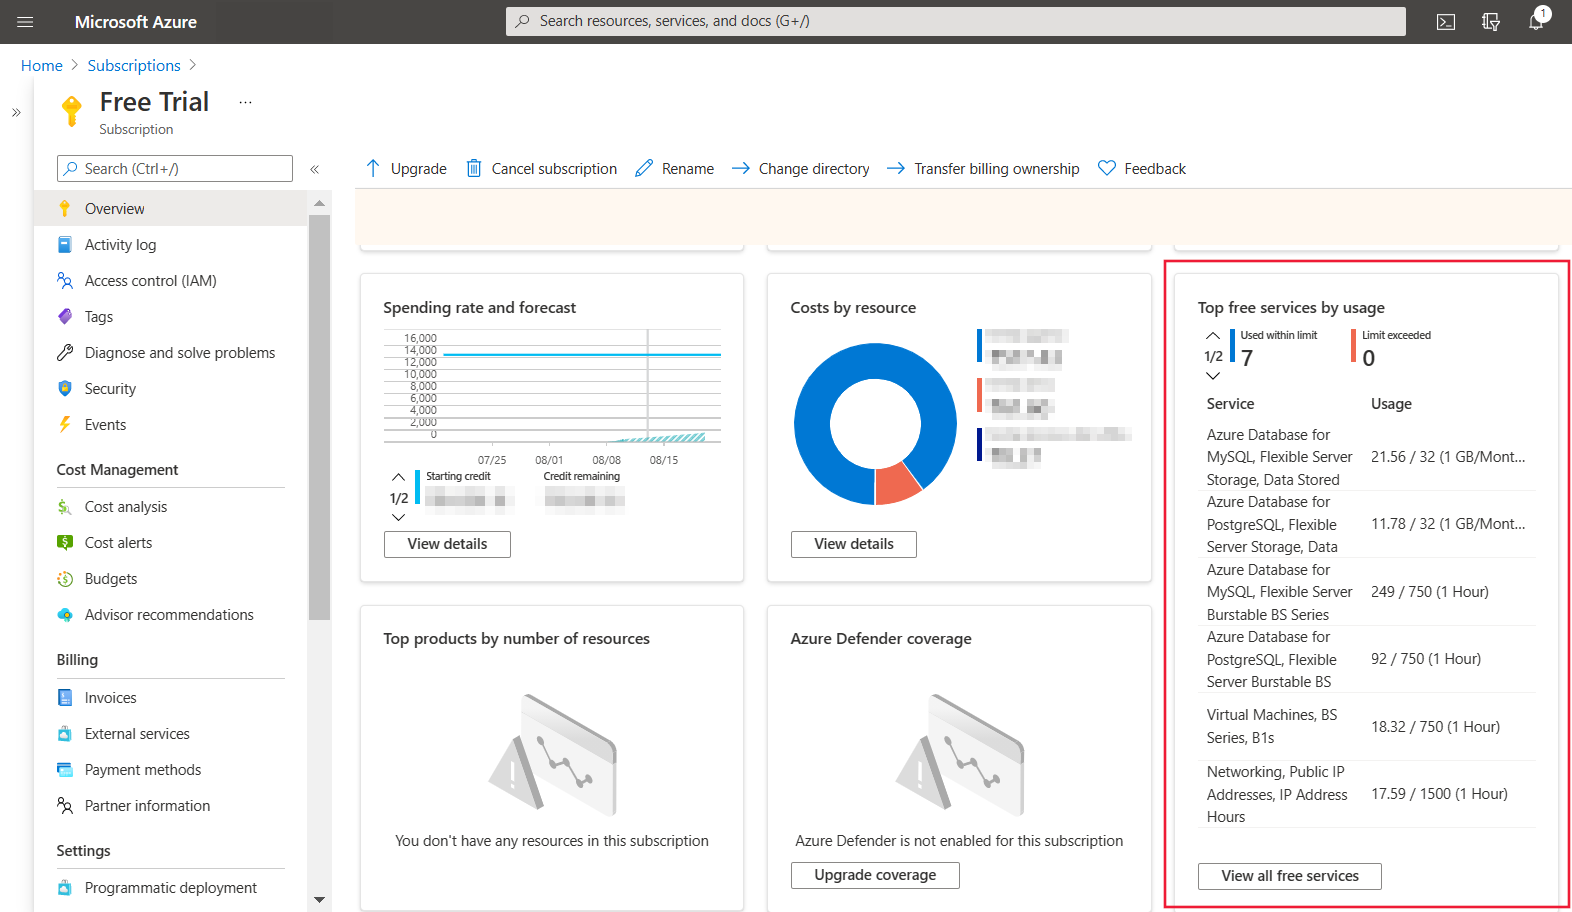
In the Azure portal, search for Subscriptions and select the Azure free account - Free Trial subscription.
On the Overview page, scroll down to show the tile Top free services by usage, and then select View all free services.
Locate the below meters related to Azure Database for PostgreSQL to track usage:
Meter Description Monthly Limit Azure Database for PostgreSQL, Flexible Server Burstable BS Series Compute, B1MS Tracks Compute usage in terms of number of hours of running 750 Hours per month - Burstable B1MS Compute Tier Azure Database for PostgreSQL, Flexible Server Storage, Data Stored Tracks Data Storage Provisioned in terms of GB used per month 32 GB per month 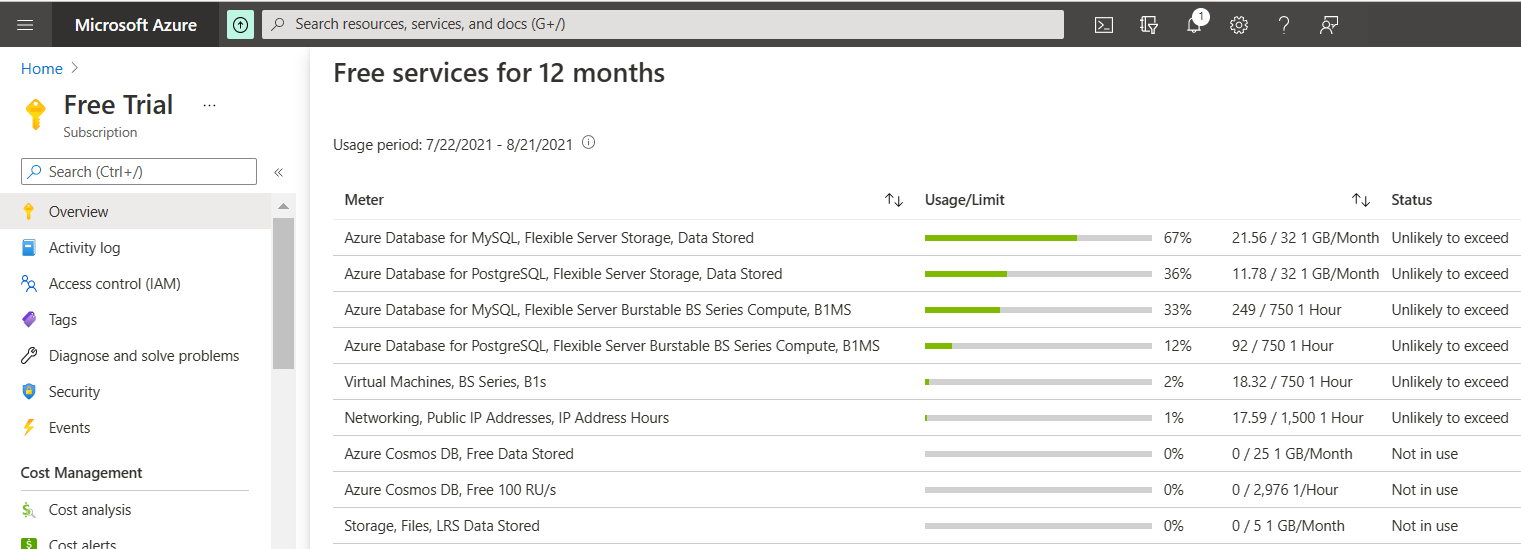
- Meter: Identifies the unit of measure for the service being consumed.
- Usage/Limit: Current month's usage and limit for the meter.
- Status: Usage status of the service. Based on your usage, you can have one of the following statutes:
- Not in use: You haven't used the meter or the usage for the meter hasn't reached the billing system.
- Exceeded on <Date>: You've exceeded the limit for the meter on <Date>.
- Unlikely to Exceed: You're unlikely to exceed the limit for the meter.
- Exceeds on <Date>: You're likely to exceed the limit for the meter on <Date>.
Important
With an Azure free account, you also get $200 in credit to use in 30 days. During this time, any usage beyond the free monthly amounts of services will be deducted from this credit. At the end of your first 30 days or after you spend your $200 credit (whichever comes first), you'll only pay for what you use beyond the free monthly amounts of services. To keep getting free services after 30 days, move to pay-as-you-go pricing. If you don't move to pay as you go, you can't purchase Azure services beyond your $200 credit—and eventually your account and services will be disabled. For more information, see Azure free account FAQ.

Clean up resources
If you're using the Azure Database for PostgreSQL flexible server instance for development, testing, or predictable, time-bound production workloads, optimize usage by starting and stopping the server on-demand. After you stop the server, it remains in that state for seven days unless restarted sooner. For more information, see Start/Stop Server to lower TCO. When your Azure Database for PostgreSQL flexible server instance is stopped, there's no Compute usage, but Storage usage is still considered.
Alternatively, if you don't expect to need these resources in the future, you can delete them by deleting the resource group, or you can just delete the Azure Database for PostgreSQL flexible server instance.
To delete the resource group, complete the following steps:
- In the Azure portal, search for and select Resource groups.
- In the list of resource groups, select the name of your resource group.
- On the Overview page for your resource group, select Delete resource group.
- In the confirmation dialog box, type the name of your resource group, and then select Delete.
To delete the Azure Database for PostgreSQL flexible server instance, on the Overview page for the server, select Delete.